Seite 3
All manuals and user guides at all-guides.com CONTENTS DEUTSCH ..................3-78 ENGLISH ..................81-156 NEDERLANDS ................157-232 FRANÇAIS ................233-308...
Seite 4
All manuals and user guides at all-guides.com Bedienungsanleitung DIGITRADIO 10 IR DAB+/UKW/Internet-Radio...
All manuals and user guides at all-guides.com 1.2 Ansicht von hinten Farb-Display Optischer-Digitalausgang S/PDIF Analoger-Audioausgang (rechts/links) Infrarot-Sensor Antennenanschluss DC-IN 5 V, 500 mA...
All manuals and user guides at all-guides.com 1.3 Fernbedienung Mute/Stumm Programm + / Equalizer/EQ Lautstärke + / SCAN Programm - / Wiederholung* INFO Zufallswiedergabe* Zifferntasten/ Vorheriger Titel Direktwahltasten Stopp* FAV-Speicher MENÜ OK / Auswahl Lautstärke - / BACK / Zurück Zifferneingabe Ein-/Standby...
Sicherheitshinweise ....................12 Verwendete Zeichen und Symbole .................. 12 Bestimmungsgemäßer Gebrauch ..................14 Die Zielgruppe dieser Bedienungsanleitung ..............14 Sicherer Umgang mit dem DIGITRADIO 10 IR ............. 14 Rechtliche Hinweise ....................17 Servicehinweise.......................... 19 Aufstellen des Gerätes...................20 Beschreibung des DIGITRADIO 10 IR ..............22...
Seite 10
All manuals and user guides at all-guides.com Die besonderen Eigenschaften des DIGITRADIO 10 IR ...........23 DIGITRADIO 10 IR zum Betrieb vorbereiten ..............23 6.3.1 Wurfantenne anschließen und ausrichten ..............23 6.3.2 Audio-Anschluss an Stereo-Anlage, Aktivlautsprecher .......... 24 6.3.3 Netzteil anschließen ........................25 6.3.4 Batterien in Fernbedienung einlegen ................26 Allgemeine Geräte-Funktionen ..................27...
Seite 11
All manuals and user guides at all-guides.com 9.2.3 DAB+ -Sender auf einem Speicherplatz ablegen ............38 9.2.4 DAB+ -Sender von einem Speicherplatz abrufen .............39 9.2.5 Überschreiben/Löschen einer Programmplatz-Speicherung......40 9.2.6 Signalstärke ..........................40 9.2.7 Manuell einstellen ........................41 9.2.8 Lautstärkeanpassung (DRC) ....................42 9.2.9 Inaktive Sender löschen ......................43 FM (UKW)-Betrieb ....................
Seite 12
All manuals and user guides at all-guides.com 11.3 Favoriten hinzufügen ......................50 11.4 Favoriten abrufen........................51 Podcasts ........................52 Spotify Connect ....................... 52 Bluetooth ........................53 14.1 Bluetooth-Betrieb einschalten ...................53 14.2 Externes Gerät koppeln ......................53 14.3 Koppelung aufheben .......................56 Weitere Funktionen ....................56 15.1 Sleep-Timer ..........................56 15.2...
Seite 13
All manuals and user guides at all-guides.com 16.1.2 Einstellungen anzeigen ......................65 16.1.3 TechniSat Connect PIN ......................65 16.1.4 Netzwerkprofil löschen ......................65 16.1.5 WLAN-Verbindung in Standby ..................66 16.2 Uhrzeit- und Datumseinstellungen .................. 66 16.2.1 Zeit/Datum manuell einstellen ..................66 16.2.2 Zeitaktualisierung ........................67 16.2.3 Uhrzeitformat einstellen ......................68...
All manuals and user guides at all-guides.com 3 Sicherheitshinweise 3.1 Verwendete Zeichen und Symbole In dieser Bedienungsanleitung: Kennzeichnet einen Sicherheitshinweis, der bei Nichtbeachtung zu schweren Verletzungen oder zum Tod führen kann. Beachten Sie die folgenden Signalwörter: GEFAHR - Schwere Verletzungen mit Todesfolge WARNUNG - Schwere Verletzungen, eventuell mit Todesfolge ACHTUNG - Verletzungen Kennzeichnet einen Hinweis, den Sie zur Vermeidung von Gerätedefekten,...
Seite 16
All manuals and user guides at all-guides.com Auf dem Gerät: Benutzung in Innenräumen - Geräte mit diesem Symbol sind nur für die Verwendung in Innenräumen geeignet. Schutzklasse II - Elektrogeräte der Schutzklasse II sind Elektrogeräte die durchgehende doppelte und/oder verstärkte Isolierung besitzen und keine Anschlussmöglichkeiten für einen Schutzleiter haben.
Die Bedienungsanleitung richtet sich an jede Person, die das Gerät aufstellt, bedient, reinigt oder entsorgt. 3.4 Sicherer Umgang mit dem DIGITRADIO 10 IR Bitte beachten Sie die nachfolgend aufgeführten Hinweise, um Sicherheitsrisiken zu minimieren, Beschädigungen am Gerät zu vermeiden, sowie einen Beitrag zum Umweltschutz zu leisten.
Seite 18
All manuals and user guides at all-guides.com Beachten Sie alle nachfolgenden Hinweise zur bestimmungsgemäßen Nutzung des Gerätes und um Gerätedefekten und Personenschäden vorzubeugen. Reparieren Sie das Gerät nicht selbst. Eine Reparatur darf nur von geschultem Fachpersonal durchgeführt werden. Wenden Sie sich an unsere Kundendienststellen.
Seite 19
All manuals and user guides at all-guides.com Spannung zu betreiben. Wenn das Gerät Schäden aufweist, darf es nicht in Betrieb genommen werden. Nehmen Sie das Gerät nicht in der Nähe von Badewannen, Duschen, Swimmingpools oder fließendem/spritzendem Wasser in Betrieb. Es besteht die Gefahr eines elektrischen Schlages und/oder Gerätedefekten.
All manuals and user guides at all-guides.com 4 Rechtliche Hinweise Hiermit erklärt TechniSat, dass der Funkanlagentyp DIGITRADIO 10 IR der Richtlinie 2014/53/EU entspricht. Der vollständige Text der EU- Konformitätserklärung ist unter der folgenden Internetadresse verfügbar: http://konf.tsat.de/?ID=22920 TechniSat ist nicht für Produktschäden auf Grund von äußeren Einflüssen, Verschleiß...
Seite 22
All manuals and user guides at all-guides.com DIGITRADIO 10 IR und TechniSat sind eingetragene Warenzeichen der: TechniSat Digital GmbH TechniPark Julius-Saxler-Straße 3 D-54550 Daun/Eifel www.technisat.de Namen der erwähnten Firmen, Institutionen oder Marken sind Warenzeichen oder eingetragene Warenzeichen der jeweiligen Inhaber.
Produktes. Hinweis! Für Fragen und Informationen oder wenn es mit diesem Gerät zu einem Problem kommt, ist unsere Technische Hotline: Mo. - Fr. 8:00 - 18:00 unter Tel.: 03925/9220 1800 erreichbar. Reparaturaufträge können auch direkt online unter www.technisat.de/reparatur, beauftragt werden.
All manuals and user guides at all-guides.com Für eine eventuell erforderliche Einsendung des Gerätes verwenden Sie bitte ausschließlich folgende Anschrift: TechniSat Digital GmbH Service-Center Nordstr. 4a 39418 Staßfurt 5 Aufstellen des Gerätes > Stellen Sie das Gerät auf einen festen, sicheren und horizontalen Untergrund.
Seite 25
Beachten Sie, dass die Gerätefüße u. U. farbige Abdrücke auf bestimmten Möbeloberflächen hinterlassen könnten. Verwenden Sie einen Schutz zwischen Ihren Möbeln und dem Gerät. Halten Sie das DIGITRADIO 10 IR von Geräten fern, die starke Magnetfelder erzeugen. Stellen Sie keine schweren Gegenstände auf das Gerät.
> Wenn das Gerät längere Zeit nicht benutzt wird, z. B. vor Antritt einer längeren Reise, ziehen Sie den Netzstecker. 6 Beschreibung des DIGITRADIO 10 IR 6.1 Der Lieferumfang Bitte überprüfen sie vor Inbetriebnahme, ob der Lieferumfang vollständig ist: 1x DIGITRADIO 10 IR...
All manuals and user guides at all-guides.com 6.2 Die besonderen Eigenschaften des DIGITRADIO 10 IR Das DIGITRADIO 10 IR besteht aus einem DAB+/UKW/Internetradio-Empfänger, mit folgend aufgeführten Funktionen: Sie können bis zu 30 DAB+ und 30 UKW-Sender speichern. Das Radio empfängt auf den Frequenzen UKW 87,5–108 MHz (analog) und DAB+ 174,9–239,2 MHz (digital Antenne), 252-261 MHz (digital Kabel).
Eingang AUDIO-IN einer Stereo-Anlage oder AV-Verstärker an. Benutzen Sie hierzu das mitgelieferte Audioverbindungskabel (eventuell wird eine spezielles Kabel, je nach AV-Verstärker-Eingang, benötigt). > Hat Ihr AV-Verstärker einen Optischen Digitaleingang, können Sie das DIGITRADIO 10 IR über den Optischen Digitalausgang S/PDIF (4) mit dem Verstärker verbinden.
Verlegen Sie das Netzkabel so, dass niemand darüber stolpern kann. > Verbinden Sie das mitgelieferten USB-Kabel mit dem Netzteil und verbinden Sie es mit der mit DC-IN (5) beschrifteten Buchse an der Rückseite des DIGITRADIO 10 IR. Verbinden Sie danach das Netzteil mit dem Stromnetz.
All manuals and user guides at all-guides.com 6.3.4 Batterien in Fernbedienung einlegen > Öffnen Sie das Batteriefach auf der Rückseite der Fernbedienung, indem Sie es in Pfeilrichtung schieben. > Legen Sie die Batterien (2x AAA 1,5V) gemäß der im Batteriefach abgebildeten Polung in das Batteriefach ein.
All manuals and user guides at all-guides.com 6.4 Allgemeine Geräte-Funktionen 6.4.1 Gerät einschalten > Bereiten Sie das DIGITRADIO 10 IR zunächst wie unter Punkt 6.3.1 und 6.3.4 beschrieben, zum Betrieb vor. > Durch Drücken der Taste Ein/Standby (18) auf der Fernbedienung, schalten Sie das DIGITRADIO 10 IR ein.
All manuals and user guides at all-guides.com 6.4.3 Quellenwahl > Mit der Taste MODE (25) kann zwischen den Quellen DAB+ (Digital Radio), FM (UKW) und Bluetooth umgeschaltet werden. Drücken Sie hierzu die Taste mehrmals. Die Quellen werden anhand eines Symbols dargestellt. DAB+ FM (UKW) Internetradio...
All manuals and user guides at all-guides.com 6.4.4 Lautstärke einstellen > Stellen Sie die Lautstärke mit den Tasten VOL +/- (15, 27) der Fernbedienung ein. Die eingestellte Lautstärke wird im Display anhand eines Balkendiagrammes gezeigt. > Drücken Sie die Taste Mute/Stummschaltung (6), um den Ton direkt stummzuschalten.
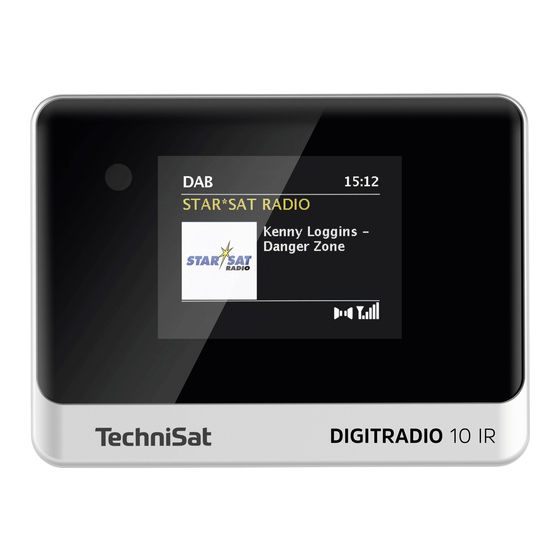
All manuals and user guides at all-guides.com 6.4.5 Display Je nach gewählter Funktion oder Option, werden im Display folgende Informationen angezeigt: Quelle Uhrzeit Sendername Titelname/ Albumcover/ Zusatinfos Slideshow Empfangs- stärke DAB/FM und WLAN Aktive Wecker Favoritenliste Stereo-Ton Aktiver Sleeptimer...
All manuals and user guides at all-guides.com 6.4.5.1 Displayanzeigen aufrufen > Drücken Sie die Taste MENU und wählen Sie mit den Tasten / das Untermenü [Displayeinst.] > [Display]. Drücken Sie anschließend die Taste OK. Wählen Sie mit den Tasten / und OK eine Anzeigeoption. Sie haben die Wahl, sich folgende Infos anzeigen zu lassen: Im Internetradio -Betrieb (gewählte Funktion wird mit einem “*”...
All manuals and user guides at all-guides.com Alternativ können auch die Taste INFO auf der Fernbedienung drücken, um die Displayanzeigen umzuschalten. 6.4.5.2 Slideshow Einige DAB+ Sender übertragen Zusätzliche Informationen wie z. B. Albumcover des Aktuellen Titels, Werbung oder Wetterdaten. Die Größe des Fensters kann mit der Taste OK oder im Menü...
Seite 40
All manuals and user guides at all-guides.com Einstellungen werden erst durch Drücken der Taste OK gespeichert. Wird stattdessen die Taste BACK gedrückt, wird die Einstellungen nicht übernommen und gespeichert (die Taste MENU übernimmt hier auch die Funktion einer “Zurück”-Taste und das Menü wird verlassen). Funktionen und zu drückende Tasten werden in dieser Bedienungsanleitung in fett dargestellt.
> Hier kann gewählt werden, über welche Quelle (DAB+, FM oder Internet) das DIGITRADIO 10 IR die Uhrzeit und das Datum bezieht und aktualisiert. Haben Sie Aktualisierung von NET gewählt, müssen Sie im nächsten Schritt noch die Zeitzone wählen, damit die Uhrzeit korrekt dargestellt wird. Legen Sie anschließend fest, ob zum Zeitpunkt der Einstellung die Sommerzeit oder die...
Seite 42
All manuals and user guides at all-guides.com > Im nächsten Schritt können Sie festlegen, ob das DIGITRADIO 10 IR auch im Standby mit dem Internet verbunden bleiben soll. Dies kann z. B. für die App- Steuerung (Spotify-Connect) von Vorteil sein. Jedoch erhöht sich dadurch der Stromverbrauch im Standby-Modus.
All manuals and user guides at all-guides.com > Bestätigen Sie nach Abschluss der Netzwerkkonfiguration den Hinweis, das die Ersteinrichtung abgeschlossen ist, durch Drücken der Taste OK. 9 Die DAB+ (Digital Radio)-Funktion 9.1 Was ist DAB+ und DAB+ Cable DAB+ ist ein neues digitales Format, durch welches Sie kristallklaren Sound ohne Rauschen hören können.
All manuals and user guides at all-guides.com 9.2.1 Vollständigen Suchlauf durchführen Der automatische Suchlauf Vollständiger Suchlauf scannt alle DAB+ Band III - Kanäle und findet somit alle Sender, die im Empfangsgebiet ausgestrahlt werden. Nach Beendigung des Suchlaufes wird der erste Sender in alphanumerischer Reihenfolge wiedergegeben.
All manuals and user guides at all-guides.com 9.2.2 Sender wählen > Durch drücken der Tasten P+ oder P- kann die Senderliste aufgerufen und zwischen den verfügbaren Sendern umgeschaltet werden. Je nach Einstellung unter MENU > [Suchlaufeinst.] > [Senderwechsel], muss anschließend die Taste OK zur Wiedergabe des gewählten Senders gedrückt werden (Option: Senderwechsel >...
All manuals and user guides at all-guides.com Sie können Sender auch direkt auf eine der Direktwahltasten 1...10 auf der Fernbedienung speichern, indem Sie die entsprechende Taste länger gedrückt halten (Taste 0=10). Um auf den Speicherplätzen 11...30 zu speichern, drücken Sie kurz die Taste Zifferneingabe (17) und halten anschließend die zweite Ziffer gedrückt.
All manuals and user guides at all-guides.com 9.2.5 Überschreiben/Löschen einer Programmplatz-Speicherung > Speichern Sie wie beschrieben einfach einen neuen Sender auf einen Favoritenspeicherplatz ab. Beim Aufruf der Werkseinstellungen werden alle Speicherplätze gelöscht. 9.2.6 Signalstärke > Drücken Sie mehrmals die Taste INFO, bis der Signalstärkebalken angezeigt wird.
All manuals and user guides at all-guides.com Sender, deren Signalstärke unterhalb der erforderlichen Mindestsignalstärke liegt, senden kein ausreichendes Signal. Richten Sie die Wurfantenne ggf. wie unter Punkt 6.3.1 beschrieben aus. 9.2.7 Manuell einstellen Dieser Menüpunkt dient der Überprüfung der Empfangskanäle und kann zur Ausrichtung der Antenne dienen.
All manuals and user guides at all-guides.com Befinden sich Sender auf der eingestellten Frequenz bzw Kanal, die noch nicht in der Senderliste gespeichert wurden, werde diese nun ebenfalls gespeichert. 9.2.8 Lautstärkeanpassung (DRC) Mit dem Menüpunkt DRC wird die Kompressionsrate, welche Dynamikschwankungen und damit einhergehende Lautstärkevariationen ausgleicht, eingestellt.
All manuals and user guides at all-guides.com 9.2.9 Inaktive Sender löschen Dieser Menüpunkt dient der Entfernung alter und nicht mehr empfangbarer Sender aus der Senderliste. > Drücken Sie die Taste MENU und wählen Sie mit den Tasten / den Eintrag [Suchlaufeinst.] >...
All manuals and user guides at all-guides.com 10 FM (UKW)-Betrieb 10.1 UKW-Radiobetrieb einschalten > Wechseln Sie durch Drücken der Taste MODE in den FM-Modus. > Im Display wird [FM] angezeigt. Beim erstmaligen Einschalten ist die Frequenz 87,5 MHz eingestellt. Haben Sie bereits einen Sender eingestellt oder gespeichert, spielt das Radio den zuletzt eingestellten Sender.
All manuals and user guides at all-guides.com 10.3 Automatische Sendersuche > Drücken Sie die Taste SCAN, um automatisch den nächsten Sender mit ausreichendem Signal zu suchen. Wird ein UKW-Sender mit ausreichend starkem Signal gefunden, stoppt der Suchlauf und der Sender wird wiedergegeben. Wird ein RDS-Sender empfangen erscheint der Sendername und ggf.
All manuals and user guides at all-guides.com > Wählen Sie aus, ob der Suchlauf nur bei starken Sendern [Nur starke Sender] stoppen soll oder bei allen Sendern (auch bei schwachen Sendern) [Alle Sender]. Bei der Einstellung Alle Sender stoppt der automatische Suchlauf bei jedem verfügbaren Sender.
All manuals and user guides at all-guides.com > Stellen Sie zunächst die gewünschte Senderfrequenz ein (Punkt 10.3, 10.4) > Um diesen Sender auf einem Speicherplatz abzulegen, halten Sie während der Wiedergabe die Taste FAV gedrückt, bis [Progr. Speichern] im Display erscheint. Wählen Sie anschließend mit den Tasten / einen Favoritenspeicher (1...30).
All manuals and user guides at all-guides.com Ist kein Sender auf dem gewählten Programmplatz gespeichert, erscheint im Display [(leer)]. Alternativ kann auch die entsprechende Direktwahltaste 1...10 auf der Fernbedienung genutzt werden. Für Sender auf den Speicherplätzen 11...30 drücken Sie die Zifferneingabe (17) und eine weitere Ziffer (z. B. Zifferneingabe + 3 für den Speicherplatz 13).
All manuals and user guides at all-guides.com 11 Internetradio Das DIGITRADIO 10 IR ist mit einem Internet-Radio Empfänger ausgestattet. Um Internet-Radio Stationen/Sender empfangen zu können, benötigen Sie eine Internetverbindung über einen WLAN-Router zu einem Drahtlosnetzwerk. > Drücken Sie die Taste MODE so oft, bis [Internet Radio] im Display angezeigt wird.
All manuals and user guides at all-guides.com 11.1 Senderliste > Drücken Sie die Taste MENU und wählen Sie > Senderliste. Unter Senderliste werden alle Internet-Radiostationen in verschiedenen Kategorien unterteilt angezeigt. Außerdem haben Sie hier Zugriff auf Ihre Favoriten. > Wählen Sie anhand einer Kategorie/Land/Genre einen Sender und drücken Sie die Taste OK.
All manuals and user guides at all-guides.com > Um einen Sender auf einem Speicherplatz abzulegen, halten Sie während der Wiedergabe die Taste FAV gedrückt, bis [Progr. Speichern] im Display erscheint. Wählen Sie anschließend mit den Tasten / einen Favoritenspeicher (1...30).
All manuals and user guides at all-guides.com Alternativ kann auch die entsprechende Direktwahltaste 1...10 auf der Fernbedienung genutzt werden. Für Sender auf den Speicherplätzen 11...30 drücken Sie die Zifferneingabe (17) und eine weitere Ziffer (z. B. Zifferneingabe + 3 für den Speicherplatz 13). 12 Podcasts Podcasts werden wie Internetradio-Sender über das Internet abgerufen.
Verbindung automatisch hergestellt. Je nach verbundenem Gerät, startet die Musikwiedergabe eventuell automatisch. 14.2 Externes Gerät koppeln Um ein externes Gerät, z. B. ein Smartphone oder Tablet mit dem DIGITRADIO 10 IR zu koppeln, gehen Sie folgendermaßen vor: >...
Seite 65
> In der Liste der gefundenen Bluetooth Geräte an Ihrem externen Gerät sollte nun der Eintrag DIGITRADIO 10 IR erscheinen. Tippen Sie darauf, um den Koppel-Vorgang abzuschließen. Ist der Koppelvorgang erfolgreich abgeschlossen, ertönt ein Bestätigungston aus dem Lautsprecher des DIGITRADIO 10 IR.
Seite 66
Titel von Anfang - Taste Lautstärke - Tasten Lautstärke +/- Alternativ können Sie die Wiedergabesteuerung der Musik-App Ihres externen Gerätes verwenden. Wenn keine Wiedergabe erfolgt bzw. kein Gerät gekoppelt wird, schaltet das DIGITRADIO 10 IR nach ca. 15 Minuten in den Standby-Modus.
Standby. > Drücken Sie die Taste MENU und wählen Sie mit den Tasten / den Eintrag [Sleeptimer]. > Drücken Sie die Taste OK. > Wählen Sie mit / einen Zeitraum, nach dem das DIGITRADIO 10 IR...
Bei aktivem Sleeptimer erscheint im Display ein Mond-Symbol mit der noch zur Verfügung stehenden Zeit. 15.2 Wecker Der Wecker schaltet das DIGITRADIO 10 IR zur eingestellten Weckzeit ein. Es können 2 Weckzeiten programmiert werden. Als Beispiel erfolgt die Beschreibung der Programmierung von Wecker 1.
Seite 70
All manuals and user guides at all-guides.com Wecker > Schalten Sie den Wecker Aktiv: [Ein] oder [Aus]. > Sie können hier zwischen Täglich (jeden Tag in der Woche), Einmal, Wochentage (Mo. - Fr.) oder Wochenende (Sa. u. So.) wählen. Drücken Sie zum Übernehmen der Einstellung die Taste OK.
Seite 71
All manuals and user guides at all-guides.com Haben Sie Internet Radio, DAB oder FM gewählt, können Sie anschließend angeben, ob Sie mit dem zuletzt gehörten Sender geweckt werden wollen, oder mit einem aus Ihrer Favoritenliste. Dauer > Geben Sie anschließend die Dauer ein. Übernehmen Sie die Eingabe durch drücken der Taste OK.
All manuals and user guides at all-guides.com 15.2.2 Wecker nach Alarm ausschalten > Drücken Sie die Taste Ein/Standby auf der Fernbedienung, um den Wecker auszuschalten. Möchten Sie die Schlummer-Funktion aktivieren, drücken Sie mehrmals bei aktivem Wecker die Taste OK. 15.3 Equalizer Mit dem Equalizer können Sie den Ton Ihren Wünschen entsprechend anpassen.
All manuals and user guides at all-guides.com 16 Systemeinstellungen Alle unter diesem Punkt erläuterten Einstellungen gelten für alle Quellen gleichermaßen. > Öffnen Sie das Menü und wählen Sie mit den Tasten / > [Systemeinst.]. Drücken Sie die Taste OK, um die Systemeinstellungen zu öffnen. 16.1 Interneteinstellungen >...
Seite 75
All manuals and user guides at all-guides.com Nun können Sie wählen, ob Sie die WPS-Funktion nutzen oder Ihr WLAN- Passwort manuell eingeben möchten. > Wenn Sie die WPS-Funktion nutzen möchten, starten Sie diese zunächst an Ihrem Router gemäß dessen Bedienungsanleitung und wählen Sie anschließend im Netzwerkassistenten [WPS mit Taste verb.] aus.
All manuals and user guides at all-guides.com 16.1.1.2 Konfiguration per WPS-Funktion Hierdurch wird eine direkte Verbindung zum Router hergestellt. Eine Auswahl und/ oder Eingabe von WLAN-Netz (SSID) und Passwort ist nicht nötig. > Starten Sie die WPS-Funktion an Ihrem Router gemäß dessen Bedienungsanleitung.
Seite 77
All manuals and user guides at all-guides.com > Wählen Sie nun aus, ob Sie die IP-Adresse, Gateway usw. von Ihrem Router automatisch abrufen lassen (DHCP aktiv) oder diese manuell eingeben (DHCP inaktiv) möchten. Bitte beachten Sie, dass das automatische Abrufen der IP-Adresse, Gateway, Subnetzmaske nur funktioniert, wenn die DHCP-Funktion in Ihrem Router aktiviert ist.
16.1.3 TechniSat Connect PIN Sie können das DIGITRADIO 10 IR mit der TechniSat CONNECT App steuern. Hierzu muss in der App die PIN des DIGITRADIO 10 IR eingetragen werden. Die PIN können Sie hier wie folgt ändern. >...
WLAN-Verbindung aufrecht erhalten bleiben soll (JA) oder nicht (NEIN). Beachten Sie, für den uneingeschränkten und reibungslosen Betrieb und Bedienung per TechniSat CONNECT-App, muss diese Funktion eingeschaltet bleiben. Die TechniSat CONNECT-App kann in den App-Stores Ihres Smartphones heruntergeladen werden. 16.2 Uhrzeit- und Datumseinstellungen 16.2.1 Zeit/Datum manuell einstellen Je nach Einstellung der Zeitaktualisierung (Punkt 16.2.2), müssen Sie Uhrzeit und das...
All manuals and user guides at all-guides.com > Die ersten Ziffern (Tag) des Datums blinken und können mit den Tasten / abgeändert werden. > Drücken Sie zum Übernehmen der Einstellung OK. > Anschließend blinken die nächsten Ziffern (Monat) des Datums und können ebenfalls wie zuvor beschrieben abgeändert werden.
All manuals and user guides at all-guides.com > Wählen Sie mit den Tasten / folgende Optionen: [Update von Internet] (Aktualisierung über Internet) [Update von DAB] (Aktualisierung nur über DAB+) [Update von FM] (Aktualisierung nur über UKW) [Keine Update] (Uhrzeit/Datum muss manuell eingegeben werden, siehe Punkt 16.2.1).
All manuals and user guides at all-guides.com > Wählen Sie mit / eine der folgenden Optionen: [24 Stunden] [12 Stunden] > Drücken Sie zum Speichern die Taste OK. 16.3 Display Einstellungen Sie können die Displayhelligkeit sowohl für den Betrieb als auch für Standby einstellen.
Seite 84
All manuals and user guides at all-guides.com Display Hier können Sie (je nach aktuell gewählter Quelle), die Display Zusatzinfos auswählen. > Wählen Sie mit / den Eintrag [Display]. Wählen Sie eine Zusatzinfo und drücken Sie zum Speichern die Taste OK. Bildgröße Unter Bildgröße kann die Bildgröße der Slideshow bei DAB+ -Sender ausgewählt werden.
All manuals and user guides at all-guides.com dem / eine Helligkeitsstufe und drücken Sie zum Speichern OK. [Auto-Dimm] dimmt das Display automatisch (bei gewählter Option [Ein]) nach 10 Sekunden ohne Bedienung des Radios, auf den Helligkeitswert Niedrig. Wird die Option [Aus] gewählt, leuchtet das Display mit der unter der Funktion [Betrieb] gewählten Helligkeit dauerhaft.
All manuals and user guides at all-guides.com > Drücken Sie die Taste MENU und wählen Sie mit den Tasten / den Eintrag [Systemeinst.] > [Werkseinst.] und drücken Sie OK. > Wählen Sie mit / zum Ausführen der Werkseinstellung den Eintrag [Ja] und drücken Sie OK.
All manuals and user guides at all-guides.com 16.7 SW-Update Der Punkt SW-Update dient der Aktualisierung der Gerätesoftware und ist nur für den Servicefall gedacht. 16.8 Ersteinrichtung Hier kann der Ersteinrichtungsassistent erneut aufgerufen werden. Näheres hierzu unter Punkt „8 Ersteinrichtung“ auf Seite 34. 16.9 Datenschutz Unter diesem Punkt finden Sie Datenschutzinformationen.
Seite 89
All manuals and user guides at all-guides.com Reinigen Sie das Gehäuse mit einem weichen, mit Wasser angefeuchteten Tuch. Kein Spiritus, Verdünnungen usw. verwenden; sie könnten die Oberfläche des Gerätes beschädigen. Das Display nur mit einem weichen Baumwolltuch reinigen. Baumwolltuch gegebenenfalls mit geringen Mengen nicht-alkalischer, verdünnter Seifenlauge auf Wasser- oder Alkoholbasis verwenden.
All manuals and user guides at all-guides.com 18 Fehler beseitigen Wenn das Gerät nicht wie vorgesehen funktioniert, überprüfen Sie es anhand der folgenden Tabelle. Symptom Mögliche Ursache/Abhilfe Gerät lässt sich nicht einschalten. Das Gerät wird nicht mit Strom versorgt. Schließen Sie das Netzteil richtig an die Steckdose und am Gerät an.
Seite 91
All manuals and user guides at all-guides.com Symptom Mögliche Ursache/Abhilfe Schlechte Bluetooth-Verbindung Die maximale Reichweite über Bluetooth von und Aussetzer 10m nicht überschreiten. Gerät schaltet selbstständig in Die Auto-Standby-Funktion schaltet das Gerät Standby selbstständig nach ca. 15 Minuten in Standby, wenn folgende Bedingungen vorliegen: Keine Ton-Wiedergabe, Kein Gerät über Bluetooth verbunden wenn...
All manuals and user guides at all-guides.com 19 Technische Daten / Herstellerhinweise Technische Änderungen und Irrtümer vorbehalten. Empfangswege DAB/DAB+, FM, Internet, Bluetooth Stromversorgung Netzteil DC 5 V, 1 A über externes mitgeliefertes Netzteil Frequenzen UKW: 87,5-108 MHz DAB/DAB+: 174-240 MHz DAB+ Cable: 252-261 MHz Bluetooth: 2,402-2,480 GHz Sendeleistung: Class 2/max.
Seite 94
All manuals and user guides at all-guides.com Bluetooth Protokolle Version V4.1 AVRCP, A2DP WLAN IEEE 802.11 a/b/g/n Dual band 2.4/5 GHz Display TFT-Color 2,8“ 320 X 240 Pixel RGB Stromverbrauch im Betrieb typisch: 1,4 W (DAB- Betrieb) Standby: 0,72 W Verbrauchsminimierung (automatisches Wenn kein Signal wiedergegeben wird: Abschalten nach 15 Minuten in Standby)
Seite 95
All manuals and user guides at all-guides.com...
Seite 96
All manuals and user guides at all-guides.com...
Seite 97
All manuals and user guides at all-guides.com Instruction Manual DIGITRADIO 10 IR DAB+/FM/Internet radio...
All manuals and user guides at all-guides.com 1 Illustrations 1.1 Front view...
Seite 100
All manuals and user guides at all-guides.com 1.2 View from the rear 1Colour display 4Optical digital output S/PDIF Analogue audio output (right/left) 2Infrared sensor 3Antenna port 5 DC IN 5 V, 500 mA...
All manuals and user guides at all-guides.com 1.3 Remote control MUTE Channel +/ Equaliser/EQ Volume +/ SCAN Channel -/ Repeat* INFO Random repeat* Numeric keys/ Previous track One-touch buttons Stop* FAV memory MENU OK / Select Volume - / BACK Entering numbers On/standby...
Seite 102
Safety instructions ....................90 Signs and symbols used ....................... 90 Intended use ..........................92 Target group for this instruction manual ..............92 Using the DIGITRADIO 10 IR safely .................. 92 Legal notices ......................95 Service instructions ........................97 Setting up the device .....................98 Description of the DIGITRADIO 10 IR ..............
Seite 103
All manuals and user guides at all-guides.com Special features of the DIGITRADIO 10 IR ..............101 Preparing the DIGITRADIO 10 IR for operation............101 6.3.1 Connect and align the dipole antenna ................. 101 6.3.2 Audio connection to stereo equipment, active speaker ........102 6.3.3 Connecting the power supply unit .................103...
Seite 105
All manuals and user guides at all-guides.com 9.2.3 Storing DAB+ stations in a memory slot ..............116 9.2.4 Retrieving DAB+ stations from a memory slot ............117 9.2.5 Overwriting/deleting a station memory slot ...............118 9.2.6 Signal intensity ..........................118 9.2.7 Manual setting .......................... 119 9.2.8 Volume adjustment (DRC) ....................
Seite 106
All manuals and user guides at all-guides.com 11.3 Adding favourites ........................128 11.4 Retrieving favourites ......................129 Podcasts ........................130 Spotify Connect .....................130 Bluetooth ........................131 14.1 Switching on Bluetooth mode ...................131 14.2 Pairing an external device ....................131 14.3 Cancelling pairing........................134 Other functions ......................134 15.1 Sleep timer ..........................134 15.2...
Seite 107
All manuals and user guides at all-guides.com 16.1.2 Display settings ........................143 16.1.3 TechniSat Connect PIN ......................143 16.1.4 Delete network profile ......................143 16.1.5 WLAN connection on standby ..................144 16.2 Time and date settings ......................144 16.2.1 Manually setting the date/time ..................144 16.2.2 Time update ..........................145...
All manuals and user guides at all-guides.com 3 Safety instructions 3.1 Signs and symbols used In this instruction manual: Indicates a safety instruction which can lead to serious injuries or death if not observed. Note the following signal words: DANGER - Serious / fatal injury WARNING - Serious injury, possibly fatal CAUTION - Injury This identifies information that must always be observed to prevent defects,...
Seite 109
All manuals and user guides at all-guides.com On the unit: Indoor use - Devices with this symbol are only suitable for indoor use. Protection class II - Electrical devices of protection class II are electrical devices with continuous double and/or reinforced insulation and no connection options for a protective conductor.
The instruction manual is intended for anyone concerned with installing, operating, cleaning or disposing of the device. 3.4 Using the DIGITRADIO 10 IR safely Please take note of the following information to minimise safety risks, to prevent damage to the device and to make a contribution to environmental protection.
Seite 112
All manuals and user guides at all-guides.com Observe all of the following instructions for the intended use of the device and to prevent damage to the device and injury to persons. Do not repair the device yourself. Repairs should only be carried out by trained experts.
Seite 113
All manuals and user guides at all-guides.com If the device shows signs of damage, it must not be put into operation. Do not put the device into operation in the vicinity of bath tubs, showers, swimming pools or running/splashing water. There is a risk of electric shock and/or device defects.
All manuals and user guides at all-guides.com 4 Legal notices TechniSat herewith declares that the radio system model DIGITRADIO 10 IR corresponds to Directive 2014/53/EU. The complete text of the EU Declaration of Conformity is available at the following web address: http://konf.tsat.de/?ID=22920...
Seite 115
All manuals and user guides at all-guides.com DIGITRADIO 10 IR and TechniSat registered trademarks of: TechniSat Digital GmbH TechniPark Julius-Saxler-Strasse 3 D-54550 Daun/Eifel, Germany www.technisat.de The names of the companies, institutions or brands referred to are trademarks or registered trademarks of the respective owners.
Should you experience a problem with this unit, or for queries and information, our Technical Hotline is available: Mon. - Fri. 8:00 am - 6:00 pm on: +49 (0) 3925 9220 1800. Repairs can also be ordered directly online at www.technisat.de/reparatur.
All manuals and user guides at all-guides.com If the device needs to be returned, please use the following address only: TechniSat Digital GmbH Service-Center Nordstr. 4a 39418 Stassfurt, Germany 5 Setting up the device > Place the device on a firm, secure and horizontal base. Make sure the area is well ventilated.
Seite 119
Please note that the device feet could leave coloured marks on some types of furniture surfaces in certain situations. Place a protective layer between your furniture and the device. Keep the DIGITRADIO 10 IR away from devices that emit intense magnetic fields. Do not place any heavy objects on the device.
Remove the plug if the device is not going to be used for a prolonged period, e.g. before going away on a long trip. 6 Description of the DIGITRADIO 10 IR 6.1 Scope of delivery Before start-up, please check whether everything has been delivered:...
All manuals and user guides at all-guides.com 6.2 Special features of the DIGITRADIO 10 IR The DIGITRADIO 10 IR is comprised of a DAB+/FM/Internet radio receiver having the following functions: You can store up to 30 DAB+ and 30 FM stations.
(a special cable may be required, depending on the AV amplifier input). > If your AV amplifier has an optical digital input, you can connect the DIGITRADIO 10 IR to the amplifier via the S/PDIF optical digital output (4).
Route the mains cable in such a way that nobody can trip over it. > Connect the supplied USB cable to the mains adapter and attach this to the port marked DC IN (5) on the reverse of the DIGITRADIO 10 IR. Then connect the mains adapter to the mains.
All manuals and user guides at all-guides.com 6.3.4 Insert the batteries into the remote control > Open the battery compartment on the back of the remote control by pushing it in the direction of the arrow. > Insert the batteries (2 x AAA 1.5V) in accordance with the polarity indicated in the battery compartment.
All manuals and user guides at all-guides.com 6.4 General device functions 6.4.1 Switching on the device > First prepare the DIGITRADIO 10 IR for operation as described in Sections 6.3.1 and 6.3.4. > Press the On/Standby button (18) on the remote control to turn on the DIGITRADIO 10 IR.
All manuals and user guides at all-guides.com 6.4.3 Source selection > Press the MODE button (25) to switch between DAB+ (Digital Radio), FM and Bluetooth modes. Press the button repeatedly to do so. The modes are displayed using a symbol. DAB+ Internet radio Bluetooth...
All manuals and user guides at all-guides.com 6.4.4 Adjusting the volume > Set the volume using the VOL +/- buttons (15, 27) on the remote control. The set volume is shown on the display by way of a bar chart. >...
All manuals and user guides at all-guides.com 6.4.5 Display Depending on the selected function or option, the display will show the following information: Source Time Station name Track name/ Album cover/ Additional info Slideshow Reception strength (DAB/FM and WLAN) Active alarm Favourites list Stereo Active sleep...
All manuals and user guides at all-guides.com 6.4.5.1 Retrieving displays > Press the MENU button and use the / buttons to select the [Display settings] > [Display] submenu. Then press the OK button. Use the / and OK buttons to select a display option. You have the choice of viewing the following information: In Internet radio mode (the selected function is identified with an “*”): [Track, Artist], [Description], [Genre], [Reliability], [Bit rate], [Sound...
OK button or in the menu under [Display settings] > [Picture size]. 7 Menu operation The menu takes you to all functions and settings for the DIGITRADIO 10 IR. Menu navigation is carried out with the MENU, BACK, / and OK buttons. The menu is divided into submenus and contains different menu items or activatable functions, depending on the mode.
Seite 133
All manuals and user guides at all-guides.com Settings are not saved until the OK button is pressed. If the BACK button is pressed instead of this, settings are not accepted or saved (the MENU button in this case acts as a “Back” button and you exit the menu). The functions and buttons to be pressed are shown in bold in this instruction manual.
All manuals and user guides at all-guides.com 8 Initial set-up After switching on the DIGITRADIO 10 IR for the first time, the initial set-up wizard starts. Settings can all be changed at any time in the future. > To launch the initial set-up wizard, use / on the remote control to select the [YES] field and press the OK button.
Seite 136
All manuals and user guides at all-guides.com > In the next step you can specify whether the DIGITRADIO 10 IR should remain connected to the Internet when on standby. This can, for example, be useful for App control (Spotify Connect). Power consumption is, however, increased by using the standby mode.
All manuals and user guides at all-guides.com > After completing the network set-up, confirm the message that the initial set- up has been completed by pressing the OK button. 9 DAB+ (digital radio) function 9.1 What are DAB+ and DAB+ Cable? DAB+ is a new digital format through which crystal clear sound with no noise can be heard.
All manuals and user guides at all-guides.com 9.2.1 Performing a complete scan The automatic scan (Complete scan) scans all DAB+ band III channels and thereby finds all stations being broadcast within the reception area. After the scan is complete, the first station is played back in alphanumeric order.
All manuals and user guides at all-guides.com 9.2.2 Selecting stations > By pressing the P+ or P- buttons, the station list can be called up and you can switch between the available stations. Depending on the setting under MENU > [Scan settings] > [Change channel], the OK button must then be pressed to play the selected station (alternatively: Change Channel >...
All manuals and user guides at all-guides.com You can also save stations to one of the One-Touch buttons (1 - 10) by holding down the corresponding button a little longer (0 button = 10). To save to memory slots 11 - 30, briefly press the Number entry button (17) and then hold down the second number.
All manuals and user guides at all-guides.com 9.2.5 Overwriting/deleting a station memory slot > Simply save a new station on a favourite memory slot as described. When retrieving the factory settings all memory slots are deleted. 9.2.6 Signal intensity > Press the INFO button repeatedly until the signal strength bar is displayed.
All manuals and user guides at all-guides.com Stations with a signal intensity below the required minimum signal intensity are not transmitting a strong enough signal. Align the dipole antenna, if required, as described in Section 6.3.1. 9.2.7 Manual setting This menu item is used to check the reception channels and can be used to align the antenna.
All manuals and user guides at all-guides.com If there are stations on the set frequency or channel that have not yet been stored in the station list, they will now also be saved. 9.2.8 Volume adjustment (DRC) The DRC menu item is used to set the compression rate, which compensates for dynamic fluctuations and the associated volume variations.
All manuals and user guides at all-guides.com 9.2.9 Deleting inactive stations This menu item is for removing old stations and those no longer being received from the station list. > Press the MENU button and use the / buttons to select the [Scan settings] >...
All manuals and user guides at all-guides.com 10 FM mode 10.1 Switching on FM radio mode > Switch to FM mode by pressing the MODE button. > [FM] is shown on the display. When switching on for the first time, the frequency 87.5 MHz is set. If you have already set or saved a station, the radio plays the last station set.
All manuals and user guides at all-guides.com 10.3 Automatic station scan > Press the SCAN button to automatically search for the next station with sufficient signal intensity. If a FM station with sufficient signal intensity is found, the scan stops and the station is played.
All manuals and user guides at all-guides.com > Select whether the scan should only stop for stations with a strong signal [Strong Stations Only] or for all stations (including stations with a weak signal) [All Stations]. With the All Stations setting, the scan stops automatically upon detecting each available station.
All manuals and user guides at all-guides.com > First set the desired station frequency (Section 10.3, 10.4) > In order to store this station in a memory slot, hold down the FAV button while playing until [Save channel] appears on the display. Then use the / buttons to select a favourites memory slot (1 - 30).
All manuals and user guides at all-guides.com If no station is saved in the selected station slot, [(empty)] appears on the display. Alternatively, the corresponding One-touch button (1 - 10) on the remote control can be used. For stations in memory slots 11 - 30, press the Number entry button (17) and another number (e.g.
All manuals and user guides at all-guides.com 11 Internet radio The DIGITRADIO 10 IR is equipped with an Internet radio receiver. In order to receive Internet radio stations/channels, you need an Internet connection using a connection to a wireless network via a WLAN router.
All manuals and user guides at all-guides.com 11.1 Station list > Press the MENU button and select the >Station list item. Under Station list, all Internet radio stations are displayed, sub-divided into different categories. You can also access to your Favourites here. >...
All manuals and user guides at all-guides.com > In order to store this station in a memory slot, hold down the FAV button while playing until [Save channel] appears on the display. Then use the / buttons to select a favourites memory slot (1 - 30). Press the OK button to save.
All manuals and user guides at all-guides.com Alternatively, the corresponding One-touch button (1 - 10) on the remote control can be used. For stations in memory slots 11 - 30, press the Number entry button (17) and another number (e.g. number entry + 3 for memory slot 13).
All manuals and user guides at all-guides.com 14 Bluetooth In Bluetooth mode, you can enjoy music from a connected smartphone or tablet via the DIGITRADIO 10 IR's speakers. For this purpose, the two devices must first be "paired" to each other. 14.1 Switching on Bluetooth mode >...
Seite 159
During the pairing process, both devices should be within 10 cm of each other. > The entry DIGITRADIO 10 IR should now appear in the list of Bluetooth devices found on your external device. Tap on the name of the radio to complete the pairing process.
Seite 160
- Button volume +/- Alternatively, you can use the playback control for the music App on your external device. If no sound is being played, or no device is paired, the DIGITRADIO 10 IR switches to standby mode after approx. 15 minutes.
To cancel an active pairing, select MENU > [Disconnect] and press the OK button. Note that the device to be unpaired must be connected to the DIGITRADIO 10 IR if you want to unpair it. Then you can pair a new device, as described in Section 14.2.
15.2 Alarm The alarm switches on the DIGITRADIO 10 IR at the set time. 2 alarm times can be programmed. The description of how to programme Alarm 1 serves as an example. 15.2.1 Setting the alarm >...
Seite 163
All manuals and user guides at all-guides.com Alarm > Switch the alarm to Active:[On] or [Off]. > Here you can select from Daily (every day of the week), Once, Weekdays (Mon - Fri) or Weekends (Sat and Sun). Press the OK button to apply the setting.
Seite 165
All manuals and user guides at all-guides.com If you have selected Internet Radio, DAB or FM, you can then enter whether or not you want to be woken up by the last station listened to or by one from your Favourites list. Duration >...
All manuals and user guides at all-guides.com 15.2.2 Switching off the alarm after being woken > Press the On/Standby button on the remote control to switch the alarm off. If you want to activate the snooze function, press the OK button repeatedly when an alarm is active.
All manuals and user guides at all-guides.com 16 System settings All settings explained in this section apply equally to all sources. > Open the menu and use the / > [System Settings] buttons to select. Press the OK button to open the system settings. 16.1 Internet settings >...
Seite 168
All manuals and user guides at all-guides.com You can now choose whether to use the WPS function or whether you prefer to enter your WLAN password manually. > If you would like to use the WPS function, launch it on your router first as per its instruction manual and then select [Use WPS via button] in the network wizard.
All manuals and user guides at all-guides.com 16.1.1.2 Configuration via the WPS function This establishes a direct connection to the router. Selecting and/or entering a WLAN network (SSID) and password is not required. > Start the WPS function on your router as per the instruction manual. >...
Seite 171
All manuals and user guides at all-guides.com > Now select whether to allow automatic retrieval of the IP address, gateway etc. from your router (DHCP active) or if you would like to enter this manually (DHCP inactive). Please take into account that automatic retrieval of the IP address, gateway, subnet mask only works if the DHCP function is activated in your router.
16.1.3 TechniSat Connect PIN You can control the DIGITRADIO 10 IR via the TechniSat CONNECT App. To do so, the PIN for the DIGITRADIO 10 IR must be entered in the App. You can change the PIN as follows. >...
Under [WLAN active on standby], select whether the WLAN connection is to be maintained in standby mode (YES) or not (NO). Note that, for unrestricted and smooth use and operation via the TechniSat CONNECT App, this function must remain switched on.
All manuals and user guides at all-guides.com > The first digits (day) of the date flash and can be changed using the / buttons. > Press the OK button to apply the setting. > The next date digits (month) then start to flash and can again be changed as described above.
All manuals and user guides at all-guides.com > Use the /buttons to select the following options: [Update from Internet] (Update via the Internet) [Update from DAB] (Update via DAB+ only) [Update from FM] (Update via FM only) [No update] (Time/date must be entered manually, see Section 16.2.1). >...
All manuals and user guides at all-guides.com > Use / to choose one of the following options: [24 hours] [12 hours] > Press the OK button to save. 16.3 Display settings It is possible to set the display brightness both for operation and standby. There are also various colour schemes available.
Seite 178
All manuals and user guides at all-guides.com Display Here you can select the additional information display (depending on the source currently selected). > Use / to select the [Display] item. Select the additional information and press the OK button to save. Picture size Under Picture size, the picture size for the slideshow for DAB+ stations can be selected.
All manuals and user guides at all-guides.com brightness level and press OK to save. [Auto Dim] dims the display automatically (with the option [On] selected) to the Low brightness value after 10 seconds without operating the radio. When the [Off] option is selected, the display will be permanently lit with the brightness selected under [Operation].
All manuals and user guides at all-guides.com > Press the MENU button and use the / buttons to select the [System settings] > [Factory settings] item, then press OK. > Use / to select the [Yes] option, then press OK to reset to the factory settings.
All manuals and user guides at all-guides.com 16.7 SW update The SW update option is used to update the device software and is only intended for use when servicing. 16.8 Initial set-up Here the initial set-up wizard can be accessed again. For more details, see Section „8 Ersteinrichtung“...
Seite 183
All manuals and user guides at all-guides.com Clean the housing using a soft, damp cloth. Do not use spirit, thinners, etc.; you could damage the surface of the device. Only clean the display with a soft, cotton cloth. If required, use a cotton cloth with small amounts of non-alkaline, diluted, water or alcohol-based soap solution.
Disconnect the device from the power supply and then reconnect it. Poor reception via DAB+/FM. Fully extend the antenna. Change the position of the antenna or the DIGITRADIO 10 IR. The device cannot be operated. Disconnect the device from the power supply and then reconnect it.
Seite 185
All manuals and user guides at all-guides.com Symptom Possible cause/remedy Bad Bluetooth connection and Do not exceed the maximum range for dropouts Bluetooth of 10m. Device automatically switches to The auto-standby function automatically standby switches the device to standby after approx. 15 minutes in the following circumstances: No sound is played No device is connected via Bluetooth when...
All manuals and user guides at all-guides.com 19 Technical specifications / manufacturer's instructions Subject to technical changes and errors. Reception channels DAB/DAB+, FM, Internet, Bluetooth Power supply, power supply unit DC: 5V, 1A via supplied external power cable Frequencies FM: 87.5-108 MHz DAB/DAB+: 174 - 240 MHz DAB+ Cable: 252 - 261 MHz Bluetooth: 2.402 - 2.480 GHz...
Seite 187
All manuals and user guides at all-guides.com Bluetooth protocols Version V4.1 AVRCP, A2DP WLAN IEEE 802.11 a/b/g/n Dual band 2.4/5 GHz Display TFT colour 2.8" 320 X 240 pixels RGB Power consumption in typical operation: 1.4 W (DAB mode) on standby: 0.72 W Consumption minimisation If no signal is being played: (automatic shutdown after 15...
All manuals and user guides at all-guides.com 1.2 Achteraanzicht Kleurendisplay Optische digitale uitgang S/PDIF Analoge audiouitgang (rechts/links) Infraroodsensor Antenne-aansluiting DC-IN 5 V, 500 mA...
Seite 192
All manuals and user guides at all-guides.com 1.3 Afstandsbediening Mute/Geluidloos Programma + / Equalizer/EQ Volume + / SCAN Programma - / Herhalen* INFORMATIE Willekeurig Cijfertoetsen/ afspelen* Snelkeuzetoetsen Vorige nummer FAV-geheugen Stop* MENU OK / Selecteren Volume - / BACK / Terug Met cijfertoetsen invoeren...
Seite 193
Veiligheidsinstructies ...................166 Gebruikte tekens en symbolen ..................166 Doelmatig gebruik ......................... 168 Doelgroep van deze handleiding ................... 168 Veilig gebruik van de DIGITRADIO 10 IR ..............168 Juridische informatie ....................171 Service-instructies ........................173 Apparaat installeren ..................... 174 Beschrijving van de DIGITRADIO 10 IR ............176...
Seite 195
All manuals and user guides at all-guides.com De bijzondere kenmerken van de DIGITRADIO 10 IR ..........177 DIGITRADIO 10 IR gereedmaken voor gebruik ............177 6.3.1 Draadantenne aansluiten en richten ................177 6.3.2 Audio-aansluiting van stereo-installatie, actieve luidspreker ......178 6.3.3 Voedingsadapter aansluiten ....................179 6.3.4 Batterijen in de afstandsbediening plaatsen ............
Seite 196
All manuals and user guides at all-guides.com 9.2.3 Bewaar het DAB+ station op een opslaglocatie ............. 192 9.2.4 DAB+ station vanaf een favorietengeheugen opvragen ........193 9.2.5 Overschrijven/verwijderen van een opgeslagen programmageheugen ..194 9.2.6 Signaalsterkte .......................... 194 9.2.7 Handmatig instellen .......................195 9.2.8 Volume regelen (DRC) ......................
Seite 197
All manuals and user guides at all-guides.com 11.3 Favorieten toevoegen ......................204 11.4 Favorieten opvragen ......................205 Podcasts ......................... 206 Spotify Connect ....................206 Bluetooth ........................ 207 14.1 Bluetooth inschakelen ......................207 14.2 Extern apparaat koppelen ....................207 14.3 Koppeling annuleren ......................210 Overige functies ....................210 15.1 Sleeptimer ..........................
Seite 198
All manuals and user guides at all-guides.com 16.1.2 Instellingen weergeven ....................... 219 16.1.3 TechniSat Connect PIN ......................219 16.1.4 Netwerkprofiel verwijderen ....................219 16.1.5 WiFi-verbinding in stand-by .................... 220 16.2 Tijd- en datuminstellingen ....................220 16.2.1 Tijd/datum handmatig instellen ..................220 16.2.2 Tijd bijwerken ...........................
All manuals and user guides at all-guides.com 3 Veiligheidsinstructies 3.1 Gebruikte tekens en symbolen In deze handleiding: Markeert een veiligheidsinstructie, die kan leiden tot ernstig letsel of de dood als deze niet wordt opgevolgd. Let op de volgende signaalwoorden: GEVAAR - Ernstige verwondingen met de dood tot gevolg WAARSCHUWING - Zware verwondingen, mogelijk met de dood tot gevolg LET OP - Kans op verwondingen Let op - duidt een belangrijke aanwijzing aan die strikt moet worden...
Seite 201
All manuals and user guides at all-guides.com Op het apparaat: Gebruik binnenshuis - units met dit symbool zijn uitsluitend bestemd voor gebruik binnenshuis. Beschermingsklasse II - Elektrische apparaten van beschermingsklasse II zijn elektrische apparaten met doorlopende dubbele en/of versterkte isolatie en zonder aansluitmogelijkheden voor een aardingskabel.
De handleiding is bedoeld voor iedereen die het apparaat installeert, bedient, schoonmaakt of afdankt. 3.4 Veilig gebruik van de DIGITRADIO 10 IR Neem de volgende instructies in acht om veiligheidsrisico's tot een minimum te beperken, schade aan het apparaat te voorkomen en bij te dragen aan de bescherming van het milieu.
Seite 203
All manuals and user guides at all-guides.com Neem steeds de volgende instructies in acht voor doelmatig gebruik van het apparaat en om defecten aan het apparaat en persoonlijk letsel te voorkomen. Repareer het toestel niet zelf. Reparaties mogen alleen door gekwalificeerde technici worden uitgevoerd.
Seite 204
All manuals and user guides at all-guides.com Neem het apparaat niet in gebruik als het beschadigingen vertoont. Gebruik het apparaat niet in de buurt van een badkuip, douche, zwembad of stromend/spattend water. Er bestaat gevaar voor stroomschokken en/of defecten aan het apparaat! Vreemde voorwerpen, zoals naalden, munten, enz., mogen niet in het apparaat vallen.
All manuals and user guides at all-guides.com 4 Juridische informatie TechniSat verklaart hierbij dat de DIGITRADIO 10 IR-radioapparatuur voldoet aan Richtlijn 2014/53/EU. De volledige tekst van de EU-conformiteitsverklaring is beschikbaar op de volgende website: http://konf.tsat.de/?ID=22920 TechniSat is niet aansprakelijk voor productschade als gevolg van externe invloeden, slijtage of onjuiste behandeling, ongeoorloofde reparatie, veranderingen of ongelukken.
Seite 207
All manuals and user guides at all-guides.com DIGITRADIO 10 IR en TechniSat zijn geregistreerde handelsmerken van: TechniSat Digital GmbH TechniPark Julius-Saxler-Straße 3 D-54550 Daun/Eifel www.technisat.de Namen van de genoemde bedrijven, instellingen of merken zijn handelsmerken of gedeponeerde handelsmerken van hun respectievelijke eigenaren.
Voor vragen en informatie of als er een probleem is met dit apparaat, kunt u terecht bij onze technische hotline: Ma. - vr. 8:00 - 18:00 via tel.: 03925/9220 1800 bereikbaar. U kunt reparaties ook direct online op www.technisat.de/reparatur aanvragen.
All manuals and user guides at all-guides.com Gebruik in geval van retourzending van het apparaat alleen het volgende adres: TechniSat Digital GmbH Service-center Nordstr. 4a 39418 Staßfurt 5 Apparaat installeren > Plaats het apparaat op een stevige, veilige en horizontale ondergrond. Zorg voor goede ventilatie.
Seite 210
Houd er rekening mee dat de poten van het apparaat mogelijk gekleurde afdrukken op bepaalde meubeloppervlakken kunnen achterlaten. Gebruik bescherming tussen uw meubels en het apparaat. Houd de DIGITRADIO 10 IR uit de buurt van apparaten die sterke magnetische velden produceren. Plaats geen zware voorwerpen op het apparaat.
> Koppel de stekker los als het apparaat lange tijd niet wordt gebruikt, bijvoorbeeld voor aanvang van een lange reis. 6 Beschrijving van de DIGITRADIO 10 IR 6.1 De levering Controleer voor ingebruikname of de levering compleet is: 1x DIGITRADIO 10 IR...
All manuals and user guides at all-guides.com 6.2 De bijzondere kenmerken van de DIGITRADIO 10 IR De DIGITRADIO 10 IR bestaat uit een DAB+/FM-/internetradio-ontvanger met de volgende functies: U kunt maximaal 30 DAB+ en 30 FM-stations opslaan. De radio ontvangt op de frequenties FM 87,5-108 MHz (analoog) en DAB+ 174,9–239,2 MHz (digital Antenne), 252-261 MHz (digitale kabel).
All manuals and user guides at all-guides.com Vaak is de exacte uitrichting van de draadantenne belangrijk, vooral in de randgebieden van de DAB+-ontvangst. Op het internet kan bijv. onder "www. dabplus.de" snel de locatie van de dichtstbijzijnde zendmast worden bepaald. Begin de eerste scan bij een raam in de richting van de zendmast.
Leg het netsnoer zo dat niemand erover kan struikelen. > Sluit de meegeleverde USB-kabel aan op de voedingsadapter en op de ingang met het opschrift DC-IN (5) op de achterzijde van de DIGITRADIO 10 IR. Sluit vervolgens de voedingsadapter op het lichtnet aan.
All manuals and user guides at all-guides.com 6.3.4 Batterijen in de afstandsbediening plaatsen > Open het batterijvak aan de achterzijde van de afstandsbediening (schuiven in de richting van de pijl). > Plaats de batterijen (2x AAA 1,5V). Let hierbij op de polariteit die in het batterijvak is aangeduid.
All manuals and user guides at all-guides.com 6.4 Algemene functies van het apparaat 6.4.1 Apparaat aanzetten > Maak eerst de DIGITRADIO 10 IR klaar voor gebruik zoals beschreven onder Punt 6.3.1 en 6.3.4 hierboven. > Druk op de toets Aan/Stand-by (18) van de afstandsbediening om de DIGITRADIO 10 IR aan te zetten.
All manuals and user guides at all-guides.com 6.4.3 Bron selecteren > Met de toets MODE (25) kunt u tussen de bronnen DAB+ (digitale radio), FM en Bluetooth overschakelen. Druk hiervoor herhaaldelijk op deze toets. De bronnen worden met een symbool aangeduid. DAB+ Internetradio Bluetooth...
All manuals and user guides at all-guides.com 6.4.4 Volume instellen > Stel het volume in met behulp van de toetsen VOL +/- (15, 27) van de afstandsbediening. Het ingestelde volume wordt op het display weergegeven met een staafdiagram. > Druk op de toets Mute/Geluidloos (6) om het geluid direct af te zetten. Druk nogmaals op de toets om met het laatst ingestelde volume af te spelen.
All manuals and user guides at all-guides.com 6.4.5 Display Afhankelijk van de geselecteerde functie of optie, geeft het Display de volgende informatie weer: Bron Tijd Stationsnaam Titel/ Albumhoes/ aanvullende Slideshow informatie Ontvangst- sterkte DAB/FM en WiFi Alarm actief Favorietenlijst Stereogeluid Actieve sleeptimer...
Seite 222
All manuals and user guides at all-guides.com 6.4.5.1 Displayweergave opvragen > Houd de toets MENU ingedrukt en selecteer met de toetsen / het submenu [Displayinstellingen] > [Display]. Druk daarna op OK. Selecteer met de toetsen / en OK een weergaveoptie. U kunt naar keuze de volgende informatie laten zien: In de modus Internetradio (geselecteerde functie is gemarkeerd met een "*"): [Titel, artiest], [Beschrijving], [Genre], [Betrouwbaarheid], [Bitrate],...
[Beeldformaat] instellen. 7 Menubediening Via het menu komt u bij alle functies en instellingen van de DIGITRADIO 10 IR. De menunavigatie wordt uitgevoerd met de knoppen MENU, BACK, / en OK. Het menu is onderverdeeld in submenu's en bevat verschillende menuopties of activeerbare functies, afhankelijk van de geselecteerde modus.
Seite 225
All manuals and user guides at all-guides.com Instellingen worden pas opgeslagen als u op de OK-toets drukt. Als in plaats daarvan op de knop BACK wordt gedrukt, worden de instellingen niet bevestigd en opgeslagen (de knop MENU heeft hier de functie van een "Terug"-knop en het menu wordt afgesloten).
All manuals and user guides at all-guides.com 8 Eerste installatie Na de eerste keer aanzetten van de DIGITRADIO 10 IR start de wizard voor de eerste installatie. Alle instellingen kunnen naderhand op elk moment worden gewijzigd. > Om de wizard voor de eerste installatie te starten, kiest u met de toetsen / ...
Seite 227
All manuals and user guides at all-guides.com > In de volgende stap kunt u opgeven of de DIGITRADIO 10 IR in de stand- bymodus met het internet verbonden moet blijven. Dit kan bijvoorbeeld voor de appbediening (Spotify-connect) nuttig zijn. Hierdoor wordt het verbruik in stand-by wel hoger.
All manuals and user guides at all-guides.com > Nadat u de netwerkconfiguratie hebt voltooid, bevestig het bericht dat de eerste installatie is voltooid door op de knop OK te drukken. 9 De DAB+ (Digital Radio)-functie 9.1 Wat is DAB+ en DAB+ Cable DAB+ is een nieuw digitaal formaat dat kristalhelder geluid zonder ruis mogelijk maakt.
All manuals and user guides at all-guides.com 9.2.1 Volledige scan uitvoeren De automatische scan Volledige scan scant alle DAB+ band III-kanalen en vindt dus alle zenders die in het ontvangstgebied worden uitgezonden. Na voltooiing van de zenderscan wordt het eerste station in alfanumerieke volgorde afgespeeld.
All manuals and user guides at all-guides.com 9.2.2 Zender selecteren > Druk op de toetsen P+ of P- om het zenderoverzicht weer te geven en tussen de beschikbare zenders te schakelen. Afhankelijk van de instelling onder MENU > [Scaninstellingen] > [Kanaalschakelaar], moet u vervolgens op de toets OK drukken om het geselecteerde kanaal af te spelen (optie: Kanaalschakelaar >...
All manuals and user guides at all-guides.com U kunt de zender ook direct met een van de Snelkeuzetoetsen 1...10 van de afstandsbediening opslaan, door de betreffende toets langer ingedrukt te houden (toets 0=10). Om zenders op de geheugenplaatsen 11...30 op te slaan, druk kort op Met cijfertoetsen invoeren (17) en houd vervolgens het tweede cijfer ingedrukt.
All manuals and user guides at all-guides.com 9.2.5 Overschrijven/verwijderen van een opgeslagen programmageheugen > Sla gewoon een nieuw station op in een favorietengeheugen volgens de aanwijzingen. Bij het opvragen van de fabrieksinstellingen worden alle geheugenlocaties verwijderd. 9.2.6 Signaalsterkte > Druk herhaaldelijk op INFO totdat de signaalsterkte wordt weergegeven: Signaalsterkte Min.
All manuals and user guides at all-guides.com Stations met een signaalsterkte die lager is dan de minimumsignaalsterkte zenden geen voldoende signaal uit. Richt zo nodig de antenne uit (zie Punt 6.3.1). 9.2.7 Handmatig instellen Met deze menuoptie kunt u de ontvangen kanalen controleren en de antenne afstellen.
All manuals and user guides at all-guides.com Als er zenders op de ingestelde frequentie of het ingestelde kanaal staan, die nog niet in de zenderlijst zijn opgeslagen, dan worden deze nu ook opgeslagen. 9.2.8 Volume regelen (DRC) Met de menuoptie DRC kunt u de mate van compressie instellen, die dynamische fluctuaties en de bijbehorende volumevariaties compenseert.
All manuals and user guides at all-guides.com 9.2.9 Niet-actieve stations verwijderen Met deze menuoptie kunt u oude en niet langer te ontvangen stations uit de zenderlijst verwijderen. > Houd de toets MENU ingedrukt en selecteer met de toetsen / de optie [Scaninstellingen] >...
All manuals and user guides at all-guides.com 10 FM-modus 10.1 FM-modus inschakelen > Schakel naar de FM-modus door op de toets MODE te drukken. > Op het display wordt [FM] weergegeven. Bij de eerste keer inschakelen is de frequentie 87,5 MHz ingesteld. Als u al een station hebt ingesteld of opgeslagen, speelt de radio de als laatste ingestelde zender af.
All manuals and user guides at all-guides.com 10.3 Automatische zenderkeuze > Druk op de SCAN-knop om automatisch naar het volgende station met voldoende signaal te zoeken. Als een FM-station met een voldoende sterk signaal wordt gevonden, stopt het zoeken en wordt het station afgespeeld. Als een RDS-zender wordt ontvangen, verschijnt de zendernaam en eventueel radiotekst.
All manuals and user guides at all-guides.com > Selecteer of u de scanner alleen bij sterke zenders [Alleen sterke zenders] of voor alle stations (ook bij zwakke zenders) [Alle zenders] moet stoppen. Bij de instelling Alle zenders stopt de automatische scanner bij elk beschikbaar station.
All manuals and user guides at all-guides.com > Stel eerst de gewenste zenderfrequentie in (Punt 10.3,10.4). > Om dit station in het geheugen op te slaan, houdt u tijdens het afspelen de toets FAV ingedrukt totdat [Prog. opslaan] op het display verschijnt. Selecteer vervolgens met de toetsen ...
All manuals and user guides at all-guides.com Als er geen station op het geselecteerde kanaal is opgeslagen, wordt op het display [(leeg)] weergegeven. Als alternatief kunt u hiervoor ook de betreffende snelkeuzetoets 1...10 van de afstandsbediening gebruiken. Druk voor zenders op de geheugenplaatsen 11...30 op Met cijfertoetsen invoeren (17) en op een tweede cijfer (bijv.
All manuals and user guides at all-guides.com 11 Internetradio De DIGITRADIO 10 IR is met een internetradio-ontvanger uitgerust. Om internetradiostations/-zenders te ontvangen, hebt u een internetverbinding via een aangesloten WiFi-router of een draadloos netwerk nodig. > Druk herhaaldelijk op de MODE-knop tot [Internetradio] op het display verschijnt.
All manuals and user guides at all-guides.com 11.1 Zenderoverzicht > Druk op de toets MENU en selecteer >Zenderoverzicht. Onder Zenderoverzicht zijn alle internetradiostations onderverdeeld in verschillende categorieën. Bovendien hebt u hier ook toegang tot uw Favorieten. > Selecteer aan de hand van categorie/land/genre een station en druk op de OK-knop.
All manuals and user guides at all-guides.com > Om een station in het geheugen op te slaan, houdt u tijdens het afspelen de toets FAV ingedrukt, totdat [Progr. opslaan] op het display verschijnt. Selecteer vervolgens met de toetsen / een favorietengeheugen (1...30). Druk op OK om op te slaan.
All manuals and user guides at all-guides.com Als alternatief kunt u hiervoor ook de betreffende snelkeuzetoets 1...10 van de afstandsbediening gebruiken. Druk voor zenders op de geheugenplaatsen 11...30 op Met cijfertoetsen invoeren (17) en vervolgens op een tweede cijfer (bijv. Met cijfertoetsen invoeren + 3 voor de geheugenplaats 13). 12 Podcasts Podcasts worden evenals internet-radiozenders via het internet opgevraagd.
All manuals and user guides at all-guides.com 14 Bluetooth In de Bluetooth-modus kunt u muziek afspelen vanaf een aangesloten smartphone of tablet via de luidsprekers van DIGITRADIO 10 IR. Om dit te doen, moeten beide apparaten eerst aan elkaar "gekoppeld" worden. 14.1 Bluetooth inschakelen >...
Seite 250
DIGITRADIO 10 IR-luidspreker. > Afhankelijk van het externe apparaat verschijnt nu de naam op het display van de DIGITRADIO 10 IR. U kunt nu beginnen met het afspelen van muziek op uw externe apparaat.
Seite 251
- Toetsen Volume +/- Als alternatief kunt u ook gebruik maken van de muziek-app afspeelregeling van uw externe apparaat. Wanneer het afspelen niet begint of er geen apparaat gekoppeld wordt, schakelt de DIGITRADIO 10 IR na ca. 15 minuten in de stand-bymodus.
Druk op MENU en selecteer met de toetsen / de optie [Sleeptimer]. > Druk op OK. > Gebruik / om een periode te selecteren waarna de DIGITRADIO 10 IR moet worden uitgeschakeld. U heeft de keuze tussen Uit, 5, 10, 15, 30, 60 en 90 minuten.
Als de sleeptimer actief is, ziet u op het display het Maan-symbool met de resterende tijd. 15.2 Wekker De wekfunctie schakelt de DIGITRADIO 10 IR op de ingestelde wektijd in. U kunt twee wektijden programmeren. Bij wijze van voorbeeld wordt hier het programmeren van Alarm 1 beschreven.
Seite 255
All manuals and user guides at all-guides.com Wekker > Zet het alarm op Actief:[Aan] of [Uit]. > U kunt hier kiezen uit Dagelijks (elke dag van de week), Eenmaal, Weekdagen (Ma - Vr) of Weekeinde (Za en Zo). Druk op OK om de instelling te bevestigen. Tijdstip en datum >...
Seite 256
All manuals and user guides at all-guides.com Als u Internetradio, DAB of FM hebt geselecteerd, dan kunt u vervolgens aangeven of u met de laatst beluisterde zender gewekt wilt worden of met een zender uit uw Favorietenlijst. Duur > Voer vervolgens de tijdsduur in. Druk op OK om te bevestigen. Volume >...
All manuals and user guides at all-guides.com 15.2.2 Wekker na alarm uitschakelen > Druk op de knop Aan/Stand-by op het apparaat om de wekker uit te schakelen. Als u de sluimerfunctie wilt activeren, drukt u herhaaldelijk op OK terwijl het alarm actief is.
All manuals and user guides at all-guides.com 16 Systeeminstellingen Alle instellingen die onder dit punt worden genoemd zijn op alle bronnen van toepassing. > Open het menu en selecteer met de toetsen / > [Systeeminst.]. Druk op OK om de systeeminstellingen te openen. 16.1 Internetinstellingen >...
Seite 259
All manuals and user guides at all-guides.com Nu kunt u kiezen of u de WPS-functie wilt gebruiken of handmatig uw WiFi- wachtwoord wilt invoeren. > Als u de WPS-functie wilt gebruiken, start u deze eerst op uw router volgens de bedieningsinstructies en vervolgens selecteert u in de netwerkassistent [WPS met toets verb.].
All manuals and user guides at all-guides.com 16.1.1.2 Configuratie met de WPS-functie Hiermee wordt een directe verbinding met de router tot stand gebracht. Een selectie en/of invoer van een draadloos netwerk (SSID) en wachtwoord is niet nodig. > Start de WPS-functie op uw router volgens de gebruikershandleiding daarvan. >...
Seite 262
All manuals and user guides at all-guides.com > Selecteer nu of u het IP-adres, de gateway enz. automatisch van uw router wilt laten ophalen (DHCP actief) of deze handmatig wilt invoeren (DHCP inactief). Vergeet niet dat het automatisch ophalen van het IP-adres, de gateway en het subnetmasker alleen werkt als de DHCP-functie in uw router is geactiveerd.
16.1.3 TechniSat Connect PIN U kunt uw DIGITRADIO 10 IR met de app TechniSat CONNECT bedienen. Hiervoor moet u in de app de pincode voor de DIGITRADIO 10 IR invoeren. U kunt de pincode hier als volgt aanpassen. >...
(JA) of niet (NEE) in stand gehouden moet worden. Let op: voor een onbeperkte en probleemloze werking en bediening met de app TechniSat CONNECT moet deze functie ingeschakeld blijven. U kunt de app TechniSat CONNECT in de appstore van uw smartphone downloaden. 16.2 Tijd- en datuminstellingen 16.2.1 Tijd/datum handmatig instellen...
All manuals and user guides at all-guides.com > De eerste cijfers (dag) van de datum knipperen en kunnen met de toetsen / worden gewijzigd. > Druk op OK om uw keuze te bevestigen. > Vervolgens knipperen de volgende cijfers (maand) van de datum en kunnen deze ook worden gewijzigd (zie bovenstaande aanwijzingen).
All manuals and user guides at all-guides.com > Selecteer met de toetsen of de volgende opties: [Update via internet] (via internet actualiseren) [Update via DAB] (update alleen via DAB+) [Update via FM] (update alleen via FM) [Geen update] (Tijd/datum moeten handmatig worden ingevoerd, zie Punt16.2.1 ).
All manuals and user guides at all-guides.com > Kies met / een van de volgende opties: [24 uur] [12 uur] > Druk op OK om op te slaan. 16.3 Display-instellingen U kunt de helderheid van het scherm zowel voor gebruik als voor stand-by instellen. Bovendien kunt u uit verschillende kleurenschema's kiezen.
Seite 269
All manuals and user guides at all-guides.com Display Hier kunt u (al naargelang de geselecteerde bron), het display Aanvullende informatie selecteren. > Selecteer met / de optie [Display]. Selecteer aanvullende informatie en druk op OK om op te slaan. Beeldformaat Onder Beeldformaat kunt u het beeldformaat voor de slideshow voor DAB+ -zenders selecteren.
All manuals and user guides at all-guides.com van / een helderheidsstand en druk op OK om deze instelling op te slaan. [Auto-dim] dimt het display automatisch (wanneer optie [Aan]) na 10 seconden zonder bediening van de radio, naar de helderheidswaarde Laag. Wanneer de optie [Uit] is geselecteerd, zal het display continu oplichten bij de helderheid die is geselecteerd in de functie [Werking].
All manuals and user guides at all-guides.com > Houd de toets MENU ingedrukt en selecteer met de toetsen / de optie [Systeeminst.] > [Fabrieksinst.] en druk op OK. > Gebruik / om [Ja] te selecteren voor het uitvoeren van de fabrieksinstellingen en druk op OK.
All manuals and user guides at all-guides.com 16.7 SW-update Het Punt SW-update wordt gebruikt voor het actualiseren van de software van dit apparaat en is alleen bedoeld voor reparaties. 16.8 Eerste installatie Hiermee kunt u de wizard voor de eerste installatie opnieuw starten. Meer hierover vindt u onder „8 Ersteinrichtung“...
Seite 274
All manuals and user guides at all-guides.com Maak de behuizing met een zachte met water bevochtigde doek schoon. Gebruik geen alcohol, verdunners, en dergelijke: deze stoffen kunnen het oppervlak van het apparaat beschadigen. Maak het display alleen met een zachte katoenen doek schoon. Gebruik indien nodig een katoenen doek met een kleine hoeveelheid niet-alkalisch zeepsop op water- of alcoholbasis.
Ontvangst via DAB/FM is slecht. Trek de antenne geheel uit. Wijzig de positie van de antenne of van de DIGITRADIO 10 IR. Het apparaat kan niet worden Koppel het apparaat los van de voeding en bediend.
Seite 276
All manuals and user guides at all-guides.com Symptoom Mogelijke oorzaak/oplossing Apparaat schakelt uit zichzelf in De functie Automatische stand-by schakelt de stand-by het apparaat automatisch na ca. 15 minuten in stand-by, wanneer zich de volgende voorwaarden voordoen: Geen geluidsweergave, Geen apparaat via bluetooth gekoppeld wanneer het apparaat in de bluetooth-modus staat, Volume uitgeschakeld.
All manuals and user guides at all-guides.com 19 Technische gegevens/instructies van de fabrikant Technische wijzigingen en onjuistheden voorbehouden. Ontvangstmethoden DAB/DAB+, FM, Bluetooth Voedingsadapter DC 5 V, 1 A via een meegeleverde externe voedingsadapter Frequenties FM: 87,5-108 MHz DAB/DAB+: 174-240 MHz DAB+ Cable: 252-261 MHz Bluetooth: 2,402-2,480 GHz Zendvermogen: class 2/max.
Seite 279
All manuals and user guides at all-guides.com Bluetooth-protocol Versie V4.1 AVRCP, A2DP WiFi IEEE 802.11 a/b/g/n Dualband 2.4/5 GHz Display TFT-color 2,8“ 320 X 240 pixels RGB Stroomverbruik In gebruik normaliter: 1,4 W (DAB- gebruik) Stand-by. 0,72 W Verbruik minimaliseren (automatisch Als er geen signaal wordt afgespeeld: uitschakelen na 15 minuten in stand-by) DAB, Bluetooth (indien niet...
Seite 280
All manuals and user guides at all-guides.com Mode d'emploi DIGITRADIO 10 IR DAB+/UKW/Internet/Internet-Radio...
Seite 285
Consignes de sécurité ..................242 Caractères et symboles utilisés ..................242 Utilisation conforme......................244 Groupe cible de ce mode d’emploi ................244 Utilisation sécurisée de la DIGITRADIO 10 IR ............244 Mentions légales ....................247 Consignes d'entretien ......................249 Installation de l’appareil ..................250 Description de la DIGITRADIO 10 IR ..............
Seite 286
All manuals and user guides at all-guides.com Caractéristiques spécifiques de la DIGITRADIO 10 IR ........... 253 Préparation de la DIGITRADIO 10 IR au fonctionnement ........253 6.3.1 Branchement et orientation de l'antenne intérieure ..........253 6.3.2 Connexion audio à une chaîne Hi-Fi, haut-parleur actif ........254 6.3.3 Branchement du bloc d’alimentation ................255...
Seite 287
All manuals and user guides at all-guides.com 9.2.3 Mémorisation d'une station DAB+ sur un emplacement mémoire ....268 9.2.4 Accès à une station DAB+ à partir d’un emplacement mémoire ....269 9.2.5 Écrasement/suppression d'un programme mémorisé .........270 9.2.6 Puissance du signal ......................270 9.2.7 Réglage manuel ........................271 9.2.8 Adaptation du volume (DRC) ...................
Seite 288
All manuals and user guides at all-guides.com 11.3 Ajouter des favoris ....................... 280 11.4 Consulter des favoris ......................281 Podcasts ......................... 282 Spotify Connect ....................282 Bluetooth ........................ 283 14.1 Mise en marche du mode Bluetooth................283 14.2 Couplage d'un appareil externe ..................283 14.3 Arrêt du couplage ........................284 Fonctions supplémentaires ................
Seite 289
All manuals and user guides at all-guides.com 16.1.2 Afficher les réglages ......................295 16.1.3 Code PIN TechniSat Connect ....................295 16.1.4 Supprimer le profil réseau ....................295 16.1.5 Connexion WLAN en veille ....................296 16.2 Réglages de l’heure et de la date ..................296 16.2.1 Réglage manuel de l'heure et de la date ..............296 16.2.2 Actualisation de l’heure.......................
All manuals and user guides at all-guides.com 3 Consignes de sécurité 3.1 Caractères et symboles utilisés dans ce mode d'emploi : Désigne une consigne de sécurité qui peut conduire à de graves blessures ou la mort en cas de non-respect. Veuillez respecter les avertissements suivants : DANGER - Graves blessures avec risque mortel AVERTISSEMENT - Graves blessures, éventuellement avec risque mortel ATTENTION - Blessures...
Seite 292
All manuals and user guides at all-guides.com Sur l'appareil : Utilisation dans des espaces intérieurs - les appareils avec ce symbole conviennent uniquement à une utilisation dans des espaces intérieurs. Classe de protection II - les appareils électriques de la classe de protection II sont des appareils électriques qui possèdent une isolation continue double et/ou renforcée sans possibilité...
Ce mode d’emploi s’adresse à toutes les personnes qui installent, utilisent, nettoient ou mettent l’appareil au rebut. 3.4 Utilisation sécurisée de la DIGITRADIO 10 IR Veuillez observer les indications ci-dessous afin de réduire tout risque en matière de sécurité, d’éviter toute détérioration de l’appareil et de contribuer à la protection de l’environnement.
Seite 294
All manuals and user guides at all-guides.com Veuillez respecter toutes les consignes suivantes pour une utilisation conforme de l'appareil et éviter toute perturbation de l'appareil et tout dommage corporel. Ne réparez pas l'appareil vous-même. Seul du personnel spécialisé qualifié peut effectuer des réparations sur l'appareil. Adressez-vous à nos centres de service après-vente.
Seite 295
All manuals and user guides at all-guides.com le bloc d'alimentation. N’essayez jamais de faire fonctionner l’appareil sous une autre tension. Si l’appareil présente des défauts, il ne doit pas être mis en marche. Ne mettez pas l’appareil en marche à proximité d’une baignoire, d'une douche, d'une piscine, de projections ou d'écoulements d'eau.
IR conforme à la directive 2014/53/UE. Le texte intégral de la déclaration de conformité européenne est disponible à l’adresse suivante : http://konf.tsat.de/?ID=22920 La société TechniSat ne peut être tenue pour responsable des dommages causés au produit dans le cas d’influences extérieures, d’une usure, d’une utilisation inappropriée, d’une réparation non autorisée, de modifications ou d’accidents.
Seite 298
All manuals and user guides at all-guides.com DIGITRADIO 10 IR et TechniSat sont des marques déposées de : TechniSat Digital GmbH TechniPark Julius-Saxler-Strasse 3 54550 Daun/Eifel, Allemagne www.technisat.de Les noms de sociétés, institutions ou marques citées sont des marques ou des marques déposées de leurs propriétaires respectifs.
Du lundi au vendredi de 8h00 à 18h00 au numéro suivant : + 49 (0) 392 592 201 800. Les demandes de réparation peuvent également être faites directement en ligne sur www.technisat.de/reparatur.
All manuals and user guides at all-guides.com En cas d'éventuel retour de l'appareil, merci d'adresser votre colis uniquement à l'adresse suivante : TechniSat Digital GmbH Service-Center Nordstr. 4a 39418 Stassfurt, Allemagne 5 Installation de l’appareil > Posez l’appareil sur une surface solide, sûre et horizontale. Assurez une circulation d'air suffisante.
Seite 301
Tenez compte du fait que les pieds de l’appareil risquent de laisser des traces colorées sur certaines surfaces de meubles. Utilisez une protection entre vos meubles et l’appareil. Tenez la DIGITRADIO 10 IR éloignée d’appareils produisant de puissants champs magnétiques. Ne posez pas d'objets lourds sur l'appareil.
Lorsque l’appareil ne doit pas être utilisé pendant une période prolongée, p. ex. avant de partir en voyage, débranchez la fiche. 6 Description de la DIGITRADIO 10 IR 6.1 Contenu de la livraison Avant la mise en service, veuillez contrôler si le contenu de la livraison est complet : 1 x DIGITRADIO 10 IR 1 x télécommande avec piles...
All manuals and user guides at all-guides.com 6.2 Caractéristiques spécifiques de la DIGITRADIO 10 IR La DIGITRADIO 10 IR se compose d’un récepteur DAB+/FM/radio Internet doté des fonctions suivantes : Vous pouvez mémoriser jusqu’à 30 stations DAB+ et 30 stations FM.
(un câble spécial est éventuellement nécessaire, selon l'entrée de l'amplificateur AV). > Si votre amplificateur AV possède une entrée numérique optique, vous pouvez connecter la DIGITRADIO 10 IR à l'amplificateur via la sortie numérique optique S/PDIF (4).
Placez le câble d'alimentation de manière à ce que personne ne puisse trébucher dessus. > Branchez le câble USB fourni au bloc d'alimentation et insérez-le dans le port DC-IN (5) à l'arrière de la DIGITRADIO 10 IR. Branchez ensuite le bloc d'alimentation au réseau électrique.
All manuals and user guides at all-guides.com 6.3.4 Insertion des piles dans la télécommande > Ouvrez le compartiment à piles à l'arrière de la télécommande en poussant dans le sens de la flèche. > Insérez les piles (2 x AAA 1,5 V) dans le compartiment à piles conformément à la polarité...
All manuals and user guides at all-guides.com 6.4 Fonctions générales de l’appareil 6.4.1 Mise en marche de l’appareil > Préparez d’abord la DIGITRADIO 10 IR au fonctionnement, comme décrit aux points 6.3.1 et 6.3.4. > En appuyant sur la touche Marche/veille (18) sur la télécommande, vous allumez la DIGITRADIO 10 IR.
All manuals and user guides at all-guides.com 6.4.3 Choix de la source > Avec la touche MODE (25), vous pouvez basculer entre les sources DAB+ (radio numérique), FM et Bluetooth. Pour ce faire, appuyez plusieurs fois sur la touche. Les sources peuvent être représentées à l'aide d'un symbole. DAB+ FM (UKW) Radio Internet...
All manuals and user guides at all-guides.com 6.4.4 Réglage du volume > Réglez le volume à l'aide des touches VOL +/- (15, 27) de la télécommande. Le volume réglé s’affiche à l’écran sous la forme d’un diagramme à barres. > Appuyez sur la touche Mute/Sourdine (6) pour mettre le son directement en sourdine.
All manuals and user guides at all-guides.com 6.4.5 Écran Selon la fonction ou l’option choisie, les informations suivantes s’affichent à l’écran : Source Heure Nom de la station Titre/infos Couverture supplémentaires d'album/ Diaporama Puissance de réception DAB/FM et WLAN Réveil actif Liste de favoris Son stéréo Minuterie de...
Seite 313
All manuals and user guides at all-guides.com 6.4.5.1 Ouverture des affichages à l’écran > Appuyez sur la touche MENU et sélectionnez à l’aide des touches / le sous-menu [Réglages écran] > [Écran]. Appuyez ensuite sur la touche OK. Sélectionnez une option d'affichage avec les touches ...
Le menu vous permet d'accéder à toutes les fonctions et tous les réglages de la DIGITRADIO 10 IR. La navigation dans le menu s'effectue avec les touches MENU, BACK, / et OK. Le menu est divisé en sous-menus et comporte, en fonction de la source sélectionnée, différentes options de menu ou fonctions activables.
Seite 316
All manuals and user guides at all-guides.com Les réglages sont enregistrés en appuyant sur la touche OK. Si vous appuyez sur la touche BACK, les réglages ne sont pas enregistrés (la touche MENU joue ici également le rôle d’une touche " Retour " et vous quittez le menu). Les fonctions et touches à...
All manuals and user guides at all-guides.com 8 Première mise en service Après avoir mis en marche votre DIGITRADIO 10 IR pour la première fois, l'assistant de mise en service démarre. Tous les réglages peuvent à tout moment être modifiés ultérieurement.
Seite 318
All manuals and user guides at all-guides.com > À l'étape suivante, vous pouvez définir si votre DIGITRADIO 10 IR doit rester connectée à Internet même en mode veille. Cela peut s'avérer utile notamment pour la commande via l'application (Spotify-Connect). Par contre, cela augmente la consommation électrique en veille.
All manuals and user guides at all-guides.com > Une fois la configuration réseau terminée, confirmez le message indiquant l'achèvement de la première mise en service en appuyant sur la touche OK. 9 Fonction DAB+ (radiodiffusion numérique) 9.1 Qu'est-ce que le DAB+ et le câble DAB+ Le DAB+ est un nouveau format numérique qui permet d’écouter un son cristallin sans aucun grésillement.
All manuals and user guides at all-guides.com 9.2.1 Exécution d'une recherche complète La recherche automatique Recherche complète scanne tous les canaux DAB+ de la bande III et trouve ainsi toutes les stations diffusées dans la zone de réception. Une fois la recherche terminée, la première station par ordre alphanumérique est diffusée.
All manuals and user guides at all-guides.com 9.2.2 Choix de la station > Appuyer sur les touches P+ ou P- permet d'ouvrir la liste de stations et de naviguer entre les stations disponibles. Selon le réglage dans MENU > [Régl. recherche] > [Changement de station], il faut ensuite appuyer sur la touche OK pour diffuser la station sélectionnée (option : Changement de station >...
All manuals and user guides at all-guides.com Vous pouvez également enregistrer les stations directement sur une des touches de sélection directe 1...10 de la télécommande en maintenant la touche correspondante enfoncée plus longtemps (touche 0=10). Pour enregistrer sur un des emplacements mémoire 11...30, appuyez brièvement sur la touche Saisie numérique (17) et maintenez ensuite le deuxième chiffre enfoncé.
All manuals and user guides at all-guides.com 9.2.5 Écrasement/suppression d'un programme mémorisé > Mémorisez comme décrit une nouvelle station sur un emplacement mémoire de votre choix. Lors de l’affichage des réglages d’usine, tous les emplacements mémoire sont supprimés. 9.2.6 Puissance du signal >...
All manuals and user guides at all-guides.com Les stations dont la puissance du signal se situe en dessous de la puissance de signal minimale n’émettent pas un signal suffisant. Orientez l’antenne intérieure si nécessaire comme décrit au point 6.3.1. 9.2.7 Réglage manuel Cette option de menu permet de contrôler les canaux de réception et peut servir à...
All manuals and user guides at all-guides.com Si des stations qui n'ont pas encore été mémorisées dans la liste des stations se trouvent sur la fréquence ou le canal réglé, celles-ci sont également enregistrées. 9.2.8 Adaptation du volume (DRC) L'option de menu DRC permet de régler le taux de compression, qui compense les oscillations dynamiques et les variations de volume afférentes.
All manuals and user guides at all-guides.com 9.2.9 Suppression des stations inactives Cette option de menu sert à supprimer de la liste de stations des stations anciennes qui ne peuvent plus être captées. > Appuyez sur la touche MENU et sélectionnez à l’aide des touches / l’entrée [Régl.
All manuals and user guides at all-guides.com 10 Mode FM 10.1 Mise en marche du mode radio FM > En appuyant sur la touche MODE, vous basculez en mode FM. > [FM] s’affiche à l’écran. Lors de la première mise en marche, la fréquence est réglée sur 87,5 MHz. Si vous avez déjà...
All manuals and user guides at all-guides.com 10.3 Recherche automatique des stations > Appuyez sur la touche SCAN pour rechercher automatiquement la prochaine station avec un signal suffisant. Lorsqu’une station FM au signal suffisamment puissant est détectée, la recherche s’arrête et la station est diffusée. Si une station RDS est captée, le nom de la station s’affiche, accompagné...
All manuals and user guides at all-guides.com > Sélectionnez si la recherche doit s'arrêter uniquement sur les stations dont le signal est fort [Uniquement les grandes fréquences] ou sur toutes les stations (même celles dont le signal est faible) [Toutes les stations]. Avec le réglage Toutes les stations, la recherche automatique s’arrête sur chaque station disponible.
All manuals and user guides at all-guides.com > Sélectionnez d'abord la fréquence de la station souhaitée (point 10.3, 10.4) > Pour mémoriser cette station sur un emplacement mémoire, maintenez la touche FAV enfoncée durant la diffusion jusqu'à ce que [Prog. mémorisé] s'affiche à...
All manuals and user guides at all-guides.com Si aucune station n’est mémorisée sur cet emplacement mémoire, [(vide)] s’affiche à l’écran. La touche de sélection directe 1 à 10 de la télécommande peut également être utilisée. Pour les stations sur les emplacements mémoire 11 à 30, appuyez sur la saisie numérique (17) et un chiffre supplémentaire (p.
All manuals and user guides at all-guides.com 11 Radio Internet Votre DIGITRADIO 10 IR est équipée d'un récepteur radio Internet. Pour recevoir des stations de radio Internet, vous avez besoin d'une connexion Internet à un réseau sans fil via un routeur WLAN.
All manuals and user guides at all-guides.com 11.1 Liste des stations > Appuyez sur la touche MENU et sélectionnez > Liste de stations. Toutes les stations de radio Internet réparties dans différentes catégories sont affichées dans la liste des stations. Vous avez également accès ici à vos favoris.
All manuals and user guides at all-guides.com > Pour mémoriser une station sur un emplacement mémoire, maintenez la touche FAV enfoncée durant la diffusion jusqu'à ce que [Prog. mémorisé] s'affiche à l'écran. Sélectionnez ensuite avec les touches / un emplacement favori (1 à...
All manuals and user guides at all-guides.com La touche de sélection directe 1 à 10 de la télécommande peut également être utilisée. Pour les stations sur les emplacements mémoire 11 à 30, appuyez sur la saisie numérique (17) et un chiffre supplémentaire (p. ex. saisie numérique + 3 pour l'emplacement mémoire 13).
14 Bluetooth En mode Bluetooth, vous pouvez diffuser la musique d'un smartphone ou d'une tablette connecté(e) via les haut-parleurs de la DIGITRADIO 10 IR. Pour ce faire, vous devez d'abord " coupler " les deux appareils entre eux. 14.1 Mise en marche du mode Bluetooth >...
Seite 341
> Dans la liste des appareils Bluetooth détectés sur votre appareil externe, l'entrée DIGITRADIO 10 IR s'affiche. Cliquez dessus pour terminer le processus de couplage. Une fois le processus de couplage réussi, un signal sonore retentit du haut-parleur de la DIGITRADIO 10 IR.
Seite 342
All manuals and user guides at all-guides.com Selon le protocole Bluetooth de votre appareil externe, vous pouvez commander la lecture de la musique via les touches de lecture de la télécommande. Lecture/Pause - Touche Titre suivant - Touche Titre précédent - Touche x 2 Titre depuis le début - Touche...
15 Fonctions supplémentaires 15.1 Minuterie de mise en veille Grâce à la minuterie de mise en veille, la DIGITRADIO 10 IR se met automatiquement en veille après un laps de temps défini. > Appuyez sur la touche MENU et sélectionnez à l’aide des touches / ...
En cas d'activation d'une minuterie de mise en veille, le symbole d'une lune s'affiche à l'écran avec la durée restante. 15.2 Réveil Le réveil met en marche la DIGITRADIO 10 IR à l'heure de réveil réglée. Deux heures de réveil peuvent être programmées. La programmation du réveil 1 est décrite en exemple.
Seite 346
All manuals and user guides at all-guides.com Réveil > Réglez le réveil Actif : [On] ou [Off]. > Vous pouvez choisir ici entre Tous les jours (chaque jour de la semaine), Une fois, Jours de la semaine (Lu. - Ve.) ou Week-end (Sa. et Di.). Appuyez sur la touche OK pour enregistrer le réglage.
Seite 347
All manuals and user guides at all-guides.com Si vous avez sélectionné Radio Internet, DAB ou FM, vous pouvez ensuite indiquer si vous souhaitez être réveillé(e) avec la dernière station écoutée ou avec une station de votre liste de favoris. Durée >...
All manuals and user guides at all-guides.com 15.2.2 Arrêt du réveil après l'alarme > Appuyez sur la touche Marche/Veille de la télécommande pour éteindre le réveil. Si vous souhaitez activer la fonction Snooze, appuyez plusieurs fois sur la touche OK en cas de réveil actif. 15.3 Égaliseur Avec l'égaliseur, vous pouvez adapter le son selon vos attentes.
All manuals and user guides at all-guides.com 16 Réglages système Tous les réglages expliqués sous ce point s'appliquent de la même manière pour toutes les sources. > Ouvrez le menu et sélectionnez avec les touches / > [Réglages système].
Seite 351
All manuals and user guides at all-guides.com Vous pouvez à présent choisir si vous souhaitez utiliser la fonction WPS ou saisir manuellement votre mot de passe WLAN. > Si vous souhaitez utiliser la fonction WPS, lancez-la d'abord sur votre routeur conformément au mode d'emploi de ce dernier, puis sélectionnez [Connecter WPS avec la touche] dans l'assistant réseau.
All manuals and user guides at all-guides.com 16.1.1.2 Configuration via la fonction WPS Une connexion directe au routeur est créée ici. Le choix et/ou la saisie d'un réseau WLAN (SSID) et du mot de passe n'est pas nécessaire. > Lancez la fonction WPS sur votre routeur conformément au mode d'emploi de ce dernier.
Seite 353
All manuals and user guides at all-guides.com > Sélectionnez à présent si vous souhaitez ouvrir automatiquement l'adresse IP, la passerelle, etc. de votre routeur (DHCP actif) ou les saisir manuellement (DHCP inactif). Veuillez noter que l'ouverture automatique de l'adresse IP, de la passerelle, du masque de sous-réseau ne fonctionne que si la fonction DHCP est activée dans votre routeur.
16.1.3 Code PIN TechniSat Connect Vous pouvez commander la DIGITRADIO 10 IR avec l'appli TechniSat CONNECT. Pour ce faire, le code PIN de la DIGITRADIO 10 IR doit être saisi dans l'application. Vous pouvez modifier le code PIN ici comme suit.
(OUI) ou non (NON) . Veuillez noter que cette fonction doit être activée pour permettre un fonctionnement efficace et illimité via l'application TechniSat CONNECT. L'application TechniSat CONNECT peut être téléchargée dans l'App-Store de votre smartphone. 16.2 Réglages de l’heure et de la date 16.2.1 Réglage manuel de l'heure et de la date...
All manuals and user guides at all-guides.com > Les premiers chiffres (jour) de la date clignotent et peuvent être modifiés avec les touches / . > Appuyez sur OK pour enregistrer le réglage. > Les chiffres suivants (mois) de la date clignotent ensuite et peuvent également être modifiés comme décrit précédemment.
All manuals and user guides at all-guides.com > À l’aide de la touche / , sélectionnez les options suivantes : [Mise à jour depuis Internet] (actualisation via Internet) [Mise à jour depuis le DAB] (actualisation uniquement via le DAB+) [Mise à jour depuis la FM] (actualisation uniquement via la FM) [Aucune mise à...
All manuals and user guides at all-guides.com > Sélectionnez avec / une des options suivantes : [24 heures] [12 heures] > Appuyez sur la touche OK pour enregistrer. 16.3 Réglages écran Vous pouvez régler la luminosité de l'écran aussi bien en marche qu'en veille. Différents thèmes de couleur sont également à...
Seite 360
All manuals and user guides at all-guides.com Écran Vous pouvez sélectionner ici les informations supplémentaires à l'écran (selon la source choisie). > Sélectionnez avec / l'entrée [Écran]. Sélectionnez une information supplémentaire et appuyez sur la touche OK pour enregistrer. Taille d'image Sous l'option Taille d'image, la taille d'image du diaporama des stations DAB+ peut être sélectionnée.
All manuals and user guides at all-guides.com / un niveau de luminosité et appuyez sur OK pour enregistrer. L'option [Auto-Dimm] module automatiquement l’écran (uniquement avec l’option [Marche] sélectionnée) sur la valeur de luminosité Bas au bout de 10 secondes d’inactivité de la radio. Si l’option [Arrêt] est sélectionnée, l’écran s’allume durablement dans la luminosité...
All manuals and user guides at all-guides.com > Appuyez sur la touche MENU et sélectionnez avec les touches / l'entrée [Réglages système] >[Réglages d'usine] et appuyez sur OK. > À l’aide de / , sélectionnez l'entrée [Oui] pour exécuter le réglage d’usine puis appuyez sur OK.
All manuals and user guides at all-guides.com 16.7 Mise à jour du logiciel L'option Mise à jour du logiciel sert à mettre le logiciel de l'appareil à jour uniquement en cas d'intervention du service après-vente. 16.8 Première mise en service Vous pouvez ouvrir à...
Seite 365
All manuals and user guides at all-guides.com Nettoyez le boîtier avec un chiffon doux, imbibé d’eau. N’utilisez pas d’alcool à brûler, de diluants, etc. ; vous risqueriez d’abîmer la surface de l’appareil. Nettoyez l’écran uniquement avec un chiffon en coton. Utilisez le chiffon en coton si nécessaire avec de faibles quantités d’eau savonneuse diluée non alcaline à...
All manuals and user guides at all-guides.com 18 Dépannage Si l'appareil ne fonctionne pas comme prévu, vérifiez-en le fonctionnement à l'aide des tableaux suivants. Symptôme Cause possible/résolution Impossible de mettre l'appareil en L'appareil n'est pas alimenté en électricité. marche. Branchez le bloc d’alimentation correctement à...
Seite 367
All manuals and user guides at all-guides.com Symptôme Cause possible/résolution Mauvaise connexion Bluetooth et La portée maximale du Bluetooth ne doit pas ratés dépasser 10 m. L'appareil se place lui-même en La fonction de veille automatique place veille l'appareil automatiquement en veille après 15 minutes si les conditions suivantes sont remplies : Aucun son n'est diffusé...
All manuals and user guides at all-guides.com 19 Données techniques/consignes du fabricant Sous réserve de modifications techniques et d’erreurs. Modes de réception DAB/DAB+, FM, Internet, Bluetooth Bloc d'alimentation électrique 5 V CC, 1 A via le bloc d'alimentation externe fourni Fréquences FM : 87,5 - 108 MHz DAB/DAB+ : 174 - 240 MHz...
Seite 370
All manuals and user guides at all-guides.com Protocole Bluetooth Version V4.1 AVRCP, A2DP WLAN IEEE 802.11 a/b/g/n Dual band 2,4/5 GHz Écran Couleurs TFT 2,8“ 320 X 240 pixels RVB Consommation électrique Typique en marche : 1,4 W (mode DAB) Veille : 0,72 W Réduction de la consommation En cas d'absence de signal :...
Seite 371
All manuals and user guides at all-guides.com...
Seite 372
All manuals and user guides at all-guides.com...
Seite 373
All manuals and user guides at all-guides.com...