Herunterladen Inhalt Inhalt Diese Seite drucken
sportplus X-Bike Bedienungsanleitung
Vorschau ausblenden Andere Handbücher für X-Bike:
Inhaltsverzeichnis

Werbung

Verfügbare Sprachen
  • DE

Verfügbare Sprachen

  • DEUTSCH, seite 1
BEDIENUNGSANLEITUNG
SP-HT-1002-IM-V12-INT.indb 1
OPERATING INSTRUCTIONS
INSTRUCTIONS D'UTILISATION
MANUALE UTENTE
MANUAL DE INSTRUCCIONES
X-Bike
DE
X-BIKE
GB
VÉLO X
FR
X-BIKE
IT
X-BIKE
ES
SP-HT-1002
4/16/2021 11:49:21 AM

Werbung

Inhaltsverzeichnis
loading

Inhaltszusammenfassung für sportplus X-Bike

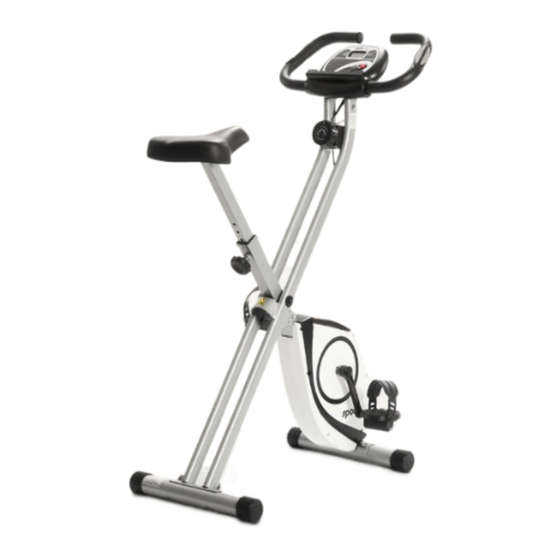
  • Seite 1 BEDIENUNGSANLEITUNG X-Bike OPERATING INSTRUCTIONS X-BIKE INSTRUCTIONS D’UTILISATION VÉLO X MANUALE UTENTE X-BIKE MANUAL DE INSTRUCCIONES X-BIKE SP-HT-1002 SP-HT-1002-IM-V12-INT.indb 1 SP-HT-1002-IM-V12-INT.indb 1 4/16/2021 11:49:21 AM 4/16/2021 11:49:21 AM...
  • Seite 2: Inhaltsverzeichnis

    Sehr geehrte Kundin, sehr geehrter Kunde, Wir gratulieren Ihnen zu Ihrem neuen SportPlus Produkt und sind überzeugt, dass Sie mit diesem Produkt zufrieden sein werden. Um eine stets optimale Funktion und Leistungsbereitschaft Ihres Produktes zu gewährleisten, haben wir eine Bitte an Sie: Bevor Sie das Produkt das erste Mal benutzen, lesen Sie bitte die folgende Bedienungsanleitung sorgfältig durch!
  • Seite 3: Sicherheitshinweise

    SICHERHEITSHINWEISE VERWENDUNGSZWECK • Das Produkt ist für die Nutzung im privaten Bereich konzipiert und nicht für medizinische, therapeutische oder gewerbliche Zwecke geeignet. • Das Produkt ist für die Nutzung im Innenbereich vorgesehen. • Das höchstzulässige Gewicht auf diesem Produkt beträgt 110 kg. HINWEISE ZUM UMGANG MIT BATTERIEN •...
  • Seite 4: Vorsicht - Produktschäden

    • Benutzen Sie das Produkt immer auf einem waagerechten, ebenen, rutschfesten und soliden Untergrund. Benutzen Sie es nie in der Nähe von Wasser und halten Sie aus Sicherheitsgründen rund um das Produkt einen Freiraum von einem Meter neben und zwei Metern hinter dem Gerät ein. •...
  • Seite 5: Explosionszeichnung

    3. EXPLOSIONSZEICHNUNG SP-HT-1002-IM-V12-INT.indb 5 SP-HT-1002-IM-V12-INT.indb 5 4/16/2021 11:49:22 AM 4/16/2021 11:49:22 AM...
  • Seite 6: Teileliste

    4. TEILELISTE Teilenummer Beschreibung und Daten Anzahl Hauptrahmen 1 Vorderer/Hinterer Standfuß Sattelstange Handgriff vorne Schlossschraube M8x60L Gewölbte Unterlegscheibe φ8.3xφ22x1.5t Hutmutter M8x16t Nylonmutter M8x8t Unterlegscheibe φ8.3xφ17.5x1.0t Schraube M6x12L Federscheibe M6 Pedal L Pedal R Befestigungsschraube für Sattelstange Sitz Computer Widerstandseinstellknopf Unterlegscheibe φ6.5xφ13x1.5t Sicherungsbolzen φ8x70L Gewölbte Unterlegscheibe φ6.5xφ13x1.5t Schraube M5x8L...
  • Seite 7 Teilenummer Beschreibung und Daten Anzahl Platte Unterlegscheibe φ5.2xφ18x1.5t Achse für Spannrolle Achse für Hauptrahmen Schraube M8x80L C-Clip 17 C-Clip 15 Kugellager Sechskantschraube M6x30t Kugellager 6003ZZ Gewölbte Unterlegscheibe Feder Einstellungssatz Kunststoff-Unterlegscheibe φ6.5xφ13x0.5t Riemenscheibe 2 Kabeldurchführung Kurbel L Kurbel R Lagerblock Gehäuse L Gehäuse R Gehäusedeckel Abdeckkappe für Kurbel...
  • Seite 8 Teilenummer Beschreibung und Daten Anzahl Selbstschneidende Schraube ST3.2x12L Kunststoff-Unterlegscheibe φ14xφ10.3x1.0t Riemen Schaumstoff für Handgriff Selbstschneidende Schraube ST2.9x8L EVA-Pad Hauptrahmen 2 Innensechskantschlüssel Schraubenschlüssel SP-HT-1002-IM-V12-INT.indb 8 SP-HT-1002-IM-V12-INT.indb 8 4/16/2021 11:49:22 AM 4/16/2021 11:49:22 AM...
  • Seite 9: Montagehinweise

    5. MONTAGEHINWEISE Entnehmen Sie alle Teile vorsichtig aus der Verpackung und legen Sie diese auf eine flache Oberfläche. Benutzen Sie dabei eine schützende Bodenunterlage. Der Zusammenbau der Einzelteile sollte von 2 Personen durchgeführt werden! Überprüfen Sie vor dem Zusammenbau anhand der Teileliste die Vollständigkeit der gelieferten Einzelteile.
  • Seite 10 SCHRITT 2: • Befestigen vorderen Standfuß Schlossschrauben (M8 x 60 mm) (5), der gewölbten Unterlegscheibe (6) und den M8-Sechskant- Hutmuttern (7) am Rahmen (1). Befestigen Sie anschließend den hinteren Standfuß (2) mit 2 Schlossschrauben (M8 x 60 mm) (5), der gewölbten Unterlegscheibe (6) und den M8-Sechskant-Hutmuttern (7) am Rahmen (1).
  • Seite 11 SCHRITT 3: • Das linke und rechte Pedal (12L und 12R) sind mit „L“ und „R“ gekennzeichnet. Befestigen Sie die Pedale an den entsprechenden Tretkurbeln. Wenn Sie auf dem Trainingsgerät sitzen, befindet sich das rechte Pedal auf der rechten Seite. •...
  • Seite 12 SCHRITT 4: • Befestigen Sie den Sattel (14) mit Mutter (8) und Unterlegscheibe (9) an der Sattelstange (3) und schieben Sie diese anschließend in den Rahmen (1). Positionieren Sie die Bohrungen übereinander und sichern Sie den Sattel mit der Stellschraube (13) an der Stange. •...
  • Seite 13 SCHRITT 5: • Befestigen Sie die Griffstange (4) mit 4 Innensechskantschrauben (M6 x 12 mm) (10), 4 Federscheiben (11), 2 Unterlegscheiben (17) und 2 gebogenen Unterlegscheiben (19) am oberen Teil des Rahmens (1). SP-HT-1002-IM-V12-INT.indb 13 SP-HT-1002-IM-V12-INT.indb 13 4/16/2021 11:49:24 AM 4/16/2021 11:49:24 AM...
  • Seite 14: Bedienung Des Computers

    Computerkabel SCHRITT 6 • Achten Sie darauf, dass das Kabel des Computers aus der Aussparung an der Rückseite des Rahmens herausgeführt ist, und schließen Sie das obere Ende des Computerkabels an. 6. BEDIENUNG DES COMPUTERS SCAN SPEED CALORIES DISTANCE PILSE TIME SP-HT-1002-IM-V12-INT.indb 14 SP-HT-1002-IM-V12-INT.indb 14...
  • Seite 15: Einlegen Der Batterien

    FUNKTIONSTASTE • Die Funktionen Zeit, Geschwindigkeit, Strecke, Kalorien und Puls werden mit dieser Taste gewählt. Zum Zurücksetzen ist die Taste 2 Sekunden lang gedrückt zu halten. EINLEGEN DER BATTERIEN Abdeckung des Batteriefachs an der Rückseite des Monitors abnehmen. 2 AAA-Batterien mit korrekter Polung in das Fach einlegen und Abdeckung anbringen. Lässt sich das Display nicht mehr ablesen oder sind lediglich einige Segmente sichtbar, nehmen Sie bitte die Batterien heraus und warten Sie 15 Sekunden, bevor Sie neue Batterien einlegen.
  • Seite 16: Training

    7. TRAINING TRAININGSTIPPS Alle Empfehlungen innerhalb dieser Bedienungsanleitung richten sich ausschließlich an gesunde Personen und nicht an Personen mit Herz-/Herz-Kreislauf-Erkrankungen. Bei allen Tipps handelt es sich nur um grobe Vorschläge für ein Trainingsprogramm. Konsultieren Sie, falls notwendig, Ihren Arzt für Ratschläge entsprechend Ihrer persönlichen Bedürfnisse.
  • Seite 17: Benutzung

    2. BENUTZUNG Halten Sie sich mit beiden Händen an dem Lenker in gewünschter Position fest und bleiben Sie während des Trainings auf dem Sattel sitzen. Achten Sie ebenso darauf, dass die Füße auf den Pedalen mit den Pedalschlaufen gesichert sind. 3.
  • Seite 18: Regelmässigkeit

    WARNUNG! Die Anzeige Ihrer Pulsfrequenz könnte ungenau sein. Ein Übertrainieren könnte zu ernsthaften Verletzungen oder Tod führen. Falls Sie Schwindelgefühle bekommen, unterbrechen Sie die Übung umgehend. 2. REGELMÄSSIGKEIT Die meisten Experten empfehlen eine Kombination aus gesunder Ernährung, welche in Einklang mit dem Trainingsziel stehen muss, und körperlicher Ertüchtigung drei bis fünf Mal pro Woche.
  • Seite 19 GRUNDLAGEN DES TRAININGS Hierbei handelt es sich um sehr generelle Trainingstipps. Diese verfügen über keinen medizinischen Wert und dienen lediglich der Informationsvergabe zu verschiedenen Trainingsarten. Zur Entwicklung eines persönlichen detaillierten Trainingsprogramms ziehen Sie einen Experten heran. Personen, welche an Herzproblemen oder anderen Krankheiten leiden, die durch ein ungewöhnliches oder nicht maßgerechtes Trainingsprogramm oder -aktivitäten verschlimmert werden könnten, MÜSSEN vor der Aufnahme jeglicher Art von Training ihren Arzt konsultieren.
  • Seite 20: Problembehandlung - Probleme Mit Der Computeranzeige

    8. PROBLEMBEHANDLUNG – PROBLEME MIT DER COMPUTERANZEIGE „Es werden keine Funktionswerte angezeigt. Nur die Pulsanzeige funktioniert“. Dies könnte darauf hinweisen, dass eine Übertragungsstörung zwischen dem Gerät und dem Computer vorliegt. Überprüfen Sie, ob alle Kabel korrekt miteinander verbunden sind und ob keines der Kabel beschädigt ist.
  • Seite 21: Wartung, Reinigung Und Pflege

    9. WARTUNG, REINIGUNG UND PFLEGE • Überprüfen Sie nach dem Zusammenbau und vor dem Einsatz des Gerätes, ob alle Bolzen/Muttern vollständig und korrekt angezogen sind. • Reinigen Sie das Gerät regelmäßig mit einem leicht angefeuchteten Tuch unter Einsatz eines milden Reinigers. •...
  • Seite 22: Reklamationen & Gewährleistungen

    Servicezeit: Montag bis Freitag von 9.00 bis 18.00 Uhr Servicehotline: +49 (0)40 - 780 896 – 35* E-Mail: Service@SportPlus.org URL: https://sportplus.de/ersatzteile Nationales Festnetz, Gesprächsgebühren sind von Ihrem Telefonanbieter / Ihrem Telefonvertrag abhängig. Bitte achten Sie darauf, dass Sie hierzu folgende Informationen zur Hand haben.
  • Seite 23: Gewährleistungsbestimmungen

    12. GEWÄHRLEISTUNGSBESTIMMUNGEN SportPlus versichert, dass das Produkt, auf das sich die Gewährleistung bezieht, aus qualitativ hochwertigen Materialien hergestellt und mit äußerster Sorgfalt überprüft wurde. Voraussetzung für die Gewährleistung ist die Bedienung und der ordentliche Aufbau gemäß Bedienungsanleitung. Durch unsachgemäße Nutzung und / oder unsachgemäßen Transport kann die Gewährleistung entfallen.
  • Seite 24: Technical Data

    Dear Customer, Congratulations for choosing a SportPlus product. We have every expectation that you will be fully satisfied with your new purchase. To guarantee optimal function of this product, please adhere to the following instructions: Before using this product for the first time, please read the manual carefully! The product has been designed with safety features.
  • Seite 25: Safety Information

    SAFETY INFORMATION INTENDED USE • This product is intended for private use and is not suitable for medicinal, therapeutic or commercial purposes. • The product is intended for indoor use. • The maximum permissible weight of a person using this product is 110 kg. ADVICE WITH REGARD TO BATTERIES •...
  • Seite 26: Hazards Due To Wear

    • Always use the product on a horizontal, level, nonslip and solid surface. Never use the product near water and make sure there is a safety clearance of at least one meter on both sides and two meters behind the product. •...
  • Seite 27: Explosion View

    3. EXPLOSION VIEW SP-HT-1002-IM-V12-INT.indb 27 SP-HT-1002-IM-V12-INT.indb 27 4/16/2021 11:49:25 AM 4/16/2021 11:49:25 AM...
  • Seite 28: Part List

    4. PART LIST Parts number Description and information Quantity Main frame 1 Front/rear stabilizer Seat post Handlebar Carriage bolt M8 x 60L Curved washer φ8.3 x φ22 x 1.5t Cap nut M8 x 16t Nylon nut M8 x 8t Washer φ8.3 x φ17.5 x 1.0t Screw M6 x 12L Spring washer M6 Pedal L...
  • Seite 29 Parts number Description and information Quantity Plate Washer φ5.2 x φ18 x 1.5t Tension pulley axle Axle for main frame Screw M8 x 80L C-clip 17 C clip 15 Ball bearings Hex screw M6 x 30t Ball bearing 6003ZZ Curved washer Spring Setting set Plastic washer φ6.5 x φ13 x 0.5t...
  • Seite 30 Parts number Description and information Quantity Self-tapping screw ST3.2 x 12L Plastic washer φ14 x φ10.3 x 1.0t Belt Foam for handle Self-tapping screw ST2.9 x 8L EVA pad Main frame 2 Hex key Wrench SP-HT-1002-IM-V12-INT.indb 30 SP-HT-1002-IM-V12-INT.indb 30 4/16/2021 11:49:25 AM 4/16/2021 11:49:25 AM...
  • Seite 31: Assembly Instructions

    5. ASSEMBLY INSTRUCTIONS Take all parts out of the packaging carefully and place them on a flat surface. When doing this, use suitable padding to protect the working surface. Assembly of the individual parts should be carried out by 2 people! Before assembly, check the parts list to verify that all parts are present.
  • Seite 32 STEP 2: • Fasten the front stabilizer (2) to the frame (1) using 2 carriage bolts (M8 x 60 mm) (5), the curved washer (6), and the M8 cap nuts (7). Then fasten the rear stabilizer (2) to the frame (1) using 2 carriage bolts (M8 x 60 mm) (5), the curved washer (6), and the M8 cap nuts (7).
  • Seite 33 STEP 3: • The pedals (12L and 12R) are marked “L” for left and “R” for right. Mount the pedals to the corresponding treadles. When you are sitting on the home trainer, the right pedal is on your right. • Please note that the right pedal screws on clockwise and the left pedal counter clockwise.
  • Seite 34 STEP 4: • Fasten the seat (14) to the seat post (3) using a nut (8) and washer (9) and then slide the assembly into the frame (1). Align the holes and then fasten the saddle to the seat post using the set screw (13). •...
  • Seite 35 STEP 5: Fasten the handlebar (4) to the upper part of the frame (1) with 4 screws (M6 x 12 mm) (10), 4 spring washers (11), 2 washers (17), and 2 curved washers (19). SP-HT-1002-IM-V12-INT.indb 35 SP-HT-1002-IM-V12-INT.indb 35 4/16/2021 11:49:27 AM 4/16/2021 11:49:27 AM...
  • Seite 36: Using The Computer

    Computer cable STEP 6 • Make sure that the computer cable feeds through the slot on the back of the frame and connect the upper end of the cable. 6. USING THE COMPUTER SCAN SPEED CALORIES DISTANCE PILSE TIME SP-HT-1002-IM-V12-INT.indb 36 SP-HT-1002-IM-V12-INT.indb 36 4/16/2021 11:49:27 AM 4/16/2021 11:49:27 AM...
  • Seite 37: Function Button

    FUNCTION BUTTON • Use this button to select the functions time, speed, distance, calories, and pulse. Press and hold the button for 2 seconds to reset. INSERTING THE BATTERIES Remove the battery compartment cover on the back of the monitor. Heeding correct polarity, insert 2 AAA batteries into the compartment and replace the cover.
  • Seite 38: Training

    7. TRAINING WORKOUT TIPS All recommendations in this manual are intended exclusively for healthy persons and not for persons with heart/cardiovascular problems. All tips are intended only as rough suggestions for a training program. If necessary, consult your physician for tips that meet your personal requirements. The following pages will explain exactly how to operate your new training device and will illustrate the fundamentals of fitness training.
  • Seite 39 2. USE Hold the handlebar with both hands in your desired position and stay seated on the seat during training. Also make sure that your feet are securely on the pedals in the pedal straps. 3. GETTING OFF Stop training and hold on tight to the handlebar. First place one foot on the floor for secure footing and stand up from the seat.
  • Seite 40 WARNING! The pulse rate monitoring systems may be inaccurate. Over-exercise may result in serious injury or death. If you feel faint stop exercising immediately. 2. FREQUENCY Most experts recommend a combination of health-conscious nutrition, which must be adapted according to the training goal, and physical exercise three to five times per week. A normal adult should train twice per week to retain his/her current level of fitness.
  • Seite 41 TRAINING BASICS All tips are intended only as general training tips. The tips listed here have no medicinal value and are intended solely as a source of information on various types of training. For a personal detailed training program, please consult a specialist.
  • Seite 42: Troubleshooting - Problems With The Computer Display

    8. TROUBLESHOOTING – PROBLEMS WITH THE COMPUTER DISPLAY “No function values are displayed. Only the pulse display is working”. This could mean there is transmission interference between the home trainer and the computer. Check to see that all cables are properly connected to one another and that none of the cables is damaged.
  • Seite 43: Maintenance, Cleaning And Care

    9. MAINTENANCE, CLEANING AND CARE • After the assembly and before using the home trainer, always make sure that all bolts/nuts are fully and correctly tightened. • Clean the unit regularly with a slightly damp cloth and a mild cleaning agent. •...
  • Seite 44: Complaints & Warranties

    Service time: Monday to Friday from 9:00 am to 6:00 pm Service hotline: +44 - 203 318 4415* Email: Service@SportPlus.org URL: https://sportplus.de National fixed-line network, call charges depend on your phone company/your phone contract. Please have the following information at hand when you call.
  • Seite 45: Warranty Conditions

    12. WARRANTY CONDITIONS SportPlus guarantees that the product under warranty has been manufactured from the highest quality materials and has been checked with the utmost care. The operation and assembly of the product according to the operating instructions is a precondition of this warranty.
  • Seite 46: Indications Techniques

    Chère cliente, Cher client, Nous vous félicitons pour l'achat de votre nouveau produit SportPlus et sommes convaincus que vous en serez satisfait. Afin de garantir un fonctionnement parfait et un rendement toujours plus optimal de votre produit, nous vous prions de suivre les consignes suivantes : Avant d’utiliser le produit pour la première fois, veuillez lire attentivement les instructions...
  • Seite 47: Consignes De Sécurité

    CONSIGNES DE SÉCURITÉ USAGE PRÉVU • Le produit est conçu pour une utilisation dans le domaine privé, et non pas dans un but médical et thérapeutique, ni à des fins commerciales. • Le produit est prévu pour être utilisé en intérieur. •...
  • Seite 48: Instructions Pour Le Montage

    • Utilisez toujours le produit sur un sol plane, antidérapant, horizontal et solide. Ne l'utilisez jamais à proximité de l'eau et pour des raisons de sécurité, assurez autour du produit un espace libre suffisant d'au moins un mètre à l'avant et de deux mètres à...
  • Seite 49: Vue Éclatée

    3. VUE ÉCLATÉE SP-HT-1002-IM-V12-INT.indb 49 SP-HT-1002-IM-V12-INT.indb 49 4/16/2021 11:49:29 AM 4/16/2021 11:49:29 AM...
  • Seite 50: Liste Des Pièces

    4. LISTE DES PIÈCES Numéro des Description et données Quantité pièces Cadre principal 1 Pied avant/arrière Tige de selle Poignée avant Vis à tête bombée M8 x 60L Rondelle incurvée φ8,3 x φ22 x 1,5t Écrou borgne M8 x 16t Écrou en nylon M8 x 8t Rondelle plate φ8,3 x φ17,5 x 1,0t Vis M6 x 12L...
  • Seite 51 Numéro des Description et données Quantité pièces Rondelle plate φ10,3 x φ25 x 1,5t Plaque Rondelle plate φ5,2 x φ18 x 1,5t Axe pour galet tendeur Axe pour cadre principal Vis M8 x 80L Clip C 17 Clip C 15 Roulement à...
  • Seite 52 Numéro des Description et données Quantité pièces Vis M4 x 10L Aimant Vis autotaraudeuse ST3,2 x 12L Rondelle plastique φ14 x φ10,3 x 1,0t Courroie Mousse pour poignée Vis autotaraudeuse ST2,9 x 8L EVA-Pad Cadre principal 2 Clé hexagonale Clé plate SP-HT-1002-IM-V12-INT.indb 52 SP-HT-1002-IM-V12-INT.indb 52 4/16/2021 11:49:29 AM...
  • Seite 53: Notices Explicatives De Montage

    5. NOTICES EXPLICATIVES DE MONTAGE Enlevez prudemment toutes les pièces de l'emballage et mettez celles-ci sur une surface plane. Utilisez pour cela un revêtement protégeant le sol. L’assemblage des pièces doit être effectué par 2 personnes. Avant l'assemblage, contrôlez l'exhaustivité des pièces livrés au moyen de la liste des pièces.
  • Seite 54 ÉTAPE : • Fixez le pied avant (2) avec 2 vis à tête bombée (M8 x 60 mm) (5), la rondelle bombée (6) et les écrous borgne hexagonaux M8 (7) sur le cadre (1). Fixez ensuite le pied arrière (2) avec 2 vis à tête bombée (M8 x 60 mm) (5), la rondelle bombée (6) et les écrous borgne hexagonaux M8 (7) sur le cadre (1).
  • Seite 55 ÉTAPE : • La pédale gauche et la pédale droite (12G et 12D) sont marquées avec « L » et « R ». Fixez les pédales sur le côté du pédalier correspondant. Si vous êtes assis sur l'appareil d'entraînement, la pédale de droite se trouve du côté droit. •...
  • Seite 56 ÉTAPE : • Fixez la selle (14) avec l’écrou (8) et la rondelle (9) sur le tube de selle (3) et glissez- la ensuite sans le cadre (1). Positionnez les trous l'un sur l'autre et sécurisez la selle sur le tube avec la vis de réglage (13) sur le tube. •...
  • Seite 57 ÉTAPE : • Fixez le guidon (4) avec 4 vis hexagonales (M6 x 12 mm) (10), 4 rondelles élastiques (11), 2 rondelles (17) et 2 rondelles bombées (19) sur la partie supérieure du cadre (1). SP-HT-1002-IM-V12-INT.indb 57 SP-HT-1002-IM-V12-INT.indb 57 4/16/2021 11:49:30 AM 4/16/2021 11:49:30 AM...
  • Seite 58: Utilisation De L'ordinateur

    Câble d'ordinateur ÉTAPE : • Veillez à ce que le câble de l'ordinateur sorte de l'évidement au dos du cadre ; ensuite, raccordez l'extrémité supérieure du câble d'ordinateur. 6. UTILISATION DE L'ORDINATEUR SCAN SPEED CALORIES DISTANCE PILSE TIME SP-HT-1002-IM-V12-INT.indb 58 SP-HT-1002-IM-V12-INT.indb 58 4/16/2021 11:49:31 AM 4/16/2021 11:49:31 AM...
  • Seite 59: Touche De Fonction

    TOUCHE DE FONCTION • Les fonctions durée, vitesse, distance, calories et pouls sont sélectionnés avec cette touche. Pour réinitialiser, il faut appuyer pendant 2 secondes sur la touche. INSERTION DES PILES Enlevez le couvercle du compartiment des piles au dos du moniteur. Ensuite, insérez 2 piles de type AAA en respectant bien la polarité...
  • Seite 60: Entraînement

    7. ENTRAÎNEMENT CONSEILS D'ENTRAÎNEMENT Toutes les recommandations incluses dans ce mode d'emploi s'adressent exclusivement à des personnes en bonne santé et non pas à des personnes souffrant de maladies cardiovasculaires. Ces conseils sont surtout donnés à titre indicatif et il ne s'agit que de propositions informatives pour un programme d'entraînement.
  • Seite 61 2. UTILISATION Gardez la position souhaitée en vous tenant des deux mains au guidon et restez assis sur la selle pendant l’entraînement. Veillez également à ce que vos pieds soient bloqués avec les sangles des pédales. 3. DESCENDRE Arrêtez l’entraînement et tenez-vous bien au guidon. Posez d’abord un pied au sol en le retirant de la pédale pour une bonne stabilité...
  • Seite 62: Phases D'entraînement

    ATTENTION ! L'affichage de la fréquence du pouls pourrait être inexact. Un entraînement excessif pourrait conduire à des blessures sérieuses ou à un décès. Si vous ressentez des vertiges, interrompez immédiatement l'exercice. 2. RÉGULARITÉ La plupart des experts recommandent la combinaison d'une alimentation saine, qui doit être en accord avec l'objectif de l'entraînement, et de l'exercice physique trois à...
  • Seite 63 PRINCIPES DE L'ENTRAÎNEMENT Ici, il s'agit de conseils très généraux sur l'entraînement. Ceux-ci n'ont pas de valeur médicale et servent seulement à vous donner quelques informations sur les différents types d'entraînement. Pour le développement d'un programme d'entraînement détaillé et personnel, veuillez consulter un expert. Les personnes qui souffrent de problèmes cardiaques ou d'autres maladies, qui pourraient être aggravés par un programme d'entraînement ou des activités sportives normatifs, DOIVENT consulter leur médecin avant de commencer tout type d'entraînement.
  • Seite 64: Dépannage - Problèmes Avec L'affichage De L'ordinateur

    8. DÉPANNAGE – PROBLÈMES AVEC L'AFFICHAGE DE L'ORDINATEUR « Aucune valeur des fonctions n'est indiquée. Seulement l'affichage du pouls fonctionne ». Cela pourrait indiquer qu'il existe un dérangement dans la transmission entre l'appareil et l'ordinateur. Contrôlez si tous les câbles sont correctement raccordés et si aucun des câbles n'est endommagé.
  • Seite 65: Maintenance, Nettoyage Et Entretien

    9. MAINTENANCE, NETTOYAGE ET ENTRETIEN • Contrôlez après l'assemblage et avant l'utilisation de l'appareil si tous les boulons/ écrous sont complètement et correctement serrés. • Nettoyez régulièrement l’appareil à l’aide d’un chiffon légèrement humide et en appliquant si besoin un produit de nettoyage doux. •...
  • Seite 66: Réclamations Et Garanties

    Heures d’ouverture : du lundi au vendredi de 9 h 00 à 18 h 00 Service hotline : +33 - 176 361 493* Adresse électronique : Service@SportPlus.org Site Internet : https://sportplus.de Réseau national, les frais d’appel dépendent de votre opérateur/votre abonnement téléphonique.
  • Seite 67: Dispositions De La Garantie

    12. DISPOSITIONS DE LA GARANTIE SportPlus certifie que le produit, auquel se réfère la garantie, a été fabriqué avec des matériaux d’excellente qualité et vérifié avec le plus grand soin. Les conditions indispensables pour le recours à la garantie sont une utilisation et un assemblage corrects selon le mode d'emploi.
  • Seite 68: Dati Tecnici

    Gentile Cliente, congratulazioni per l'acquisto del Suo nuovo prodotto SportPlus, che siamo certi Le garantirà la massima soddisfazione. Per garantire funzionamento e prestazioni sempre ottimali del Suo prodotto, La preghiamo di rispettare le condizioni che seguono: Prima del primo utilizzo del prodotto, leggere con attenzione e integralmente questo manuale utente! Il prodotto è...
  • Seite 69: Precauzioni Per La Sicurezza

    PRECAUZIONI PER LA SICUREZZA UTILIZZO • Il prodotto è progettato per uso privato e non a scopi clinici, terapeutici o commerciali. • Il prodotto è inteso per uso interno. • Il peso massimo supportato dal prodotto è di 110 kg. NOTE SULLE BATTERIE •...
  • Seite 70 • Usare sempre il prodotto su una superficie orizzontale, piana, antiscivolo e solida. Non utilizzare mai in prossimità di acqua e, per motivi di sicurezza, mantenere intorno al prodotto uno spazio libero di almeno 1 metro sui lati e 2 metri dietro. •...
  • Seite 71: Disegno Esploso

    3. DISEGNO ESPLOSO SP-HT-1002-IM-V12-INT.indb 71 SP-HT-1002-IM-V12-INT.indb 71 4/16/2021 11:49:32 AM 4/16/2021 11:49:32 AM...
  • Seite 72: Elenco Delle Parti

    4. ELENCO DELLE PARTI Numero Descrizione e dati Quantità parte Telaio principale 1 Piede anteriore/posteriore Reggisella Impugnatura anteriore Vite con quadro sottotesta M8 x 60L Rondella curva φ8,3 x φ22 x 1,5t Dado cieco M8 x 16t Dado in nylon M8 x 8t Rondella φ8,3 x φ17,5 x 1,0t Vite M6 x 12L Rondella elastica M6...
  • Seite 73 Numero Descrizione e dati Quantità parte Rondella φ10,3 x φ25 x 1,5t Piastra Rondella φ5,2 x φ18 x 1,5t Asse per rullo tenditore Asse per telaio principale Vite M8 x 80L Clip a C 17 Clip a C 15 Cuscinetto a sfere Vite a testa esagonale M6 x 30t Cuscinetto a sfere 6003ZZ Rondella curva...
  • Seite 74 Numero Descrizione e dati Quantità parte Vite M4 x 10L Magnete Vite autofilettante ST3.2 x 12L Rondella in plastica φ14 x φ10,3 x 1,0t Cinghia Schiuma per impugnatura Vite autofilettante ST2.9 x 8L Pad in EVA Telaio principale 2 Chiave a brugola Chiave per dadi SP-HT-1002-IM-V12-INT.indb 74 SP-HT-1002-IM-V12-INT.indb 74...
  • Seite 75: Note Per Il Montaggio

    5. NOTE PER IL MONTAGGIO Estrarre con cautela tutte le parti dalla confezione e disporle su una superficie piana. A tal fine, stendere sul pavimento un rivestimento protettivo. L’assemblaggio delle singole parti dovrebbe essere eseguito da 2 persone! Usando come riferimento l'elenco delle parti, verificare che non vi siano pezzi mancanti prima di procedere al montaggio.
  • Seite 76 PASSAGGIO 2: • Fissare il piede anteriore (2) con 2 viti con quadro sottotesta (M8 x 60 mm) (5), la rondella curva (6) e i dadi ciechi M8 (7) al telaio principale (1). Fissare successivamente il piede posteriore (2) con 2 viti con quadro sottotesta (M8 x 60 mm) (5), la rondella curva (6) e i dadi ciechi M8 (7) al telaio principale (1).
  • Seite 77 PASSAGGIO 3: • I pedali sinistro e destro (12S e 12D) sono contrassegnati con „L“ ed „R“. Fissare i pedali alla pedivella corrispondente. In posizione seduta sull'attrezzo da fitness, il pedale destro deve trovarsi a destra. • Assicurarsi di avvitare il pedale destro in senso orario e il sinistro in senso antiorario. SP-HT-1002-IM-V12-INT.indb 77 SP-HT-1002-IM-V12-INT.indb 77 4/16/2021 11:49:33 AM...
  • Seite 78 PASSAGGIO 4: • Fissare il sedile (14) con il dado (8) e la rondella (9) al reggisella (3) e poi inserire il gruppo nel telaio principale (1). Posizionare i fori uno sopra l'altro e fissare il sedile con la vite di fissaggio per barra sella (13) al reggisella. •...
  • Seite 79 PASSAGGIO 5: • Fissare l’impugnatura anteriore (4) con 4 viti (M6 x 12 mm) (10), 4 rondelle elastiche (11), 2 rondelle (17) e 2 rondelle curve (19) sulla parte superiore del telaio principale (1). SP-HT-1002-IM-V12-INT.indb 79 SP-HT-1002-IM-V12-INT.indb 79 4/16/2021 11:49:34 AM 4/16/2021 11:49:34 AM...
  • Seite 80: Utilizzo Del Computer

    Cavo computer PASSAGGIO 6 • Assicurarsi che il cavo del computer fuoriesca dall'apertura posta sul retro del telaio, quindi collegare l'estremità superiore del cavo. 6. UTILIZZO DEL COMPUTER SCAN SPEED CALORIES DISTANCE PILSE TIME SP-HT-1002-IM-V12-INT.indb 80 SP-HT-1002-IM-V12-INT.indb 80 4/16/2021 11:49:34 AM 4/16/2021 11:49:34 AM...
  • Seite 81: Tasti Funzione

    TASTI FUNZIONE • Le funzioni di tempo, velocità, distanza, calorie e pulsazioni sono selezionate con questi tasti. Per il ripristino, tenere premuti i tasti per 2 secondi. INSERIMENTO DELLE BATTERIE Rimuovere il coperchio del vano batterie sul retro del monitor. Inserire 2 batterie AAA nel vano osservando la corretta polarità...
  • Seite 82: Suggerimenti Per L'allenamento

    7. ALLENAMENTO SUGGERIMENTI PER L'ALLENAMENTO Tutte le raccomandazioni contenute in questo manuale utente si riferiscono esclusivamente a soggetti sani e non a persone affette da problemi cardiovascolari. Tutti i suggerimenti sono da intendersi come indicazioni generiche per un programma di allenamento.
  • Seite 83 2. UTILIZZO Tenere il manubrio nella posizione desiderata con entrambe le mani e rimanere seduti sul sedile durante l'allenamento. Assicurarsi inoltre che i piedi sui pedali siano tenuti fermi dalle apposite cinghie. 3. DISCESA Interrompere l’allenamento tenendosi saldamente al manubrio. Per prima cosa, procedere poggiando un piede in una posizione sicura sul pavimento, quindi scendere dal sedile.
  • Seite 84: Fasi Di Allenamento

    AVVERTENZA! La visualizzazione della frequenza cardiaca potrebbe essere imprecisa. Un allenamento eccessivo potrebbe causare lesioni gravi o morte. In caso di vertigini, interrompere immediatamente l'esercizio. 2. REGOLARITÀ La maggior parte degli esperti raccomanda di combinare un'alimentazione sana, in linea con il proprio obiettivo di allenamento, ad attività fisica dalle tre alle cinque volte alla settimana.
  • Seite 85: Principi Di Allenamento

    PRINCIPI DI ALLENAMENTO In questa sezione sono forniti suggerimenti di allenamento estremamente generali. Non si basano su valori medici e sono da intendersi a solo scopo informativo. Per lo sviluppo di un programma di allenamento dettagliato e personalizzato, rivolgersi a un esperto. Le persone affette da problemi cardiaci o altre patologie che potrebbero essere aggravate da programmi di allenamento/esercizi fisici occasionali o irregolari DEVONO consultare un medico prima di qualsiasi attività.
  • Seite 86: Risoluzione Dei Problemi - Problemi Con Il Display Del Computer

    8. RISOLUZIONE DEI PROBLEMI – PROBLEMI CON IL DISPLAY DEL COMPUTER “Nessun valore di funzione visualizzato. Funziona solo il display delle pulsazioni”. Ciò potrebbe indicare un problema di trasmissione fra attrezzo e computer. Verificare che tutti i cavi siano collegati correttamente e che nessuno di essi sia danneggiato. „Il display delle pulsazioni non funziona più...
  • Seite 87: Manutenzione, Pulizia E Cura

    9. MANUTENZIONE, PULIZIA E CURA • Dopo il montaggio e prima di ogni utilizzo, verificare il prodotto controllando che tutti i dadi/le viti siano inseriti e serrati correttamente. • Pulire il prodotto regolarmente con un panno leggermente inumidito con del detergente delicato.
  • Seite 88: Reclami E Garanzia

    Dal lunedì al venerdì dalle 9.00 alle 18.00 Linea diretta per l'assistenza: +39 - 069 480 1459* E-mail: Service@SportPlus.org URL: https://sportplus.de Rete fissa nazionale, le tariffe di chiamata dipendono dal proprio gestore telefonico / contratto di telefonia. Assicurarsi di avere a disposizione le informazioni seguenti.
  • Seite 89: Garanzia

    12. GARANZIA SportPlus assicura che il prodotto coperto da tale garanzia è stato fabbricato con materiali di alta qualità ed è stato controllato con la massima cura. Affinché la garanzia non sia invalidata, è necessario utilizzare e montare il prodotto in accordo a questo manuale utente.
  • Seite 90: Datos Técnicos

    Estimada cliente, estimado cliente, Le felicitamos por su nuevo producto SportPlus, y estamos convencidos de que quedará completamente satisfecho con él. Para garantizar un funcionamiento y capacidad de rendimiento óptimos de su producto, le pedimos que: ¡Antes de usar el producto por primera vez, lea con atención el siguiente manual de instrucciones! El producto está...
  • Seite 91: Indicaciones De Seguridad

    INDICACIONES DE SEGURIDAD FINALIDAD DE USO • El producto está diseñado para uso privado y no es adecuado para fines médicos, terapéuticos o comerciales. • El producto ha sido concebido para su uso en interiores. • El peso máximo permitido de este producto es de 110 kg. INDICACIONES PARA LA MANIPULACIÓN DE LAS PILAS •...
  • Seite 92 • Utilice el producto siempre sobre una superficie horizontal, plana, sólida y antideslizante. Nunca use el producto cerca del agua. Para ello mantenga, por motivos de seguridad, un espacio libre de un metro junto al producto y dos metros detrás de él. •...
  • Seite 93: Plano Detallado

    3. PLANO DETALLADO SP-HT-1002-IM-V12-INT.indb 93 SP-HT-1002-IM-V12-INT.indb 93 4/16/2021 11:49:35 AM 4/16/2021 11:49:35 AM...
  • Seite 94: Lista De Piezas

    4. LISTA DE PIEZAS Número de Descripción y datos Cantidad pieza Cuadro principal 1 Pata de apoyo delantera/trasera Tija de sillín Mango delantero Tornillo carrocero M8 x 60L Arandela curva φ8,3 x φ22 x 1,5t Tuerca de sombrerete M8 x 16t Tuerca de nylon M8 x 8t Arandela φ8,3 x φ17,5 x 1,0t Tornillo M6 x 12L Arandela de resorte M6...
  • Seite 95 Número de Descripción y datos Cantidad pieza Arandela φ10,3 x φ25 x 1,5t Placa Arandela φ5,2 x φ18 x 1,5t Eje de polea tensora Eje de cuadro principal Tornillo M8 x 80L Clip C 17 Clip C 15 Cojinete de bolas Tornillo hexagonal M6 x 30t Cojinete de bolas 6003ZZ Arandela curva Resorte Juego de ajuste...
  • Seite 96 Número de Descripción y datos Cantidad pieza Tornillo M4 x 10L Imán Tornillo autorroscante ST3.2 x 12L Arandela de plástico φ14 x φ10,3 x 1,0t Correa Espuma para mango Tornillo autorroscante ST2.9 x 8L Almohadilla EVA Cuadro principal 2 Llave de hexágono interior Llave de tuercas SP-HT-1002-IM-V12-INT.indb 96 SP-HT-1002-IM-V12-INT.indb 96 4/16/2021 11:49:36 AM 4/16/2021 11:49:36 AM...
  • Seite 97: Instrucciones De Montaje

    5. INSTRUCCIONES DE MONTAJE Retire cuidadosamente todas las piezas del embalaje y colóquelas en una superficie plana. Para ello utilice una esterilla protectora del suelo. ¡El montaje de las piezas individuales lo deberán realizar 2 personas! Compruebe la integridad de los elementos suministrados antes del montaje, verificándolos con la lista de piezas. Plegar Desplegar PASO 1:...
  • Seite 98 PASO 2: • Fije la pata delantera (2) al cuadro (1) con 2 tornillos carroceros (M8 x 60 mm) (5), la arandela cóncava (6) y la tuerca de sombrerete hexagonal (7). Fije la pata trasera (2) al cuadro (1) con 2 tornillos carroceros (M8 x 60 mm) (5), la arandela cóncava (6) y las tuercas de sombrerete hexagonales M8 (7).
  • Seite 99 PASO 3: • El pedal izquierdo y derecho (12I y 12D) están marcados con una "L" y una "R". Fije los pedales en las bielas correspondientes. Cuando se siente en la bicicleta estática, deberá encontrar el pedal derecho en la parte derecha. •...
  • Seite 100 PASO 4: • Fije el sillín (14) con la tuerca (8) y la arandela (9) en la tija de sillín (3) y, a continuación, introduzca esta en el cuadro (1). Coloque los orificios superpuestos y asegure el sillín en la tija con el tornillo de ajuste (13). •...
  • Seite 101 PASO 5: • Fije la barra de agarre (4) a la parte superior del cuadro (1) con 4 tornillos hexagonales (M6 x 12 mm) (10), 4 arandelas de resorte (11), 2 arandelas (17) y 2 arandelas cóncavas (19). SP-HT-1002-IM-V12-INT.indb 101 SP-HT-1002-IM-V12-INT.indb 101 4/16/2021 11:49:37 AM 4/16/2021 11:49:37 AM...
  • Seite 102: Funcionamiento Del Ordenador

    Cable de ordenador PASO 6 • Asegúrese de que el cable del ordenador sale del hueco de la parte trasera del cuadro, y conecte el extremo superior del cable del ordenador. 6. FUNCIONAMIENTO DEL ORDENADOR SCAN SPEED CALORIES DISTANCE PILSE TIME SP-HT-1002-IM-V12-INT.indb 102 SP-HT-1002-IM-V12-INT.indb 102...
  • Seite 103: Tecla De Función

    TECLA DE FUNCIÓN • Las funciones de tiempo, velocidad, distancia, calorías y pulso se podrán seleccionar con esta tecla. Para restablecer, mantenga apretada la tecla durante 2 segundos. INSERTAR LAS PILAS Quite la tapa del compartimento de la pila en la parte trasera del monitor. Inserte las 2 pilas AAA en el compartimento con la polaridad correcta y coloque la tapa.
  • Seite 104: Entrenamiento

    7. ENTRENAMIENTO CONSEJOS PARA ENTRENAMIENTOS Todas las recomendaciones en este manual están dirigidas sólo a personas sanas y no a las personas con enfermedades de corazón / circulación cardiovascular. Todos los consejos son solamente propuestas generales para un programa de entrenamiento.
  • Seite 105 2. USO Sujétese bien al manillar con ambas manos en la posición deseada y permanezca sentado en el sillín durante el entrenamiento. Asegúrese también de que los pies estén fijos a los pedales con las correas de los pedales. 3. BAJAR Detenga el entrenamiento y sujétese bien al manillar.
  • Seite 106 ¡ADVERTENCIA! El indicador de frecuencia de pulso podría ser impreciso. Un entrenamiento excesivo podría conducir a lesiones graves o la muerte. Si tiene sensación de mareo, detenga el ejercicio inmediatamente. 2. REGULARIDAD La mayoría de los expertos recomiendan una combinación de alimentación sana, acorde con el objetivo del entrenamiento, y una actividad física de entre tres y cinco veces por semana.
  • Seite 107 BASES DEL ENTRENAMIENTO En este caso, tratamos algunos consejos generales de entrenamiento. Estos no disponen de valores médicos, y sirven únicamente de información de los diferentes tipos de entrenamiento. Para desarrollar un programa de entrenamiento personal detallado, consulte con un experto. Las personas, que padezcan problemas cardíacos u otras enfermedades coronarias, y puedan agravar su enfermedad por un programa de entrenamiento incorrecto o inapropiado, deberán consultar con su médico antes de realizar cualquier tipo de entrenamiento.
  • Seite 108: Solución De Problemas - Problemas Con La Pantalla Del Ordenador

    8. SOLUCIÓN DE PROBLEMAS – PROBLEMAS CON LA PANTALLA DEL ORDENADOR "No se muestran valores de función. Solo funciona el indicador de pulso". Esto puede advertir que hay una avería de transmisión entre el aparato y el ordenador. Compruebe que todos los cables estén correctamente conectados entre sí y que no haya ninguno dañado.
  • Seite 109: Limpieza, Cuidado Y Mantenimiento

    9. LIMPIEZA, CUIDADO Y MANTENIMIENTO • Compruebe después del montaje y antes de cada uso del aparato si están todos los pernos/tuercas y si están correctamente apretados. • Limpie el aparato regularmente con un paño ligeramente humedecido en un detergente suave. •...
  • Seite 110: Reclamaciones Y Garantías

    Horario de servicio: Lunes a viernes, de 9:00 h a 18:00 h Línea telefónica: +34 - 932 204 048* Correo electrónico: Service@SportPlus.org URL: https://sportplus.de Llamadas a teléfonos fijos nacionales, las tasas de llamada serán sufragadas por su compañía telefónica / su contrato de teléfono. Asegúrese de recibir la siguiente información.
  • Seite 111: Términos De Garantía

    12. TÉRMINOS DE GARANTÍA SportPlus garantiza que el producto, en lo que se refiere a la garantía, ha sido fabricado con materiales de alta calidad y comprobado con la máxima atención. Para que la garantía tenga validez, resulta esencial que el uso y montaje se realice conforme al manual de instrucciones. Un uso indebido y / o transporte inadecuado puede anular el derecho de garantía.
  • Seite 112: Service-Hotline

    Servicehotline: +49 (0) 40 - 780 896 – 35 (Nationales Festnetz, Gesprächsgebühren sind von Ihrem Telefonanbieter / Ihrem Telefonvertrag abhängig.) E-Mail: service@sportplus.org URL: https://sportplus.de/ersatzteile Servicehotline: +44 - 203 318 4415 (Call charges depend on your phone company / your phone contract.) E-Mail: service@sportplus.org...

Diese Anleitung auch für:

Sp-ht-1002

Inhaltsverzeichnis