
Verwandte Anleitungen für EMAK DR55H6.5


Inhaltszusammenfassung für EMAK DR55H6.5
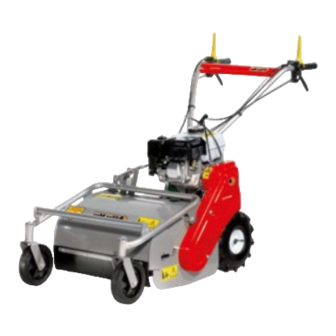
- Seite 1 TRINCIASARMENTI TONDOBROYEUSE SCHLEGLMAHER FLAIR MOWER TRITURADORA DE BARRAS KOSIARKA BIJAKOWA DR55H6,5 WB55H6,5 NTS 50...
- Seite 3 USO E MANUTENZIONE...
-
Seite 4: Inhaltsverzeichnis
USO E MANUTENZIONE INDICE Capitolo 1 : Premessa ............... 3 Sez.1 Introduzione e sicurezza ............3 Sez.2 Identificazione della macchina / motore ........5 Sez.3 Garanzia ..................6 Capitolo 2 : Norme generali e dispositivi di sicurezza ..8 Sez.1 Parole, simboli e decalcomanie di allarme e sicurezza ..... -
Seite 5: Capitolo 1 : Premessa
Capitolo 1 : Premessa Sez.1 Introduzione e sicurezza ATTENZIONE : Prima dell’uso del- la macchina, leggere attentamente questo manuale ed il libretto allegato sulle Norme generali per la vostra sicurezza e conservateli per future consulatazioni. Scopo di questa pubblicazione è quello Scopo di questa pubblicazione è... - Seite 6 Emak. relative norme di sicurezza (prevenzio- ne degli infortuni). Si raccomanda ai clienti di rivolgersi ad...
-
Seite 7: Sez.2 Identificazione Della Macchina / Motore
Capitolo 1 : Premessa Sez.2 Identificazione della macchina / motore La falciatrice a flagelli viene identificata attraverso i dati impressi nell’apposita targhetta di identificazione posta sulla base del telaio (Fig. 1.2). E’ importante segnare tali dati, allo scopo di assicurare un servizio pronto ed efficiente, quando si ordinano parti di ricambio o quando si richiedono in- formazioni o delucidazioni tecniche. -
Seite 8: Sez.3 Garanzia
Capitolo 1 : Premessa Sez.3 Garanzia I prodotti Emak sono coperti da una ga- L'installazione eseguita correttamente, ranzia che, a determinate condizioni, associata ad una regolare manutenzio- copre i difetti di materiale o di costru- ne, è utile per prevenire guasti. Se tut- zione. - Seite 9 Capitolo 1 : Premessa Sez.3 Garanzia rantire che le riparazioni e l'assistenza siano all'altezza degli standard. NOTA : Il montaggio di parti non originali NOTA : può portare all'utilizzo di un ricam- bio di qualità inferiore. Il Costruttore In alcune illustrazioni contenute in della falciatrice a flagelli non si as- questo Libretto d’Istruzioni per l'Ope- sume nessuna responsabilità...
-
Seite 10: Capitolo 2 : Norme Generali E Dispositivi Di Sicurezza
Capitolo 2 : Norme generali e dispositivi di sicurezza Sez.1 Parole, simboli e decalcomanie di allarme e sicurezza La sicurezza dell'operatore rappresen- ta una delle principali preoccupazioni NOTA : di chi progetta e sviluppa una nuova falciatrice a flagelli, i progettisti cerca- E’... -
Seite 11: Sez.2 Precauzioni Per Lavorare In Sicurezza
Capitolo 2 : Norme generali e dispositivi di sicurezza Sez.2 Precauzioni per lavorare in sicurezza ATTENZIONE : Prima di iniziare qualsiasi attività consultate questo manuale e lo specifico libretto sulla sicurezza : Norme generali per la vostra sicurezza Questo libretto è di fondamentale importanza in quanto vengono descritte Questo libretto è... - Seite 12 Capitolo 2 : Norme generali e dispositivi di sicurezza Sez.2 Precauzioni per lavorare in sicurezza Osservare le seguenti precauzioni: Proteggete voi stessi. Indossate tutti gli indumenti protettivi - NON permettete mai a bambini o (Fig. 2.1) ed i dispositivi per la sicurez- ragazzi o a personale non qualifica- za personale messi a vostra disposi- to di utilizzare la vostra falciatrice a...
- Seite 13 Capitolo 2 : Norme generali e dispositivi di sicurezza Sez.2 Precauzioni per lavorare in sicurezza Mezzi individuali di protezione dal rumore I mezzi individuali di protezione servo- no ad attenuare l'energia sonora tra- smessa all'orecchio per via aerea. Vanno utilizzati quando non è possibi- le evitare in altro modo un'esposizione dannosa.
-
Seite 14: Sez.3 Operazioni A Rischio
Capitolo 2 : Norme generali e dispositivi di sicurezza Sez.3 Operazioni a rischio - Prima di avviare la macchina accer- tatevi sempre che non ci sia nessu- no vicino al rotore lame (Fig. 2.3). Durante l’utilizzo del trinciasarmenti Durante l’utilizzo del trinciasarmenti assicuratevi che non vi siano perso- assicuratevi che non vi siano perso- ne entro un arco di 10 m. -
Seite 15: Capitolo 3 : Dati E Caratteristiche Tecniche
Capitolo 3 : Dati e caratteristiche tecniche Sez.1 Pesi e misure d’ingombro Versione TS 50 Peso = 125 Kg Dimensioni 1640... -
Seite 16: Sez.2 Motore E Informazioni Generali
Capitolo 3 : Dati e caratteristiche tecniche Sez.2 Motore e Informazioni generali Motore Honda GX 200 Cilindrata 200 cc Potenza 4,8 kW (6,5 cv) Motore B&S Vanguard Cilindrata 205 cc Potenza 4,8 kW (6,5 cv) Per ulteriori informazioni consulta- re il libretto di istruzioni del Motore Fig. -
Seite 17: Capitolo 4 : Comandi E Strumenti Di Controllo
Capitolo 4 : Comandi e strumenti di controllo Sez.1 Descrizione dei comandi In questo paragrafo viene fatta una pa- noramica di tutti gli strumenti e coman- di presenti sulla falciatrice a flagelli. Se non diversamente specificato, essi sono validi per tutte le versioni. Per il corretto uso dei comandi qui elencati occorre leggere attentamente il capitolo 5 - Utilizzazione. - Seite 18 Capitolo 4 : Comandi e strumenti di controllo Sez.1 Descrizione dei comandi 8 - Tappo serbatoio carburante 9 - Tappo olio trasmissione 10 - Asta livello olio motore 11 - Levetta Starter per motori a benzina 12 - Interruttore motore ON/OF 13 - Maniglia avviamento motore Fig.
-
Seite 19: Sez.2 Leve Regolazioni In Altezza E Laterale Del Manubrio
Capitolo 4 : Comandi e strumenti di controllo Sez.2 Leve regolazioni in altezza e laterale del manubrio Prima di utilizzare la falciatrice a fla- gelli in modalità di lavoro è buona nor- ma regolare l’altezza del manubrio in base alla propria statura e alla natura del terreno (pianeggiante o collinare). -
Seite 20: Capitolo 5 : Utilizzazione
Capitolo 5 : Utilizzazione Sez.1 Avviamento motore Prima di iniziare qualsiasi attività lavo- rativa controllate anzi tutto la presen- za di carburante nel serbatoio (10), in caso di rifornimento utilizzate un imbu- to con filtro a rete in modo da trattene- re eventuali impurità. - Seite 21 Capitolo 5 : Utilizzazione Sez.1 Avviamento / arresto del motore - Portare il manettino comando gas (5) a metà corsa (Fig. 5.3). - Predisporre la falciatrice a flagelli per l’accensione agendo sulla Levet- ta Starter (11) per motori a benzina. Consultare il libretto uso e manuten- zione del motore.
-
Seite 22: Sez.2 Leva Frizione Avanzamento Macchina E Movimento Lame
Capitolo 5 : Utilizzazione Sez.2 Leva frizione avanzamento macchina e movimento lame A questo punto se abbassate la Leva frizione avanzamento (Fig. 5.5) la cin- ghia della trasmissione si tenderà fa- cendo presa sulla puleggia motore, questa leva consente al vostro moto- coltivatore di procedere avanti. - Seite 23 Capitolo 5 : Utilizzazione Sez.3 Leve sbloccaggio ruote DX/SX La vostra falciatrice a flagelli è dotata di una sola marcia in avanti e raggiunge una velocità massima di 2,1 Km/h. Le Leve sbloccaggio ruote destra e si- nistra (Fig. 5.10) aiutano il cambio di direzione della falciatrice a flagelli du- rante l’avanzamento.
-
Seite 24: Sez.4 Leva Regolazione Altezza Taglio
Capitolo 5 : Utilizzazione Sez.4 Leva regolazione altezza taglio La Leva (17) regola l’altezza di taglio. Ruotando la leva in un senso o nell’al- tro si alza o si abbassa il rullo porta lame. Se l’altezza di taglio è regolata troppo Se l’altezza di taglio è... -
Seite 25: Capitolo 6 : Manutenzione E Regolazioni
Capitolo 6 : Manutenzione e regolazioni Sez.1 Rifornimento della macchina Requisiti del combustibile La qualità del combustibile usato è un fattore importante per la prestazione ri- sultante e per una durata soddisfacen- te del motore. I combustibili devono essere puliti, ben raffinati e non corro- sivi per le parti del sistema di alimenta- zione. -
Seite 26: Sez.2 Manutenzione Periodica E Straordinaria
Capitolo 6 : Manutenzione e regolazioni Sez.2 Manutenzione periodica e straordinaria Motore Ogni giorno controllate il livello dell’olio e se necessario, ripristinate (Fig. 6.2). Utilizzate solo olio ESSO UNIFARM 15 - 40 W e grasso ESSO MULTIPUR- POSE. Il cambio completo dell’olio motore va effettuato agli intervalli e con le modali- tà... - Seite 27 UTILISATION ET ENTRETIEN...
- Seite 28 UTILISATION ET ENTRETIEN INDEX Chapitre 1 : Avant-propos ..............3 Section 1 Introduction et sécurité ............3 Section 2 Identi cation de la machine/du moteur ........5 Section 3 Garantie ................6 Chapitre 2 : Normes générales et dispositifs de sécurité ....8 Section 1 Termes, symboles et décalcomanies d’alarme et de sécurité...
-
Seite 29: Chapitre 1 : Avant-Propos
Chapitre 1 : Avant-propos Section 1 - Introduction et sécurité ATTENTION Pour votre sécurité, avant d’utiliser machine, lisez attentivement manuel et la notice jointe portant sur les normes générales de sécurité, et conservez-les pour toute consultation future. Ce manuel a pour objet de permettre au propriétaire et à... - Seite 30 être règles de sécurité (prévention des reproduit ni copié, sans le consentement accidents). écrit de la Société Emak. Il est recommandé à nos clients de s’adresser à un Concessionnaire pour tout problème d’assistance ou de réglage qui surgirait.
-
Seite 31: Section 2 Identi Cation De La Machine/Du Moteur
Chapitre 1 : Préface Section 2 Identi cation de la machine / moteur La tondobroyeuse à fléaux est identifiée au moyen de données gravées dans la plaquette d’identification spéciale placée sur la base du châssis (Fig. 1.2). Veuillez prendre note de ces données, en vue de vous assurer un service prompt et efficace, lorsque vous commanderez des pièces détachées ou que vous... -
Seite 32: Section 3 Garantie
Chapitre 1 : Préface Section 3 Garantie Les produits Emak sont couverts par doit impliquer tous les usagers et les une garantie qui, à des conditions personnes préposées à l’entretien du déterminées, couvre tout défaut de motoculteur. matière ou de fabrication. Ce manuel Afin de prévenir tout dommage, une... - Seite 33 Chapitre 1 : Préface Section 3 Garantie diagnostiques modernes. REMARQUE : reçoivent régulièrement les Bulletins d’Assistance, ils possèdent tous les Manuels d’Usine et toutes les autres L’installation de pièces détachées informations techniques nécessaires non d’origine peut amener l’usager pour garantir que les réparations et à...
- Seite 34 Chapitre 2 : Normes générales et dispositifs de sécurité Section 1 Termes, symboles et décalcomanies d’alerte et de sécurité La sécurité de l’usager constitue l’un d’avertissements : des principaux soucis de tous ceux REMARQUE : qui conçoivent et développent une nouvelle tondobroyeuse à...
-
Seite 35: Consignes De Sécurité
Chapitre 2 : Normes générales et dispositifs de sécurité Section 2 Consignes de sécurité ATTENTION : Avant de débuter quelque activité que ce soit, consultez ce manuel et la notice de sécurité spécifique : Règles générales pour votre sécurité. Ce manuel est d’une importance capitale, car toutes les procédures et les modalités y sont décrites, afin de permettre à... - Seite 36 Chapitre 2 : Normes générales et dispositifs de sécurité Section 2 Consignes de sécurité Observez les précautions suivantes : Protégez vous-mêmes. - Ne permettez jamais aux enfants, Portez tous les vêtements protecteurs plus ou moins jeunes, ni à des (Fig. 2.1) et servez-vous de tous les personnels non qualifiés d’utiliser dispositifs de sécurité...
- Seite 37 Chapitre 2 : Normes générales et dispositifs de sécurité Section 2 Consignes de sécurité Protecteurs individuels contre le bruit Les moyens individuels de protection servent à atténuer l’énergie sonore transmise à l’oreille par voie aérienne. Il faut se servir de ces protecteurs, s’il n’est pas possible d’éviter toute exposition nuisible autrement.
-
Seite 38: Chapitre 2 : Normes Générales Et Dispositifs De Sécurité
Chapitre 2 : Normes générales et dispositifs de sécurité Section 8 Opérations à risque - Avant de démarrer la machine, assurez-vous toujours que personne ne se trouve près du rotor à lames (Fig. 2.3). Pendant Pendant l’utilisation l’utilisation hachesarments, assurez-vous que hachesarments, assurez-vous que personne ne se trouve en l’espace personne ne se trouve en l’espace... -
Seite 39: Chapitre 3 : Données Et Caractéristiques Techniques
Chapitre 3 : Données et caractéristiques techniques Section 1 Poids et encombrement Version TS 50 Poids = 125 Kg Dimensions 1640... -
Seite 40: Section 2 Moteur Et Informations Générales
Chapitre 3 : Données et caractéristiques techniques Section 2 - Moteur et informations générales Moteur Honda GX 200 Cylindrée 200 cc Puissance 4,8 kW (6,5 cv) Moteur B&S Vanguard Cylindrée 205 cc Puissance 4,8 kW (6,5 cv) Pour d’autres informations, consulter la notice d’instructions du moteur. -
Seite 41: Chapitre 4 : Commandes Et Instruments De Contrôle
Chapitre 4 : Commandes et instruments de contrôle Section 1 Description des commandes paragraphe fournit d’ensemble de tous les instruments et commandes présents sur la tondeuse à éaux. Sauf indication contraire, ils sont valables pour toutes les versions. Pour utiliser correctement commandes énumérées... - Seite 42 Chapitre 4 : Commandes et instruments de contrôle Section 1 Description des commandes 8 - Bouchon du réservoir de carburant 9 - Bouchon de l’huile de la transmission 10 - Jauge de l’huile du moteur 11 - Starter pour moteurs à essence 12 - Interrupteur moteur ON/OFF Fig.
-
Seite 43: Section 2 Leviers De Réglage En Hauteur Et Réglage Latéral Du Guidon
Chapitre 4 : Commandes et instruments de contrôle Section 2 - Leviers de réglage en hauteur et latéral du guidon Avant d’utiliser la tondeuse à éaux en modalité de travail, il convient de régler la hauteur du guidon selon sa propre taille et selon la nature du terrain (de plaine ou de colline). -
Seite 44: Chapitre 5 : Utilisation
Chapitre 5 : Utilisation Section 1 Mise en route / arrêt du moteur Avant de commencer toute activité, vérifiez d’abord présence carburant dans le réservoir (10), s’il faut en mettre, utilisez un entonnoir muni d’un filtre à mailles fines destiné à... - Seite 45 Chapitre 5 : Utilisation Section 1 Mise en route / arrêt du moteur - Mettre la manette des gaz (5) à mi- course (Fig. 5.3). - Préparer la machine à l’allumage en agissant sur la manette Starter (11) pour moteurs à essence. Consulter la notice d’utilisation et d’entretien du moteur.
-
Seite 46: Section 2 Levier D'embrayage De L'avancement De La Machine Et Du Mouvement Des Couteaux
Chapitre 5 : Utilisation Section 2 - Levier d’embrayage de l’avancement de la machine et du mouvement des couteaux Maintenant, si vous baissez le levier d’embrayage de l’avancement (Fig. 5.5), la courroie de transmission se tendra en faisant prise sur la poulie moteur ;... - Seite 47 Chapitre 5 : Utilisation Section 3 - Leviers de déblocage des roues droite/gauche Votre tondeuse à éaux possède une seule marche avant et atteint une vitesse maximale de 2,1 Km/h. Les leviers de déblocage des roues droite et gauche (Fig. 5.10) aident la tondeuse à...
-
Seite 48: Section 4 Levier De Réglage De La Hauteur De Coupe
Chapitre 5 : Utilisation Section 4 - Levier de réglage de la hauteur de coupe Le levier (17) règle la hauteur de coupe. En tournant le levier dans un sens ou dans l’autre, on lève ou l’on abaisse le rotor porte-couteaux. Si la hauteur de coupe est réglée trop bas, vous pourriez obtenir différents effets négatifs :... -
Seite 49: Chapitre 6 : Entretien Et Réglages
Chapitre 6 : Entretien et réglages Section 1 - Approvisionnement de la machine en carburant Qualités requises du combustible La qualité du combustible utilisé est un facteur important pour les prestations nales et pour une durée satisfaisante du moteur. Les combustibles doivent être propres, bien raf nés et non corrosifs pour les pièces du système d’alimentation. -
Seite 50: Section 2 Maintenance Périodique Et Extraordinaire
Chapitre 6 : Entretien et réglages Section 2 - Maintenance périodique et extraordinaire Moteur Contrôlez chaque jour le niveau de l’huile et, en cas de besoin, rétablissez- le (Fig. 6.2). Utilisez seulement de l’huile ESSO UNIFARM 15 - 40 W et de la graisse ESSO MULTIPURPOSE. -
Seite 51: Bedienung Und Wartung
BEDIENUNG UND WARTUNG... - Seite 52 BEDIENUNG UND WARTUNG INHALTSVERZEICHNIS Kapitel 1 : Vorwort ..............3 Abschn.1 Einleitung und Sicherheit ............. 3 Abschn.2 Identifizierung der Maschine/des Motors ......5 Abschn.3 Garantie ................6 Kapitel 2 : Allgemeine Sicherheitsvorschriften und -vorrichtungen . 8 Abschn Alarm- und Sicherheitsbegriffe, -symbole und -aufkleber ..8 Abschn Vorsichtsmaßnahmen für eine sichere Arbeit ......
-
Seite 53: Kapitel 1 : Vorwort
Kapitel 1 : Vorwort Abschn.1 Einleitung und Sicherheit ACHTUNG : Gebrauch Maschine sind dieses Handbuch beigestellte Heft Allgemeinen Sicherheitsvorschriften aufmerksam zu lesen. Handbuch und Heft für späteres Nachschlagen aufbewahren. Ziel dieser Veröffentlichung ist es, dem Ziel dieser Veröffentlichung ist es, dem Fig. - Seite 54 Reparatur dieses Schlegelmähers Die Reproduktion sowie das Kopieren muss der Anwender alle spezifischen dieses Handbuchs ohne schriftliche Eigenschaften des Geräts genau kennen Genehmigung der Emak sind -auch und muss genau über die entsprechenden auszugsweise- verboten. Sicherheitsvorschriften (Unfallverhütung) informiert sein. empfehlen Kunden,...
-
Seite 55: Abschn.2 Identifizierung Der Maschine/Des Motors
Kapitel 1 : Vorwort Abschn.2 Identifizierung der Maschine/des Motors Der Schlegelmäher wird mittels der in das entsprechende Kennschild gestanzten Daten identifiziert. Dieses Kennschild ist am Rahmensockel angebracht (Abb. 1.2). wichtig, diese Daten vermerken, einen schnellen effizienten Service Bestellung von Ersatzteilen oder bei der Anforderung von Informationen oder technischen Erläuterungen zu gewährleisten. -
Seite 56: Abschn.3 Garantie
Kapitel 1 : Vorwort Abschn.3 Garantie Emak-Produkte wird eine teilnehmen. Garantie gewährt, die unter bestimmten Die korrekt durchgeführte Montage ist Bedingungen, Materialmängel oder gemeinsam mit einer regelmäßigen Wartung Konstruk tionsfehler deckt. Dieses Handbuch nützlich zum Vorbeugen gegen Störungen. wird für die Verbreitung in der ganzen Welt Falls es während des Gültigkeitszeitraums... - Seite 57 Kapitel 1 : Vorwort Abschn.3 Garantie der Reparatur- und Wartungsarbeiten zu gewährleisten. ANMERKUNG : Die Montage von Nichtoriginaler- ANMERKUNG : satzteilen kann dazu führen, dass ein Ersatzteil schlechterer Qualität Die Montage von Nichtoriginaler- verwendet wird. Der Hersteller des satzteilen kann dazu führen, dass Schlegelmähers haftet nicht für Ver- ein Ersatzteil schlechterer Qualität dienstausfälle oder...
-
Seite 58: Kapitel 2 : Allgemeine Sicherheitsvorschriften Und -Vorrichtungen
Kapitel 2 : Allgemeine Sicherheitsvorschriften und -vorrichtungen Abschn.1 Alarm- und Sicherheitsbegriffe, -symbole und -aufkleber Da die Sicherheit des Bedieners eine ANMERKUNG : der größten Sorgen bei der Planung und Entwicklung eines neuen Schlegelmähers Warnhinweis, dessen ist, versuchen die Entwicklungstechniker Nichtbeachten eine Beschädigung so viele Sicherheitsvorrichtungen wie des Schlegelmähers oder dessen möglich vorzusehen. - Seite 59 Kapitel 2 : Allgemeine Sicherheitsvorschriften und -vorrichtungen Abschn.1 Alarm- und Sicherheitsbegriffe, -symbole und -aufkleber ACHTUNG : Vor Aufnahme jeglicher Arbeiten ist dieses Handbuch und das spezifische Sicherheitsheft Allgemeine Sicherheitsvorschriften zu lesen: Dieses Heft ist von wesentlicher Bedeutung, denn in ihm werden alle Dieses Heft ist von wesentlicher Bedeutung, denn in ihm werden alle Prozeduren und Modalitäten beschrieben, die es dem Bediener erlauben unter Prozeduren und Modalitäten beschrieben, die es dem Bediener erlauben unter...
-
Seite 60: Abschn.2 Vorsichtsmaßnahmen Für Eine Sichere Arbeit
Kapitel 2 : Allgemeine Sicherheitsvorschriften und -vorrichtungen Abschn.2 Vorsichtsmaßnahmen für eine sichere Arbeit Folgende Vorsichtsmaßnahmen sind zu treffen: für Ihren Schlegelmäher vorgesehen sind. - Erlauben Kindern oder nicht Schützen Sie sich selbst. qualifiziertem Personal NIEMALS ihren Tragen Sie Schutzkleidung (Abb. 2.1) und die Schlegelmäher zu verwenden. -
Seite 61: An Den Verfügbaren Motoren Gemessene Höchstwerte
Kapitel 2 : Allgemeine Sicherheitsvorschriften und -vorrichtungen Abschn.2 Vorsichtsmaßnahmen für eine sichere Arbeit Persönliche Lärmschutzausrüstungen persönlichen Schutzausrüstungen dienen zum Abschwächen der durch die Luft auf das Ohr übertragenen Schallenergie. Diese Schutzausrüstungen werden verwendet, wenn eine schädliche Aussetzung auf keine andere Weise verhindert werden kann. -
Seite 62: Abschn Gefährliche Eingriffe
Kapitel 2 : Allgemeine Sicherheitsvorschriften und -vorrichtungen Abschn.3 Gefährliche Eingriffe - Vor dem Anlassen der Maschine immer sicherstellen, dass sich keine Personen in der Nähe des Messerrotors (Abb. 2.3) aufhalten. Beim Gebrauch des Mulchers aufhalten. Beim Gebrauch des Mulchers sicherstellen, dass sich im Wirkungskreis sicherstellen, dass sich im Wirkungskreis von 10 Metern keine Personen aufhalten. -
Seite 63: Kapitel 3 : Technische Daten Und Eigenschaften
Kapitel 3 : Technische Daten und Eigenschaften Abschn.1 Gewicht und Gesamtabmessungen Ausführung TS 50 Gewicht = 125 Kg Abmessungen 1640... -
Seite 64: Abschn.2 Motor Und Allgemeine Informationen
Kapitel 3 : Technische Daten und Eigenschaften Abschn.2 Motor und Allgemeine Informationen Motor Honda GX 200 Hubraum 200 cc Leistung 4,8 kW (6,5 cv) Motor B&S Vanguard Hubraum 205 cc Leistung 4,8 kW (6,5 cv) Für weitere Informationen schlagen Sie bitte die Gebrauchsanweisungen des Motors nach. -
Seite 65: Kapitel 4 : Steuer- Und Kontrollgeräte
Kapitel 4 : Steuer- und Kontrollgeräte Abschn.1 Beschreibung der Steuerungen Dieser Abschnitt enthält eine Übersicht über alle Messgeräte und Steuerelemente des Schlegelmähers. Wenn nicht anders spezifiziert, gilt diese Übersicht für alle Ausführungen. Für den korrekten Gebrauch der Steuerelemente ist Kapitel 5 - Gebrauch aufmerksam zu lesen. - Seite 66 Kapitel 4 : Steuer- und Kontrollgeräte Abschn.1 Beschreibung der Steuerungen 8 - Kraftstofftank 9 - Getriebeölstopfen 10 - Motorölstab 11 - Starterhebel für Benzinmotoren 12 - Motorschalter ON/OF 13 - Schnitthöheneinstellhebel Fig. 4.4 14 - Hebel für Regulierung der Schnitthöhe Fig.
-
Seite 67: Abschn.2 Hebel Für Das Seitliche Verstellen Und Die Höhenverstellung Des Lenkers
Kapitel 4 : Steuer- und Kontrollgeräte Abschn. 2 Hebel für das seitliche- und Höhenverstellung des Lenkers Vor dem Gebrauch des Schlegelmähers im Betriebsmodus ist es empfehlenswert, die Lenkerhöhe an seine eigene Größe und an den Bodentyp (eben oder hügelig) anzupassen. Zum Verstellen der Lenkerhöhe ist auf den Hebel (Abb. -
Seite 68: Kapitel 5 : Gebrauch
Kapitel 5 : Gebrauch Abschn.1 Anlassen / Abstellen des Motors Vor der Aufnahme der Arbeit ist zu kontrollieren, dass Kraftstoff im Tank (10) vorhanden ist. Zum Nachfüllen Kraftstoff einen Trichter Filter verwenden, damit eventuelle Verunreinigungen zurückgehalten werden. VERBOT : Die Maschine nie bei laufendem Motor betanken. - Seite 69 Kapitel 5 : Gebrauch Abschn.1 Anlassen / Abstellen des Motors - Den Gashebel (5) in die mittlere Stellung bringen (Abb. 5.3) - Den Schlegelmäher Anlassen vorbereiten, indem bei Benzinmotoren der Starter-Hebel (11) betätigt wird. Das Gebrauchs- und Wartungshandbuch des Motors nachschlagen - Den Motorschalter ON/OFF auf ON stellen (Abb.
-
Seite 70: Abschn.2 Kupplungshebel Für Den Maschinenvorlauf Und Die Messerbewegung
Kapitel 5 : Gebrauch Abschn.2 Kupplungshebel für den Maschinenvorlauf und die Messerbewegung Jetzt Vorlaufkupplungshebel (Abb. 5.5) nach unten drücken. Der Treibriemen wird gespannt und greift an der Motorriemenscheibe. Dieser Hebel dient Vorwärtsfahren Ihrer Landmaschine. Wenn Vorlaufkupplungshebel losgelassen wird, wird Schlegelmäher angehalten. - Seite 71 Kapitel 5 : Gebrauch Abschn.3 Entriegelungshebel Räder rechts/links Ihr Schlegelmäher verfügt über einen einzigen Vorwärtsgang und erreicht eine Höchstgeschwindigkeit von km/h. Die Entriegelungshebel des rechten und linken Rads (Abb. 5.10) helfen beim Fahrtrichtungswechsel des fahrenden Schlegelmähers. Fig. 5.10 ACHTUNG : Bei der Arbeit an Hängen (Abb.
-
Seite 72: Abschn.4 Schnitthöheneinstellhebel
Kapitel 5 : Gebrauch Abschn.4 Schnitthöheneinstellhebel Der Hebel (17) regelt die Schnitthöhe. Bei Drehen des Hebels in die eine oder andere Richtung wird Messerträgerrolle hochgefahren oder abgesenkt. Wenn eine zu niedrige Schnitthöhe Wenn eine zu niedrige Schnitthöhe eingestellt wird, kann es zu folgenden eingestellt wird, kann es zu folgenden negativen Auswirkungen kommen: negativen Auswirkungen kommen:... -
Seite 73: Kapitel 6 : Wartung Und Einstellungen
Kapitel 6 : Wartung und Einstellungen Abschn.1 Befüllen der Maschine Erforderliche Kraftstoffeigenschaften Die Qualität des verwendeten Kraftstoffs ist ein wichtiger Faktor für die Leistung und für eine lange Lebensdauer des Motors. Der Kraftstoff muss sauber und korrekt raffiniert sein und darf die Bauteile der Kraftstoffversorgungsanlage nicht korrodieren. -
Seite 74: Abschn.2 Regelmäßige Und Außerordentliche Wartung
Kapitel 6 : Wartung und Einstellungen Abschn.2 Regelmäßige und außerordentliche Wartung Motor Kontrollieren Sie täglich den Ölstand und füllen Sie gegebenenfalls Öl nach (Abb. 6.2). Verwenden Sie nur das Öl ESSO UNIFARM 15 - 40 W und das Fett ESSO MULTIPURPOSE. Ein kompletter Motorölwechsel ist in den vom Hersteller des Motors festgesetzten Zeitabständen und auf die... -
Seite 75: Use And Maintenance
USE AND MAINTENANCE... - Seite 76 USE AND MAINTENANCE INDEX Chapter 1: Introduction ............3 ............3 Section 1 Introduction and safety Section 2 Identification of the machine/engine ........5 Section 3 Warranty ................6 Chapter 2 : General rules and safety devices ......8 Section 1 Safety alarm: words, symbols and signs ........
-
Seite 77: Chapter 1: Introduction
Chapter 1: Introduction Section 1 Introduction and safety CAUTION : For your own safety, please read this manual carefully before using the machine, as well as the attached handbook on general Norms. Keep these books for future reference. The aim of this manual is to allow The aim of this manual is to allow Fig. -
Seite 78: Section 1 Introduction And Safety
These form a complete documentation to be kept with the machine. All rights reserved, this manual cannot be reproduced of copied, as a whole or in part, in any form, without written permission of Emak. -
Seite 79: Section 2 Identification Of The Machine/Engine
Chapter 1: Introduction Section 2 Identification of the machine / engine The flail mower can be identified with the data as on appropriate the identification label on the base of the chassis (Fig. 1.2). It is important to write down those data for a quick and efficient service, when spare parts need to be ordered or when requesting information or technical... -
Seite 80: Section 3 Warranty
Chapter 1: Introduction Section 3 Guarantee All Emak products are covered by a Once the installation has been done guarantee that – under determinate correctly, a regular maintenance routine conditions - includes material faults is useful to prevent faults. However, and construction errors. - Seite 81 Chapter 1: Introduction Section 3 Guarantee and all other technical information necessary in order to guarantee a high WARNING : standard of assistance for the repairs The assembly of non-original parts may result in a lesser working WARNING : quality of the spare part. The Builder of the flail mower will not assume In some images in this Operator any responsibility for whatever leak...
-
Seite 82: Chapter 2: General Safety Measures And Regulations
Chapter 2: General safety measures and regulations Section 1 Safety alarm: words, symbols and signs The safety of the operator is one of the main worries or whoever designs and WARNING : develops a new flail mower. Our design department, therefore, aim to offer This symbol is a warning against as many safety devices as possible. -
Seite 83: Section 2 Precautions For Safety At Work
Chapter 2: General safety measures and regulations Section 2 Precautions for safety at work CAUTION : Before starting any activity, please consult this manual and the specific safety booklet: General safety regulations This booklet is of fundamental importance because it describes all conditions and procedures that allow the operator to work in complete safety, avoiding risky manoeuvres that could harm the operator or anybody nearby. - Seite 84 Chapter 2: General safety measures and regulations Section 2 Precautions for safety at work Please observe following Protect yourself. precautions: When at work, wear all protective gear (Fig. 2.2) and necessary personal - NEVER allow children or non- security measures at your disposal. qualified people to use your flail mower.
-
Seite 85: Maximum Values Detected In The Range Of Available Engines
Chapter 2: General safety measures and regulations Section 2 Precautions for safety at work Individual means of protection against noise These individual means of protection serve to lower the sound energy transmitted to the ear by air. They are used when it is not possible to avoid a damaging exposure in any other way. -
Seite 86: Section 3 Risk Operations
Chapter 2: General safety measures and regulations Section 3 Risk operations - Before starting the machine, always make sure that other people stand clear of the area around the rotor (Fig. 2.4). During the use of the mower, During the use of the mower, make sure that other people keep make sure that other people keep a distance of at least 10 m. -
Seite 87: Chapter 3: Technical Data And Characteristics
Chapter 3: Technical data and characteristics Section 1 Weights and sizes Version TS 50 Weight = 125 Kg Sizes 1640... -
Seite 88: Section 2 Engine
Chapter 3: Technical data and characteristics Section 2 Engine and General Information Honda Engine GX 200 Capacity 200 cc Power 4,8 KW (6,5 cv) B&S Vanguard Engine Capacity 205 cc Power 4,8 KW (6,5 cv) For further information please consult the instruction booklet of the Engine Fig. -
Seite 89: Chapter 4: Control Commands And Instruments
Chapter 4: Control commands and instruments Section 1 Description of the commands In this paragraph we offer a range of all instruments and commands as present on the flail mower. If not specified differently, these are valid for all versions. Please read carefully Chapter 5 –... - Seite 90 Chapter 4: Control commands and instruments Section 1 Description of the commands 8 - Fuel tank cap 9 - Gear oil cap 10 - Engine oil level bar 11 - Start lever for gasoline engines 12 - Engine ON/OFF 13 -Engine starting handle Fig.
-
Seite 91: Section 2 Height And Side Handlebar Control Levers
Chapter 4: Control commands and instruments Section 2 Height and side handlebar control levers Before using the flail mower at work, we advise you regulate the working height of the handle bar as most convenient for you and the nature of the terrain (flat or hilly). -
Seite 92: Chapter 5: Use
Chapter 5: Use Section 1 Start/stop engine Before starting any work activity, check that there is enough fuel in the tank (10). Use a funnel with a net filter when topping up fuel, to prevent any impurities from entering the tank. STOP : Never top up the vehicle with fuel while the engine is going. - Seite 93 Chapter 5: Use Section 1 Start/stop engine - Put the gas control lever (5) onto half (Fig. 5.3). - Set up the flail mower for ignition by using the Starter Lever (11) for petrol engines. Refer engine maintenance booklet. - Put the engine ON/OFF switch onto ON (12, Fig.
- Seite 94 Chapter 5: Use Sect.2 Blade movement and machine groundspeed clutch lever At this stage if you lower the groundspeed clutch lever (Fig. 5.5) the transmission belt will extend gripping on the engine pulley, this lever allows your machine to move forwards. If the groundspeed clutch lever is released the flail mower will stop.
- Seite 95 Chapter 5: Use Sect.3 RH/LH wheel release levers Your flail mower is equipped with a single forward gear and it reaches a top speed of 2.1 km/h. The right and left hand wheel release levers (Fig. 5.10) help the flail mower change direction when in movement.
- Seite 96 Chapter 5: Use Sect.4 Cutting height adjustment lever Lever (17) adjusts the cutting height. Turning the lever in one direction or the other raises or lowers the blade holder roller. If the cutting height is set too low, the following negative effects could occur: - foreign objects such as stones etc.
-
Seite 97: Chapter 6: Maintenance And Controls
Chapter 6: Maintenance and controls Section 1 Topping up of the machine Fuel requisites The quality of the used fuel is an important factor for the resulting performance and for a satisfying life span of the engine. The fuel has to be clean, refined and non-corrosive to the parts of the feeding system. -
Seite 98: Section 2 Regular And Exceptional Maintenance
Chapter 6: Maintenance and controls Section 2 Regular and exceptional maintenance Engine Check every day the oil level and if necessary fill up (Fig. 6.2). Use only ESSO UNIFARM 15 - 40 W oil and ESSO MULTIPURPOSE grease. Complete renewal of the engine oil needs to be done at intervals and in specific ways as established by the Builder of the engine. -
Seite 99: Uso Y Mantenimiento
USO Y MANTENIMIENTO... - Seite 100 USO Y MANTENIMIENTO INDICE Capítulo 1 : Preliminar ............... 3 Sec.1 Introducción y seguridad ............3 Sec.2 Identificación de la máquina / motor .......... 5 Sec.3 Garantía ..................6 Capítulo 2 : Normas generales y dispositivos de seguridad . 8 Palabras, símbolos y calcomanías de alarmas y seguridad ..
- Seite 101 Capítulo 1 : Preliminar Sec.1 Introducción y seguridad ATENCIÓN : Antes del uso de la máquina, lea atentamente este manual y el libreto anexado sobre Normas generales para vuestra seguridad y consérvelo para futuras consultas. El objeto de esta publicación es aquello El objeto de esta publicación es aquello de permitir al propietario y al operador de permitir al propietario y al operador...
- Seite 102 Emak. estar exactamente informados sobre las relativas normas de seguridad (prevención de accidentes). Se recomienda a los clientes de dirigirse...
- Seite 103 Capítulo 1 : Preliminar Sec.2 Identificación de la máquina / motor La trituradora de barras se identifica a través de los datos impresos en la propia placa de identificación colocada en la base del bastidor (Fig. 1.2). Es importante tomar nota de tales datos, para asegurarse un servicio veloz y eficiente, cuando se solicitan repues tos...
- Seite 104 Capítulo 1 : Preliminar Sec.3 Garantía Los productos Emak están cubiertos instalación efectuada por una garantía que, con determinadas correctamente, asociada con un regular condiciones, cubre los defectos de mantenimiento, previene daños. Si de material o de construcción. Este libreto...
- Seite 105 Capítulo 1 : Preliminar Sec.3 Garantía instrumentos y aparatos diagnóstico. NOTA : Reciben regularmente las Noticias de Asistencia, poseen todos los Manuales El montaje de partes no originales y las demás informaciones técnicas puede comportar el uso de un necesarias para garantizar que las repuesto de calidad inferior.
- Seite 106 Capítulo 2 : Normas generales y dispositivos de seguridad Sec.1 Palabras, símbolos y calcomanías de alarmas y seguridad La seguridad del operador representa NOTA : una de las principales preocupaciones de quien proyecta y desarrolla una nueva Es una advertencia contra una trituradora de barras, los proyectistas circunstancia que si no se observa tratan de crear el mayor número posible...
- Seite 107 Capítulo 2 : Normas generales y dispositivos de seguridad Sec.2 Precauciones para trabajar en seguridad ATENCIÓN : Antes de iniciar cualquier actividad consulte este manual y específicamente el libreto sobre la seguridad : Normas general para vuestra seguridad Este libreto es de fundamental importancia ya que en el mismo se describen Este libreto es de fundamental importancia ya que en el mismo se describen todos los procedimientos y modalidades que permiten al operador trabajar todos los procedimientos y modalidades que permiten al operador trabajar...
- Seite 108 Capítulo 2 : Normas generales y dispositivos de seguridad Sec.1 Palabras, símbolos y calcomanías de alarmas y seguridad Observar las siguientes precauciones: Protéjase usted mismo. Endose toda la indumentaria protectiva - NO permita a niños o a personal no (Fig. 2.1) y los dispositivos para la cualificado utilizar vuestra trituradora seguridad personal puestos a vuestra de barras.
- Seite 109 Capítulo 2 : Normas generales y dispositivos de seguridad Sec.2 Precauciones para trabajar en seguridad Medios individuales de protección contra el ruido Los medios individuales de protección sirven para atenuar la energía sonora transmitida al oído vía aérea. Se deben utilizar cuando no es posible evitar en otro modo una exposición dañosa.
- Seite 110 Capítulo 2 : Normas generales y dispositivos de seguridad Sec.8 Operaciones de riesgo - Antes de encender la máquina asegúrese siempre que ninguna persona se encuentre en proximidad del rotor de cuchillas (Fig. 2.3). Durante el uso del triturador de barras Durante el uso del triturador de barras asegúrese que no se encuentren asegúrese que no se encuentren...
- Seite 111 Capítulo 3 : Datos y características técnicas Sec.1 Pesos y medidas totales Versión TS 50 Peso = 125 Kg Dimensiones 1640...
- Seite 112 Capítulo 3 : Datos y características técnicas Sec.2 Motor Motore Honda GX 200 Cilindrada 200 cc Potencia 4,8 kW (6,5 cv) Motore B&S Vanguard Cilindrada 205 cc Potencia 4,8 kW (6,5 cv) Para mayor información consultar el libreto de instrucciones del Motor Fig.
- Seite 113 Capítulo 4 : Mandos e instrumentos de control Sec.1 Descripción de los mandos En este párrafo se realiza una panorámica de todos los instrumentos y mandos presentes en la trituradora de barras. Si no se específica diversamente, los mismos son válidos para todas las versiones.
- Seite 114 Capítulo 4 : Mandos e instrumentos de control Sec.1 Descripción de los mandos 8 - Tapa depósito carburante 9 - Tapa aceite transmisión 10 - Varilla nivel aceite motor 11 - Palanca Starter para motores a gasolina 12 - Interruptor motor ON/OFF 13 - Manija arranque motor Fig.
- Seite 115 Capítulo 4 : Mandos e instrumentos de control Sec.2 Palancas regulaciones en alteza y lateral del manubrio Antes de utilizar la trituradora de barras en modalidad de trabajo se debería regular la alteza del manubrio en base a la propia estatura y a la naturaleza del terreno (llano o montañoso).
- Seite 116 Capítulo 5 : Uso Sec.1 Encendido del motor Antes de iniciar cualquier actividad laboral controle primero la presencia de carburante en el depósito (10), en caso de abastecimiento utilice un embudo con filtro de red en modo de retener eventuales impurezas. PROHIBICIÓN : Nunca efectúe un reabastecimiento con el motor del vehículo encendido...
- Seite 117 Capítulo 5 : Uso Sec.1 Encendido / detención del motor - Lleve la maneta mando gas (5) a mitad de carrera (Fig. 5.3). - Prepare la segadora de cuchillas para el encendido utilizando la Palanquita Starter (11) para motores de gasolina. Consulte el libreto uso y mantenimiento del motor.
- Seite 118 Capítulo 5 : Uso Sec.2 Palanca embrague avance máquina y movimiento cuchillas En este momento, si baja la Palanca embrague avance (Fig. 5.5), correa de la transmisión se tensará enganchada en la polea del motor, esta palanca permite que su motocultor avance hacia adelante.
- Seite 119 Capítulo 5 : Uso Sec.3 Palancas desbloqueo ruedas DCH/IZQ Su segadora de cuchillas está dotada de una sola marcha hacia adelante y alcanza una velocidad máxima de 2,1 Km/h. Las Palancas de desbloqueo ruedas derecha e izquierda (Fig. 5.10) ayudan al cambio de dirección de la segadora de cuchillas durante el avance.
- Seite 120 Capítulo 5 : Uso Sec.4 Palanca regulación alteza corte La palanca (17) regula la alteza de corte. Girando la palanca en un sentido o en el otro se alza o se baja el rodillo porta-cuchillas. Si la alteza de corte se regula Si la alteza de corte se regula demasiado baja podrían verificarse los demasiado baja podrían verificarse los...
- Seite 121 Capítulo 6 : Mantenimiento y regulaciones Sec.1 Abastecimiento de la máquina Requisitos del combustible La calidad del combustible usado es un factor importante para la prestación resultante y para una duración satisfactoria del motor. Los combustibles deben ser limpios, bien refinados y no corrosivos para las partes del sistema de alimentación.
- Seite 122 Capítulo 6 : Mantenimiento y regulaciones Sec.2 Mantenimiento periódico y extraordinario Motor Todos los días controle el nivel del aceite y si es necesario, reabastecerlo. (Fig. 6.2). Utilice sólo aceite ESSO UNIFARM grasa ESSO MULTIPURPOSE. El cambio completo del aceite debe ser efectuado en los intervalos y con las modalidades establecidas por el Constructor del motor.
-
Seite 123: Obs Uga I Konserwacja
OBS UGA I KONSERWACJA... - Seite 124 OBS UGA I KONSERWACJA SPIS TRE CI Rozdzia 1: Prezentacja ................3 Cz. 1 Wprowadzenie i bezpieczeństwo..........3 Cz. 2 Identyfikacja urządzenia/silnka ..........5 Cz. 3 Gwarancja ................6 Rozdzia 2: Dyspozycje ogólne i zabezpieczenia ......... 8 Cz. 1 Słowa, symbole oraz naklejki związane z alarmami i bezpieczeństwem..
- Seite 125 Rozdzia 1: Prezentacja Rozdzia 1: Prezentacja Cz. 1 Wprowadzenie i bezpiecze stwo Cz. 1 Wprowadzenie i bezpiecze stwo BACZNO Przed przystąpieniem do użytkowania urządzenia należy uważnie przeczytać niniejszą instrukcję obsługi oraz dołączoną broszurę opisującą dyspozycje ogólne dotyczące bezpieczeństwa; należy je zachować na przyszłość. Celem niniejszej publikacji...
- Seite 126 Emak. odnośnych przepisów bezpieczeństwa (zapobieganie wypadkom). W razie konieczności wykonania jakichkolwiek regulacji lub skorzystania z pomocy technicznej należy się zwrócić do autoryzowanego sprzedawcy. Z uwagi na to, że bezpieczeństwo operatora stanowi jeden z głównych priorytetów...
- Seite 127 Rozdzia 1: Prezentacja Cz. 2 Identyfikacja urz dzenia/silnika Kosiarkę bijakową zidentyfikować można poprzez dane wytłoczone na odpowiedniej tabliczce umieszczonej na podstawie konstrukcji (Rys. 1.2). Zaleca się zapisanie takich danych w celu zapewnienia szybkiej i sprawnej obsługi podczas zamawiania części zamiennych lub żądania informacji lub objaśnień...
- Seite 128 Rozdzia 1: Prezentacja Cz. 3 Gwarancja Produkty marki Emak podlegają Prawidłowo przeprowadzona gwarancji, która pod określonymi instalacja w połączeniu z regularną warunkami, obejmuje wady konserwacją pomagają zapobiec materiałowe konstrukcyjne. usterkom. Gdyby mimo to wystąpiły Niniejsza broszura publikowana jakiekolwiek problemy z działaniem jest z myślą...
- Seite 129 Rozdzia 1: Prezentacja Cz. 3 Gwarancja posiadają wszystkie podręczniki UWAGA: serwisowe oraz wszystkie pozostałe informacje techniczne niezbędne dla zagwarantowania, że naprawy Montaż nieoryginalnych części serwisowanie będą spełniać może prowadzić do stosowania wymagane standardy. części zamiennych gorszej jakości. Producent kosiarki bijakowej nie ponosi żadnej odpowiedzialności za jakiekolwiek straty lub szkody powstałe...
- Seite 130 Rozdział 2: Dyspozycje ogólne i zabezpieczenia Cz. 1 S owa, symbole oraz znaki alarmowe i bezpiecze stwa Z uwagi na to, że bezpieczeństwo UWAGA: operatora stanowi jeden z głównych priorytetów projektantów urządzeń Jest przestroga, której podczas prac nad nową kosiarką nieprzestrzeganie może bijakową, starają...
- Seite 131 Rozdział 2: Dyspozycje ogólne i zabezpieczenia Cz. 2 rodki ostro no ci zwi zane z bezpieczn prac BACZNO Przed przystąpieniem do jakichkolwiek czynności należy się zapoznać z niniejszą instrukcją obsługi oraz broszurą dotyczącą bezpieczeństwa: Dyspozycje ogólne dotycz ce bezpiecze stwa Niniejsza broszura jest niezwykle ważna, gdyż...
- Seite 132 Rozdział 2: Dyspozycje ogólne i zabezpieczenia Cz. 2 rodki ostro no ci zwi zane z bezpieczn prac Należy chronić własne bezpieczeństwo. Należy przestrzegać następujących Należy nosić odpowiednią odzież środków ostrożności: ochronną (Rys. 2.1) oraz dostępny • NIE pozwalać nigdy dzieciom, sprzęt ochrony osobistej stosowny do młodzieży lub niewykwalifikowanemu wykonywanej pracy.
- Seite 133 Rozdział 2: Dyspozycje ogólne i zabezpieczenia Cz. 2 rodki ostro no ci zwi zane z bezpieczn prac Indywidualne rodki ochrony s uchu Indywidualne środki ochrony słuchu służą pochłaniania energii akustycznej docierającej uszu drogą powietrzną. Są stosowane w sytuacjach, w których nie można uniknąć...
- Seite 134 Rozdział 2: Dyspozycje ogólne i zabezpieczenia Cz. 2 Czynno ci wi ce si z ryzykiem • Przed uruchomieniem urządzenia należy się zawsze upewnić, czy w pobliżu wirnika ostrzy (Rys. 2.3) nie przebywają żadne osoby. Podczas pracy kosiarką zespołem tnąco-mielącym należy się upewnić, że w promieniu 10 metrów nie przebywają...
- Seite 135 Rozdział 3: Dane i parametry techniczne Cz. 1 Ci ary i wymiary gabarytowe Wersja TS 50 Waga = 125 Kg Wymiary 1640...
- Seite 136 Rozdział 3: Dane i parametry techniczne Cz. 2 Silnik Silnik Honda GX 200 Pojemno skokowa 200 cc Moc 4,8 kW (6,5 cv) Silnik B&S Vanguard Pojemno skokowa 205 cc Moc 4,8 kW (6,5 cv) W celu uzyskania dodatkowych informacji nale y si zapozna instrukcj obs ugi silnika.
- Seite 137 Rozdział 4: Przyciski i elementy sterownicze Cz. 1 Opis elementów sterowniczych niniejszym rozdziale opisane zostały wszystkie przyrządy i elementy sterownicze zainstalowane w kosiarce bijakowej. Jeżeli nie podano inaczej, opis dotyczy wszystkich wersji. Aby prawidłowo używać elementów sterowniczych wymienionych poniżej, należy uważnie przeczytać rozdział 5 - Obsługa.
- Seite 138 Rozdział 4: Przyciski i elementy sterownicze Cz. 1 Opis elementów sterowniczych Korek zbiornika paliwa Korek wlewu oleju przekładniowego 10. Miarka poziomu oleju silnikowego 11. Dźwignia rozrusznika dla silników benzynowych 12. Przełącznik silnika ON/OFF Fig. 4.4 13. Uchwyt uruchamiający silnik 14. Dźwignia regulująca wysokość cięcia Fig.
- Seite 139 Rozdział 4: Przyciski i elementy sterownicze Cz. 2 D wignie reguluj ce wysoko i po o enie boczne uchwytu Przed użyciem kosiarki bijakowej należy dostosować wysokość uchwytu do własnego wzrostu i typu terenu (płaski lub pagórkowaty). Aby podnieść lub obniżyć uchwyt, należy zadziałać na dźwignię...
- Seite 140 Rozdział 5: Obsługa Cz. 1 Uruchamianie/zatrzymywanie silnika Przed rozpoczęciem jakiejkolwiek pracy należy przede wszystkim sprawdzić, czy w baku (10) jest paliwo; do tankowania należy używać lejka z filtrem siatkowym zatrzymującym ewentualne zanieczyszczenia. ZAKAZ: Nie tankować nigdy urządzenia przy włączonym silniku. Następnie należy również...
- Seite 141 Rozdział 5: Obsługa Cz. 1 Uruchamianie/zatrzymywanie silnika • Przygotować kosiarkę bijakową do rozruchu, działając na dźwignię rozrusznika (11) przypadku silników benzynowych. Zajrzeć do instrukcji obsługi i konserwacji silnika. • Ustawić przełącznik silnika ON/ OFF w położenie włączone, czyli ON (12, Rys.
- Seite 142 Rozdział 5: Obsługa Cz. 2 D wignia sprz g a nap du urz dzenia i ruchu ostrzy Na tym etapie, jeżeli opuści się dźwignię sprzęgła napędu (Rys. 5.5), pas napędu napręży się i będzie przylegać do kółka pasowego silnika, co umożliwi poruszanie się kultywatora. Jeżeli dźwignia sprzęgła...
- Seite 143 Rozdział 5: Obsługa Cz. 3 D wignie odblokowuj ce ko a prawe/lewe Kosiarka bijakowa posiada tylko jeden bieg jazdy do przodu i osiąga prędkość maks. 2,1 km/h. Dźwignie odblokowujące koła prawe i lewe (Rys. 5.10) ułatwiają zmianę kie- runku jazdy kosiarki bijakowej. Fig.
- Seite 144 Rozdział 5: Obsługa Cz. 4 D wignia reguluj ca wysoko ci cia Dźwignia (17) reguluje wysokość cięcia. Obracając dźwignię w jednym lub w drugim kierunku, podnosi się lub opuszcza wałek z ostrzami. Jeżeli ustawiona wysokość cięcia jest zbyt niska, mogą wystąpić następujące problemy: •...
- Seite 145 Rozdział 6: Konserwacja i regulacje Cz. 1 Tankowanie urz dzenia Wymogi dotycz ce paliwa Jakość stosowanego paliwa jest ważnym czynnikiem wpływającym na wydajność pracy i żywotność silnika. Paliwa muszą być czyste, rafinowane mogą zawierać substancji powodujących korozję elementów układu paliwowego. Należy się...
- Seite 146 Rozdział 6: Konserwacja i regulacje Cz. 2 Konserwacja okresowa i specjalna Silnik Codziennie należy kontrolować poziom oleju i w razie potrzeby uzupełniać go (Rys. 6.2). Stosować tylko olej ESSO UNIFARM 15 - 40 W i smar ESSO MULTIPURPOSE. Całkowitą wymianę oleju silnikowego należy przeprowadzać...
-
Seite 149: Certificato Di Garanzia
CERTIFICATO DI GARANZIA Questa macchina è stata concepita e realizzata - Utilizzo non corretto del prodotto o manomis attraverso le più moderne tecniche produttive. La sioni, Ditta costruttrice garantisce i propri prodotti per - Utilizzo di lubrificanti o combustibili non adat- un periodo di 24 mesi dalla data di acquisto per utilizzo privato e hobbistico. -
Seite 150: Certificat De Garantie
CERTIFICAT DE GARANTIE Cette machine a été conçue et réalisée avec les - Utilisation incorrecte ou transformations non techniques de production les plus modernes. Le autorisées du produit. fabricant garantit ses produits pendant une période - Utilisation de lubrifiants ou de combustibles de 24 mois à... -
Seite 151: Garantie-Zertificat
GARANTIE-ZERTIFICAT Diese Maschine wurde mit den modernsten tung, Produktionstechniken konzipiert und gebaut. Der - Bei nicht korrekter Verwendung oder Verän- Hersteller garantiert seine Produkte für einen derungen des Produkts, Zeitraum von 24 Monaten ab dem Kaufdatum bei - Bei Benutzung von ungeeigneten Schmiermit- Privat- und Heimwerkereinsatz. -
Seite 152: Warranty Certificate
WARRANTY CERTIFICATE This machine has been designed and manufactured - the machine has been used for improper using the most modern techniques. The manufac- purposes or has been modified in any way, turer guarantees its products for 24 months from - unsuitable lubricants and fuels have been the date of purchase, for private and hobby use. -
Seite 153: Certificado De Garantía
CERTIFICADO DE GARANTÍA Esta máquina ha sido proyectada y fabricada con - Falta evidente de mantenimiento. las técnicas más modernas. - Uso incorrecto o manipulación del producto. El fabricante garantiza sus productos durante 24 - Uso de lubricantes o combustibles inadecua- meses desde la fecha de compra, siempre que el dos. -
Seite 154: Karta Gwarancyjna
KARTA GWARANCYJNA Niniejsza maszyna została zaprojektowana i wyko- braku konserwacji, nana w oparciu o najnowsze techniki produkcyjne. - uszkodzeń powstałych na skutek niewłaściwej Producent udziela gwarancji na swoje wyroby na eksploatacji, okres dwudziestu czterech (24) miesięcy od daty - uszkodzeń powstałych na skutek stosowania zakupu do celów prywatnych i hobbystycznych. - Seite 156 42011 Bagnolo in Piano (RE) Italy Tel. +39 0522 956611 • Fax +39 0522 951555 service@emak.it • www.emak.it ATTENZIONE! - Questo manuale deve accompagnare la macchina durante tutta la sua vita. ATTENTION! - Le manuel doit accompagner la machine pour toute sa vie.