Inhaltsverzeichnis
Werbung
Verfügbare Sprachen
Verfügbare Sprachen
Quicklinks
Werbung
Inhaltsverzeichnis

Verwandte Anleitungen für LGB 030T T.I.V.


Inhaltszusammenfassung für LGB 030T T.I.V.
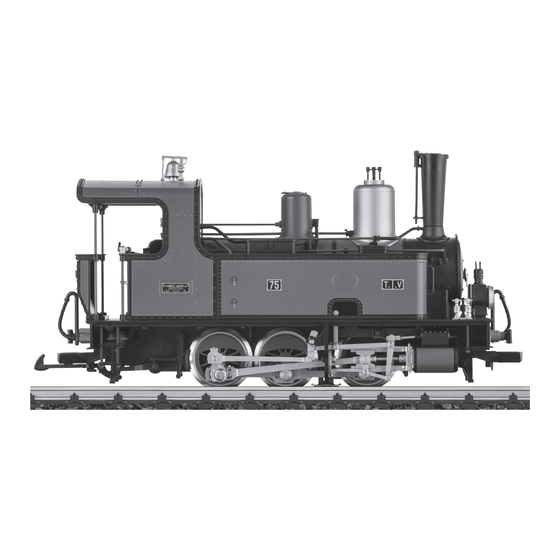
- Seite 1 Modell der Dampflok 030T T.I.V. 20781...
-
Seite 3: Inhaltsverzeichnis
Seite Pagina Inhaltsverzeichnis: Inhoudsopgave: Sicherheitshinweise Veiligheidsvoorschriften Wichtige Hinweise Belangrijke aanwijzing Funktionen Functies Betriebshinweise Bedrijfsaanwijzingen Wartung und Instandhaltung Onderhoud en handhaving Ersatzteile Onderdelen Página Table of Contents: Page Indice de contenido: Safety Notes Aviso de seguridad Important Notes Notas importantes Funciones Functions Information about operation Instrucciones de uso... -
Seite 4: Sicherheitshinweise
Austauschen des Haftreifens (E126 174) • Sechskantschraube am hinteren Treibrad mit Haftreifen lösen. Wichtige Hinweise • Gestänge abnehmen. • Die Bedienungsanleitung ist Bestandteil des Produktes und muss deshalb aufbe- • Mit einem kleinen flachen Schraubendreher den alten Haftreifen entfernen: Den wahrt sowie bei Weitergabe des Produktes mitgegeben werden. alten Haftreifen aus der Rille (Nut) im Treibrad hebeln. • Für Reparaturen oder Ersatzteile wenden Sie sich bitte an Ihren LGB-Fachhändler. • Vorsichtig den neuen Haftreifen über das Rad schieben und in die Rille (Nut) des • Gewährleistung und Garantie gemäß der beiliegenden Garantieurkunde. Rads einsetzen. • Entsorgung: www.maerklin.com/en/imprint.html • Überprüfen, daß der Haftreifen richtig sitzt. Funktionen • Das Modell ist für den Betrieb auf LGB-Zweileiter-Gleichstrom-Systemen mit herkömmlichen LGB-Gleichstrom-Fahrpulten vorgesehen (DC, 0 - 24 V). -
Seite 5: Safety Notes
Important Notes Replacing the traction tire (E126 174) • The operating instructions are a component part of the product and must therefore • Loosen the hex head screw on the rear drive wheel with a traction tire. be kept in a safe place as well as included with the product, if the latter is given to • Remove the side rods and drive rods. someone else. • Use a small, straight-blade screwdriver to replace the traction tire: Pry the old • Please see your authorized LGB dealer for repairs or spare parts. traction tire out of the wheel groove. • The warranty card included with this product specifies the warranty conditions. • Gently insert the new traction tire into the wheel groove. • Disposing: www.maerklin.com/en/imprint.html • Make sure that the traction tire is seated properly in the wheel groove. Functions • This model is designed for operation on LGB two-rail DC systems with conventio- nal LGB DC train controllers or power packs (DC, 0 - 24 volts). -
Seite 6: Remarques Importantes Sur La Sécurité
• Desserrer la vis hexagonale située sur la roue motrice arrière munie d’un bandage détaillant-spécialiste LGB. d’adhérence. • Garantie légale et garantie contractuelle conformément au certificat de garantie • Retirer les bielles. ci-joint. • À l’aide d’un petit tournevis à lame droite : Sortir avec précaution le vieux pneu de • Elimination : www.maerklin.com/en/imprint.html la gorge de la roue. • Placer avec précaution le pneu neuf dans la gorge de la roue. Fonctionnement • S’assurer que le pneu de traction est bien assis dans la gorge de la roue. • Le modèle est prévu pour être exploité sur des systèmes deux rails c.c. LGB avec des pupitres de commandes LGB classiques en courant continu (DC, 0 - 24 V). • Interface pour l’installation d’un décodeur DCC Conseil : Pour ce modèle, utilisez un régulateur de marche avec courant moteur supérieur à 1 A. Ce modèle est équipé de dispositifs d’attelage standard LGB à l’avant et à l’arrière. Commutateur de mode d’exploitation Dans la cabine de conduite du modèle se trouve un interrupteur à 4 positions pour la sélection du mode d’exploitation (fig. 1 & 2). Pos. 0 Locomotive garée hors tension Pos. 1 Eclairage activés... -
Seite 7: Veiligheidsvoorschriften
Vervangen van de antislipbanden (E126 174) Belangrijke aanwijzing • Zeskantschroef van het achterste drijfwiel met de antislipband losdraaien. • De gebruiksaanwijzing is een bestandsdeel van het product en dient derhalve • Drijfstangen losnemen. bewaard en bij doorgegeven van het product meegegeven te worden. • Met een platte schroevendraaier de oude antislipband verwijderen; de oude • Voor reparaties en onderdelen kunt u zich wenden tot uw LGB-dealer antislipband uit de gleuf in het drijfwiel wippen. • Vrijwaring en garantie overeenkomstig het bijgevoegde garantiebewijs. • Voorzichtig de nieuwe antislipband op het wiel schuiven en in de gleuf van het wiel • Afdanken: www.maerklin.com/en/imprint.html plaatsen. Functies • Controleren of de antislipband juist is geplaatst. -
Seite 8: Aviso De Seguridad
Retirar el anillo exterior del cristal de la lámpara. Apalancar con cuidado el cristal del del producto. farol y retirarlo. Extraer del portalámparas con unas pinzas la lámpara de incande- • Para reparaciones o recambios, por favor diríjase a su distribuidor profesional de LGB. scencia enchufada. Insertar una lámpara de incandescencia nueva. Rensamblar el • Responsabilidad y garantía conforme al documento de garantía que se adjunta. -
Seite 9: Avvertenze Per La Sicurezza
Tale modello è equipaggiato con un’interfaccia da Decoder per l’inserimento del • Tale modello deve venire impiegato solamente con un sistema di esercizio destina- Decoder (55028). Su tale interfaccia da Decoder si trova un ponticello. Rimuovere tale to a questo scopo. ponticello e collegare il Decoder in luogo di questo. Noi consigliamo di fare installare • Si impieghino soltanto alimentatori “switching” da rete e trasformatori che corris- il Decoder nel reparto assistenza LGB. pondano alla Vostra tensione di rete locale. Quando tale Decoder è installato nella locomotiva, il commutatore del tipo di eserci- • Tale modello deve venire alimentato soltanto da parte di una sola sorgente di zio è privo di funzionalità. potenza. -
Seite 10: Ersatzteile
Hinweis: Einige Teile werden nur ohne oder mit anderer Farbgebung angeboten. Teile, die hier nicht aufgeführt sind, können nur im Rahmen einer Reparatur im Märklin-Reparatur- Service repariert werden. Bitte berücksichtigen Sie, dass die Ersatzteile zu diesem werkseitig gealterten Modell nur im nicht gealterten Zustand verfügbar sind. - Seite 11 1 Schornstein, Deckel , Bohrniete E266 846 2 Dampfschlot E185 949 3 Pfeife,Ventil, Glocke E266 847 4 Schraube E124 206 5 Griffe, Bügel am Führerhaus E266 848 6 Schraube E124 010 7 Führerhausfenster E264 038 8 Sechskantmutter E129 249 9 Handlaufstange, Halter, Schaltstange E266 851 10 Schraube E124 205 11 Schraube E124 014 12 Beilagscheibe E124 208 13 Stirnlaterne unten E133 996...
- Seite 12 Use in the USA without this certification is not permitted and absolves us of any liability. If you should want such certification to be done, please contact us – also due to the additional costs incurred for this. Gebr. Märklin & Cie. GmbH Stuttgarter Straße 55 - 57 73033 Göppingen 264082/0416/Sm1Ef Änderungen vorbehalten Germany www.maerklin.com/en/imprint.html www.lgb.de © Gebr. Märklin & Cie. GmbH...