Herunterladen Inhalt Inhalt Diese Seite drucken
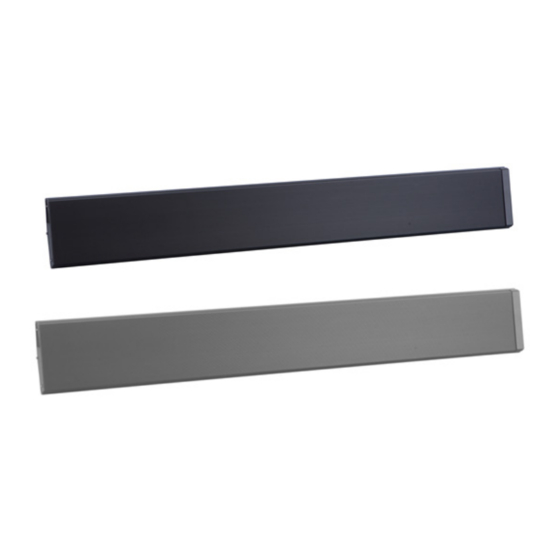
Burda PerfectClime RELAX DARK IRC IP55 Montage- Und Gebrauchsanweisungen

Burda PerfectClime RELAX DARK IRC IP55 Montage- Und Gebrauchsanweisungen

Vorschau ausblenden Andere Handbücher für PerfectClime RELAX DARK IRC IP55:

Werbung

Verfügbare Sprachen
  • DE

Verfügbare Sprachen

  • DEUTSCH, seite 1
RELAX DARK IRC IP55
MONTAGE- UND GEBRAUCHSANWEISUNG
INSTALLATION AND OPERATING INSTRUCTIONS
NOTICE D'INSTALLATION ET D'UTILISATION
MANUALE D´USO E MANUTENZIONE
USO Y MANTENIMIENTO
Irrtum und technische Änderungen vorbehalten - Subject to errors and technical changes - Sous reserve d'erreurs et de modifications techniques
- Excepto erro ou alteracao tecnica - Salvo error o modificacion tecnica!
Burda Worldwide Technologies GmbH – Rudolf-Diesel Straße 18 – 65760 Eschborn
T: +49 6173 324240 - F:+49 6173 3242424 - info@burdawtg.de – www.burdawtg.de

Werbung

Inhaltsverzeichnis
loading

Inhaltszusammenfassung für Burda PerfectClime RELAX DARK IRC IP55

  • Seite 1 Irrtum und technische Änderungen vorbehalten - Subject to errors and technical changes - Sous reserve d‘erreurs et de modifications techniques - Excepto erro ou alteracao tecnica - Salvo error o modificacion tecnica! Burda Worldwide Technologies GmbH – Rudolf-Diesel Straße 18 – 65760 Eschborn T: +49 6173 324240 - F:+49 6173 3242424 - info@burdawtg.de – www.burdawtg.de...
  • Seite 2: Bestimmungsgemäße Verwendung

    weisungen strikt befolgt werden sollten. MONTAGE- UND GEBRAUCHSANWEISUNG Sehr geehrter Kunde, • Verwenden Sie nur die Spannung, bitte lesen Sie folgende Hinweise vor Inbetrieb- die auf dem Typenschild dieses Geräts nahme aufmerksam durch. Sie geben wichtige In- angegeben ist. formationen für Ihre Sicherheit und den Gebrauch •...
  • Seite 3 • Schließen Sie das Gerät nur an eine oder ähnliches zum Trocknen über das Gerät legen! Überhitzungs- u. Brandge- vorschriftsmäßig installierte Schutzkon- fahr! takt-Steckdose an. Bei Problemen mit dem Anschluss ist zu prüfen, dass die Sicherung • Der Schwenkwinkel darf nicht während des Betriebes verstellt werden! Verbren- nicht durch weitere Stromabnehmer über- nungsgefahr!
  • Seite 4: Montage

    • Lassen Sie das Gerät erst abkühlen, fen Sie keine Teppiche oder Läufer darüber. Legen Sie das Kabel nicht so hin, das darüber gestolpert bevor Sie es tragen und aufbewahren! werden kann. • Das Gerät nicht in kleinen Räumen ver- •...
  • Seite 5: Technische Daten

    - Stecken Sie das Gerät in die Steckdose der Haupt- • Um die Gefahr von Betriebsstörungen zu stromversorgung, die Heizung beginnt zu heizen. vermeiden, muss das Gerät alle 6 Monate für ein - Ziehen Sie das Gerät aus der Steckdose oder paar Stunden in Betrieb genommen werden.
  • Seite 6 MONTAGE DETAILS: Anweisungen In der Lieferung enthalten: Der Heizstrahler darf Die an der Wand oder nicht in Richtung der Decke zu Decke oder entzündlicher befestigende Materialien ausgerichtet Halterung weist werden. eine Reihe an Löchern auf. die eine Befestigung des Strahlers Das Gerät darf auf in 6 verschiedenen Positionen keinen Fall in der...
  • Seite 7 KORREKTE ENTSORGUNG DIESES PRODUKTS: Dieses Produkt stimmt mit der 50cm 50cm EU-Richtlinie 2002/96/ EG überein. Das Symbol mit dem durchgestrichenen Mülleimer auf dem Gerät zeigt an, dass das vom Hausmüll separat zu behandelnde Produkt am Ende seiner Nutzungsdauer einer Sammelstelle für die Mülltren- nung von Elektrogeräten und elektronischen Geräten zugeführt werden muss oder dem Händler bei Kauf eines entsprechenden neuen Gerätes zurückzugeben...
  • Seite 8: Designated Use

    • Remove transit protection before use. ASSEMBLY AND OPERATING INSTRUCTIONS Dear Customer, • Keep packaging materials out of reach please read the following information carefully of children. before using the appliance for the first time for your • This appliance must be handled with own safety and to ensure correct use.
  • Seite 9 mains as specified on the rating plate. knowledge, unless they have been given • Never touch live parts! Danger to life! supervision or instruction concerning use of • Never operate the appliance with wet the appliance by a person responsible for hands! Danger to life! their safety.
  • Seite 10: Power Cord

    POWER CORD: • This heater comes with a pair of stainless steel • The use of an extension cord with this appliance adjustable angle mounting brackets. The adjust- is not recommended. able angle enables the heater to be installed on •...
  • Seite 11: Technical Data

    • Important! Any tampering with the appliance the power supply must be done by means of a will invalidate the warranty. minimum IP55 system, as per the standards HD • Repairs carried out improperly and by unqual- 384 CENELEC for Europe, or international IEC ified persons may have serious consequences for 60364-7 1988.
  • Seite 12 INSTALLATION DETAILS: Instructions Provided wall/ceiling support: The heater must not be The support to be fixed directed towards the ceiling to the wall pres- or flammable materials. ents a series of holes that allow to fix the heater in different positions.
  • Seite 13 CORRECT DISPOSAL OF THIS PRODUCT: This product conforms to EU Directive 50cm 50cm 2002/96/EC. This appliance bears the symbol of the barred waste bin. This indicates that, at the end of its useful life, it must not be disposed of as domestic waste, but must be taken to a collection centre for waste electrical and electronic equipment, or returned to a retailer on purchase of a replacement.
  • Seite 14: Utilisation Prévue

    MODE D’EMPLOI contenus dans ce manuel doivent être Cher client, suivis strictement. Veuillez lire attentivement les instructions suiva- • N’utilisez que le voltage spécifié sur la ntes avant la mise en service Ils fournissent des plaque technique de cet appareil. informations importantes pour votre sécurité...
  • Seite 15 • AVERTISSEMENT : Vérifiez blessure (choc électrique) et d’endom- régulièrement que votre appareil n’est magement de l’appareil! pas abîmé. L’appareil de chauffage ne • Attention! Ne regardez pas la lu- doit pas être utilisé si le panneau ray- mière longtemps! onnant noir ou n’importe quelle autre •...
  • Seite 16 EMPLACEMENT: commandes et toute personne se trouvant dans la • Pour le montage au plafond et le montage baignoire ou la douche. mural, le radiateur doit être monté à au moins 2,1 • Débrancher l’appareil de l’alimentation dans le mètres du sol. cas où...
  • Seite 17: Données Techniques

    • Une fois l’appareil refroidi, essuyez-le avec un s’adresser exclusivement à des Centres d’assis- chiffon doux, humide et froid quand il fait froid. tance technique agréés BURDA. S’assurer que les • Vérifier qu’il est parfaitement sec avant de le pièces de rechange sont d’origine.
  • Seite 18 DÉTAILS DE MONTAGE: Instructions Inclus dans la livraison: Le radiateur ne doit pas être Le support à fixer au orienté vers le plafond ou mur comporte vers des matériaux inflam- une série de trous mables. qui permettent de fixer le radiateur dans 6 positions différentes.
  • Seite 19 ELIMINATION CORRECTE DU PRODUIT: Ce produit est conforme à la 50cm 50cm Directive 2002/96/CE. Le symbole de la poubelle barrée figurant sur l’appareil indique que le produit, au terme de son cycle de vie, doit être traité séparément des ordures ménagères.
  • Seite 20: Istruzione Per L'uso

    ISTRUZIONE PER L’USO • Utilizzare solo la tensione specificata Gentile Cliente, sulla targhetta identificativa di questo si prega di leggere attentamente le seguenti apparecchio. istruzioni prima della messa in servizio. Forniscono • Rimuovere le protezioni utilizzate per il informazioni importanti per la sicurezza dell’utente trasporto prima dell’uso.
  • Seite 21 • AVVERTENZA: Controllare regolar- • Attenzione: il dispositivo si scalda mente la presenza di eventuali danni molto durante il funzionamento! Pertan- all’apparecchio. Il radiatore non deve to, impostare il dispositivo in modo da essere utilizzato se il pannello radiante escludere contatti accidentali. Rischio di nero o qualsiasi altra sua parte è...
  • Seite 22: Cavo Di Alimentazione

    POSIZIONE: o i comandi vengano toccati da chi si trova nella • Il riscaldatore deve essere montato ad almeno vasca da bagno o nella doccia. 2,1 metri dal suolo per il montaggio a soffitto • Scollegare l’apparecchio dall’alimentazione se o parete. L’altezza minima di installazione per i non lo si utilizza per lunghi periodi bagni è...
  • Seite 23: Dati Tecnici

    Centri di Assistenza • Dopo che l’unità si è raffreddata, pulire la Tecnica autorizzati BURDA. Assicurarsi che i ricam- polvere con un panno freddo, umido e morbido. bi siano originali. • Assicurarsi che tutte le parti siano asciutte prima di utilizzare nuovamente.
  • Seite 24 DETTAGLI DI MONTAGGIO: Istruzione Incluso nella consegna: Il riscaldatore non deve Il supporto da fissare al essere orientato verso il muro presenta soffitto o materiali infiam- una serie mabili. di fori che permettono di fissare il riscalda- tore in 6 diverse posizioni. L’apparecchio non deve essere montato incassato nel soffitto.
  • Seite 25 SMALTIMENTO CORRETTO DEL PRODOTTO: Questo prodotto è conforme alla 50cm 50cm Direttiva EU 2002/96/ EC. Il simbolo del cestino barrato ripor- tato sull’apparecchio indica che il prodotto, alla fine della propria vita utile, dovendo essere trattato separatamente dai rifiuti domestici, deve essere conferito in un centro di raccolta differenziata per apparecchiature elettriche ed elettroniche oppure riconsegnato al rivenditore al momento dell’acquisto di una nuova apparecchiatu-...
  • Seite 26: Destino De Uso

    INSTRUCCIONES DE MONTAJE Y USO fuera del alcance de los niños. Estimado cliente, • Este aparato se debe manipular con lea detenidamente la siguiente información antes cuidado y se deben evitar vibraciones y de utilizar el aparato por primera vez por su pro- golpes.
  • Seite 27 • Conecte el aparato únicamente a una pivote cuando el dispositivo esté en fun- cionamiento! ¡Riesgo de quemaduras! toma de corriente debidamente instalada con contacto de puesta a tierra. Posible- Deje que el aparato se enfríe antes de mente sea necesario un fusible C de ac- ajustar el soporte ción lenta si tiene problemas al encender •...
  • Seite 28: Instalación

    UBICACIÓN: INSTALACIÓN: • Para el montaje en el techo y en la pared, el • A instalação do aparelho deve ser efetuada calentador radiante debe montarse al menos a 2, 1 por pessoal competente e qualificado, de acordo metros sobre el suelo. La altura mínima de insta- com a norma em vigor no seu país que regula as lación para los baños es de 2.25 m sobre el suelo.
  • Seite 29: Mantenimiento

    El calentador nunca se debe instalar hacia arriba araciones, dirigirse exclusivamente a Centros o hacia adentro, la superficie de calentamiento de Asistencia Técnica autorizados por BURDA. siempre se debe colocar para dirigir el calor Asegurarse de que las piezas de recambio sean hacia abajo o hacia afuera.
  • Seite 30 DETALLES DE INSTALACIÓN: Instrucciones Incluido en la entrega: El calefactor no debe estar El soporte que se fijará a orientado hacia el techo o la pared o techo materiales inflamables. tiene una serie de orificios. La fijación del foco en posiciones diferentes permite.
  • Seite 31 CORRECTA ELIMINACIÓN DE ESTE PRODUCTO: Este producto respeta la 50cm 50cm Directiva UE 2002/96/CE. El símbolo del contenedor de basu- ra tachado colocado en el aparato indica que el producto, al final de su vida útil, debe separarse de los residuos domésticos y entregarse a un centro de recogida selectiva para aparatos eléctricos y electrónicos, o bien devuelto al vendedor al comprar un nuevo aparato equivalente.
  • Seite 32 BURDA WORLDWIDE TECHNOLOGIES GMBH Rudolf-Diesel-Straße 18 · D-65760 Eschborn · Tel +49 6173 /324 24 0 · Fax +49 6173 /324 24 24 E-Mail info@burdawtg.com · www.burdawtg.com...

Inhaltsverzeichnis