Herunterladen Inhalt Inhalt Diese Seite drucken
Inhaltsverzeichnis

Werbung

Verfügbare Sprachen

Verfügbare Sprachen

All manuals and user guides at all-guides.com
E
Manual de instrucciones
GB
Instruction manual
F
Notice d'instructions
DE
Bedienungsanleitung
HPP-960

Werbung

Inhaltsverzeichnis
loading

Inhaltszusammenfassung für Franke HPP-960

  • Seite 1 All manuals and user guides at all-guides.com Manual de instrucciones Instruction manual Notice d’instructions Bedienungsanleitung HPP-960...
  • Seite 2 All manuals and user guides at all-guides.com...
  • Seite 3 All manuals and user guides at all-guides.com Manual de instrucciones Índice………………………………………………………pag. 05 -------------------------------------------------------------------------------------- Instruction manual Table of contents..…………………………………………pag. 23 -------------------------------------------------------------------------------------- Notice d’Instructions Tables des matières…...…………………………………...pag. 41 -------------------------------------------------------------------------------------- Bedienungsanleitung Inhaltsverzeichnis………………………………………….pag. 59 --------------------------------------------------------------------------------------...
  • Seite 4 All manuals and user guides at all-guides.com In Übereinstimmung mit den Anforderungen der Europäischen Este aparato lleva el marcado CE en conformidad con la Directiva 2002/96/EC del Parlamento Europeo y del Consejo sobre residuos de Richtlinie 2002/96/EG über Elektro- und Elektronik-Altgeräte aparatos eléctricos y electrónicos (RAEE).
  • Seite 5 All manuals and user guides at all-guides.com Diagrama de introducción del horno Oven slot-in diagram Schéma d'installation du four Plan für den Einbau des Bauckofens...
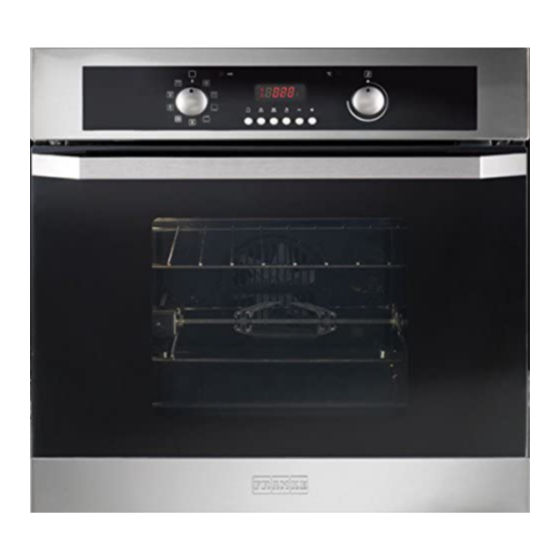
  • Seite 6 All manuals and user guides at all-guides.com Panel de mandos / Control panel / Tableau des commandes / Schalterblende 1. Selector de funciones / Cooking function selector / Selecteur de fonctions / Wahlschalter 2. Programador / Programmer / Programmateur / Programmierer 3.
  • Seite 7 All manuals and user guides at all-guides.com Índice • Consejos para el correcto uso • Utilización del horno • Funciones que pueden seleccionarse por medio del conmutador 10-11 • Uso del grill • Uso del asador • Accesorios del horno •...
  • Seite 8: Funcionamiento Del Horno

    All manuals and user guides at all-guides.com Empleo del horno Consejos para el correcto uso Antes del primer uso, es preciso hacerlo funcionar en vacío a la máxima temperatura durante 40 minutos. Después de esto, el horno está listo para el normal uso.
  • Seite 9 All manuals and user guides at all-guides.com Programador electrónico con display de la temperatura Funciones del mismo: - Reloj de display iluminado con indicación de 24 horas - Avisador acústico (máximo 23 horas y 59 minutos) - Programación automática (inicio y fin de la cocción) - Programación semi-automática (sólo inicio ó...
  • Seite 10 All manuals and user guides at all-guides.com Reloj electrónico Tras estas operaciones, aparecerá el símbolo «A» de manera fija en el marcador, Indica las horas (0-24) y los minutos. indicándonos que el horno ha quedado Inmediatamente después de la conexión programado.
  • Seite 11 All manuals and user guides at all-guides.com Cocción semi automática Avisador electrónico La función del «timer» consiste unicamente A. Programación del tiempo de duración en un avisador acústico que puede ser re- de la cocción. gulado por un período máximo de 24 horas B.
  • Seite 12 All manuals and user guides at all-guides.com Se enciende la luz interiora del horno. Seleccione la temperatura deseada, manteniendo la puerta del horno cerrada. La activación automática del asador se produce al mismo tiempo que el encendido del grill. Función adecuada para grellar pequeñas quantidades de alimentos. Se aconseja mantener la puerta del horno cerrada.
  • Seite 13 All manuals and user guides at all-guides.com Solamente se pone en marcha el ventilador, sin propagar el calor puesto que no está funcionando el termostato. La puerta del horno debe estar cerrada. Esta función permite descongelar los alimentos utilizando aproximadamente 1/3 del tiempo que se emplea normalmente.
  • Seite 14: Uso Del Grill

    All manuals and user guides at all-guides.com Uso del grill Consejos útiles Por medio del grill pueden cocinarse todo tipo de carnes, brochetas, pescados y verduras. Las carnes rojas cortadas en tiras delgadas y los pescados llanos o en lonchas tienen que asarse muy rápidamente y lo más cerca posible al grill.
  • Seite 15 All manuals and user guides at all-guides.com Uso del asador El rustepollos funciona siempre simultaneamente con la resistencia del grill. Traspasar longitudinalmente la carne con el espadín y bloquearla con los pinchos. Después proceder del modo siguie nte: introducir la punta del espadín en el mástil cavo del motor situado en el fondo del horno.
  • Seite 16: Accesorios Del Horno

    All manuals and user guides at all-guides.com Accesorios del horno Parilla porta - alimentos (accesorio opcional) Se emplea como soporte para los moldes de pastelería, los platos a gratinar, la bandeja para pastelería y las carnes a asar a la parrilla.
  • Seite 17 All manuals and user guides at all-guides.com REGULACIONES PERSONALES TIPOS DE ALIMENTOS TEMP. °C TIEMPOS MIN. TEMP. °C TIEMPOS MIN. • Carnes de animales domésticos 150/160 180/210 Carne de vaca estofada (de 1/1,5 kg) 150/160 120/150 Ternera asada (de 1/1,5 kg) 180/190 90/120 Guiso de carne picada (de 1/1,5 kg)
  • Seite 18: Limpieza Y Mantenimiento Del Horno

    All manuals and user guides at all-guides.com Limpieza y mantenimiento del horno Importante Antes de realizar el mantenimiento del horno, hay que desconectar siempre el enchufe de la toma de corriente o cortar el suministro de corriente en la línea de alimentación por medio del interruptor general de la instalación eléctrica.
  • Seite 19 All manuals and user guides at all-guides.com Sustitución de las lámparas del horno En caso de que hiciese falta sustituir una de las lámpara interior del horno, ante todo hay que cortar la conexión eléctrica del aparato. A continuación, desatornille el casquete protector en vidrio (A), sustituya la lámpara y vuelva a colocar el casquete protector.
  • Seite 20 All manuals and user guides at all-guides.com Instrucciones para el instalador Importante Hay que realizar la instalación con arreglo a las normas y a las disposiciones vigentes. La misma tiene que realizarse única y exclusivamente por personal especializado y con titulación para ello. Notas características del mueble Los componentes de los muebles en los que se empotrarán los hornos (materiales plásticos y madera chapeada) tienen que estar aplacados por medio...
  • Seite 21: Conexión Eléctrica

    All manuals and user guides at all-guides.com Conexión eléctrica Importante - Todos los trabajos de mantenimiento y regulación del aparato tienen que ser realizados sin conexión a la red eléctrica. - Hay que realizar la conexión con arreglo a las normas y a las disposiciones vigentes.
  • Seite 22 All manuals and user guides at all-guides.com Sustitución del cable En caso de que hiciese falta sustituir los cables de alimentación, hay que proceder como sigue: - Cortar el suministro de corriente eléctrica. - Abra la tapa de la caja de bornes (fig. A) - Conecte el cable de alimentación según señala la figura, teniendo en cuenta que el conductor amarillo-verde es el de toma a tierra...
  • Seite 23: Datos Técnicos

    All manuals and user guides at all-guides.com Datos Técnicos DATOS 220-240V~ 50Hz Tensión ,1 kW Potencia total Potencia de las resistencias: 0,9 + 1,6 kW superior + grill 1,3 kW solera circular 2,3 kW Dimensiones útiles interiores: Altura: 591 mm Anchura: 597 mm Profundidad:...
  • Seite 24 All manuals and user guides at all-guides.com...
  • Seite 25: Inhaltsverzeichnis

    All manuals and user guides at all-guides.com Table of contents • Hints for correct use • Using the oven 25-28 • Functions selected via the switch 29-30 • Using the grill • Using the turnspit • Oven accessories • Cooking tables 32-33 •...
  • Seite 26: Using The Oven

    All manuals and user guides at all-guides.com Using the oven Hints for correct use The first time you use the oven, switch on at maximum temperature and leave on, empty, for approximately 40 minutes. Once this time has elapsed, the oven is ready for normal use.
  • Seite 27 All manuals and user guides at all-guides.com ELECTRONIC PROGRAMMER/ TEMPERATURE DISPLAY The electronic programmer is a device, which groups together the following functions: - 24 hours clock with illuminated display - Timer (up to 23 hours and 59 min.) - Program for automatic beginning and end of cooking - Program for semi-automatic cooking (either start or finish only)
  • Seite 28 All manuals and user guides at all-guides.com Manual cooking taking place Automatic cooking taking place Timer in operation NOTE: After having selected the operation, a period of time will pass (about 3-4 seconds) before confirmation, during which the data may be modifies. Digital clock (THE CLOCK MUST BE SET BEFORE OVEN WILL OPERATE)
  • Seite 29 All manuals and user guides at all-guides.com 1) Automatic cooking (start and end) ƒ Set temperature and cooking program required by using the thermostat and the selector knobs. ƒ Set the length of cooking time by pushing the button. ƒ Set the end of cooking time by pushing the button.
  • Seite 30 All manuals and user guides at all-guides.com Timer = buzzer The timer program consists only of a buzzer, which may be set for a maximum period of 23 hours and 59 min. To set the timer, push the button and, at the same time, + or - until you read the desired time on the display.
  • Seite 31: Functions Selected Via The Switch

    All manuals and user guides at all-guides.com To turn on the light inside the oven. This function operates the centre grill element as well as the rotisserie motor. An ideal way to produce a healthy small roast as all the fats are drained whilst cooking.
  • Seite 32 All manuals and user guides at all-guides.com Multifunction The fan and the circular element come on. The heat is diffused by the fan to give an even temperature in the oven by adjusting the thermostat, a desired temperature of 50°C to 250°C can be obtained. It is necessary to pre-heat the oven before introducing the food.
  • Seite 33: Using The Grill

    All manuals and user guides at all-guides.com Using the grill All types of meat, fish and vegetables can be cooked under the grill. Red meat, cut into thin pieces and flat or sliced fish must be grilled very quickly and as near as possible to the grill. White meat, ordinary fish and vegetables must be kept farther away from the grill and in this case cooking will take slightly longer.
  • Seite 34: Oven Accessories

    All manuals and user guides at all-guides.com Oven accessories Rack Used as a support for baking tins, dishes etc. and grilled meat. Dripping pan Normally used to collect the juices from food during grilling (remove from oven if not required). Temperature and cooking time table Table intended as a guide which can vary according to the oven user’s taste and experience and, in particular, the type of food.
  • Seite 35: Correct Position Of Rack

    All manuals and user guides at all-guides.com CUSTOMISED SETTINGS TYPE OF DISH TEMP. °C MIN. TIMES TEMP. °C MIN. TIMES MEAT 150/160 180/210 Stewed veal (1/1.5 kg) 150/160 120/150 Roast veal (1/1.5 kg) 180/190 90/120 Meat loaf (1/1.5 kg) 150/160 60/90 Lamb (leg or shoulder) 150/160...
  • Seite 36: Oven Cleaning And Care

    All manuals and user guides at all-guides.com Oven cleaning and care Important Before carrying out any cleaning operation, switch the oven off, unplug and disconnect from the power supply via the master switch. Cleaning and care The stainless steel and enamel parts will stay new if cleaned with water or specific products and thoroughly dried.
  • Seite 37: Replacing The Light Bulb

    All manuals and user guides at all-guides.com Replacing the oven light bulb If you have to replace the oven light bulb, disconnect the appliance from the power supply. Remove the glass protection cover (A), remembering to re-fit it after replacing the bulb.
  • Seite 38: Instructions For The Installer

    All manuals and user guides at all-guides.com Instructions for the installer Important The oven must be installed by qualified authorised personnel in compliance with current regulations. Installation must be performed by specialist authorised persons only. Characteristics of the unit The components of the unit in which the oven is fitted (plastic and veneered wood) must be secured with suitable adhesive able to withstand the heat (max 150°C);...
  • Seite 39: Electrical Connection

    All manuals and user guides at all-guides.com Electrical connection Important - All maintenance and adjustment work on the appliance must be performed with the power disconnected. - The connection must be made in accordance with current regulations. - The connection must be made only by a specialist authorised electrician. - The appliance operates correctly with alternating current at 220/240 V~ single-phase 50 Hz.
  • Seite 40: Replacing The Electrical Cable

    All manuals and user guides at all-guides.com Replacing the cable The cable is replaced as follows: - Disconnect the power supply. - Open the terminal block cover (fig. A). - Connect the power supply cable as shown in the figure, remembering that the yellow-green lead is the earth.
  • Seite 41: Technical Specifications

    All manuals and user guides at all-guides.com Technical specifications SPECIFICATIONS 220-240V~ 50 Hz Voltage 3,1 kW Total power Powe r of resistance s: top + grill 0,9 + 1,6 kW 1,3 kW bottom Circular 2,3 kW Internal working dimensions: Height: 591 mm Width: 597 mm...
  • Seite 42 All manuals and user guides at all-guides.com...
  • Seite 43 All manuals and user guides at all-guides.com Table des matières • Conseils pour l’usage correct • Utilisation du four 44-46 • Fonctions sélectionnables au moyen du commutateur 47-48 • Utilisation du gril et tournebroche • Accessoires du four • Table de cuisson 50-51 •...
  • Seite 44 All manuals and user guides at all-guides.com...
  • Seite 45: Conseils Pour L'usage Correct

    All manuals and user guides at all-guides.com Utilisation du four Conseils pour l’usage correct La première fois qu’on utilise le four, il faut le faire fonctionner à vide pendant 40 minutes à la température maximum. Quand le temps indiqué est écoulé, le four est prêt pour l’usage normal.
  • Seite 46 All manuals and user guides at all-guides.com Programmateur électronique avec visualisation de la température choisie Le programmateur électronique regroupe les fonctions suivantes: - Horloge de 24 h. avec affichage lumineux - Timer, avertisseur sonore jusqu' à maximum 23 h. et 59 min. - Programme en mode automatique de début ou fin cuisson - Programme en mode semi-automatique...
  • Seite 47 All manuals and user guides at all-guides.com Horloge digitale Après ces opérations le symbole «AUTO» s'allumera en permanence, cela signifie Les chiffres de l'horloge montrent les heures que le four a été programmé. (0-24) e les minutes. Voilà un exemple pratique : l'utilisateur A la première mise sous tension ou après souhaite une cuisson de 45 minutes, qui une interruption du courant trois chiffres...
  • Seite 48 All manuals and user guides at all-guides.com Cuisson semi-automatique Minuterie = avertisseur sonore A. Programmation du temps de cuisson Le «timer» est uniquement un avertisseur sonore qui peut être réglé pour une période B. Programmation de l'heure de fin maximale de 23 heures et 59 min. Régler le cuisson timer en enfonçant le bouton et même...
  • Seite 49: Fonctions Sélectionnables Au Moyen Du Commutateur

    All manuals and user guides at all-guides.com Sélectionner la temperature désirée, en maintenant la porte du four fermée. Type de cuisson indiqué pour petits aliments rôtis. Sélectionner la temperature désirée. Ce type de cuisson est particulièrement indiqué pour réchauffer les aliments. Sélectionner la température désirée;...
  • Seite 50 All manuals and user guides at all-guides.com Ce type de cuisson permet la diffusion de la chaleur de manière régulière et homogène dans toutes les parties du four. Il est possible de cuire deux types de palts (ex. viandes et poissons), en respectant les temps de cuisson relatifs.
  • Seite 51: Utilisation Du Gril Et Tournebroche

    All manuals and user guides at all-guides.com Utilisation du gril Avec le gril, on peut cuire toutes les viandes, les poissons et les légumes. Les viandes rouges, coupées en petits morceaux e et les poissons plats ou coupés en tranches, doivent être grillés très rapidement et le plus près possible du gril.
  • Seite 52: Accessoires Du Four

    All manuals and user guides at all-guides.com Accessoires du four Grille porte - aliments On l’utilise comme support des moules pour pâtisserie, pour des plats divers, pour des plateaux pour pâtisseries et viandes grillées. Lèchefrite On l’utilise normalement pour récolter les jus des grillades (il faut l’enlever du four si on ne l’utilise pas).
  • Seite 53: Position Correcte De La Grille Porte-Aliments

    All manuals and user guides at all-guides.com PROGRAMMATIONS PERSONNELLES TEMPS DE TEMPS DE TYPES D’ALIMENTS TEMP. °C TEMP. °C CUISSON MIN. CUISSON MIN. VIANDES 150/160 180/210 Viande de veau en daube (1/1,5 kg.) 150/160 120/150 Veau rôti (1/1,5 kg.) 180/190 90/120 Hachis de viande (1/1,5 kg.) 150/160...
  • Seite 54: Nettoyage Et Maintenance

    All manuals and user guides at all-guides.com Nettoyage et maintenance du four Important Avant d’effectuer n’importe quelle opération de nettoyage, éteindre le four, débrancher la fiche de la prise de courant et ôter la tension au moyen de l’interrupteur général du branchement électrique. Nettoyage et maintenance Les parties en acier inox et émaillées resteront toujours impeccables, si elles seront nettoyées soigneusement avec de l’eau ou en utilisant des produits spécifiques et...
  • Seite 55: Substitution De La Lampe

    All manuals and user guides at all-guides.com Substitution de la lampe du four Si la lampe du four doit être remplacée, débrancher l’appareil de l’alimentation électrique. Enlever le couvercle de protection en verre (A), après avoir remplacé la lampe, réinstaller le couvercle de protection. La lampe doit résister à...
  • Seite 56: Instructions Pour L'installateur

    All manuals and user guides at all-guides.com Instructions pour l’installateur Important L’installation doit être effectuée par du personnel qualifié et autorisé conformément aux normes en vigueur. L’installation doit être effectuée uniquement par des personnes spécialisées et autorisées. Caractéristiques du meuble Les parties du meuble dans lequel le four est installé...
  • Seite 57: Branchement Électrique

    All manuals and user guides at all-guides.com Branchement électrique Important - Tous les travaux de maintenance et de réglage de l’appareil doivent être effectués quand l’alimentation électrique est débranchée. - Le branchement de l’appareil doit être effectué conformément aux normes en vigueur.
  • Seite 58: Substitution Du Câble Électrique

    All manuals and user guides at all-guides.com Substitution du câble d’alimentation La substitution du câble d’alimentation s’effectue de la façon suivante: - Débrancher le courant électrique. - Ouvrir le couvercle de la boîte à borne (fig. A) - Brancher le câble d’alimentation comme indiqué...
  • Seite 59: Données Techniques

    All manuals and user guides at all-guides.com Données techniques DONNEES 220-240V~ 50 Hz Tension 3,1 kW Puissance totale Puissance de s ré sistances: voûte + grill 0,9 + 1,6 kW 1,3 kW sole circulaire 2,3 kW Dimensions utiles intérieures: Hauteur : 591 mm Largeur: 597 mm...
  • Seite 60 All manuals and user guides at all-guides.com...
  • Seite 61 All manuals and user guides at all-guides.com Inhaltsverzeichnis • Hinweise für einen korrekten Gebrauch • Gebrauch des Backofens 61-63 • Mit dem Schalter auswählbare Funktionen 64-65 • Gebrauch des Grills und Spieß • Backofenzubehör • Kochtabelle 67-68 • Korrekte Stellung des Kochgutrostes •...
  • Seite 62: Hinweise Für Einen Korrekten Gebrauch

    All manuals and user guides at all-guides.com Gebrauch des Backofens Hinweise für einen korrekten Gebrauch Den Backofen ca. 40 Minuten auf Höchsttemperatur betreiben, wenn man ihn zum ersten Mal benutzt. Nach Ablauf dieser Zeit kann der Backofen normal benutzt werden. Für ein korrektes Kochen sollte das Kochgut nie in den noch kalten Backofen gegeben werden;...
  • Seite 63 All manuals and user guides at all-guides.com Elektronische Schaltuhr mit Temperaturanzeige Die Schaltuhr hat folgende Funktionen: - Uhr mit 24-Stunden-Leuchtdisplay - Zeitmesser (maximal 23 Stunden und 59 Minuten) - Programmierung von Anfang und Ende des Brat-/Backvorgangs - halbautomatische Programmierung (nur Anfang oder nur Ende des Brat-/Backvorgangs).
  • Seite 64 All manuals and user guides at all-guides.com Digitaluhr Nach diesen Schritten erscheint auf dem Display die Leuchtanzeige "AUTO", was Zeigt die Stunden (0 - 24) und Minuten an. bedeutet, daß der Backofen programmiert Gleich nach Anschluß des Backofens (auch worden ist. nach einer Stromunterbrechung) erschei- Praktisches Beispiel: nen auf der Bedienungblende DREI...
  • Seite 65 All manuals and user guides at all-guides.com Halbautomatisches Braten oder Backen Elektronisches Signal A. Programmierung der Brat-/Backzeit Der Zeitmesser kann auf eine Maximaldauer B. Programmierung des Brat- von 23 Stunden und 59 Minuten eingestellt /Backendes werden und gibt nach Ablauf der entspre- chenden Zeit ein akustisches Signal ab.
  • Seite 66: Mit Dem Schalter Auswählbare Funktionen

    All manuals and user guides at all-guides.com Mit dem Thermostat bei geschlossener Ofentür die gewünschte Temperatur wählen. Der Spieß schaltet sich automatisch ein. Die gewünschte Temperatur bei geschlossener Ofentür einstellen; besonders zum Aufwärmen von Gerichten geeignet. Die gewünschte Temperatur wählen; die gelbe Kontrollleuchte schaltet sich bis zum Erreichen der eingestellten Temperatur ein.
  • Seite 67 All manuals and user guides at all-guides.com Die Backofenbeleuchtung und die grüne Kontrolleuchte schalten sich wie bei allen anderen Funktionen ein. Nür das Gebläse setzt sich in betrieb, da der Thermostat nicht in Betrieb ist, wird keine Wärme erzeugt. Die Backofentür muss geschlossen ein. Mit dieser Funktion werden Lebensmittel mit nür einem 1/3 des normalerweise üblichen Zeitaufwandes aufgetaut.
  • Seite 68: Gebrauch Des Grills Und Spieß

    All manuals and user guides at all-guides.com Gebrauch des Grills Mit dem Grill kann man sämtliche Fleischsorten, Fisch und Gemüse kochen. In dünne Scheiben geschnittenes, rotes fleisch oder flacher Fisch oder Fisch in Scheiben müssen sehr schnell und so nah wie möglich am Grill gegrillt werden. Weißes Fleisch, normaler Fisch und Gemüse müssen weiter entfernt vom Grill sein und das Kochen wird in diesem Fall etwas länger sein.
  • Seite 69: Zubehörteile Des Backofens

    All manuals and user guides at all-guides.com Zubehörteile des Backofens Kochgutrost Wird als Halterung von Backformen, verschiedenen Tellern, Pfannen und für gegrilltes Fleisch verwendet. Fettpfanne Wird gewöhnlich benutzt, um Grillsauce zu sammeln (aus dem Ofen nehmen, falls nicht benutzt). Tabelle mit den Kochtemperaturen und Kochzeiten Richtungsweisende Tabelle, auf dem Geschmack und der Erfahrung des Ofenbenutzers, aber vor allem auf der Qualität des Kochguts beruhend.
  • Seite 70: Korrekte Stellung Des Kochgutrostes

    All manuals and user guides at all-guides.com INDIVIDUELLE EINSTELLUNGEN SPEISEN TEMP. °C MINDESTZEITEN TEMP. °C MINDES TZEITEN SCHLACHTFLEISCH 150/160 180/210 Geschmortes Kalbsfleisch (1/1,5 kg) 150/160 120/150 Kalbsbraten (1/1,5 kg) 180/190 90/120 Hackbraten (1/1,5 kg) 150/160 60/90 Lamm (Schenkel oder Schulter) 150/160 45/60 Ziegenlamm (Schenkel oder...
  • Seite 71: Reinigung Und Instandhaltung Des Backofens

    All manuals and user guides at all-guides.com Reinigung und Instandhaltung des Backofens Wichtig Vor Reinigungsarbeiten immer den Backofen ausschalten, den Stecker aus der Stromsteckdose ziehen und die Spannung mit dem Hauptschalter der elektrischen Verbindung abschalten. Reinigung und Instandhaltung Edelstahlteile und emaillierte Teile werden immer neu bleiben, wenn man sie mit Wasser und Spezialprodukten reinigt und sorgfältig trocknet.
  • Seite 72: Auswechseln Der Lampen

    All manuals and user guides at all-guides.com Auswechseln der Lampe Wenn man die Lampe des Ofens auswechseln muss, so muss das Gerät von der Stromversorgung abgetrennt werden. Den Schutzdeckel aus Glas (A) abnehmen und nach dem Auswechseln der Lampe wieder einbauen. Die Lampe muss einer Temperatur bis 300°...
  • Seite 73: Anweisungen Für Den Installateur

    All manuals and user guides at all-guides.com Anweisungen für den Installateur Wichtig Die Installation muss von autorisiertem Fachpersonal nach den gültigen Vorschriften ausgeführt werden. Die Installation darf nur von autorisiertem Fachpersonal ausgeführt werden. Merkmale des Möbels Die Komponenten des Möbels, in das der Backofen eingebaut wird (Materialien aus Kunststoff und mit Holzfurnier) müssen mit Klebefolie plattiert sein, die einer Wärme von max.
  • Seite 74: Elektrischer Anschluss

    All manuals and user guides at all-guides.com Elektrischer Anschluss Wichtig - Wartungs- und Einstellarbeiten am Gerät dürfen nur ohne Strom ausgeführt werden. - Der Anschluss muss nach den gültigen Vorschriften ausgeführt werden. - Der Anschluss darf nur von einem autorisierten Fachelektriker ausgeführt werden.
  • Seite 75: Auswechseln Des Stromkabels

    All manuals and user guides at all-guides.com Auswechseln des Stromkabels Das Stromkabel wird wie folgt ausgewechselt: - Den Strom abschalten. - Den Deckel des Klemmenbretts öffnen (Abb. A) - Das Versorgungskabel wie auf der Abbildung gezeigt anschließen, dabei berücksichtigen, dass der gelb-grüne Leiter der Erdleiter ist.
  • Seite 76: Technische Daten

    All manuals and user guides at all-guides.com Technische Daten DATEN 220-240V~ 50Hz Spannung 3,1 kW Gesamtleistung Leistungen der Heizelemente Decke + grill 0,9 + 1,6 kW 1,3 kW Boden Umluft 2,3 kW Nutzabmessungen innen: Höhe : 591 mm Breite: 597 mm Tiefe: 547 mm Volumen:...
  • Seite 77 All manuals and user guides at all-guides.com...
  • Seite 78 All manuals and user guides at all-guides.com...
  • Seite 79 All manuals and user guides at all-guides.com...
  • Seite 80 All manuals and user guides at all-guides.com Franke España, SAU Polígono Can Magarola C/ Molí de Can Bassa, nº 2-10 08100MOLLET DEL VALLES Barcelona-España Tel.:902 499 498 Fax: 935 700 294 www.franke.es fss-comercialksd@franke.com Cod. 12300114160...

Inhaltsverzeichnis