
Verwandte Anleitungen für Megasat Caravanman 65 Premium V2


Inhaltszusammenfassung für Megasat Caravanman 65 Premium V2
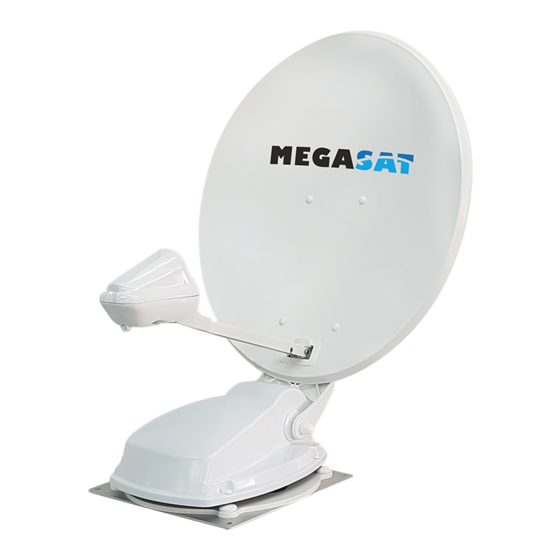
- Seite 1 Caravanman 65 / 85 Premium V2 Caravanman 65 / 85 Professional GPS V2 Bedienungsanleitung...
-
Seite 2: Inhaltsverzeichnis
Inhaltsverzeichnis 1. Einführung 1.1 Allgemeine Informationen ..............03 1.2 Sicherheitshinweise ................. 03 1.3 Lieferumfang ....................03 2. Steuergerät und Bedienteil 2.1 Steuergerät Vorderseite ................. 04 2.1 Steuergerät Rückseite ................04 2.3 Bedienteil ......................05 3. Montage und Installation 3.1 Montage auf dem Dach des Fahrzeugs ........06 3.2 Klebeanleitung .................... -
Seite 3: Einführung
1. Einführung 1.1 Allgemeine Informationen Vorsicht: Unsachgemäße Handhabung kann zu schweren Schäden an die- sem Gerät führen. Die Verantwortlichen können auch für daraus resultierende weitere Schäden am Gerät verantwortlich gemacht werden. Hinweis: Lesen Sie das Benutzerhandbuch sorgfältig durch bevor Sie mit der Installation beginnen. -
Seite 4: Steuergerät Und Bedienteil
2. Steuergerät und Bedienteil 2.1 Steuergerät Vorderseite 1. I/O: Hauptschalter zur Stromversorgung. Standby-Taste und Taste zur Verbindung mit einem Mobilgerät via Bluetooth ® 3. SAT: LED blinkt langsam bei Satellitensuche, blinkt schnell bei Feinjustierung. 4. PWR: LED leuchtet, wenn das Steuergerät betriebsbereit ist. 5. -
Seite 5: Bedienteil
2. Steuergerät und Bedienteil 2.3 Bedienteil 1. p: Wechselt aufwärts zu einem Satelliten. 2. q: Wechselt abwärts zu einem Satelliten. 3. I/O: Schaltet das Steuergerät in Standby und fährt die Antenne ein. 4. Satellitenliste: Zeigt den aktuell gewählten Satelliten. DEUTSCH... -
Seite 6: Montage Und Installation
3. Montage und Installation 3.1 Montage auf dem Dach des Fahrzeugs 1. Sorgen Sie für einen geeigneten Arbeitsplatz. Eine Garage oder Halle ist besser als ein Platz im Freien. Die Umgebungstemperatur zur Montage muss zwischen +5° C und max. +25° C liegen. Arbeiten Sie nicht direkt in der Sonne. Halten Sie die Arbeitsvor- schriften beim Umgang mit Chemieprodukten ein. -
Seite 7: Klebeanleitung
3. Montage und Installation 6. Zeichnen Sie anschließend den Antennenfuß (Montageplatte) mit einem Stift an. 7. Rauen Sie die gezeichnete Fläche mit Schleifpapier (120er Körnung) leicht an und säubern Sie die Fläche erneut mit dem Reiniger und lassen Sie den Reiniger ca. -
Seite 8: Montage Der Dachdurchführung
3. Montage und Installation 3.3 Montage der Dachdurchführung Falls keine Dachdurchführung vorhanden ist, die genutzt werden kann, suchen Sie eine geeignete Stelle (am besten im Windschatten hinter der Antenne) auf dem Fahrzeug- dach. Es ist darauf zu achten, dass das Eindringen von Wasser und Feuchtigkeit (z.B. Re- gen oder Spritzwasser) im Bohrloch vermieden werden muss. -
Seite 9: Anschluss Der Verbindungskabel
3. Montage und Installation 3.4 Anschluss der Verbindungskabel Verbindungen auf dem Dach: 1. Verbinden Sie das LNB-Kabel (Nr. 1) und das LNB-Kabel (Nr. 2) mit dem F-Verbinder. 2. Verbinden Sie das Steuerkabel (Nr. 3) und das Steuerkabel (Nr. 4). 3. Schieben Sie beide Kabel vorsichtig durch die Öffnungen der Dachdurchführung. 4. -
Seite 10: Vorbereitungen Der Inbetriebnahme
4. Vorbereitungen der Inbetriebnahme 4.1 Wahl des Standorts Objekte wie Bäume, Brücken und große Häuser, die sich im Einfallswinkel des Satelliten be- finden, führen zu einem Verlust des Signals. Starker Regen, Wolken, Schnee oder Eis kann die Empfangsqualität beeinträchtigen. Wenn das Satellitensignal durch schwere Wetterbedin- gungen verloren geht, wird das laufende Programm des Receivers beendet (das Bild wird einfrieren, bzw. -
Seite 11: Inbetriebnahme
4. Vorbereitungen der Inbetriebnahme Folgende Einstellungen müssen Sie nur beim Caravanman 65 / 85 Premium V2 (ohne Auto Skew) vornehmen! Sollten Sie sich in Mitteleuropa befinden, sind in der Regel keine Skew-Einstellungen notwendig. Um die Skew-Einstellung dennoch anzupassen gehen Sie wie folgt vor: 1. -
Seite 12: Das System In Betrieb Nehmen
5. Inbetriebnahme und Bedienung 5.1 Das System in Betrieb nehmen Vergewissern Sie sich zunächst, dass alle Verbindungen zwischen Antenne, Steuergerät, Bedienteil und Receiver korrekt angeschlossen sind. 1. Schalten Sie das Steuergerät am Netzschalter ein. 2. Drücken Sie die Taste auf der Vorderseite des Bedienteils. Die LED des zuletzt gewählten Satelliten leuchtet und die Antenne richtet sich auf. -
Seite 13: Empfangsreichweite
6. Empfangsreichweiten Caravanman 65 Ausleuchtzone Astra 1 Hotbird Caravanman 85 Ausleuchtzone Astra 1 Hotbird Hinweis: In den Randgebieten der Ausleuchtzone kann es zu Empfangsstörungen kommen. DEUTSCH... -
Seite 14: Steuergung Über Die App
Bei der ersten Verwendung müssen Sie das Steuergerät mit dem Mobilge- rät koppeln. Hinweis: Dies ist nur bei der ersten Verwendung nötig! 1. Öffnen Sie die Megasat-App. 2. Um den Kopplungsmodus zu akti- vieren halten Sie die Standby-Taste ) an der Vorderseite des Steuer- gerätes gedrückt, bis ein Signalton... -
Seite 15: Erklärung Der App
7. Steuerung über die App 7.3 Erklärung der App 1. Ändert den ausgewählten Satelliten (hoch / runter). 2. Öffnet oder schließt die Antenne. 3. Öffnet die Seite „Konfiguration“. 4. Aktualisiert die Satellitenkonfigurationen (Firmware-Update), wenn verfügbar. 5. Zeigt die Satellitenparameter an. 6. - Seite 16 7. Steuerung über die App 9. Wählen Sie den Satelliten aus, indem Sie auf den Satellitennamen drücken. Die Satelliteninformationen werden anschließend unten aufgelistet. 10. Drehen Sie im Menü „Manual Adjust- ment“ die Antenne mit den Pfeilen nach links und rechts für den Azimut (Drehung), oder drehen Sie die Antenne mit den Pfeilen nach oben und unten für die Elevation (Neigung).
- Seite 17 7. Steuerung über die App 11. Wenn Sie die App mit dem Steuergrät trennen möchten, drücken Sie dieses Feld. Anschließend können Sie sich mit einem anderen bzw. neuen Steuergerät koppeln. 12. Falls während dem Betrieb mit dem System ein Fehler autritt, wird Ihnen hier ein Fehlercode angezeigt.
-
Seite 18: Fehlerbehebung
8. Fehlerbehebung Während dem normalen Betrieb zeigen die LEDs des Bedienteils an, welcher Satellit gerade gewählt ist. Aber bei einem Fehler haben diese eine besondere Bedeutung, wie im Folgenden beschrieben. Das Bedienteil verfügt über mehrere Indikatoren, um Meldungen über unerwartete oder fehlerhafte Zustände zu zeigen. - Seite 19 Die Antenne kann den Satelliten nicht finden. Überprüfen Sie, ob eine neuere Firmware der Antenne zur Verfügung steht (Transponder-Update). Eine aktuelle Firmware finden Sie auf der Homepage „www.megasat.tv“. Überprüfen Sie, ob ein Gebäude, ein Baum oder andere Hindernisse den Empfang mindern oder blockieren.
-
Seite 20: Firmware-Update
Von Zeit zu Zeit kommt es vor, dass die Firmware des Steuergerätes aktualisiert werden muss (z. B. bei einer Frequenzänderung des Satellitenbetreibers oder einer allgemeinen Verbesserung des Steuergerätes). Die aktuelle Firmware finden Sie auf unserer Homepage www.megasat.tv 9.1 Update über einen USB-Stick 1. Kopieren Sie die Firmware-Datei auf einen ge- eigneten USB Stick. -
Seite 21: Technische Daten
10. Technische Daten Caravanman 65 Caravanman 85 Premium V2 Premium V2 Anzahl der Teilnehmer Satelliten-Eingangsfrequenz 10.7 ~ 12.75 GHz Polarisation Vertikal / Horizontal Frequenzband Ku-Band Frequenzbereich 10,7 GHz – 12,75 GHz Antennenverstärkung 35,1 dBi @ 11,8 GHz 36,8 dBi @ 11,8 GHz Empfangsleistung 45 dBW 43,5 dBW... -
Seite 22: Abmessungen
11. Abmessungen 11.1 Caravanman 65 V2 70 cm Drehpunkt 33 cm 82,5 cm max. Schwenkbereich DEUTSCH... - Seite 23 11. Abmessungen 11.2 Caravanman 85 V2 85 cm Drehpunkt 33 cm 97,5 cm max. Schwenkbereich DEUTSCH...
-
Seite 24: Konformitätsinformation
Konformitätsinformation Hiermit erklärt die Firma Megasat Werke GmbH, dass sich folgendes Gerät in Überein- stimmung mit den grundlegenden Anforderungen und den übrigen einschlägigen Bestimmungen der Richtlinien 2014/30/EU (EMV), 2014/35/EU (LVD) und 2014/53/EU (RED) befindet: Caravanman 65 Premium V2 (Artikel-Nr. 1500197) Caravanman 65 Professional GPS V2 (Artikel-Nr. - Seite 25 Notizen DEUTSCH...
- Seite 26 Version: 1.0 (November 2021) // Technische Änderungen, Druckfehler und Irrtümer vorbehalten. Megasat Werke GmbH | Brückenstraße 2 | D-97618 Niederlauer | www.megasat.tv | info@megasat.tv...
- Seite 27 Caravanman 65 / 85 Premium V2 Caravanman 65 / 85 Professional GPS V2 user manual...
- Seite 28 Content 1. Introduction 1.1 General information................. 03 1.2 Safety instructions..................03 1.3 Delivery ......................03 2. Control unit and control panel 2.1 Control unit front side ................04 2.1 Control unit rear side ................04 2.3 Control panel ....................05 3.
-
Seite 29: Introduction
1. Introduction 1.1 General information Attention: Improper handling can lead to serious damage to this device. The responsible persons may also be held liable for any further damage to the de- vice resulting from this. Note: Read the user manual carefully before you start the installation. If you have already installed similar products, the procedure may not be the same for this product. -
Seite 30: Control Unit And Control Panel
2. Control unit ans control panel 2.1 Control unit front side 1. I/O: Main switch for power supply. Standby button and key for connection to a mobile device via Bluetooth®. 3. SAT: LED flashes long during satellite search, flashes fast during fine adjustment. 4. -
Seite 31: Control Panel
2. Control unit ans control panel 2.3 Control panel 1. p: Switches up to a satellite. 2. q: Switches down to a satellite. 3. I/O: Switches the control unit to standby and retracts the antenna. 4. Satellite list: Displays the currently selected satellite. ENGLISH... -
Seite 32: Mounting And Installation
3. Mounting and installation 3.1 Mounting on the roof of the vehicle 1. Provide a suitable workplace. A garage or hall is better than an outdoor place. The ambient temperature for mounting must be between +5° C and max. +25° C. Do not work directly in the sun. -
Seite 33: Gluing Instructions
3. Mounting and installation 7. Slightly roughen the drawn surface with sandpaper (120 grit) and clean the surface again with the cleaner and allow the cleaner to flash off for approx. 10 minutes. ATTENTION: Do not touch the surfaces afterwards! 3.2 Gluing instruction 1. -
Seite 34: Mounting The Roof Outlet
3. Mounting and installation 3.3 Mounting the roof outlet If there is no existing roof lead-through that can be used, look for a suitable place (pre- ferably in the slipstream behind the antenna) on the vehicle roof. Make sure that water and moisture (e.g. -
Seite 35: Connection Of The Connecting Cables
3. Mounting and installation 3.4 Connecting the connecting cables Connections on the roof: 1. Connect the LNB cable (No. 1) and the LNB cable (No. 2) to the F connector. 2. Connect the control cable (No. 3) and the control cable (No. 4). 3. -
Seite 36: Preparations For Commissioning
4. Preparations for commissioning 4.1 Choice of location Objects such as trees, bridges and large houses located at the satellite‘s angle of incidence cause the signal to be lost. Heavy rain, clouds, snow or ice can affect the reception quality. If the satellite signal is lost due to severe weather conditions, the current program of the receiver will be stopped (the image will freeze or disappear). - Seite 37 4. Preparations for commissioning You only have to make the following settings for the Caravanman 65 / 85 Premium V2 (without Auto Skew)! If you are located in Central Europe, no skew settings are usually necessary. To adjust the skew setting nevertheless, proceed as follows: 1.
-
Seite 38: Startup And Operation
5. Startup and operation 5.1 Starting up the system First make sure that all connections between antenna, control unit, control unit and receiver are connected correctly. 1. Switch on the control unit at the mains switch. 2. Press the button on the front of the control unit. The LED of the last selected satellite will light up and the antenna will straighten up. -
Seite 39: Footprint
6. Footprint Caravanman 65 Footprint Astra 1 Hotbird Caravanman 85 Footprint Astra 1 Hotbird Note: In the peripheral areas of the footprint reception interference may occur. ENGLISH... -
Seite 40: Control Via The App
The first time you use it, you must pair the control device with the mobile device. Note: This is only necessary for the first use! 1. Open the Megasat app. 2. To activate pairing mode, press and hold the standby key ( ) on the front of the control unit until a signal tone is heard. - Seite 41 7. Control via the App 7.3 Declaration of the App 1. Changes the selected satellite (up / down). 2. Opens or closes the antenna. 3. Opens the „Configuration“ page. 4. Updates the satellite configurations (firmware update) if available. 5. Displays the satellite parameters. 6.
- Seite 42 7. Control via the App 9. Select the satellite by pressing the satellite name. The satellite information is then listed below. 10. In the „Manual Adjustment“ menu, rotate the antenna with the left and right arrows for azimuth, or rotate the antenna with the up and down arrows for elevation.
- Seite 43 7. Control via the App 11. If you want to separate the app with the control device, press this field. You can then pair with another or new control device. 12. If an error occurs during operation with the system, an error code is displayed here.
-
Seite 44: Troubleshooting
8. Troubleshooting During normal operation, the LEDs on the control panel indicate which satellite is cur- rently selected. But in case of an error they have a special meaning, as described below. The control panel has several indicators to show messages about unexpected or faulty conditions. - Seite 45 The antenna can‘t find the satellite. Check whether a newer firmware is available for the antenna (transponder update). A current firmware can be found on the homepage „www.megasat.tv“. Check whether a building, a tree or other obstructions reduce or block reception.
-
Seite 46: Firmware-Update
The current firmware can be found on our homepage www.megasat.tv 9.1 Update via USB device 1. Copy the firmware file to a suitable USB stick. -
Seite 47: Specifications
10. Specifications Caravanman 65 Caravanman 85 Premium V2 Premium V2 Number of subscribers Satellite input frequency 10.7 ~ 12.75 GHz Polarization Vertical / Horizontal Frequency band Ku-Band Frequency range 10,7 GHz – 12,75 GHz Antenna gain 35,1 dBi @ 11,8 GHz 36,8 dBi @ 11,8 GHz Receive power 45 dBW... -
Seite 48: Dimensions
11. Dimensions 11.1 Caravanman 65 V2 70 cm Pivot point 33 cm 82,5 cm max. Swivel range ENGLISH... - Seite 49 11. Dimensions 11.2 Caravanman 85 V2 85 cm Pivot point 33 cm 97,5 cm max. Swivel range ENGLISH...
-
Seite 50: Conformity Information
Conformity information Megasat Werke GmbH hereby declares that the following equipment is in compliance with the essential requirements and other relevant provisions of Directives 2014/30/EU (EMC), 2014/35/EU (LVD) and 2014/53/EU (RED): Caravanman 65 Premium V2 (Art-No. 1500197) Caravanman 65 Professional GPS V2 (Art-No. 1500198) Caravanman 85 Premium V2 (Art-No. - Seite 51 Notes ENGLISH...
- Seite 52 Version: 1.0 (November 2021) // Technical changes, misprints and errors reserved. Megasat Werke GmbH | Brückenstraße 2 | D-97618 Niederlauer | www.megasat.tv | info@megasat.tv...
- Seite 53 Caravanman 65 / 85 Premium V2 Caravanman 65 / 85 Professional GPS V2 Instructions d‘utilisation...
- Seite 54 Table des matières 1. Introduction 1.1 Informations générales ................03 1.2 Consignes de sécurité ................03 1.3 Étendue de la livraison ................03 2. Unité de commande et panneau de commande 2.1 Façade de l‘unité de commande ............. 04 2.1 Arrière de l‘unité de commande ............04 2.3 Panneau de contrôle ................
-
Seite 55: Introduction
1. Introduction 1.1 Informations générales Attention: Une manipulation incorrecte peut entraîner de graves dommages à cet appareil. Les responsables peuvent également être tenus pour responsables de tout autre dommage à l‘unité résultant de cette situation. Note: Lisez attentivement le manuel d‘utilisation avant de commencer l‘instal- lation. -
Seite 56: Unité De Commande Et Panneau De Commande
2. Unité de commande et panneau de commande 2.1 Façade de l‘unité de commande 1. I/O: Interrupteur principal pour l‘alimentation électrique. Bouton de mise en veille et bouton permettant de se connecter à un appareil mobile via Bluetooth®. 3. SAT: La LED clignote lentement pendant la recherche du satellite, et rapidement pendant le réglage fin. -
Seite 57: Panneau De Contrôle
2. Unité de commande et panneau de commande 2.3 Panneau de contrôle 1. p: Se déplace vers le haut vers un satellite. 2. q: Se déplace vers le bas vers un satellite. 3. I/O: Met l‘unité de commande en veille et rétracte l‘antenne. 4. -
Seite 58: Montage Et Installation
3. Montage et installation 3.1 Montage sur le toit du véhicule 1. Assurez-vous que vous disposez d‘un lieu de travail approprié. Un garage ou un hall est préférable à un endroit extérieur. La température ambiante pour le montage doit être comprise entre +5° C et +25° C maximum. Ne travaillez pas directement au soleil. Respecter les règles de travail lors de la manipulation de produits chimiques. -
Seite 59: Instructions Relatives À L'adhésif
3. Montage et installation 6. Marquez ensuite la base de l‘antenne (plaque de montage) avec un crayon. 7. Rendre légèrement rugueuse la sur- face dessinée avec du papier de verre (grain 120) et nettoyer à nouveau la surface avec le nettoyant et laisser le nettoyant s‘... -
Seite 60: Montage Du Conduit De Toit
3. Montage et installation 3.3 Montage du conduit de toit Si aucune traversée de toit ne peut être utilisée, trouvez un emplacement approprié (de préférence dans le vent derrière l‘antenne) sur le toit du véhicule. Il faut éviter la pénét- ration de l‘eau et de l‘humidité... -
Seite 61: Raccordement Des Câbles De Connexion
3. Montage et installation 3.4 Raccordement des câbles de connexion Connexions sur le toit: 1. Connectez le câble LNB (n° 1) et le câble LNB (n° 2) au connecteur F. 2. Connectez le câble de commande (n°3) et le câble de contrôle (n°4). 3. -
Seite 62: Choix De L'emplacement
4. Les préparatifs de la mise en service 4.1 Choix de l‘emplacement Les objets tels que les arbres, les ponts et les grandes maisons qui se trouvent dans l‘angle d‘incidence du satellite provoquent une perte de signal. De fortes pluies, des nuages, de la neige ou de la glace peuvent affecter la qualité... - Seite 63 4. Les préparatifs de la mise en service Il vous suffit d‘effectuer les réglages suivants pour le Caravanman 65 / 85 Premium V2 (sans Auto Skew) ! Si vous êtes en Europe centrale, aucun réglage d‘inclinaison n‘est généralement néces- saire. Pour ajuster néanmoins le réglage du skew, procédez comme suit : 1.
-
Seite 64: Mise En Service
5. Mise en service et exploitation 5.1 Mise en service du système Assurez-vous d‘abord que toutes les connexions entre l‘antenne, l‘unité de commande, le panneau de commande et le récepteur sont correctement branchées. 1. Allumez l‘unité de commande à l‘aide de l‘interrupteur principal. 2. - Seite 65 6. Plages de réception Caravanman 65 Zone d‘éclairage Astra 1 Hotbird Caravanman 85 Zone d‘éclairage Astra 1 Hotbird Note: Des interférences de réception peuvent se produire dans les zones périphériques de l‘empreinte. FRANÇAIS...
-
Seite 66: Contrôle Via L'application
7.1 Installation der App auf dem Mobilgerät Vous devez d‘abord télécharger l‘application. Vous pouvez le trouver dans l‘AppStore et le Google PlayStore sous le nom suivant: Megasat 65/85 V2 7.2 Connexion avec l‘unité de commande Lorsque vous utilisez l‘unité de com- mande pour la première fois, vous de-... -
Seite 67: Explication De L'application
7. Contrôle via l‘application 7.3 Explication de l‘application 1. Change le satellite sélectionné (haut / bas). 2. Ouvre ou ferme l‘antenne. 3. Ouvre la page „Configuration“. 4. Met à jour les configurations du satellite (mise à jour du firmware), si disponible. 5. - Seite 68 7. Contrôle via l‘application 9. Wählen Sie den Satelliten aus, indem Sie auf den Satellitennamen drücken. Die Satelliteninformationen werden anschließend unten aufgelistet. 10. Drehen Sie im Menü „Manual Adjust- ment“ die Antenne mit den Pfeilen nach links und rechts für den Azimut (Drehung), oder drehen Sie die Antenne mit den Pfeilen nach oben und unten für die Elevation (Neigung).
- Seite 69 7. Contrôle via l‘application 11. Wenn Sie die App mit dem Steuergrät trennen möchten, drücken Sie dieses Feld. Anschließend können Sie sich mit einem anderen bzw. neuen Steuergerät koppeln. 12. Falls während dem Betrieb mit dem System ein Fehler autritt, wird Ihnen hier ein Fehlercode angezeigt.
-
Seite 70: Dépannage
8. Dépannage En fonctionnement normal, les voyants de l‘unité de commande indiquent quel satelli- te est actuellement sélectionné. Mais en cas d‘erreur, ils ont une signification particuliè- re, comme décrit ci-dessous. L‘unité de commande dispose de plusieurs indicateurs pour afficher des messages sur des conditions inattendues ou défectueuses. - Seite 71 L‘antenne ne trouve pas le satellite. Vérifiez si un micrologiciel plus récent de l‘antenne est disponible (mise à jour du transpondeur). Vous pouvez trouver le der- nier firmware sur la page d‘accueil „www.megasat.tv“. Vérifiez si un bâtiment, un arbre ou d‘autres obstacles réduisent ou bloquent la réception.
-
Seite 72: Mise À Jour Du Firmware
à jour (par exemple, en cas de changement de fréquence de l‘opérateur satellite ou d‘amélioration générale de l‘unité de commande). Vous pouvez trouver le firmware actuel sur notre page d‘accueil www.megasat.tv. 9.1 Mise à jour par clé USB 1. Copiez le fichier du microprogramme sur une clé... -
Seite 73: Données Techniques
10. Données techniques Caravanman 65 Caravanman 85 Premium V2 Premium V2 Nombre d'abonnés Fréquence d'entrée satellite 10.7 ~ 12.75 GHz Polarisation Vertical / Horizontal Bande de fréquence Ku-Band Gamme de fréquences 10,7 GHz – 12,75 GHz Gain de l'antenne 35,1 dBi @ 11,8 GHz 36,8 dBi @ 11,8 GHz Recevoir de l'énergie 45 dBW... -
Seite 74: Dimensions
11. Dimensions 11.1 Caravanman 65 V2 70 cm Point de pivot 33 cm 82,5 cm Plage de pivotement maximale FRANÇAIS... - Seite 75 11. Dimensions 11.2 Caravanman 85 V2 85 cm Point de pivot 33 cm 97,5 cm Plage de pivotement maximale FRANÇAIS...
-
Seite 76: Informations Sur La Conformité
Informations sur la conformité Megasat Werke GmbH déclare par la présente que l‘équipement suivant est conforme aux exigences essentielles et aux autres dispositions pertinentes des directives 2014/30/ EU (EMC), 2014/35/EU (LVD) et 2014/53/EU (RED) : Caravanman 65 Premium V2 (Numéro d‘article 1500197) Caravanman 65 Professional GPS V2 (Numéro d‘article 1500198) - Seite 77 Notes FRANÇAIS...
- Seite 80 Version: 1.0 (Novembre 2021) // Sous réserve de modifications techniques, de fautes d‘impression et d‘ e rreurs. Megasat Werke GmbH | Brückenstraße 2 | D-97618 Niederlauer | www.megasat.tv | info@megasat.tv...