
Verwandte Anleitungen für Horizon Hobby hobbyzone AeroScout S


Inhaltszusammenfassung für Horizon Hobby hobbyzone AeroScout S
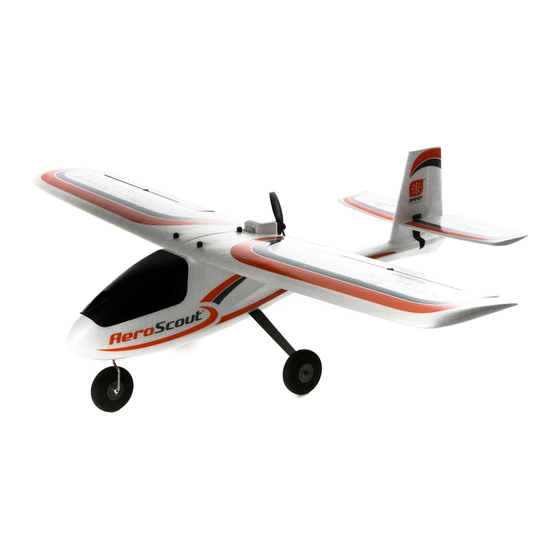
- Seite 1 All manuals and user guides at all-guides.com Instruction Manual Bedienungsanleitung Manuel d’utilisation Manuale di Istruzioni...
-
Seite 2: Safety Precautions And Warnings
All manuals and user guides at all-guides.com NOTICE All instructions, warranties and other collateral documents are subject to change at the sole discretion of Horizon Hobby, LLC. For up-to-date product literature, visit www.horizonhobby.com or www.towerhobbies.com and click on the support or resources tab for this product. -
Seite 3: Inhaltsverzeichnis
All manuals and user guides at all-guides.com Box Contents Table of Contents Specifi cations ....................3 Flying ......................14 Charging Warnings..................4 Trimming the Aircraft ..................15 Charge the Flight Battery ................4 Post Flight Checklist ..................16 Transmitter Setup ................... 5 Factory Settings for the Control Horns and Servo Arms ......... -
Seite 4: Charging Warnings
All manuals and user guides at all-guides.com Charging Warnings CAUTION: All instructions and warnings must be followed exactly. • Always inspect the battery before charging and never charge dead or Mishandling of Li-Po batteries can result in a fi re, personal injury, and/ damaged batteries. -
Seite 5: Transmitter Setup
All manuals and user guides at all-guides.com WARNING: Before proceeding further, remove the propeller and spinner from the motor shaft. Never attempt to program the radio components, assemble the aircraft or perform maintenance of any kind without removing the propeller. Serious injury could result if the motor starts inadvertently with the propeller still attached. 1. -
Seite 6: Included Dxe Transmitter (Rtf Version)
All manuals and user guides at all-guides.com Included DXe Transmitter (RTF Version) Installing the Transmitter Batteries Remove the battery cover, install the four included batteries (noting proper polarity) and reinstall the battery cover. Low Battery Alarm The LED indicator fl ashes and the transmitter beeps progressively faster as the battery voltage drops. -
Seite 7: Assemble The Aircraft
All manuals and user guides at all-guides.com Assemble the Aircraft Install the landing gear 1. Slide the main gear into the slots in the fuselage until they lock into place. 2. Insert the nose gear into the wheel collar as shown and tighten the setscrew against the fl... - Seite 8 All manuals and user guides at all-guides.com Assemble and install the wing 1. Slide the carbon fi ber wing spar fully into a wing panel as shown. Ensure the aileron servo lead exits through the slot in the bottom of the wing. 2.
-
Seite 9: Transmitter And Receiver Binding
All manuals and user guides at all-guides.com Transmitter and Receiver Binding CAUTION: Connecting the battery to the ESC with reversed polarity Binding Procedure will cause damage to the ESC, the battery or both. Damage caused by 1. Make sure the transmitter is powered off. incorrectly connecting the battery is not covered under warranty. -
Seite 10: Center Of Gravity (Cg)
If the control surfaces do not respond as shown, DO NOT FLY. Refer to the Troubleshooting Guide for more information. If you need more assistance, contact the appropriate Horizon Hobby Product Support department. If the aircraft responds as shown, continue on to the Flight Control section. -
Seite 11: Choose A Flying Field
6. If control issues exist, do not attempt to fl y. Refer to the contact table at the HOLD end of the this manual to contact Horizon Hobby product support. Also, see the Spektrum website for more information. 7. When the range check is successfully completed, release the bind button to exit range check mode. -
Seite 12: Install The Propeller
All manuals and user guides at all-guides.com Install the Propeller WARNING: Do not install the propeller until the aircraft has been completely assembled, all systems have been checked thoroughly and you are located at a suitable fl ying site. Follow the instructions below to install the propeller and spinner: 1. -
Seite 13: Flight Control
All manuals and user guides at all-guides.com Flight Control IMPORTANT: Even though SAFE technology is a very helpful tool, the aircraft Transmitter command Aircraft Response still needs to be fl own manually. If incorrect input is given at lower altitudes or at slower speeds, the aircraft can crash. -
Seite 14: Prefl Ight Checklist
All manuals and user guides at all-guides.com Prefl ight Checklist 1. Find a safe and open fl ying area 6. Perform a range check 2. Charge fl ight battery 7. Plan fl ight for fl ying fi eld conditions 3. Install fully charged fl ight battery in aircraft 8. -
Seite 15: Trimming The Aircraft
All manuals and user guides at all-guides.com Landing 1. Reduce the throttle to around 50% to slow the airspeed. 2. Fly the aircraft downwind past the end of the runway. 3. Turn the aircraft into the wind and line the aircraft up with the runway center line. -
Seite 16: Post Flight Checklist
All manuals and user guides at all-guides.com Post Flight Checklist 1. Activate Throttle Cut. 5. Inspect the airframe for loose or damaged parts 2. While avoiding the area of the propeller and prop arc, 6. Repair or replace all damaged parts disconnect and remove the fl... -
Seite 17: System Trouble Shooting Guide
All manuals and user guides at all-guides.com AS3X ® System Trouble Shooting Guide Problem Possible Cause Solution If you need to adjust the trim more than 8 clicks, return the trim to Trim is not at neutral neutral and manually adjust the clevis to center the trim Trim change when fl... -
Seite 18: Replacement Parts List
Product, (iv) attempted service by support or service. Once assembly, setup or use of the Product has been anyone other than a Horizon Hobby authorized service center, (v) Product not started, you must contact your local distributor or Horizon directly. This will... -
Seite 19: Contact Information
Horizon Technischer Service service@horizonhobby.eu Hanskampring 9 European Union D 22885 Barsbüttel, Germany Sales: Horizon Hobby GmbH +49 (0) 4121 2655 100 FCC Information FCC ID: BRWDXE BRWDASRX15 This device complies with part 15 of the FCC rules. Operation is subject to the following two conditions: (1) This device may not cause harmful interference, and (2) this device must accept any interference received, including interference that may cause undesired operation. -
Seite 20: Ic Information
CHBZ AeroScout S 1.1m BNF Basic (HBZ3850) EU Compliance Statement: Horizon Hobby, LLC hereby declares EU Compliance Statement: Horizon Hobby, LLC hereby declares that this that this product is in compliance with the essential requirements product is in compliance with the essential requirements and other relevant and other relevant provisions of the RED and EMC directives. -
Seite 21: Ama National Model Aircraft Safety Code
All manuals and user guides at all-guides.com AMA National Model Aircraft Safety Code Effective January 1, 2014 A. GENERAL B. RADIO CONTROL A model aircraft is a non-human-carrying aircraft capable of sustained fl ight 1. All pilots shall avoid fl ying directly over unprotected people, vessels, in the atmosphere. -
Seite 22: Sicherheits Maßnahmen Und Warnungen
Grundfähigkeiten. Wird dieses Produkt nicht auf eine sichere und verantwortungsvolle Weise betrieben, kann dies zu Verletzungen oder Schäden am Produkt oder anderen Sachwerten führen. Versuchen Sie nicht ohne Genehmigung durch Horizon Hobby, LLC, das Produkt zu zerlegen, es mit inkompatiblen Komponenten zu verwenden oder auf jegliche Weise zu erweitern. -
Seite 23: Packungsinhalt
All manuals and user guides at all-guides.com Packungsinhalt Inhaltsverzeichnis Spezifi kationen ..................... 23 Flugsteuerung ....................33 Akku-Warnhinweise ..................24 Checkliste vor dem Flug................34 Flug-Akku laden ................... 24 Fliegend......................34 Senderprogrammierung ................25 Trimmung des Flugzeugs ................35 Mitgelieferter DXe-Sender (RTF-Version) ............26 Checkliste nach dem Flug ................ -
Seite 24: Akku-Warnhinweise
Feuer fangen. (empfohlener Temperaturbereich 5 – 49°) oder im direkten Sonnenlicht. Flug-Akku laden Der empfohlene Akku für das HobbyZone AeroScout S Fluggerät, der in der Zum Laden des mitgelieferten Flug-Akkus: RTF-Version mitgeliefert wird, ist ein 11,1 V, 2200 mAh 3S 30C Smart Technology 1. -
Seite 25: Senderprogrammierung
All manuals and user guides at all-guides.com WARNUNG: Bauen Sie vor weiteren Schritten zunächst den Propeller und den Spinner von der Motorwelle ab. Versuchen Sie niemals, die Funkkomponenten zu programmieren, das Fluggerät zusammenzubauen oder Wartungseingriffe irgendeiner Art vorzunehmen, ohne zuvor den Propeller zu entfernen. Sollte der Motor unbeabsichtigt mit dem noch befestigten Propeller starten, kann dies zu schweren Verletzungen führen. -
Seite 26: Mitgelieferter Dxe-Sender (Rtf-Version)
All manuals and user guides at all-guides.com Mitgelieferter DXe-Sender (RTF-Version) Die Sender-Akkus einsetzen Die Akku-Abdeckung abnehmen, die vier im Lieferumfang enthaltenen Akkus (unter Beachtung der richtigen Polarität) einsetzen und Akku-Abdeckung wieder anbringen. Alarm niedriger Akkustand Die LED-Anzeige blinkt und der Sender gibt einen Piepton ab, der zunehmend schneller wird, während die Akku-Spannung fällt. -
Seite 27: Flugzeug Zusammenbauen
All manuals and user guides at all-guides.com Flugzeug zusammenbauen Einbau des Fahrwerks 1. Das Hauptfahrwerk in die Schlitze im Rumpf schieben, bis sie einrasten. 2. Das Bugfahrwerk in die Anschlaghülse entsprechend der Abbildung einfügen und die Feststellschraube an der Flachstelle des Fahrwerk-Kabels mit einem Kreuzschlitzschraubendreher festziehen. -
Seite 28: Flügel Zusammenbauen Und Montieren
All manuals and user guides at all-guides.com Flügel zusammenbauen und montieren 1. Den Kohlefaser-Tragfl ächenholm entsprechend der Abbildung vollständig auf eine Tragfl äche schieben. Sicherstellen, dass die Servoleitung des Querruders durch den Schlitz auf der Unterseite des Flügels austritt. 2. Die gegenüberliegende Tragfl äche über den Tragfl ächenholmen schieben, bis die Tragfl... -
Seite 29: Sender Und Empfänger Binden
All manuals and user guides at all-guides.com Sender und Empfänger binden ACHTUNG: Das Anschließen des Akkus an Geschwindigkeitsregler mit Vorgehensweise zur Bindung umgekehrter Polarität wird Schäden am Geschwindigkeitsregler, dem 1. Sicherstellen, dass der Sender ausgeschaltet ist. Akku oder beiden verursachen. Schäden durch das falsche Anschließen des 2. -
Seite 30: Schwerpunkt (Cg)
All manuals and user guides at all-guides.com Schwerpunkt (CG) Bei einem Fluggerät mit dem richtigen Schwerpunkt ist das Gewicht für einen sicheren, stabilen Flug in der Mitte des Flugzeugs ausbalanciert. Schwerpunkt und Gewicht des Flugzeugs basieren auf dem installierten Akku. Die Position des Schwerpunkts befi... -
Seite 31: Die Auswahl Eines Flugfeldes
6. Wenn es Probleme mit der Steuerung gibt, das Flugzeug nicht fl iegen lassen. Beziehen Sie sich auf die Kontakttabelle am Ende dieses Handbuchs und wenden Sie sich an den Horizon Hobby Produktsupport. Weitere Informationen fi nden Sie außerdem auf der Spektrum Website. -
Seite 32: Den Propeller Anbringen
All manuals and user guides at all-guides.com Den Propeller anbringen WARNUNG: Den Propeller niemals anbringen, bevor das Flugzeug vollständig zusammengebaut ist, alle Systeme gründlich überprüft wurden und Sie sich in einer geeigneten Flugumgebung befi nden. Befolgen Sie zum Anbau von Propeller und Spinner die nachstehenden Anweisungen: 1. -
Seite 33: Flugsteuerung
All manuals and user guides at all-guides.com Flugsteuerung WICHTIG: Die SAFE Plus Technologie ist ein sehr hilfreiches Instrument, aber Sendersteuerung Reaktion des Flugzeugs das Flugzeug muss dennoch von Hand gefl ogen werden. Wenn in niedriger Flughöhe oder bei geringer Geschwindigkeit an den Steuerhebeln die falschen Entscheidungen getroffen werden, kann das Flugzeug abstürzen. -
Seite 34: Checkliste Vor Dem Flug
All manuals and user guides at all-guides.com Checkliste vor dem Flug 1. Suchen Sie einen sicheren und freien Bereich 6. Reichweitentest durchführen. 2. Flug-Akku aufl aden 7. Flug gemäß Bedingungen des Flugfeldes planen 3. Voll aufgeladenen Flug-Akku in Flugzeug einbauen 8. -
Seite 35: Trimmung Des Flugzeugs
All manuals and user guides at all-guides.com Landen 1. Drosseln Sie das Gas um ca. 50 % der Luftgeschwindigkeit. 2. Fliegen Sie das Flugzeug windabwärts über das Ende der Landebahn hinaus. 3. Drehen Sie das Flugzeug gegen den Wind und richten Sie es auf die Mittellinie der Landebahn aus. -
Seite 36: Checkliste Nach Dem Flug
All manuals and user guides at all-guides.com Checkliste nach dem Flug 1. Aktivieren Sie die Gasabschaltung 5. Den Flugzeugrahmen auf gelockerte oder beschädigte Teile untersuchen 2. Den Propeller- und Propellerbogenbereich vermeiden und den Flug-Akku 6. Alle beschädigten Teile reparieren oder ersetzen vom Flugzeug trennen 7. -
Seite 37: Leitfaden Zur Problemlösung As3X
All manuals and user guides at all-guides.com Leitfaden zur Problemlösung AS3X Problem Mögliche Ursache Lösung Sollte die Trimmung um mehr als 8 Klicks verstellt sein, bringen Sie die Trimmung nicht neutral Trimmung ändert sich bei bei Trimmung zurück auf Neutral und justieren die Gabelköpfe Wechsel des Flugmodes Sub-Trimm nicht neutral Verwenden Sie kein Sub-Trim. -
Seite 38: Ersatzteile
Garantiezeitraum Garantiefall akzeptieren, die über den individuellen Wert des Produktes hinaus Exklusive Garantie Horizon Hobby LLC (Horizon) garantiert, dass dasgekaufte gehen. Horizon hat keinen Einfl uss auf den Einbau, die Verwendung oder die Produkt frei von Material- und Montagefehlern ist. Der Garantiezeitraum Wartung des Produktes oder etwaiger Produktkombinationen, die vom Käufer... -
Seite 39: Garantie Und Service Kontaktinformationen
Elektronik und Motoren vor. Mechanische Reparaturen, besonders Kaufdatum hervorgeht. Sollte sich ein Garantiefall bestätigen wird das Produkt bei Hubschraubern und RC-Cars sind extrem aufwendig und müssen repariert oder ersetzt. Diese Entscheidung obliegt einzig Horizon Hobby. deshalb vom Käufer selbst vorgenommen werden. 10/15... -
Seite 40: Précautions Et Avertissements Liés À La Sécurité
REMARQUE Toutes les instructions, garanties et autres documents de garantie sont sujets à la seule discrétion de Horizon Hobby, LLC. Veuillez, pour une littérature produits bien à jour, visiter www.horizonhobby.com ou www.towerhobbies.com et cliquer sur l’onglet de support de ce produit. -
Seite 41: Contenu De La Boîte
All manuals and user guides at all-guides.com Contenu de la boîte Table des matières Caractéristiques .................... 41 Liste de contrôles avant le décollage ............52 Avertissements relatifs à la charge ............... 42 Vol ........................ 52 Charger la batterie de vol ................42 Réglages de compensation de l’appareil ............ -
Seite 42: Avertissements Relatifs À La Charge
Charger la batterie de vol La batterie recommandée pour l’appareil HobbyZone AeroScout S, incluse avec Pour charger la batterie de vol incluse : la version RTF, est une batterie Li-Po à technologie SMART 11,1 V 2 200 mAH 1. -
Seite 43: Confi Guration De L'émetteur
All manuals and user guides at all-guides.com AVERTISSEMENT : avant de continuer, retirez l’hélice et le cône de l’arbre du moteur. N’essayez jamais de programmer les composants de radio, de monter l’appareil ou d’effectuer quelques travaux d’entretien que ce soit sans retirer l’hélice. Démarrer le moteur par inadvertance alors que l’hélice est encore fi xée peut entraîner des blessures graves. -
Seite 44: Émetteur Dxe Inclus (Version Rtf)
All manuals and user guides at all-guides.com Émetteur DXe inclus (version RTF) Installation des batteries de l’émetteur Enlevez le couvercle de batterie, installez les quatre batteries incluses (en respectant la polarité) et réinstallez le couvercle de batterie. Alarme de batterie faible Le témoin DEL clignote et l’émetteur produit un bip sonore qui s’accélère progressivement à... -
Seite 45: Assembler L'appareil
All manuals and user guides at all-guides.com Assembler l’appareil Installation du train d’atterrissage 1. Faites glisser le train principal dans les fentes du fuselage jusqu’à ce qu’il soit bloqué en position. 2. Insérez le train avant dans la bague, comme illustré, et serrez la vis de fi xation contre le méplat sur le câble du train à... - Seite 46 All manuals and user guides at all-guides.com Assembler et installer l’aile 1. Faites glisser entièrement le longeron en fi bre de carbone dans un panneau d’aile, comme illustré. Assurez-vous que le câble du servo de l’aileron sorte par le trou en bas de l’aile. 2.
-
Seite 47: Affectations De L'émetteur Et Du Récepteur
All manuals and user guides at all-guides.com Affectations de l’émetteur et du récepteur ATTENTION : un raccordement de la batterie au variateur ESC avec Procédure d’affectation une polarité inversée endommagera le variateur, la batterie ou ces 1. Assurez-vous que l’émetteur est éteint. deux éléments. -
Seite 48: Centre De Gravité (Cg)
Consultez le Guide de dépannage pour obtenir de plus amples informations. Si vous avez besoin de plus d’assistance, veuillez contacter le service après- vente Horizon Hobby approprié. Si l’appareil répond comme indiqué, veuillez poursuivre avec la section Commande de vol. -
Seite 49: Choisissez Un Terrain De Vol
6. S’il y a des problèmes de commande, n’essayez pas de voler. Référez- vous à la grille de contact à la fi n de ce manuel pour contacter le service après-vente d’Horizon Hobby. Vous pouvez également consulter le site de Spektrum pour plus d’informations. -
Seite 50: Installation De L'hélice
All manuals and user guides at all-guides.com Installation de l’hélice AVERTISSEMENT : n’installez pas l’hélice avant que l’appareil soit complètement monté, tous les systèmes minutieusement vérifi és et que vous vous trouviez sur un site de vol adapté. Suivez les instructions ci-dessous pour installer l’hélice et le cône : 1. -
Seite 51: Commande De Vol
All manuals and user guides at all-guides.com Commande de vol IMPORTANT : même si la technologie SAFE Plus est un outil très utile, Commande de l’émetteur Réponse de l’appareil l’appareil doit tout de même être piloté manuellement. Si une entrée incorrecte est donnée à... -
Seite 52: Liste De Contrôles Avant Le Décollage
All manuals and user guides at all-guides.com Liste de contrôles avant le décollage 1. Trouver une zone de vol sécurisée et ouverte 6. Vérifi er la portée 2. Charger la batterie de vol 7. Prévoir le vol dans les conditions d’un terrain de vol 3. -
Seite 53: Réglages De Compensation De L'appareil
All manuals and user guides at all-guides.com Atterrissage 1. Réduisez les gaz à 50 % environ pour baisser la vitesse. 2. Faites voler l’appareil dans le sens du vent après la fi n de la piste d’atterrissage. 3. Faites virer l’appareil contre le vent et alignez-le avec la ligne centrale de la piste d’atterrissage. -
Seite 54: Liste De Contrôles Après Le Vol
All manuals and user guides at all-guides.com Liste de contrôles après le vol 1. Activez l’arrêt du moteur 5. Inspectez le fuselage pour repérer les pièces détachées ou endommagées 2. Tout en évitant la zone et de l’arc d’hélice, déconnectez la batterie de vol de l’appareil 6. -
Seite 55: Guide De Dépannage (As3X)
All manuals and user guides at all-guides.com Guide de dépannage (AS3X) Problème Cause possible Solution Le trim n’est pas au neutre Si vous ajustez les trims plus de 8 clics, ajustez la chape pour annuler le trim Les trims changent lorsque l’on bascule entre les modes de Vol Le sub-trim n’est pas au neutre Pas de sub-trim. -
Seite 56: Pièces De Rechange
Horizon ne prend en compte aucune garantie et Garantie exclusive - Horizon Hobby, LLC (Horizon) garantit que le Produit acheté (le n‘accepte aucun recours pour les blessures ou les dommages pouvant en «... -
Seite 57: Coordonnées De Garantie Et Réparations
Si le cas de garantie est confi rmé, ATTENTION: Nous n’effectuons de réparations payantes que pour les le produit sera réparé. Cette décision relève uniquement d’Horizon Hobby. composants électroniques et les moteurs. Les réparations touchant Réparations payantes... - Seite 58 Non utilizzare componenti incompatibili o modificare il prodotto in maniera diversa da quanto riportato nelle istruzioni fornite da Horizon Hobby, LLC. Il presente manuale contiene le istruzioni per la sicurezza, l’uso e la manutenzione del prodotto.
-
Seite 59: Contenuto Della Scatola
All manuals and user guides at all-guides.com Contenuto della scatola Indice Specifi che ..................... 59 Controllo del volo ..................69 Avvertenze per la carica ................60 Controlli prevolo .................... 70 Caricare la batteria di bordo ................60 Volo ......................70 Impostazione della trasmittente .............. -
Seite 60: Avvertenze Per La Carica
All manuals and user guides at all-guides.com Avvertenze per la carica ATTENZIONE: seguire attentamente tutte le istruzioni e avvertenze. • Caricare sempre le batterie lontano da materiali infi ammabili. L’uso improprio delle batterie LiPo può provocare incendi, lesioni alle • Controllare sempre la batteria prima di caricarla. persone e/o danni alle cose. - Seite 61 All manuals and user guides at all-guides.com AVVERTENZA: prima di procedere, rimuovere l'elica e l'ogiva dall'albero motore. Non tentare mai di programmare i componenti radio, assemblare l'aeromodello o eseguire qualsiasi tipo di manutenzione senza prima rimuovere l'elica. Se il motore si avvia accidentalmente con l'elica montata, potrebbe provocare lesioni gravi. 1.
-
Seite 62: Allarme Batterie Scariche
All manuals and user guides at all-guides.com Trasmittente DXe inclusa (Versione RTF) Installazione batterie trasmittente Rimuovere il coperchio delle batterie, installare le quattro pile incluse (facendo attenzione alla polarità), poi rimettere il coperchio. Allarme batterie scariche L’indicatore LED lampeggia e la trasmittente emetterà dei segnali acustici sempre più... - Seite 63 All manuals and user guides at all-guides.com Assemblaggio dell’aeromodello Installare il carrello d’atterraggio 1. Far scorrere il carrello principale nelle fessure nella fusoliera fi no a quando si bloccano in sede. 2. Inserire il carrello anteriore nel collare del ruotino come mostrato e serrare il grano contro il punto piatto nel fi...
- Seite 64 All manuals and user guides at all-guides.com Assemblaggio e installazione delle ali 1. Far scorrere l’ala in fi bra di carbonio completamente in un apposito pannello come mostrato. Accertarsi che il fi lo elettrico del servo alettone esca attraverso la fessura alla base dell’ala. 2.
-
Seite 65: Installare La Batteria Di Bordo
All manuals and user guides at all-guides.com Connessione trasmittente/ricevente ATTENZIONE: collegare la batteria all’ESC con la polarità inversa Procedura di connessione (binding) danneggerà l’ESC, la batteria o entrambi i componenti. I danni causati 1. Accertarsi che la trasmittente sia spenta. da un collegamento errato della batteria non sono coperti dalla garanzia. -
Seite 66: Baricentro (Cg)
Se le superfi ci di controllo non rispondono in modo corretto, NON VOLARE. Consultare la Guida alla risoluzione dei problemi per avere maggiori informazioni. Per ricevere assistenza, contattare il servizio assistenza Horizon Hobby. Se l’aeromodello risponde come indicato, passare alla sezione Flight Control. - Seite 67 All manuals and user guides at all-guides.com Scegliere il campo di volo Consultare le leggi e le normative locali prima di scegliere un luogo dove far volare l’aeromodello. Per avere più successo e salvaguardare la propria incolumità e quella del Il posto dovrebbe: modello, è...
- Seite 68 All manuals and user guides at all-guides.com Montaggio dell’elica AVVERTENZA: montare l’elica soltanto dopo avere completamente assemblato l’aeromodello, verifi cato con attenzione tutti i sistemi e avere localizzato un campo di volo adeguato. Seguire le istruzioni qui riportate per installare l’elica e l’ogiva: 1.
- Seite 69 All manuals and user guides at all-guides.com Controllo del volo IMPORTANTE: nonostante la tecnologia SAFE Plus sia uno strumento Comando trasmittente Risposta aereo molto utile, l’aereo va ancora pilotato manualmente. Se si impartiscono comandi a bassa quota o a velocità ridotta, l’aereo potrebbe cadere. Studiare attentamente questi comandi e la relativa risposta dell’aereo prima di effettuare il primo volo.
- Seite 70 All manuals and user guides at all-guides.com Controlli prevolo 1. Trovare un’area sicura e aperta 6. Fare una prova di portata 2. Caricare la batteria di bordo 7. Pianifi care il volo in base alle condizioni del campo 3. Installare la batteria completamente carica sull’aeromodello 8.
-
Seite 71: Regolare I Trim In Volo
All manuals and user guides at all-guides.com Atterraggio 1. Ridurre la potenza del motore a circa il 50% per rallentare. 2. Volare sottovento oltre il termine della pista. 3. Girare l’aereo controvento e allinearlo con il centro della pista. 4. Continuare a ridurre la potenza del motore e iniziare a scendere verso la pista, tenendo le ali a livello durante l’avvicinamento. -
Seite 72: Manutenzione E Riparazioni
All manuals and user guides at all-guides.com Controlli dopo il volo 1. Attivare il throttle cut 5. Controllare l'eventuale presenza di parti della cellula allentate o danneggiate 2. Evitando la zona dell'elica e l'arco dell'elica, scollegare la batteria di volo 6. -
Seite 73: Guida Alla Risoluzione Dei Problemi
All manuals and user guides at all-guides.com Guida alla risoluzione dei problemi AS3X Problema Possibile causa Soluzione Il trim non è al centro Se il trimmaggio richiede più di 8 scatti, riportare il trim al centro e regolare i collegamenti meccanici Il trimmaggio cambia quando si commuta modalità... -
Seite 74: Pezzi Di Ricambio
Quindi Horizon non accetta nessuna responsabilità per danni o lesioni derivanti da Garanzia esclusiva - Horizon Hobby, LLC (Horizon) garantisce che il prodotto tali circostanze. Con l’utilizzo e il montaggio del prodotto l’utente acconsente a acquistato (il “Prodotto”) sarà... -
Seite 75: Garanzia E Assistenza - Informazioni Per I Contatti
HBZ AeroScout S 1.1m BNF Basic (HBZ3850) Dichiarazione di conformità UE: Horizon Hobby, LLC dichiara che Dichiarazione di conformità UE: Horizon Hobby, LLC dichiara che il presente il presente prodotto è conforme ai requisiti essenziali e ad altre prodotto è conforme ai requisiti essenziali e ad altre disposizioni rilevanti delle disposizioni rilevanti delle direttive RED e EMC. - Seite 76 © 2019 Horizon Hobby, LLC HobbyZone, the HobbyZone logo, E-fl ite, SAFE, the SAFE logo, DSM, DSM2, DSMX, IC3, Bind-N-Fly, the BNF logo, and the Horizon Hobby logo are trademarks or registered trademarks of Horizon Hobby, LLC. The Spektrum trademark is used with permission of Bachmann Industries, Inc.