Herunterladen Inhalt Inhalt Diese Seite drucken
AEG MSB2547D Benutzerinformation
Vorschau ausblenden Andere Handbücher für MSB2547D:
Inhaltsverzeichnis

Werbung

Verfügbare Sprachen
  • DE

Verfügbare Sprachen

  • DEUTSCH, seite 74
MSB2547D
USER
MANUAL
CS
Návod k použití
Mikrovlnná trouba
NL
Gebruiksaanwijzing
Magnetron
EN
User Manual
Microwave Oven
FR
Notice d'utilisation
Four à micro-ondes
DE
Benutzerinformation
Mikrowellenofen
SK
Návod na používanie
Mikrovlnná rúra
2
20
38
55
74
93

Werbung

Inhaltsverzeichnis
loading

Inhaltszusammenfassung für AEG MSB2547D

  • Seite 1 MSB2547D Návod k použití Mikrovlnná trouba Gebruiksaanwijzing Magnetron User Manual Microwave Oven Notice d'utilisation Four à micro-ondes Benutzerinformation Mikrowellenofen USER Návod na používanie Mikrovlnná rúra MANUAL...
  • Seite 2: Inhaltsverzeichnis

    12. POZNÁMKY K OCHRANĚ ŽIVOTNÍHO PROSTŘEDÍ........19 PRO DOKONALÉ VÝSLEDKY Děkujeme vám, že jste si zvolili výrobek značky AEG. Aby vám bezchybně sloužil mnoho let, vyrobili jsme jej s pomocí inovativních technologií, které usnadňují život, a vybavili funkcemi, které u obyčejných spotřebičů nespíš nenajdete. Aby vám sloužil co nejlépe, stačí...
  • Seite 3: Všeobecné Bezpečnostní Informace

    ČESKY instalací či chybným používáním. Návod k použití vždy uchovávejte spolu se spotřebičem pro jeho budoucí použití. 1.1 Bezpečnost dětí a postižených osob VAROVÁNÍ! Hrozí nebezpečí udušení, úrazu nebo jiných trvalých následků. Tento spotřebič smí používat děti starší osmi let nebo •...
  • Seite 4 VAROVÁNÍ: Spotřebič a jeho přístupné části se při • použití zahřívají na vysokou teplotu. Nedotýkejte se topných článků. Při vkládání nebo vyjímání příslušenství či nádobí • vždy používejte kuchyňské chňapky. K čištění spotřebiče nepoužívejte čistící zařízení na • páru.
  • Seite 5 ČESKY podobných předmětů může vést k poranění, vznícení nebo požáru. Uvolňuje-li se ze spotřebiče kouř, vypněte jej nebo • vypojte ze zásuvky a dvířka nechte zavřená, aby se případné plameny udusily. Ohřívání nápojů v mikrovlnné troubě může mít za • následek zpožděný...
  • Seite 6: Bezpečnostní Pokyny

    2. BEZPEČNOSTNÍ POKYNY 2.1 Instalace • Neodpojujte spotřebič ze zásuvky tahem za kabel. Vždy tahejte za VAROVÁNÍ! zástrčku. Tento spotřebič smí 2.3 Použití instalovat jen kvalifikovaná osoba. VAROVÁNÍ! • Odstraňte veškerý obalový materiál. Hrozí nebezpečí zranění, • Poškozený spotřebič neinstalujte ani popálení, úrazu elektrickým...
  • Seite 7: Všeobecné Informace

    ČESKY 2.5 Servis informací o provozním stavu spotřebiče. Nejsou určeny k použití v • Pro opravu spotřebiče se obraťte na jiných spotřebičích a nejsou vhodné k autorizované servisní středisko. osvětlení místností v domácnosti. Používejte výhradně originální náhradní díly. 2.6 Likvidace •...
  • Seite 8 2. Pokud hloubka skříňky přesahuje 4. Otevřete dvířka a připevněte 300 mm, položte šablonu na dno mikrovlnnou troubu ke skříňce skříňky a zkontrolujte, zda ji lze pomocí šroubu. správně umístit. Pokud ano, označte místa pro šrouby. Odstraňte šablonu a na označeném místě upevněte konzolu pomocí...
  • Seite 9: Popis Spotřebiče

    ČESKY 4. POPIS SPOTŘEBIČE 4.1 Celkový pohled Žárovka Bezpečnostní blokovací zámek Displej Ovládací panel Otvírání dvířek Kryt vlnovodu Gril Hřídel otočného talíře 4.2 Ovládací panel Symbol Funkce Popis Displej Ukazuje nastavení a aktuální — čas. Tlačítka nastavení Slouží k nastavení mikrovlnné‐ výkonu ho výkonu Tlačítko funkce Gril Slouží...
  • Seite 10: Příslušenství

    Symbol Funkce Popis Start / +30 sekund Slouží ke spuštění spotřebiče nebo prodloužení času přípravy o 30 sekund při plném výkonu. Tlačítka nastavení Slouží k nastavení doby, hmot‐ nosti, teploty nebo funkce auto‐ matické přípravy. Stop / Vymazat Slouží k vypnutí spotřebiče ne‐...
  • Seite 11: Denní Používání

    ČESKY 4. Pomocí tlačítek nastavení nastavte K vypnutí denního času stiskněte minuty. nebo k zapnutí displeje a nastavení 5. Potvrďte stisknutím VYPNUTÉHO stavu. Potvrďte stisknutím Chcete-li nastavení zrušit, stiskněte Displej se v pohotovostním režimu zapne na pět minut. Zobrazí se denní čas. 6.
  • Seite 12: Zapnutí A Vypnutí

    Vhodné nádobí a materiály Nádobí / materiál Mikrovlny Gril Rozmrazo‐ Ohřev Vaření vání Žáruvzdorné sklo a porcelán bez kovo‐ vých dílů, například Pyrex, žáruvzdorné sklo Nežáruvzdorné sklo a porcelán Sklo a sklokeramika ze žáruvzdorného a mrazuvzdorného materiálu (například Arcoflam), grilovací rošt...
  • Seite 13: Rychlý Start

    ČESKY odpovídajícího výkonu se řiďte níže • otevřením dvířek spotřebiče. uvedenou tabulkou. Mikrovlnná trouba automaticky přestane pracovat. Zavřením dvířek a 2. Stisknutím nebo nastavte dobu přípravy. stisknutím pokračujte v přípravě jídla. Tuto funkci používejte ke 3. Stisknutím potvrďte nastavení a kontrole jídel.
  • Seite 14 6.5 Grilování a kombinovaná Připravovat jídla lze maximálně ve třech fázích. příprava Veškerá zmrazená jídla se připravují ve 1. Opakovaným stisknutím nastavte dvou fázích. funkci grilování nebo kombinované Chcete-li jídla připravovat v jedné fázi, přípravy. krok 1 a 2 přeskočte.
  • Seite 15: Použití Příslušenství

    ČESKY Oblíbená nabídka V mikrovlnné troubě je předprogramovaná Oblíbená nabídka. Můžete si ji upravit podle vlastní potřeby. Jídlo Hmotnost Displej Změknutí másla 50 g 50 g 100 g 100 g 150 g 150 g 200 g 200 g 250 g 250 g Rozpouštění...
  • Seite 16: Doplňkové Funkce

    8. DOPLŇKOVÉ FUNKCE 8.1 Dětská bezpečnostní Když budete pokračovat v přípravě, časovač se vrátí na předchozí pojistka nastavenou dobu. Funkce dětské bezpečnostní pojistky Po uplynutí nastavené doby zazní brání náhodnému použití mikrovlnné zvukový signál. trouby. 8.3 Funkce pohotovostního Stiskněte a podržte po dobu tří...
  • Seite 17: Čištění A Údržba

    ČESKY Problém Řešení Pokrm stále není rozmrazený, horký Nastavte delší dobu přípravy nebo vyšší výkon. nebo uvařený ani po uplynutí nastave‐ Berte na vědomí, že větší pokrmy potřebují více ného času. času. Po uplynutí doby přípravy je pokrm na Příště zvolte nižší výkon a delší čas. Tekutiny, okrajích přehřátý, ale uprostřed není...
  • Seite 18: Odstraňování Závad

    šťávy při plném mikrovlnném výkonu dvou až tří minut. po dobu pěti minut. • Zápachu se zbavíte vařením sklenice vody s dvěma lžičkami citronové 11. ODSTRAŇOVÁNÍ ZÁVAD VAROVÁNÍ! Viz kapitoly o bezpečnosti. 11.1 Co dělat, když...
  • Seite 19: Poznámky K Ochraně Životního Prostředí

    ČESKY Doporučujeme, abyste si údaje napsali zde: Model (MOD.) ........Výrobní číslo (PNC) ........Sériové číslo (SN) ........12. POZNÁMKY K OCHRANĚ ŽIVOTNÍHO PROSTŘEDÍ Recyklujte materiály označené určené k likvidaci. Spotřebiče označené příslušným symbolem nelikvidujte symbolem . Obaly vyhoďte do spolu s domovním odpadem.
  • Seite 20: Veiligheidsinformatie

    12. MILIEUBESCHERMING................... 37 VOOR PERFECTE RESULTATEN Bedankt dat je voor dit AEG-product hebt gekozen. We hebben het gecreëerd om jarenlang onberispelijke prestaties te leveren, met innovatieve technologieën die het leven eenvoudiger maken – functies die je wellicht niet op gewone apparaten aantreft.
  • Seite 21: Veiligheid Van Kinderen En Kwetsbare Mensen

    NEDERLANDS door een foutieve installatie. Bewaar de instructies van het apparaat voor toekomstig gebruik. 1.1 Veiligheid van kinderen en kwetsbare mensen WAARSCHUWING! Gevaar voor verstikking, letsel of permanente invaliditeit. Dit apparaat kan worden gebruikt door kinderen van 8 • jaar en ouder en door mensen met beperkte lichamelijke, zintuiglijke of verstandelijke vermogens of een gebrek aan ervaring en kennis, indien zij onder toezicht staan of instructies hebben gekregen over het...
  • Seite 22 WAARSCHUWING: Het apparaat en de toegankelijke • onderdelen ervan worden heet tijdens het gebruik. U dient te voorkomen de verwarmingselementen aan te raken. Gebruik altijd ovenhandschoenen om accessoires of • ovenschalen te plaatsen of verwijderen. Gebruik geen stoomreiniger om het apparaat schoon •...
  • Seite 23 NEDERLANDS Houd bij het opwarmen van voedsel in plastic of • papieren verpakkingen het apparaat in de gaten, vanwege de mogelijkheid tot zelfontbranding. Het apparaat is bedoeld voor het opwarmen van • voedsel en dranken. Het drogen van voedsel of kleding en het opwarmen van warmhoudkussentjes, slippers, sponzen, vochtige doeken enzovoort kunnen leiden tot letsel, vonkontsteking of brand.
  • Seite 24: Veiligheidsvoorschriften

    Deze kunnen krassen veroorzaken op het oppervlak, waardoor het glas zou kunnen breken. Schakel het apparaat niet in als het leeg is. Metalen • onderdelen in de ruimte kunnen elektrische vonken veroorzaken. Let op de minimale afmetingen van de kast (indien •...
  • Seite 25: Montage

    NEDERLANDS 2.4 Onderhoud en reiniging apparaat. Gebruik uitsluitend originele reserveonderdelen. WAARSCHUWING! • Met betrekking tot de lamp(en) in dit Gevaar voor letsel, brand en product en reservelampen die schade aan het apparaat. afzonderlijk worden verkocht: Deze lampen zijn bedoeld om bestand te •...
  • Seite 26: Elektrische Installatie

    3.2 Elektrische installatie De magnetron wordt geleverd met stekker en netsnoer. De kabel heeft een aardingsdraad met een aardingsstekker. De stekker moet worden aangesloten op een stopcontact dat correct is geïnstalleerd en geaard. In het geval van een elektrische kortsluiting vermindert de aarding het risico op elektrische schokken.
  • Seite 27: Beschrijving Van Het Product

    NEDERLANDS 4. BESCHRIJVING VAN HET PRODUCT 4.1 Algemeen overzicht Lampje Veiligheidvergrendelingssysteem Weergave Bedieningspaneel Deuropener Afdekking voor microgolfgeleider Grillen Schacht draaiplateau 4.2 Bedieningspaneel Symbool -functie Beschrijving Scherm Toont de instellingen en de hui‐ — dige tijd. Vermogensinstel‐ Laat u het magnetronvermogen lingstoetsen instellen Grillfunctietoets...
  • Seite 28: Voordat U Het Apparaat Voor De Eerste Keer Gebruikt

    Symbool -functie Beschrijving Start / +30 sec Om het apparaat te starten of de kooktijd te verlengen met 30 seconden op vol vermogen. Instellingstoetsen Om de tijd, het gewicht of de temperatuur of automatische bereiding in te stellen. Stop / Wissen Om het apparaat uit te schake‐...
  • Seite 29: Dagelijks Gebruik

    NEDERLANDS 2. Druk op de Instellingstoetsen om de Het display wordt 5 minuten uren in te stellen. ingeschakeld in standbymodus. Het tijdstip verschijnt. 3. Druk op om te bevestigen. 4. Druk op de Instellingstoetsen om de Om het tijdstip uit te schakelen druk op minuten in te stellen.
  • Seite 30 (bijv. metalen afdekking de magnetron. verwijderen en plastic folie • U moet de op de verpakking doorprikken). afgedrukte instructies van de fabrikant Geschikt kookgerei en materialen Materiaal van de pannen Magnetron Grillen Ontdooien Verwar‐...
  • Seite 31: Snelle Start

    NEDERLANDS 6.2 De magnetron aan- en De magnetron uitschakelen: uitzetten • wacht tot de magnetron automatisch uitschakelt als de tijd is afgelopen. Op LET OP! het display verschijnt End. Stel de magnetron nooit in • open de deur. De magnetron stopt werking als er geen voedsel automatisch.
  • Seite 32 6.7 Meerfasekoken De bereidingstijd wordt met 30 seconden verhoogd met iedere extra druk op de knop. Als één van deze fases ontdooien is, stelt u dit in als • Eenmaal indrukken. Stel de de eerste fase. bereidingstijd in met de Instellingstoetsen.
  • Seite 33: Gebruik Van De Accessoires

    NEDERLANDS Favorietenmenu De magnetron heeft een voorgeprogrammeerd favorietenmenu. U kunt dit naar wens aanpassen. Schotel Gewicht Display Boter zacht maken 50 g 50 g 100 g 100 g 150 g 150 g 200 g 200 g 250 g 250 g Chocolade smelten 100 g 100 g...
  • Seite 34: Extra Functies

    8. EXTRA FUNCTIES 8.1 Kinderslot voortzet gaat de kookwekker terug naar de vorige ingestelde tijd. Het kinderslot voorkomt dat de Nadat de ingstelde tijd is verstreken, magnetron per ongeluk in werking wordt klinkt er een geluidssignaal. gesteld. 8.3 Standby en...
  • Seite 35: Combinatiekoken

    NEDERLANDS Probleem oplossing Het eten is nog steeds niet ontdooid, Stel een langere bereidingstijd in of selecteer een heet of gekookt nadat de bereidingstijd hoger magnetronvermogen. Voor grotere gerech‐ is verstreken. ten is meer tijd nodig. Als de bereidingstijd is verstreken, is Kies de volgende keer een lager vermogen en het eten aan de rand verbrand, maar een langere bereidingstijd.
  • Seite 36: Probleemoplossing

    • Reinig de binnenkant van het • Om de moelijk te verwijderen restjes apparaat na elk gebruik. Vuil laat zich te verwijderen, kook een glas water dan het makkelijkst verwijderen en gedurende 2 tot 3 minuten op de kan niet aanbranden.
  • Seite 37: Milieubescherming

    NEDERLANDS 11.2 Onderhoudsgegevens Het typeplaatje bevindt zich op het apparaat. Verwijder het typeplaatje niet Als u niet zelf het probleem kunt van het apparaat. verhelpen, neem dan contact op met uw verkoper of de serviceafdeling. De contactgegevens van het servicecentrum staan op het typeplaatje. Wij adviseren u om de gegevens hier te noteren: Model (MOD.) ........
  • Seite 38: Safety Information

    12. ENVIRONMENTAL CONCERNS..............54 FOR PERFECT RESULTS Thank you for choosing this AEG product. We have created it to give you impeccable performance for many years, with innovative technologies that help make life simpler – features you might not find on ordinary appliances. Please spend a few minutes reading to get the very best from it.
  • Seite 39: Children And Vulnerable People Safety

    ENGLISH injuries and damages. Always keep the instructions with the appliance for future reference. 1.1 Children and vulnerable people safety WARNING! Risk of suffocation, injury or permanent disability. This appliance can be used by children aged from 8 • years and above and persons with reduced physical, sensory or mental capabilities or lack of experience and knowledge if they have been given supervision or instruction concerning use of the appliance in a safe...
  • Seite 40 Always use oven gloves to remove or put in • accessories or ovenware. Do not use a steam cleaner to clean the appliance. • Before any maintenance operation, deactivate the • appliance and disconnect the mains plug from the socket.
  • Seite 41: Safety Instructions

    ENGLISH Microwave heating of beverages can result in delayed • eruptive boiling. Care must be taken when handling the container. The contents of feeding bottles and baby food jars • shall be stirred or shaken and the temperature checked before consumption, in order to avoid burns. Eggs in their shell and whole hard-boiled eggs should •...
  • Seite 42: Electrical Connection

    2.4 Care and Cleaning • Do not pull the appliance by the handle. • Keep the minimum distance from the WARNING! other appliances and units. Risk of injury, fire, or • Make sure that the appliance is damage to the appliance.
  • Seite 43: Installation

    ENGLISH 3. INSTALLATION WARNING! Refer to Safety chapters. 3.1 General Information CAUTION! Do not connect the appliance to adapters or extension leads. This can cause overloading and risk of fire. CAUTION! The minimum installation height is 85 cm. Installation distances •...
  • Seite 44: Product Description

    3. Install the microwave. If you fixed the 4. Open the door and fix the microwave bracket, make sure it locks the back to the cabinet with screw. of the appliance. 4. PRODUCT DESCRIPTION 4.1 General overview Lamp Safety interlock system...
  • Seite 45: Control Panel

    ENGLISH 4.2 Control Panel Symbol Function Description Display Shows the settings and current — time. Power settings Allow to set the microwave pads power level Grilling function To set the microwave / combi cooking / grill. Defrosting To defrost food by weight. Start / +30 sec To start the appliance or in‐...
  • Seite 46: Accessories

    4.3 Accessories Glass cooking tray and roller guide. Grill Rack Turntable set Always use the turntable set to prepare food in the microwave. Use for: • grilling food • combi cooking 5. BEFORE FIRST USE 1. Press twice. WARNING! 2.
  • Seite 47 ENGLISH can dry out, burn or catch fire in some below it so that the defrosting liquid places. collects in the container. • Do not use the appliance to cook • Turn the food after half of the eggs or snails in their shells, because defrosting time.
  • Seite 48 Cookware / Material Microwave Grilling Defrosting Heating Cooking Cardboard, paper Clingfilm Roasting film with microwave safe clo‐ sure Roasting dishes made of metal, e. g. enamel, cast iron Baking tins, black lacquer or silicon- coated Baking tray Browning cookware, e. g. crisp pan or...
  • Seite 49: Quick Start

    ENGLISH Micro‐ Med. low Med. Med. high High wave power Dis‐ 100 Watt 300 Watt 500 Watt 700 Watt play Watt Grill and Combi cooking Display Power setting Press 1 time Grill 100% 2 times Microwave 36% Grill 64% 3 times Microwave 55% Grill 45% 4 times...
  • Seite 50: Multistage Cooking

    3. Press to confirm and activate the or rearrange the food. microwave. 6.8 Favourite 6.7 Multistage cooking You can save 3 Favourite settings. If one stage is defrosting, set Use this function to save a setting that it as the first stage.
  • Seite 51: Using The Accessories

    ENGLISH Mud Cake 1 cup 2 cups 3 cups 4 cups 7. USING THE ACCESSORIES 7.2 Inserting the grill rack WARNING! Refer to Safety chapters. Place the grill rack on the turntable set. 7.1 Inserting the turntable set CAUTION! Do not cook food without the turntable set.
  • Seite 52: Hints And Tips

    After 2 seconds the timer starts - the display deactivates when the clock automatically. is not set or the clock is OFF, The Timer stops working when you open - when the time is set and the clock is the door or pause the appliance.
  • Seite 53: Care And Cleaning

    ENGLISH Add 30 - 45 ml of cold water for every Turn the food over halfway through the 250 g of vegetables. set time and continue grilling. Cut the fresh vegetables into even size 9.6 Combi Cooking pieces before cooking. Cook all vegetables with a cover on the container.
  • Seite 54: Service Data

    Problem Possible cause Remedy The appliance does The door is not closed properly. Make sure that nothing blocks not operate. the door. The lamp does not The lamp is defective. The lamp has to be replace. operate. The display shows The Child Safety Lock is active.
  • Seite 55: Informations De Sécurité

    12. EN MATIÈRE DE PROTECTION DE L'ENVIRONNEMENT......73 POUR DES RÉSULTATS PARFAITS Merci d’avoir choisi ce produit AEG. Nous l’avons conçu pour qu’il vous offre des performances irréprochables pendant de nombreuses années, en intégrant des technologies innovantes vous simplifiant la vie – fonctions que vous ne trouverez peut-être pas sur des appareils ordinaires.
  • Seite 56: Sécurité Des Enfants Et Des Personnes Vulnérables

    être tenu pour responsable des dommages et blessures liés à une mauvaise installation ou utilisation. Conservez toujours cette notice avec votre appareil pour vous y référer ultérieurement. 1.1 Sécurité des enfants et des personnes vulnérables AVERTISSEMENT! Risque d'asphyxie, de blessure ou d'invalidité...
  • Seite 57: Sécurité Générale

    FRANÇAIS 1.2 Sécurité générale Cet appareil est conçu pour un usage domestique ou • des domaines similaires, tels que : dans les bâtiments de ferme, dans des cuisines – réservées aux employés dans des magasins, bureaux et autres lieux de travail l'utilisation par les clients des hôtels, motels, des –...
  • Seite 58 Les aliments ou boissons dans des récipients en • métal ne doivent jamais être chauffés au micro-ondes. Cet avertissement ne s'applique pas si le fabricant indique la taille et la forme des récipients métalliques adaptés à la cuisson au micro-ondes.
  • Seite 59: Consignes De Sécurité

    FRANÇAIS La température des surfaces accessibles peut être • élevée lorsque l’appareil fonctionne. Le four à micro-ondes ne doit pas être installé dans un • meuble, à moins qu'il n'ait été spécifiquement testé à cet effet. La surface arrière des appareils doit être placée •...
  • Seite 60: Mise Au Rebut

    • Ne tirez jamais sur le câble incendie et un arc électrique lorsque d'alimentation électrique pour la fonction micro-ondes est en cours. débrancher l'appareil. Tirez toujours • Nettoyez l'appareil avec un chiffon sur la fiche. doux humide. Utilisez uniquement des produits de lavage neutres.
  • Seite 61: Installation Électrique

    FRANÇAIS ATTENTION! La hauteur d’installation minimale est de 85 cm. • Le micro-ondes est destiné à une utilisation encastrable uniquement. Il doit être placé sur une surface stable et plane. • Le meuble ne peut pas avoir de paroi arrière à l’endroit où se trouve le micro-ondes.
  • Seite 62: Description De L'appareil

    3. Installez le micro-ondes. Si vous 4. Ouvrez la porte et fixez le micro- avez vissé le support, veillez à ce ondes au meuble à l'aide d'une vis. qu'il bloque l'arrière de l'appareil pour l'empêcher de reculer. 4. DESCRIPTION DE L'APPAREIL 4.1 Vue d'ensemble...
  • Seite 63: Bandeau De Commande

    FRANÇAIS 4.2 Bandeau de commande Symbole Fonction Description — Affichage Affiche les réglages et l'heure. Touches de ni‐ Permet de régler le niveau de veaux de puissan‐ puissance des micro-ondes. Touche de la fonc‐ Pour régler la fonction micro- tion gril ondes / grill / cuisson combi‐...
  • Seite 64: Avant La Première Utilisation

    4.3 Accessoires Plateau de cuisson en verre et support à roulettes. Ensemble du plateau Grille tournant Utilisez toujours l'ensemble du plateau tournant pour cuire des aliments dans le micro-ondes. Utilisez-la pour : • faire griller des aliments • cuisson combinée 5.
  • Seite 65 FRANÇAIS 6.1 Informations générales avec de petits trous, par exemple sur les poignées. L'humidité s'infiltre dans sur le fonctionnement de les trous et peut causer un l'appareil craquement de l'ustensile de cuisine lorsqu'il chauffe. • Après avoir éteint l'appareil, laissez •...
  • Seite 66 Récipients et matériaux adaptés Ustensile de cuisine / matériaux Micro-ondes Gril Décongéla‐ Résis‐ Cuisine tion tance Verre et porcelaine allant au four sans aucun composant métallique, par exemple le Pyrex, le verre résistant à la chaleur Verre et porcelaine n'allant pas au four Verre et vitrocéramique composés d'un...
  • Seite 67: Démarrage Rapide

    FRANÇAIS • ouvrir la porte. Le micro-ondes 1. Appuyez sur pour régler le s'arrête automatiquement. Refermez niveau de puissance. Pour choisir le niveau de puissance approprié, voir la porte et appuyez sur pour le tableau ci-dessous. poursuivre la cuisson. Choisissez cette option si vous souhaitez 2.
  • Seite 68: Cuisson En Plusieurs Étapes

    Le temps de cuisson augmente 3. Appuyez sur pour confirmer et de 30 secondes à chaque fois activer le micro-ondes. que vous appuyez sur la touche. 6.7 Cuisson en plusieurs • Appuyez une fois sur . Pour sélectionner la durée, utilisez les étapes...
  • Seite 69: Utilisation Des Accessoires

    FRANÇAIS Utilisation du programmé 2. Appuyez sur pour allumer le Favori micro-ondes. 1. En mode veille, appuyez plusieurs fois sur pour choisir les réglages 1, 2 ou 3. Menu Favoris Il existe un menu Favoris préprogrammé dans le micro-ondes. Vous pouvez le modifier en fonction de vos préférences.
  • Seite 70: Installation De La Grille

    7.2 Installation de la grille Placez la grille sur le plateau tournant. 8. FONCTIONS SUPPLÉMENTAIRES 8.1 Sécurité enfants l'appareil en pause. Le minuteur redémarre dès que vous poursuivez la La fonction Sécurité enfants permet cuisson. d'éviter une utilisation involontaire du Lorsque la durée programmée s'est...
  • Seite 71: Cuisson Combinée

    FRANÇAIS 9.1 Conseils pour le micro-ondes Problème Solution Vous ne trouvez pas les détails pour la Recherchez un aliment similaire. Diminuez ou ral‐ quantité de nourriture préparée. longez le temps de cuisson selon la règle suivan‐ te : double quantité = presque le double de temps, moitié...
  • Seite 72: Entretien Et Nettoyage

    10. ENTRETIEN ET NETTOYAGE • En cas de salissures importantes, AVERTISSEMENT! nettoyez à l'aide de produits de Reportez-vous aux chapitres nettoyage spécifiques. concernant la sécurité. • Nettoyez régulièrement tous les accessoires et laissez-les sécher. 10.1 Remarques et conseils Utilisez un chiffon doux additionné...
  • Seite 73: En Matière De Protection De L'environnement

    FRANÇAIS Problème Cause probable Solution Des étincelles jaillis‐ Des brochettes en métal ou du Assurez-vous que les brochet‐ sent dans la cavité. papier d'aluminium touchent les tes et le papier d'aluminium ne parois intérieures. touchent pas les parois intérieu‐ res. L'ensemble du pla‐...
  • Seite 74: Kundendienst Und Service

    12. UMWELTTIPPS....................92 FÜR PERFEKTE ERGEBNISSE Danke, dass Sie sich für dieses AEG Produkt entschieden haben. Wir haben es geschaffen, damit Sie viele Jahre von seiner ausgezeichneten Leistung und den innovativen Technologien, die Ihnen das Leben erleichtern, profitieren können. Es ist mit Funktionen ausgestattet, die in gewöhnlichen Geräten nicht vorhanden...
  • Seite 75: Sicherheit Von Kindern Und Schutzbedürftigen Personen

    DEUTSCH übernimmt keine Verantwortung für Verletzungen und Beschädigungen durch unsachgemäße Montage. Bewahren Sie die Gebrauchsanleitung griffbereit auf. 1.1 Sicherheit von Kindern und schutzbedürftigen Personen WARNUNG! Erstickungs- und Verletzungsgefahr sowie Gefahr einer dauerhaften Behinderung. Das Gerät kann von Kindern ab 8 Jahren und •...
  • Seite 76 Für Gäste in Hotels, Motels, Pensionen und – anderen wohnungsähnlichen Räumlichkeiten. WARNUNG: Das Gerät und die zugänglichen • Geräteteile werden während des Betriebs heiß. Seien Sie vorsichtig und berühren Sie niemals die Heizelemente. Verwenden Sie stets Topfhandschuhe, um Zubehör •...
  • Seite 77 DEUTSCH Verwenden Sie nur mikrowellengeeignetes • Kochgeschirr. Wenn Sie Lebensmittel in Behältern aus Kunststoff • oder Papier erwärmen, behalten Sie das Gerät im Auge, da die Möglichkeit einer Entflammung besteht. Das Gerät ist zum Erhitzen von Speisen und • Getränken bestimmt. Das Trocknen von Lebensmitteln oder Kleidungsstücken und das Erhitzen von Wärmekissen, Hausschuhen, Schwämmen, feuchten Tüchern und Ähnlichem kann zu Verletzungen,...
  • Seite 78: Sicherheitsanweisungen

    Die Rückseite der Geräte muss gegen eine Wand • zeigen. Benutzen Sie zum Reinigen der Glastür keine • scharfen Scheuermittel oder Metallschwämmchen; sie könnten die Glasfläche verkratzen und zum Zersplittern der Scheibe führen. Schalten Sie das Gerät nicht ein, wenn es leer ist.
  • Seite 79: Entsorgung

    DEUTSCH 2.3 Gebrauch Sie ausschließlich Neutralreiniger. Benutzen Sie keine Scheuermittel, WARNUNG! scheuernde Verletzungs-, Reinigungsschwämmchen, Verbrennungs-, Lösungsmittel oder Stromschlag- oder Metallgegenstände. Explosionsgefahr. • Falls Sie ein Backofenspray verwenden, befolgen Sie bitte • Nehmen Sie keine technischen unbedingt die Anweisungen auf der Änderungen am Gerät vor.
  • Seite 80: Allgemeine Informationen

    3.1 Allgemeine Informationen VORSICHT! Schließen Sie das Gerät nicht an Adapter oder Verlängerungskabel an. Dies kann zu Überlastung und Brandgefahr führen. VORSICHT! Die Mindesthöhe der Installation beträgt 85 cm. • Die Mikrowelle ist nur für den eingebauten Gebrauch bestimmt. Das Gerät muss auf einer stabilen und...
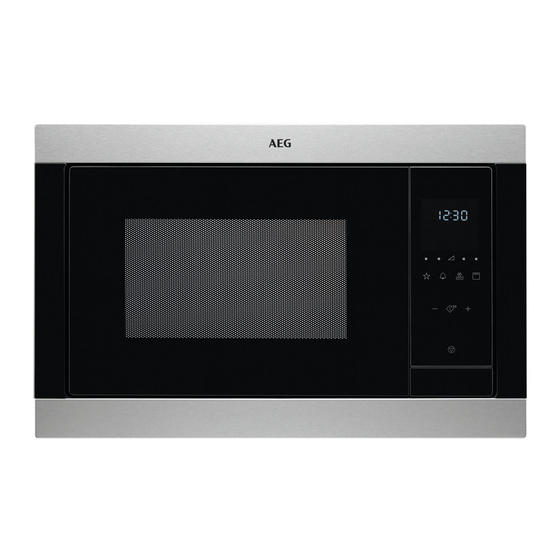
  • Seite 81: Gerätebeschreibung

    DEUTSCH 4. Öffnen Sie die Tür und befestigen Sie die Mikrowelle mit einer Schraube am Schrank. 3. Setzen Sie die Mikrowelle ein. Wenn Sie den Winkel angebracht haben, achten Sie darauf, dass er die Geräterückseite festklemmt. 4. GERÄTEBESCHREIBUNG 4.1 Allgemeine Übersicht Lampe Sicherheitsverriegelungssystem Display...
  • Seite 82: Bedienfeld

    4.2 Bedienfeld Symbol Funktion Beschreibung Anzeige Zeigt die Einstellungen und die — aktuelle Zeit an. Einstelltasten für Zum Einstellen der Mikrowel‐ Leistungstufen lenleistung Grill-Funktionstas‐ Zum Einstellen der Mikrowel‐ len-, Kombigar- und Grillfunkti‐ Auftauen Zum Auftauen von Zutaten nach Gewicht.
  • Seite 83: Vor Der Ersten Inbetriebnahme

    DEUTSCH 4.3 Zubehör Glasteller und Rollenführung Grillrost Drehteller-Set Verwenden Sie beim Zubereiten von Speisen in der Mikrowelle stets das Drehteller-Set. Verwendung: • Grillen • Kombi-Garen 5. VOR DER ERSTEN INBETRIEBNAHME 1. Drücken Sie zweimal. WARNUNG! 2. Drücken Sie die Touchpads Siehe Kapitel Einstellungen, um die Stunden Sicherheitshinweise.
  • Seite 84 • Vor der Zubereitung Löchern, zum Beispiel an Griffen. Aluminiumverpackungen, Durch in diese Löcher eingedrungene Metallbehälter usw. von den Feuchtigkeit kann das Kochgeschirr Lebensmitteln entfernen. beim Erhitzen Risse bekommen. Garen • Der Glasteller ist wichtiger Bestandteil • Lebensmittel nach Möglichkeit mit der Mikrowelle.
  • Seite 85 DEUTSCH Kochgeschirr/Material Mikrowelle Grillen Auftauen Erwär‐ Garen Nicht feuerfestes Glas und Porzellan Glas und Glaskeramik aus feuerfestem/ frostbeständigem Material (z. B. Arcof‐ lam), Grillrost Keramik , Steingut Hitzebeständiger Kunststoff bis 200 °C Pappe, Papier Frischhaltefolie Bratfolie mit mikrowellen-geeignetem Verschluss Bratgeschirr aus Metall, z. B. Emaille, Gusseisen Backformen, schwarz lackiert oder sili‐...
  • Seite 86: Schnellstart

    • Warten Sie, bis die Mikrowelle nach Garfortschritt der Speise zu Ablauf der eingestellten Gardauer überprüfen. automatisch ausgeschaltet wird. Das • Drücken Sie Display zeigt End an. Wenn die Mikrowelle • Öffnen Sie die Tür. Die Mikrowelle automatisch ausgeschaltet wird automatisch ausgeschaltet.
  • Seite 87: Mehrstufiges Garen

    DEUTSCH 2. Drücken Sie die Touchpads Tiefkühlgerichte garen Sie in 2 Schritten. „Einstellungen“, um die Zeit Zum Garen in einem Schritt überspringen einzustellen. Sie die Punkte 1 und 2. 3. Drücken Sie , um Ihre Auswahl 1. Drücken Sie und stellen Sie den zu bestätigen und die Mikrowelle Auftaumodus ein.
  • Seite 88: Verwendung Des Zubehörs

    Speise Gewicht Display Butter weich machen 50 g 50 g 100 g 100 g 150 g 150 g 200 g 200 g 250 g 250 g Schokolade schmelzen 100 g 100 g 150 g 150 g 200 g 200 g...
  • Seite 89: Zusatzfunktionen

    DEUTSCH 8. ZUSATZFUNKTIONEN 8.1 Kindersicherung Gerätebetrieb unterbrechen. Wenn Sie den Garvorgang fortsetzen, kehrt der Diese Kindersicherung verhindert eine Kurzzeitwecker zur eingestellten Zeit versehentliche Bedienung der zurück. Mikrowelle. Nach Ablauf der Zeit ertönt ein akustisches Signal. Halten Sie 3 Sekunden gedrückt. Es ertönt ein Signalton.
  • Seite 90: Aufwärmen

    Problem Abhilfe Die Speise wurde zu trocken. Kürzere Garzeit einstellen oder niedrigere Mikro‐ wellen-Leistung wählen. Die Speise ist nach Ablauf der Zeit im‐ Längere Garzeit einstellen oder höhere Leistung mer noch nicht aufgetaut, heiß oder wählen. Beachten Sie, dass für die Zubereitung gegart.
  • Seite 91: Fehlersuche

    DEUTSCH Reinigungsmittel an, und reinigen Sie warmem Wasser und etwas damit die Vorderseite des Geräts. Spülmittel an. • Reinigen Sie die Metalloberflächen • Um hartnäckige Rückstände leichter mit einem handelsüblichen entfernen zu können, stellen Sie ein Reinigungsmittel. Glas Wasser in das Gerät, und lassen •...
  • Seite 92: Servicedaten

    Problem Mögliche Ursache Abhilfe Das Drehteller-Set Unter dem Glasteller befinden Reinigen Sie die Fläche unter macht Kratz- oder sich Gegenstände oder dem Glasteller. Mahlgeräusche. Schmutz. Das Gerät funktioniert Eine Störung ist aufgetreten. Falls dieser Vorfall wiederholt ohne ersichtlichen auftritt, wenden Sie sich an den Grund nicht mehr.
  • Seite 93 12. OCHRANA ŽIVOTNÉHO PROSTREDIA............110 NA DOSIAHNUTIE PERFEKTNÝCH VÝSLEDKOV Ďakujeme, že ste si vybrali tento výrobok značky AEG. Vytvorili sme ho, aby vám poskytol bezchybný výkon na mnoho rokov, pričom sme použili inovačné technológie, ktoré pomáhajú zjednodušovať život – funkcie, ktoré nenájdete u bežných spotrebičov.
  • Seite 94: Bezpečnostné Informácie

    BEZPEČNOSTNÉ INFORMÁCIE Pred inštaláciou a používaním spotrebiča si pozorne prečítajte priložený návod na používanie. Výrobca nie je zodpovedný za škody a zranenia spôsobené nesprávnou inštaláciou a používaním. Návod na používanie uchovávajte vždy v blízkosti spotrebiča, aby ste doň mohli v budúcnosti nahliadnuť.
  • Seite 95 SLOVENSKY obytné budovy na farmách, kuchynské priestory pre – zamestnancov v obchodoch, úradoch a v iných pracovných prostrediach Pre klientov v hoteloch, moteloch, ubytovacích – zariadeniach s raňajkami a iných obytných objektoch. UPOZORNENIE: Spotrebič a jeho prístupné časti sa • počas používania môžu značne zahriať.
  • Seite 96 Ak zohrievate potraviny v plastových alebo • papierových nádobách, majte spotrebič pod dohľadom, pretože môže dôjsť k vznieteniu. Spotrebič je určený na ohrev potravín a nápojov. • Sušenie potravín alebo odevov a ohrev otepľovacích podložiek, papúč, špongií, vlhkej handry a podobných predmetov môže viesť...
  • Seite 97: Bezpečnostné Pokyny

    SLOVENSKY Nezapínajte spotrebič, keď je prázdny. Kovové časti • vo vnútri dutiny môžu vytvárať elektrický oblúk. Dávajte pozor na minimálne rozmery skrinky (ak sú • dostupné). Pozrite si kapitolu týkajúcu sa inštalácie. Prevádzka spotrebiča sa musí zabezpečiť pri • otvorených dekoratívnych dvierkach (ak sú dostupné). 2.
  • Seite 98: Inštalácia

    • Nedovoľte, aby sa zvyšky jedál alebo • Informácie o žiarovke/žiarovkách zvyšky čistiaceho prostriedku vnútri tohto výrobku a náhradných usadzovali na plochách tesnenia dieloch osvetlenia, ktoré sa predávajú dvierok. samostatne: Tieto žiarovky sú • Zvyšky tuku alebo potravín v navrhnuté...
  • Seite 99 SLOVENSKY 3. Nainštalujte mikrovlnnú rúru. Ak ste pripevnili konzolu, uistite sa, že bezpečne pridržiava zadnú časť spotrebiča. Montážne vzdialenosti Rozmer 380 + 2 4. Otvorte dvierka a pomocou skrutiek 560 + 8 upevnite mikrovlnnú rúru ku skrinke. 2. Ak je skrinka hlbšia než 300 mm, položte na dno skrinky šablónu a skontrolujte, či skrinka vyhovuje.
  • Seite 100: Popis Spotrebiča

    4. POPIS SPOTREBIČA 4.1 Celkový prehľad Osvetlenie Bezpečnostný blokovací systém Displej Ovládací panel Otváranie dvierok Kryt prívodu vĺn Gril Otočný hriadeľ 4.2 Ovládací panel Symbol Funkcia Popis Displej Zobrazuje nastavenia a aktuál‐ — ny čas. Tlačidlá nastavenia Umožňujú nastaviť úroveň mi‐...
  • Seite 101: Pred Prvým Použitím

    SLOVENSKY Symbol Funkcia Popis Štart/+30 sek. Na spustenie spotrebiča alebo predĺženie času prípravy o 30 sekúnd pri plnom výkone. Tlačidlá nastavenia Na nastavenie času prípravy, hmotnosti alebo funkcie auto‐ matického pečenia. Stop/Zrušiť Slúži na vypnutie spotrebiča alebo zrušenie nastavení. Hodiny Na nastavenie času/pripomien‐...
  • Seite 102: Každodenné Používanie

    4. Stláčaním tlačidiel nastavenia Denný čas vypnete stlačením alebo nastavte minúty. stlačte , aby ste zapli displej a nastavili 5. Nastavenie potvrďte stlačením VYPNUTÉ. Nastavenie potvrďte tlačidla stlačením tlačidla Nastavenia zrušíte stlačením tlačidla Displej sa zapne po 5 minútach v pohotovostnom režime.
  • Seite 103 SLOVENSKY Hotové jedlá odstrániť vrchný kovový obal a • Hotové jedlá môžete v spotrebiči prepichnúť plastovú fóliu). pripravovať len vtedy, ak je ich obal vhodný na použitie v mikrovlnnej rúre. • Je potrebné dodržiavať pokyny výrobcu vytlačené na obale (napr. Vhodný...
  • Seite 104: Rýchly Štart

    6.2 Zapnutie a vypnutie Vypnutie mikrovlnnej rúry: mikrovlnnej rúry • počkajte, kým sa mikrovlnná rúra automaticky nevypne po uplynutí UPOZORNENIE! nastaveného času. Na displeji sa Nenechajte mikrovlnnú rúru zobrazí End. v činnosti, keď v nej nie je • otvorte dvierka. Mikrovlnná rúra sa žiadne jedlo.
  • Seite 105 SLOVENSKY 6.7 Viacfázové pečenie Čas prípravy sa zvyšuje o 30 sekúnd každým ďalším stlačením tohto tlačidla. Ak je jednou z fáz rozmrazovanie, nastavte ho • Stlačte raz . Čas prípravy ako prvý stupeň. nastavte stlačením tlačidiel nastavenia. Stlačením tlačidla Jedlo môžete pripravovať najviac v 3 zapnete mikrovlnnú...
  • Seite 106: Používanie Príslušenstva

    Ponuka Obľúbené Mikrovlnná rúra má predprogramovanú ponuku Obľúbené. Môžete ju upravovať podľa vašich preferencií. Pokrm Hmotnosť Displej Zmäkčenie masla 50 g 50 g 100 g 100 g 150 g 150 g 200 g 200 g 250 g 250 g Rozpustenie čokolády...
  • Seite 107: Doplnkové Funkcie

    SLOVENSKY 8. DOPLNKOVÉ FUNKCIE 8.1 Detská poistka budete pokračovať v príprave pokrmu, časovač sa vráti na predtým nastavený Funkcia Detská poistka zabraňuje čas. náhodnému zapnutiu mikrovlnnej rúry. Po uplynutí nastaveného času zaznie zvukový signál. Stlačte a podržte na 3 sekundy. Zaznie zvukový...
  • Seite 108: Ošetrovanie A Čistenie

    Problém Riešenie Po uplynutí času varenia je jedlo na Nabudúce nastavte nižší výkon a dlhší čas. Kva‐ okrajoch prehriate, ale v strede stále paliny, napr. polievku, po uplynutí polovice času nie je hotové. premiešajte. 9.4 Zohrievanie Ryža sa uvarí lepšie, keď použijete plytký...
  • Seite 109: Riešenie Problémov

    SLOVENSKY • Na odstránenie pachov pridajte do pri plnom mikrovlnnom výkone po pohára vody 2 čajové lyžičky dobu 5 minút. citrónovej šťavy a nechajte zmes variť 11. RIEŠENIE PROBLÉMOV VAROVANIE! Pozrite si kapitoly ohľadne bezpečnosti. 11.1 Čo robiť, keď... Problém Možné...
  • Seite 110: Ochrana Životného Prostredia

    Odporúčame, aby ste si sem zapísali tieto údaje: Model (MOD.) ........Číslo výrobku (PNC) ........Sériové číslo (S.N.) ........12. OCHRANA ŽIVOTNÉHO PROSTREDIA Materiály označené symbolom spotrebiče označené symbolom spolu s odpadom z domácnosti. Výrobok odovzdajte na recykláciu. . Obal hoďte odovzdajte v miestnom recyklačnom...
  • Seite 112 www.aeg.com/shop...

Diese Anleitung auch für:

Msb2547d-m

Inhaltsverzeichnis