Herunterladen Inhalt Inhalt Diese Seite drucken
AEG MSB2547D Benutzerinformation

AEG MSB2547D Benutzerinformation

Mikrowellenofen
Vorschau ausblenden Andere Handbücher für MSB2547D:
Inhaltsverzeichnis

Werbung

Verfügbare Sprachen
  • DE

Verfügbare Sprachen

  • DEUTSCH, seite 73
MSB2547D
USER
MANUAL
CS
Návod k použití
Mikrovlnná trouba
NL
Gebruiksaanwijzing
Magnetron
EN
User Manual
Microwave Oven
FR
Notice d'utilisation
Four à micro-ondes
DE
Benutzerinformation
Mikrowellenofen
SK
Návod na používanie
Mikrovlnná rúra
2
19
37
54
73
92

Werbung

Inhaltsverzeichnis
loading

Inhaltszusammenfassung für AEG MSB2547D

  • Seite 1 MSB2547D Návod k použití Mikrovlnná trouba Gebruiksaanwijzing Magnetron User Manual Microwave Oven Notice d'utilisation Four à micro-ondes Benutzerinformation Mikrowellenofen Návod na používanie Mikrovlnná rúra USER MANUAL...
  • Seite 2: Inhaltsverzeichnis

    11. INSTALACE...................... 16 PRO DOKONALÉ VÝSLEDKY Děkujeme vám, že jste si zvolili výrobek značky AEG. Aby vám bezchybně sloužil mnoho let, vyrobili jsme jej s pomocí inovativních technologií, které usnadňují život, a vybavili jsme jej funkcemi, které u obyčejných spotřebičů nenajdete. Stačí...
  • Seite 3: Bezpečnostní Informace

    ČESKY BEZPEČNOSTNÍ INFORMACE Tento návod si pečlivě přečtěte ještě před instalací spotřebiče a jeho prvním použitím. Výrobce nezodpovídá za škody a zranění způsobená nesprávnou instalací či chybným používáním. Návod k použití vždy uchovávejte spolu se spotřebičem pro jeho budoucí použití. 1.1 Bezpečnost dětí...
  • Seite 4 – zaměstnance v obchodech, kancelářích a jiných pracovních prostředích; pro zákazníky hotelů, motelů, penzionů a jiných – ubytovacích zařízení. Při provozu je vnitřek spotřebiče horký. Nedotýkejte se • topných článků ve spotřebiči. Při vkládání či vyjímání...
  • Seite 5: Bezpečnostní Pokyny

    ČESKY Pokud ze spotřebiče vychází kouř, spotřebič vypněte • nebo odpojte od sítě a nechte dvířka zavřená, aby se případné plameny uhasily. Ohřívání nápojů v mikrovlnné troubě může vést • k utajenému varu a pozdějšímu prudkému vystříknutí kapaliny. S nádobou je proto nutné zacházet opatrně. Kojenecké...
  • Seite 6: Připojení K Elektrické Síti

    • Při přemisťování spotřebiče buďte • Neměňte technické parametry tohoto vždy opatrní, protože je těžký. Vždy spotřebiče. noste ochranné rukavice. • Zapnutý spotřebič nenechávejte bez • Netahejte spotřebič za držadlo. dozoru. • Dodržujte minimální vzdálenosti od • Dvířka spotřebiče nikdy neotvírejte ostatních spotřebičů...
  • Seite 7: Popis Spotřebiče

    ČESKY 3. POPIS SPOTŘEBIČE 3.1 Celkový pohled Žárovka Bezpečnostní blokovací zámek Displej Ovládací panel Otvírání dvířek Kryt vlnovodu Gril Hřídel otočného talíře 3.2 Ovládací panel Symbol Funkce Popis Displej Ukazuje nastavení a aktuální — čas. Tlačítka nastavení Slouží k nastavení mikrovlnné‐ výkonu ho výkonu Tlačítko funkce Gril Slouží...
  • Seite 8: Příslušenství

    Symbol Funkce Popis Start / +30 sekund Slouží ke spuštění spotřebiče nebo prodloužení času přípravy o 30 sekund při plném výkonu. Tlačítka nastavení Slouží k nastavení doby, hmot‐ nosti, teploty nebo funkce auto‐ matické přípravy. Stop / Vymazat Slouží k vypnutí spotřebiče ne‐...
  • Seite 9: Denní Používání

    ČESKY 4. Pomocí tlačítek nastavení nastavte Chcete-li nastavení minuty. zrušit, stiskněte 5. Potvrďte stisknutím 5. DENNÍ POUŽÍVÁNÍ dnem nebo malými dírkami, například VAROVÁNÍ! na rukojetích. Vlhkost pronikající do Viz kapitoly o bezpečnosti. otvorů může způsobit prasknutí nádobí po jeho zahřátí. 5.1 Všeobecné...
  • Seite 10: Zapnutí A Vypnutí

    Vhodné nádobí a materiály Nádobí / materiál Mikrovlny Gril Rozmrazo‐ Ohřev Vaření vání Žáruvzdorné sklo a porcelán bez kovo‐ vých dílů, například Pyrex, žáruvzdorné sklo Nežáruvzdorné sklo a porcelán Sklo a sklokeramika ze žáruvzdorného a mrazuvzdorného materiálu (například Arcoflam), grilovací rošt...
  • Seite 11: Rychlý Start

    ČESKY odpovídajícího výkonu se řiďte níže • otevřením dvířek spotřebiče. uvedenou tabulkou. Mikrovlnná trouba automaticky přestane pracovat. Zavřením dvířek a 2. Stisknutím nebo nastavte dobu přípravy. stisknutím pokračujte v přípravě jídla. Tuto funkci používejte ke 3. Stisknutím potvrďte nastavení a kontrole jídel.
  • Seite 12 5.5 Grilování a kombinovaná 5.7 Vícefázová příprava jídla příprava Pokud je jednou z fází rozmrazování, nastavte ji 1. Opakovaným stisknutím nastavte jako fázi první. funkci grilování nebo kombinované přípravy. Připravovat jídla lze maximálně ve třech 2. Pomocí tlačítek nastavení nastavte fázích.
  • Seite 13: Použití Příslušenství

    ČESKY Oblíbená nabídka V mikrovlnné troubě je předprogramovaná Oblíbená nabídka. Můžete si ji upravit podle vlastní potřeby. Jídlo Hmotnost Displej Změknutí másla 50 g 50 g 100 g 100 g 150 g 150 g 200 g 200 g 250 g 250 g Rozpouštění...
  • Seite 14: Doplňkové Funkce

    7. DOPLŇKOVÉ FUNKCE 7.1 Dětská bezpečnostní Když je spuštěný kuchyňský pojistka časovač, nelze nastavit žádný jiný program. Funkce dětské bezpečnostní pojistky brání náhodnému použití mikrovlnné 1. Stiskněte trouby. 2. Pomocí tlačítek nastavení nastavte dobu. Stiskněte a podržte po dobu tří...
  • Seite 15: Čištění A Údržba

    ČESKY 8.3 Vaření 8.5 Gril Chlazené maso a drůbež vždy vyndejte z Ploché kusy potravin grilujte uprostřed chladničky alespoň 30 minut před grilovacího roštu. přípravou. V polovině nastavené doby přípravy Po dokončení přípravy nechte maso, potraviny obraťte a pokračujte v drůbež, ryby a zeleninu zakrytou odstát.
  • Seite 16: Servisní Údaje

    Problém Možná příčina Řešení Spotřebič nefunguje. Spotřebič není zapojen do zá‐ Zapojte spotřebič do zásuvky. suvky. Spotřebič nefunguje. Spálená pojistka v pojistkové Zkontrolujte pojistku. Jestliže se skříňce. pojistka spálí vícekrát, obraťte se na kvalifikovaného elektrikáře. Spotřebič nefunguje. Dvířka nejsou správně zavřená.
  • Seite 17: Všeobecné Informace

    ČESKY 11.1 Všeobecné informace zapojit do zásuvky, která je řádně nainstalována a uzemněna. V případě POZOR! zkratu snižuje uzemnění riziko úrazu Nezakrývejte ventilační elektrickým proudem. otvory. Učiníte-li tak, 11.3 Instalace mikrovlnné spotřebič se může přehřívat. trouby POZOR! 1. Zkontrolujte, zda rozměry nábytku Nezapojujte spotřebič...
  • Seite 18: Poznámky K Ochraně Životního Prostředí

    4. Otevřete dvířka a připevněte mikrovlnnou troubu ke skříňce pomocí šroubu. 3. Nainstalujte mikrovlnnou troubu. Pokud jste připevnili konzolu, ujistěte se, že zajistí zadní stranu spotřebiče. 12. POZNÁMKY K OCHRANĚ ŽIVOTNÍHO PROSTŘEDÍ Recyklujte materiály označené určené k likvidaci. Spotřebiče označené...
  • Seite 19 10. PROBLEEMOPLOSSING..................33 11. MONTAGE ......................34 VOOR PERFECTE RESULTATEN Bedankt dat u voor dit AEG-product heeft gekozen. Dit apparaat is ontworpen om vele jaren uitstekend te presteren, met innovatieve technologieën die het leven gemakkelijker helpen maken met functies die gewone apparaten wellicht niet hebben.
  • Seite 20: Veiligheidsinformatie

    VEILIGHEIDSINFORMATIE Lees zorgvuldig de meegeleverde instructies voor installatie en gebruik van het apparaat. De fabrikant is niet verantwoordelijk voor letsel en schade veroorzaakt door een foutieve installatie. Bewaar de instructies van het apparaat voor toekomstig gebruik. 1.1 Veiligheid van kinderen en kwetsbare mensen...
  • Seite 21 NEDERLANDS boerderijen, personeelskeukens in winkels, – kantoren of andere werkomgevingen Door gasten in hotels, motels, bed&breakfasts en – andere woonomgevingen Van binnen wordt het apparaat heet als het in werking • is. Raak de verwarmingselementen in het apparaat niet aan. Gebruik altijd ovenhandschoenen om accessoires of kookgerei te plaatsen of verwijderen.
  • Seite 22 Als rook wordt waargenomen, zet dan het apparaat uit • of trek de stekker uit het stopcontact en houd de deur gesloten om vlammen te doven.
  • Seite 23: Veiligheidsvoorschriften

    NEDERLANDS 2. VEILIGHEIDSVOORSCHRIFTEN 2.1 Montage • Trek niet aan het netsnoer om het apparaat los te koppelen. Trek altijd WAARSCHUWING! aan de stekker. Alleen een erkende 2.3 Gebruik installatietechnicus mag het apparaat installeren. WAARSCHUWING! • Verwijder alle verpakkingsmaterialen. Gevaar op letsel, •...
  • Seite 24: Beschrijving Van Het Product

    2.5 Verwijdering • Haal de stekker uit het stopcontact. • Snij het netsnoer van het apparaat af WAARSCHUWING! en gooi dit weg. Gevaar voor letsel of verstikking. 3. BESCHRIJVING VAN HET PRODUCT 3.1 Algemeen overzicht Lampje Veiligheidvergrendelingssysteem Weergave Bedieningspaneel...
  • Seite 25: Voordat U Het Apparaat Voor De Eerste Keer Gebruikt

    NEDERLANDS Symbool Functie Beschrijving Grillfunctietoets Om magnetron / grill / combi- koken in te stellen. Ontdooien Voedsel ontdooien op gewicht of tijd. Start / +30 sec Om het apparaat te starten of de kooktijd te verlengen met 30 seconden op vol vermogen. Instellingstoetsen Om de tijd, het gewicht of de temperatuur of automatische...
  • Seite 26: Tijd Instellen

    • Verwijder alle onderdelen en extra 1. Druk tweemaal op verpakking uit de magnetron. 2. Druk op de Instellingstoetsen om de • Reinig het apparaat voor het eerste uren in te stellen. gebruik. 3. Druk op om te bevestigen.
  • Seite 27 NEDERLANDS Fruit, groenten ontdooien verpakking geschikt is voor gebruik in • Als fruit en groenten rauw moeten de magnetron. blijven, ontdooi deze dan niet • U moet de op de verpakking volledig in het apparaat. Laat ze bij afgedrukte instructies van de fabrikant kamertemperatuur ontdooien.
  • Seite 28 Materiaal van de pannen Magnetron Grillen Ontdooien Verwar- Koken Kant-en-klare maaltijden in de verpak- king 1) Zonder zilveren, gouden, platina of metalen laag/versieringen 2) Zonder quartz of metalen onderdelen, of glas dat metalen bevat 3) U dient de instructies van de fabrikant over de maximum temperaturen na te leven.
  • Seite 29: Snelle Start

    NEDERLANDS Grillen en combinatiekoken Display Instelling vermogen Druk op 1 keer 100% grill 2 keer 36% magnetron 64% grill 3 keer 55% magnetron 45% grill 4 keer 900 Watt 100% magnetron 5.4 Snelle start 5.6 Ontdooien U kunt uit 2 ontdooiwijzen kiezen: De maximale bereidingstijd is 95 minuten.
  • Seite 30 5.7 Meerfasekoken geluidssignaal hoort, draai het voedsel dan om of herschik het. Als één van deze fases 5.8 Favoriet ontdooien is, stelt u dit in als de eerste fase. U kunt 3 favoriete instellingen opslaan. U kunt voedsel in maximaal 3 fases Gebruik deze functie om een instelling bereiden.
  • Seite 31: Gebruik Van De Accessoires

    NEDERLANDS Smeuïge cake 1 kopje 2 kopjes 3 kopjes 4 kopjes 6. GEBRUIK VAN DE ACCESSOIRES 6.2 Het grillrek plaatsen WAARSCHUWING! Raadpleeg de hoofdstukken Plaats het grillrek op het draaiplateau. Veiligheid. 6.1 Het plaatsen van het draaiplateau LET OP! Bereid geen voedsel zonder het draaiplateau en de wieltjes.
  • Seite 32: Aanwijzingen En Tips

    Na 2 seconden begint de timer Als de kookwekkerfunctie automatisch. actief is, kan er geen ander De Kookwekker stopt als u de deur programma worden opent of het apparaat pauzeert. Als u het ingesteld. koken voortzet gaat de kookwekker terug naar de vorige ingestelde tijd.
  • Seite 33: Combinatiekoken

    NEDERLANDS 8.6 Combinatiekoken Snijd de verse groente in stukken van gelijke grootte. Alle groenten afgedekt Gebruik Combinatiekoken om bepaald in de container koken. voedsel krokant te houden. 8.4 Opwarmen Draai het voedsel halverwege de ingestelde tijd om en ga verder. Volg bij het opwarmen van verpakte kant-en-klaar maaltijden altijd de Er bestaan 2 modi voor Combikoken.
  • Seite 34: Montage

    Probleem Mogelijke oorzaak Oplossing Het apparaat werkt De zekering in de zekeringkast Controleer de zekering. Als de niet. is doorgebrand. zekering meer dan een keer doorslaat, raadpleegt u een be- voegde elektricien. Het apparaat werkt De deur is niet goed gesloten.
  • Seite 35: Algemene Informatie

    NEDERLANDS 11.1 Algemene informatie De kabel heeft geaarde bedrading met een geaarde stekker. De stekker moet in LET OP! een stopcontact worden gestoken dat Blokkeer de luchtopeningen goed is geïnstalleerd en geaard. Bij niet. Als u dat wel doet, kan kortsluiting vermindert de aarding de het apparaat oververhit kans op het krijgen van een elektrische...
  • Seite 36: Milieubescherming

    4. Open de deur en bevestig de magnetron aan de kast met een schroef. 3. De magnetron installeren. Als u de beugel bevestigd hebt, zorg er dan voor dat hij aan de achterkant van het apparaat vastzit. 12. MILIEUBESCHERMING...
  • Seite 37 11. INSTALLATION......................51 FOR PERFECT RESULTS Thank you for choosing this AEG product. We have created it to give you impeccable performance for many years, with innovative technologies that help make life simpler features you might not find on ordinary appliances. Please spend a few minutes reading to get the very best from it.
  • Seite 38: Safety Information

    SAFETY INFORMATION Before the installation and use of the appliance, carefully read the supplied instructions. The manufacturer is not responsible if an incorrect installation and use causes injuries and damages. Always keep the instructions with the appliance for future reference.
  • Seite 39 ENGLISH By clients in hotels, motels, bed and breakfast and – other residential type environments Internally the appliance becomes hot when in • operation. Do not touch the heating elements that are in the appliance. Always use oven gloves to remove or put in accessories or ovenware.
  • Seite 40: Safety Instructions

    The contents of feeding bottles and baby food jars • shall be stirred or shaken and the temperature checked before consumption, in order to avoid burns. Eggs in their shell and whole hard-boiled eggs should • not be heated in the appliance since they may explode, even after microwave heating has ended.
  • Seite 41: Electrical Connection

    ENGLISH 2.2 Electrical Connection • Do not use the appliance as a work surface and do not use the cavity for WARNING! storage purposes. Risk of fire and electrical 2.4 Care and Cleaning shock. • All electrical connections should be WARNING! made by a qualified electrician.
  • Seite 42: Product Description

    3. PRODUCT DESCRIPTION 3.1 General overview Lamp Safety interlock system Display Control panel Door opener Waveguide cover Grill Turntable shaft 3.2 Control Panel Symbol Function Description Display Shows the settings and current — time. Power settings Allow to set the microwave...
  • Seite 43: Accessories

    ENGLISH Symbol Function Description Start / +30 sec To start the appliance or in- crease the cooking time for 30 seconds at full power. Setting pads To set the time, weight, tem- perature or Auto cooking func- tion. Stop / Clear To deactivate the appliance or delete the cooking settings.
  • Seite 44: Daily Use

    4. Press the Setting pads to set the To cancel the settings minutes. press 5. Press to confirm. 5. DAILY USE • Do not use cookware made of WARNING! porcelain, ceramic or earthenware Refer to Safety chapters. with unglazed bottoms or small holes for example on handles.
  • Seite 45 ENGLISH Suitable cookware and materials Cookware / Material Microwave Grilling Defrosting Heating Cooking Ovenproof glass and porcelain with no metal components, e. g. Pyrex, heat- proof glass Non-ovenproof glass and porcelain Glass and glass ceramic made of oven- proof/frost-proof material (e. g. Arco- flam), grill shelf Ceramic , earthenware...
  • Seite 46: Quick Start

    • wait until the microwave deactivates • press automatically, when the time comes When the microwave to an end. The display shows End. deactivates automatically, an • open the door. The microwave stops acoustic signal sounds. automatically. Close the door and press to continue to cook.
  • Seite 47: Multistage Cooking

    ENGLISH 5.6 Defrosting Cook all frozen foods in 2 stages. To cook in one stage skip step 1 and 2. You can choose between 2 defrosting modes: 1. Press and set the defrosting • Weight defrosting mode. • Time defrosting 2.
  • Seite 48: Using The Accessories

    Softening butter 50 g 50 g 100 g 100 g 150 g 150 g 200 g 200 g 250 g 250 g Melting chocolate 100 g 100 g 150 g 150 g 200 g 200 g Mud Cake 1 cup...
  • Seite 49: Additional Functions

    ENGLISH 7. ADDITIONAL FUNCTIONS 7.1 Child Safety Lock 1. Press 2. Press the Setting pads to set the The Child Safety Lock prevents an time. accidental operation of the microwave. After 2 seconds the timer starts automatically. Press and hold for 3 second.
  • Seite 50: Care And Cleaning

    Brush a little oil or melted butter over the Turn the food over halfway through the fish. set time and continue grilling. All vegetables should be cooked at full 8.6 Combi Cooking microwave power. Use the Combi Cooking to keep the Add 30 - 45 ml of cold water for every crispness of certain foods.
  • Seite 51: Service Data

    ENGLISH Problem Possible cause Remedy The appliance does The fuse in the fuse box is Check the fuse. If the fuse blows not operate. blown. more than one time, contact a qualified electrician. The appliance does The door is not closed properly. Make sure that nothing blocks not operate.
  • Seite 52: Electrical Installation

    CAUTION! Do not connect the appliance to adapters or extension leads. This can cause overloading and risk of fire. CAUTION! The minimum installation height is 85 cm. • The microwave is for built-in use only. It must be placed on a stable and flat surface.
  • Seite 53: Environmental Concerns

    ENGLISH 4. Open the door and fix the microwave to the cabinet with screw. 12. ENVIRONMENTAL CONCERNS marked with the symbol with the Recycle the materials with the symbol household waste. Return the product to Put the packaging in applicable your local recycling facility or contact containers to recycle it.
  • Seite 54: Service Après-Vente

    11. INSTALLATION......................70 POUR DES RÉSULTATS PARFAITS Merci d'avoir choisi ce produit AEG. Nous l'avons conçu pour qu'il vous offre des performances irréprochables pour longtemps, en intégrant des technologies innovantes qui vous simplifient la vie grâce à des caractéristiques que vous ne trouverez pas forcément sur des appareils ordinaires.
  • Seite 55: Informations De Sécurité

    FRANÇAIS INFORMATIONS DE SÉCURITÉ Avant d'installer et d'utiliser cet appareil, lisez soigneusement les instructions fournies. Le fabricant ne peut être tenu pour responsable des dommages et blessures liés à une mauvaise installation ou utilisation. Conservez toujours cette notice avec votre appareil pour vous y référer ultérieurement.
  • Seite 56: Consignes Générales De Sécurité

    1.2 Consignes générales de sécurité Cet appareil est conçu uniquement pour un usage • domestique et des utilisations telles que : bâtiments de ferme, cuisines réservées aux – employés dans les magasins, bureaux et autres lieux de travail ;...
  • Seite 57 FRANÇAIS toujours l'appareil car ces matières peuvent s'enflammer. Cet appareil est uniquement destiné à chauffer des • aliments et des boissons. L'utiliser pour sécher des aliments ou des vêtements, ou pour faire chauffer des compresses chauffantes, des chaussons, des éponges, des tissus humides ou autres pourrait provoquer des blessures ou un incendie.
  • Seite 58: Consignes De Sécurité

    Faites attention aux dimensions minimales du meuble • (le cas échéant). Reportez-vous au chapitre « Installation ». L'appareil doit être mis en marche avec la porte • décorative du meuble ouverte (si présente). 2. CONSIGNES DE SÉCURITÉ 2.1 Instructions d’installation •...
  • Seite 59: Mise Au Rebut

    FRANÇAIS 2.5 Mise au rebut • Ne laissez pas les résidus alimentaires ou de produits nettoyants s'accumuler sur les joints de la porte. AVERTISSEMENT! • Des graisses ou de la nourriture Risque de blessure ou restant dans l'appareil peuvent d'asphyxie. provoquer un incendie.
  • Seite 60 Simbol Fonction Description — Affichage Affiche les réglages et l'heure. Touches de régla- Permet de régler le niveau de ge de l'alimenta- puissance du four à micro-on- tion Touche de fonc- Pour régler la fonction micro- tion gril ondes / grill / cuisson combi- née.
  • Seite 61: Avant La Première Utilisation

    FRANÇAIS 4. AVANT LA PREMIÈRE UTILISATION après une coupure de courant, 0:00 AVERTISSEMENT! s'affiche et un signal sonore retentit. Reportez-vous aux chapitres concernant la sécurité. Vous pouvez sélectionner le format 24 heures pour 4.1 Premier nettoyage l'horloge. ATTENTION! 1. Appuyez deux fois sur Reportez-vous au chapitre 2.
  • Seite 62 à micro-ondes. Placez les aliments ou Décongélation de fruits et légumes liquides dessus. • Si les fruits et légumes doivent rester Décongélation des viandes, de la crus, ne les décongelez pas volaille et du poisson entièrement dans l'appareil. Laissez- •...
  • Seite 63 FRANÇAIS Ustensile de cuisine / matériaux Micro-ondes Gril Décongéla- Résistan- Cuisine tion Plats à rôti en métal, par ex., émail, fon- Moules, laqués noirs ou revêtement en silicone Plateau de cuisson Ustensiles de cuisine pour dorer, par exemple plat « Crisp » ou plateau «...
  • Seite 64: Démarrage Rapide

    Puis- Moy. bas Moy. Moy. haut Fort sance du mi- cro- ondes Affi- 100 Watt 300 Watt 500 Watt 700 Watt chage Watt Gril et cuisson combinée Affichage Réglage de puissance Appuyez sur 1 fois Gril 100% 2 fois...
  • Seite 65: Cuisson En Plusieurs Étapes

    FRANÇAIS 3. Appuyez à plusieurs reprises sur Pour décongeler moins de pour sélectionner le niveau de 200 g d'aliments, placez-les puissance. sur le bord du plateau 4. Pour régler la durée, appuyez sur les tournant. touches de réglage. 1. Appuyez une fois sur pour 5.
  • Seite 66: Utilisation Des Accessoires

    50 g 50 g 100 g 100 g 150 g 150 g 200 g 200 g 250 g 250 g Faire fondre du chocolat 100 g 100 g 150 g 150 g 200 g 200 g Mud Cake...
  • Seite 67: Fonctions Supplémentaires

    FRANÇAIS 7. FONCTIONS SUPPLÉMENTAIRES 7.1 Sécurité enfants 1. Appuyez sur 2. Pour régler la durée, appuyez sur les La fonction Sécurité enfants permet touches de réglage. d'éviter une utilisation involontaire du Après 2 secondes, le programme micro-ondes. démarre automatiquement Le minuteur continue de fonctionner Maintenez la touche enfoncée lorsque vous ouvrez la porte ou mettez...
  • Seite 68: Cuisson Combinée

    8.2 Dégivrer 8.4 Réchauffage Décongelez toujours les rôtis avec le Lorsque vous réchauffez des plats côté gras vers le bas. cuisinés emballés, suivez toujours les instructions figurant sur l'emballage. Ne couvrez pas la viande pour la décongeler car elle risquerait de cuire.
  • Seite 69 FRANÇAIS 10.1 En cas d'anomalie de fonctionnement... Problème Cause probable Solution L'appareil ne fonc- L'appareil est éteint. Allumez l'appareil. tionne pas du tout. L'appareil ne fonc- L'appareil n'est pas branché. Branchez l'appareil. tionne pas du tout. L'appareil ne fonc- Le fusible dans la boîte à fusi- Vérifiez le fusible.
  • Seite 70: Installation

    11. INSTALLATION AVERTISSEMENT! Le fabricant ne pourra être Reportez-vous aux chapitres tenu pour responsable si concernant la sécurité. vous ne respectez pas les précautions de sécurité du chapitre « Consignes de 11.1 Informations générales sécurité ». ATTENTION! Ce micro-ondes est fourni avec un câble...
  • Seite 71: En Matière De Protection De L'environnement

    FRANÇAIS ses dimensions conviennent. Si oui, 4. Ouvrez la porte et fixez le micro- faites une marque pour indiquer ondes au meuble à l'aide d'une vis. l'emplacement des vis. Retirez le gabarit et vissez le support dans les marques. Ignorez cette étape si la profondeur du meuble est inférieure à...
  • Seite 72 municipaux.
  • Seite 73: Reparatur- Und Kundendienst

    10. FEHLERSUCHE......................88 11. MONTAGE.......................89 FÜR PERFEKTE ERGEBNISSE Danke, dass Sie sich für dieses AEG Produkt entschieden haben. Wir haben es geschaffen, damit Sie viele Jahre von seiner ausgezeichneten Leistung und den innovativen Technologien, die Ihnen das Leben erleichtern, profitieren können.
  • Seite 74: Sicherheitshinweise

    SICHERHEITSHINWEISE Lesen Sie vor der Montage und dem Gebrauch des Geräts zuerst die Gebrauchsanleitung. Der Hersteller übernimmt keine Verantwortung für Verletzungen und Beschädigungen durch unsachgemäße Montage. Bewahren Sie die Gebrauchsanleitung griffbereit auf. 1.1 Sicherheit von Kindern und schutzbedürftigen Personen...
  • Seite 75: Allgemeine Sicherheit

    DEUTSCH 1.2 Allgemeine Sicherheit Dieses Gerät ist für die Verwendung im Haushalt und • ähnliche Zwecke vorgesehen, wie z. B.: Bauernhöfe, Personalküchenbereiche in – Geschäften, Büros und anderen Arbeitsumfeldern Für Gäste in Hotels, Motels, Pensionen und – anderen wohnungsähnlichen Räumlichkeiten Der Geräteinnenraum wird während des Betriebs •...
  • Seite 76 Wenn Sie Lebensmittel in Behältern aus Kunststoff • oder Papier erwärmen, beobachten Sie das Gerät aufmerksam, da die Möglichkeit einer Entflammung besteht. Das Gerät ist zum Erwärmen von Speisen und • Getränken vorgesehen. Das Trocknen von Kleidungsstücken und das Erwärmen von Wärmekissen, Hausschuhen, Schwämmen, feuchten...
  • Seite 77: Sicherheitsanweisungen

    DEUTSCH Die Geräterückseite muss gegen die Wand gestellt • werden. Benutzen Sie keine scharfen Scheuermittel oder • Metallschwämmchen zum Reinigen der Glastür; sie könnten die Glasfläche verkratzen und zum Zersplittern der Scheibe führen. Achten Sie auf die Mindestabmessungen des • Einbauschranks (falls vorhanden).
  • Seite 78: Entsorgung

    • Üben Sie keinen Druck auf die • Fett- oder Speisereste im Gerät geöffnete Gerätetür aus. können einen Brand verursachen. • Die Lüftungsöffnungen dürfen nicht • Reinigen Sie das Gerät mit einem abgedeckt werden. weichen, feuchten Tuch. Verwenden • Verwenden Sie das Gerät nicht als Sie ausschließlich Neutralreiniger...
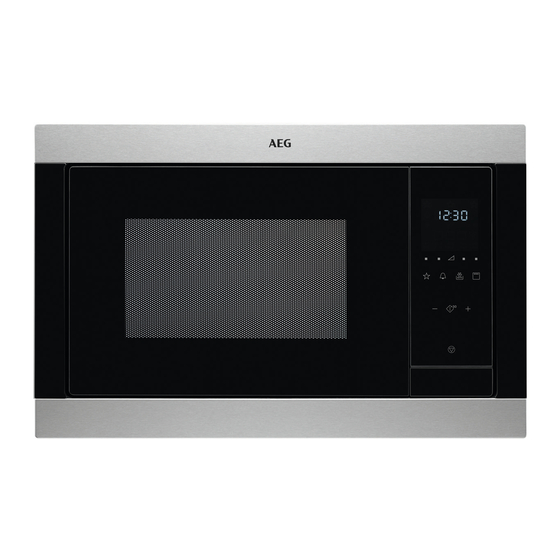
  • Seite 79: Bedienfeld

    DEUTSCH 3.2 Bedienfeld Symbol Funktion Beschreibung Display Anzeige der Einstellungen und — der aktuellen Uhrzeit. Pads zum Einstel- Einstellen der Mikrowellen- len der Leistungs- Leistungsstufe stufe Pad für die Grill- Einstellen eines der Betriebs- funktion modi Mikrowelle/Kombi-Ga- ren/Grill. Auftauen Auftauen von Lebensmitteln nach Gewicht oder Zeit.
  • Seite 80: Vor Der Ersten Inbetriebnahme

    3.3 Zubehör Glasteller und Rollenführung Grillrost Drehteller-Set Verwenden Sie beim Zubereiten von Speisen in der Mikrowelle stets das Drehteller-Set. Verwendung: • Grillen • Kombi-Garen 4. VOR DER ERSTEN INBETRIEBNAHME zeigt das Display 0:00 an und es ertönt WARNUNG! ein akustisches Signal.
  • Seite 81 DEUTSCH die Zeit zu lang einstellen. Die Lebensmittel oder Flüssigkeiten Lebensmittel können austrocknen, darauf. verbrennen oder an manchen Stellen Auftauen von Fleisch, Geflügel, Fisch Feuer fangen. • Gefrorene, ungeöffnete Lebensmittel • Das Gerät eignet sich nicht zum auf einem kleinen, umgedrehten Kochen von Eiern in der Schale oder Teller so in einen Behälter legen, dass zum Zubereiten von Schnecken im...
  • Seite 82 Kochgeschirr/Material Mikrowelle Grillen Auftauen Erwär- Garen Keramik , Steingut Hitzebeständiger Kunststoff bis 200 °C Pappe, Papier Frischhaltefolie Bratfolie mit mikrowellen-geeignetem Verschluss Bratgeschirr aus Metall, z. B. Emaille, Gusseisen Backformen, schwarz lackiert oder sili- konbeschichtet Backblech Bräunungsgeschirr, z. B. Crisp- oder...
  • Seite 83: Schnellstart

    DEUTSCH Wenn die Mikrowelle automatisch ausgeschaltet wird, ertönt ein akustisches Signal. 5.3 Tabelle der Leistungsstufen Mikrowelle Symbole auf den Bedienfeld, von links nach rechts Mikro- Niedrig Mittel niedrig Mittel Mittel hoch Hoch wel- len- Leis- tung Dis- 100 Watt 300 Watt 500 Watt 700 Watt play...
  • Seite 84: Mehrstufiges Garen

    5.6 Auftauen Um gleich zu garen, überspringen Sie Schritt 1 und 2. Sie können zwischen zwei Auftaumodi wählen: 1. Drücken Sie , und stellen Sie den Auftaumodus ein. • Auftauen nach Gewicht 2. Drücken Sie die Touchpads • Auftauen nach Zeit...
  • Seite 85: Verwendung Des Zubehörs

    DEUTSCH Speise Gewicht Display Butter weich machen 50 g 50 g 100 g 100 g 150 g 150 g 200 g 200 g 250 g 250 g Schokolade schmelzen 100 g 100 g 150 g 150 g 200 g 200 g Schlammkuchen 1 Tasse 2 Tassen...
  • Seite 86: Zusatzfunktionen

    7. ZUSATZFUNKTIONEN 7.1 Kindersicherung 1. Drücken Sie 2. Drücken Sie die Touchpads Diese Kindersicherung verhindert eine Einstellungen, um die Zeit versehentliche Bedienung der einzustellen. Mikrowelle. Der Kurzzeitwecker startet automatisch nach 2 Sekunden. Halten Sie 3 Sekunden gedrückt. Der Kurzzeitwecker bleibt stehen, wenn Ein akustisches Signal ertönt.
  • Seite 87: Aufwärmen

    DEUTSCH 8.5 Grillen Abgedecktes Fleisch nicht auftauen, dadurch könnte das Fleisch gegart Grillen flacher Lebensmittel in der Mitte werden statt aufzutauen. des Grillrostes. Geflügel stets mit der Brust nach unten Wenden Sie das Grillgut nach der Hälfte auftauen. der eingestellten Grillzeit, und setzen Sie den Grillvorgang dann fort.
  • Seite 88: Fehlersuche

    10. FEHLERSUCHE WARNUNG! Siehe Kapitel Sicherheitshinweise. 10.1 Was tun, wenn ... Problem Mögliche Ursache Abhilfe Das Gerät funktio- Das Gerät ist ausgeschaltet. Schalten Sie das Gerät ein. niert nicht. Das Gerät funktio- Der Netzstecker ist nicht einge- Stecken Sie den Netzstecker in niert nicht.
  • Seite 89: Montage

    DEUTSCH Wir empfehlen, hier folgende Daten zu notieren: Modell (MOD.) ........Produktnummer (PNC) ........Seriennummer (S.N.) ........11. MONTAGE 11.2 Elektrischer Anschluss WARNUNG! Siehe Kapitel WARNUNG! Sicherheitshinweise. Der elektrische Anschluss muss von einer qualifizierten 11.1 Allgemeine Informationen Fachkraft vorgenommen werden. VORSICHT! Lüftungsöffnungen nicht Der Hersteller haftet nicht für...
  • Seite 90 Montageabstände 3. Setzen Sie die Mikrowelle ein. Wenn Sie den Winkel angebracht haben, Maß achten Sie darauf, dass er die Geräterückseite festklemmt. 380 + 2 560 + 8 2. Beträgt die Tiefe des Einbauschranks mehr als 300 mm, legen Sie die Schablone auf den Schrankboden und prüfen Sie, ob sie hineinpasst.
  • Seite 91 DEUTSCH 12. UMWELTTIPPS Recyceln Sie Materialien mit dem Symbol Geräte mit diesem Symbol nicht mit dem Hausmüll. Bringen Sie das Gerät zu . Entsorgen Sie die Verpackung in den Ihrer örtlichen Sammelstelle oder entsprechenden Recyclingbehältern. wenden Sie sich an Ihr Gemeindeamt. Recyceln Sie zum Umwelt- und Gesundheitsschutz elektrische und elektronische Geräte.
  • Seite 92 11. INŠTALÁCIA....................107 NAJLEPŠIE VÝSLEDKY Ďakujeme vám, že ste si vybrali tento výrobok značky AEG. Vyrobili sme ho tak, aby vám poskytoval perfektný výkon mnoho rokov, a s inovatívnymi technológiami, ktoré vám uľahčia život – to sú vlastnosti, ktoré pri bežných spotrebičoch často nenájdete.
  • Seite 93: Bezpečnostné Informácie

    SLOVENSKY BEZPEČNOSTNÉ INFORMÁCIE Pred inštaláciou a používaním spotrebiča si pozorne prečítajte priložený návod na používanie. Výrobca nie je zodpovedný za škody a zranenia spôsobené nesprávnou inštaláciou a používaním. Návod na používanie uchovávajte vždy v blízkosti spotrebiča, aby ste doň mohli v budúcnosti nahliadnuť. 1.1 Bezpečnosť...
  • Seite 94 – obchodoch, kanceláriách a inom pracovnom prostredí, Pre klientov v hoteloch, moteloch, ubytovacích – zariadeniach s raňajkami a iných obytných objektoch. Počas činnosti sa vnútorné časti spotrebiča zohrejú na • vysokú teplotu. Nedotýkajte sa ohrevných článkov v spotrebiči.
  • Seite 95 SLOVENSKY podobných predmetov je zakázané a môže viesť k poraneniu, vznieteniu alebo požiaru. Ak uniká dym, spotrebič vypnite alebo ho odpojte od • elektrickej siete a nechajte dvierka zatvorené, aby sa plamene udusili. Po ohreve nápojov môže dôjsť k prudkému •...
  • Seite 96: Bezpečnostné Pokyny

    2. BEZPEČNOSTNÉ POKYNY 2.1 Inštalácia 2.3 Použitie VAROVANIE! VAROVANIE! Tento spotrebič smie Hrozí nebezpečenstvo nainštalovať iba zranenia, popálenín, zásahu kvalifikovaná osoba. elektrickým prúdom alebo výbuchu. • Odstráňte všetok obalový materiál. • Poškodený spotrebič neinštalujte ani • Nemeňte technické charakteristiky nepoužívajte.
  • Seite 97: Popis Spotrebiča

    SLOVENSKY • Odrežte elektrický kábel a zlikvidujte 3. POPIS SPOTREBIČA 3.1 Celkový prehľad Osvetlenie Bezpečnostný blokovací systém Displej Ovládací panel Otváranie dvierok Kryt prívodu vĺn Gril Otočný hriadeľ 3.2 Ovládací panel Symbol Funkcia Popis Displej Zobrazuje nastavenia a aktuál‐ — ny čas.
  • Seite 98: Pred Prvým Použitím

    Symbol Funkcia Popis Odmrazovanie Slúži na rozmrazovanie po‐ krmov podľa hmotnosti alebo času. Štart/+30 sek. Na spustenie spotrebiča alebo predĺženie času prípravy o 30 sekúnd pri plnom výkone. Tlačidlá nastavenia Na nastavenie času prípravy, hmotnosti alebo funkcie auto‐ matického pečenia.
  • Seite 99: Každodenné Používanie

    SLOVENSKY sa na displeji zobrazí symbol a zaznie 4. Stláčaním tlačidiel nastavenia akustický signál. nastavte minúty. 5. Nastavenie potvrďte stlačením Čas môžete nastaviť v 24- tlačidla hodinovom formáte. Nastavenia zrušíte 1. Stlačte dvakrát stlačením tlačidla 2. Stláčaním tlačidiel nastavenia nastavte hodiny. 3.
  • Seite 100 Hotové jedlá odstrániť vrchný kovový obal a • Hotové jedlá môžete v spotrebiči prepichnúť plastovú fóliu). pripravovať len vtedy, ak je ich obal vhodný na použitie v mikrovlnnej rúre. • Je potrebné dodržiavať pokyny výrobcu vytlačené na obale (napr.
  • Seite 101: Rýchly Štart

    SLOVENSKY 5.2 Zapnutie a vypnutie Vypnutie mikrovlnnej rúry: mikrovlnnej rúry • počkajte, kým sa mikrovlnná rúra automaticky nevypne po uplynutí UPOZORNENIE! nastaveného času. Na displeji sa Nenechajte mikrovlnnú rúru zobrazí End. v činnosti, keď v nej nie je • otvorte dvierka. Mikrovlnná rúra sa žiadne jedlo.
  • Seite 102 • Stlačením tlačidla zapnete 1. Stlačte tlačidlo raz na nastavenie mikrovlnnú rúru na 30 sekúnd pri rozmrazovania podľa hmotnosti, plnom výkone. alebo dva razy na nastavenie Čas prípravy sa zvyšuje o 30 rozmrazovania podľa času. sekúnd každým ďalším stlačením 2.
  • Seite 103: Používanie Príslušenstva

    SLOVENSKY 2. Mikrovlnnú rúru zapnite stlačením 2. Tlačidlo stlačte a podržte 2 sekundy. Po uložení nastavení tlačidla zaznie zvukový signál. Použitie programu Obľúbené 1. V pohotovostnom režime opakovane stláčajte , aby ste vybrali nastavenie 1, 2 alebo 3. Ponuka Obľúbené Mikrovlnná...
  • Seite 104: Doplnkové Funkcie

    6.2 Vkladanie grilovacieho roštu Grilovací rošt položte na otočný tanier. 7. DOPLNKOVÉ FUNKCIE 7.1 Detská poistka 1. Stlačte tlačidlo 2. Stláčaním tlačidiel nastavenia Funkcia Detská poistka zabraňuje nastavte čas. náhodnému zapnutiu mikrovlnnej rúry. Časovač sa spustí automaticky o 2 sekundy.
  • Seite 105: Ošetrovanie A Čistenie

    SLOVENSKY Problém Riešenie Jedlo sa príliš vysušilo. Nastavte kratší čas varenia alebo zvoľte nižší mi‐ krovlnný výkon. Po uplynutí času jedlo nie je rozmra‐ Nastavte dlhší čas varenia alebo nastavte vyšší zené, horúce alebo uvarené. výkon. Väčšie pokrmy si vyžadujú dlhší čas. Po uplynutí...
  • Seite 106: Riešenie Problémov

    • Vnútro spotrebiča vyčistite po každom • Na zmäkčenie ťažko odstrániteľných použití. Jednoduchšie tak odstránite zvyškov nechajte variť pohár vody pri nečistoty, ktoré sa potom nepripália. plnom mikrovlnnom výkone po dobu 2 • Odolné nečistoty odstráňte až 3 minút.
  • Seite 107: Inštalácia

    SLOVENSKY 10.2 Servisné údaje štítku. Typový štítok je na spotrebiči. Typový štítok neodstraňujte zo Ak problém nedokážete odstrániť sami, spotrebiča. kontaktujte predajcu alebo autorizované servisné stredisko. Údaje potrebné pre autorizované servisné stredisko nájdete na typovom Odporúčame, aby ste si sem zapísali tieto údaje: Model (MOD.) ........
  • Seite 108 3. Nainštalujte mikrovlnnú rúru. Ak ste pripevnili konzolu, uistite sa, že bezpečne pridržiava zadnú časť spotrebiča. Montážne vzdialenosti Rozmer 380 + 2 4. Otvorte dvierka a pomocou skrutiek upevnite mikrovlnnú rúru ku skrinke. 560 + 8 2. Ak je skrinka hlbšia než 300 mm, položte na dno skrinky šablónu a...
  • Seite 109: Ochrana Životného Prostredia

    SLOVENSKY 12. OCHRANA ŽIVOTNÉHO PROSTREDIA Materiály označené symbolom spotrebiče označené symbolom spolu s odpadom z domácnosti. Výrobok odovzdajte na recykláciu. . Obal hoďte odovzdajte v miestnom recyklačnom do príslušných kontajnerov na recykláciu. zariadení alebo sa obráťte na obecný Chráňte životné prostredie a zdravie ľudí alebo mestský...
  • Seite 110 www.aeg.com...
  • Seite 111 SLOVENSKY...
  • Seite 112 www.aeg.com/shop...

Inhaltsverzeichnis