Grundig Chassis G5 Serviceanleitung
Inhaltsverzeichnis
Verfügbare Sprachen
Verfügbare Sprachen
TV
Zusätzlich erforderliche Unterlagen für den Komplettservice
Additionally required Service Documents for the Complete Service
Service
Manual
Sicherheit
Safety
Materialnr./Part No.
720108000001
Materialnummer / Part Number 720100573000
Änderungen vorbehalten / Subject to alteration
TCC 1216 MP • Prepared in Germany
http://www.grundig.com
Service Manual
Chassis G5
32 VLE 5620 BN
43 VLE 5620 BN
49 VLE 5620 BN
PSN000
PSP000
PSQ000
Inhaltsverzeichnis

Verwandte Anleitungen für Grundig Chassis G5


Inhaltszusammenfassung für Grundig Chassis G5
- Seite 1 Service Manual Chassis G5 32 VLE 5620 BN PSN000 43 VLE 5620 BN PSP000 49 VLE 5620 BN PSQ000 Zusätzlich erforderliche Unterlagen für den Komplettservice Additionally required Service Documents for the Complete Service Service Manual Sicherheit Safety Materialnr./Part No. 720108000001 Materialnummer / Part Number 720100573000 Änderungen vorbehalten / Subject to alteration...
-
Seite 2: Inhaltsverzeichnis
GRUNDIG Service Chassis G5 Es gelten die Vorschriften und Sicherheitshinweise The regulations and safety instructions shall be valid gemäß dem Service Manual "Sicherheit", Material- as provided by the "Safety" Service Manual, part nummer 720108000001, sowie zusätzlich die even- number 720108000001, as well as the respective tuell abweichenden, landesspezifischen Vorschriften! national deviations. -
Seite 3: Spezial-Funktionen
GRUNDIG Service Chassis G5 Durchführen von Messungen Carrying out Measurements Bei Messungen mit dem Oszilloskop an Halb leitern sollten Sie nur When making measurements on semi-con duc tors with an oscillo scope, Tast köpfe mit 10:1 - Tei ler verwen den. Außerdem ist zu beachten, dass ensure that the test probe is set to 10:1 dividing factor. -
Seite 4: Geräte- Und Display-Varianten
Product Code Code" oder Ihre Display-Variante Chassis manual, please look for a current nicht aufgeführt sein, können version at the GRUNDIG service Sie eine aktualisierte Version auf portal "http://service.grundig.de". dem GRUNDIG Service-Portal Serialnummer / Before changing any board please "http://service.grundig.de"... - Seite 5 GRUNDIG Service Chassis G5 32" 1 - 5...
-
Seite 6: Technische Daten
GRUNDIG Service Chassis G5 Technische Daten / Technical Data 32" 32 VLE 5620 BN 43 VLE 5620 BN 49 VLE 5620 BN Order No. PSN000 PSP000 PSQ000 Product Code Country IT; NO; SE; HR IT; NO; SE; HR IT; NO; SE; HR... -
Seite 8: Bedienhinweise
Bedienhinweise Dieses Kapitel enthält Auszüge aus der Bedienungsanleitung. Weitergehende Informationen entnehmen Sie bitte der gerätespezifischen Bedienungsanleitung, die Sie unter www.grundig.de, Menüpunkt Downloads/Bedienungsanlei- tungen herunterladen können. AUF EINEN BLICK AUF EINEN BLICK ------------------------------------------------------------------------------------------- ------------------------------------------------------------------------------------------- Anschlüsse des Fernsehgerätes USB1 USB-Buchse für externe Bedienelemente des Fernseh- Datenträger ohne eigene... -
Seite 9: Fernbedienung - Hauptfunktionen
Videotext auf halbem nächster/vorheriger Titel Fernsehgerätes. vom Medienserver. Bildschirm Voraussetzung dafür ist, Sie laden die kostenlose Applikation »GRUNDIG TV Ohne Funktion Remote« vom Apple App Store oder vom Untertitel wählen Google play (Android Market) und installie- Netflix Applikationen ren diese auf Ihrem Apple iPhone/Smart- aufrufen. -
Seite 10: Erstinstallation Durchführen
ERSTINSTALLATION ERSTINSTALLATION ------------------------------------------------------------------------------------ ------------------------------------------------------------------------------------ Erstinstallation durchführen Die benötigte Option »Standfuß« oder Anmeldung am Heimnetzwerk – mit Zeile »Netzwerk wählen« mit » « oder »Wandmontage« mit » « oder » Λ « wäh- » Λ « wählen und mit »OK« bestätigen. einem LAN-Kabel Fernsehgerät mit »... - Seite 11 ERSTINSTALLATION ERSTINSTALLATION ------------------------------------------------------------------------------------ ------------------------------------------------------------------------------------ Programme (DVB-S) einstellen Suchlauf mit » « (rot) starten. Programme (DVB-C) einstellen Programme (DVB-T) einstellen – Das Menü »Digital Suche« wird ein- Hinweis: Die Option »Kabel (DVB-C)« mit » « oder Die Option »Terrestrisch (DVB-T/T2)« mit geblendet, die Suche nach Programmen »...
-
Seite 12: Programmtabelle Für Die Digi T Alen Programme Ändern
ERSTINSTALLATION ERSTINSTALLATION ------------------------------------------------------------------------------------ ------------------------------------------------------------------------------------ Programmtabelle für die Programmtabelle anwählen Programme in der Programmtabelle Reihenfolge der Programme in der suchen Programmtabelle ändern digi talen Programme ändern Menü mit »MENU« aufrufen. Mit dieser Suche werden Programme schnell Im Menü »Programmtabelle« die Program- <... - Seite 13 ERSTINSTALLATION ERSTINSTALLATION ------------------------------------------------------------------------------------ ------------------------------------------------------------------------------------ Programme in der Programmtabelle Hinweise: Eigene Namen für die Favoritenlisten Eigene Namen für die AV-Programm- nach „Kriterien“ sortieren vergeben (max. 6 Zeichen) plätze vergeben Programme können wieder aus Favoriten- listen gelöscht werden. Sie können die Reihenfolge der Programme in Sie können für alle Favoritenlisten eigene Na- Sie können für alle AV-Programmplätze eigene Dazu den Bearbeitungsmodus mit »...
-
Seite 14: Hbbtv-Betrieb
HBBTV-BETRIEB USB-RECORDING ------------------------------------------------------------------------------------------------- ------------------------------------------------------------------------------------------- HbbTV Bedienung HbbTV aus-/einschalten Externe Datenträger anschließen Hinweise: Die Buchse USB1 des Fernsehgerätes Nach dem Umschalten auf ein Fernsehpro- Wenn Sie den interaktiven Dienst HbbTV aus- Hinweise: liefert gemäß USB-Spezifikationen maximal gramm das HbbTV unterstützt, wird eine Infor- schalten, ist dieser Dienst nicht mehr verfügbar. -
Seite 15: Einstellungen Für Usb Recording
USB-RECORDING USB-RECORDING ------------------------------------------------------------------------------------------- ------------------------------------------------------------------------------------------- Einstellungen für USB Recording Externe Datenmedien auswählen Partition des externen Datenträgers Timeshift – Sendungen formatieren „anhalten″ Wenn mehrere externe Datenträger an das Menü anwählen Fernsehgerät angeschlossen sind, können Sie Im Menü »Datenträgerverwaltung« die Zeile Die aktuelle Sendung kann „angehalten” wer- Menü... -
Seite 16: Sendungen Aufnehmen
Hinweise: nahmezeit und der noch zur Verfügung Im „normalen“ Fernseh-Betrieb kann das Grundig ist nicht für den Inhalt und die stehende Speicherplatz. Menü »Meine Apps« mit »@« aufgerufen Qualität des Inhaltes der Applikationen – Nach kurzer Zeit werden diese Informatio- und wieder abgeschaltet werden. - Seite 17 Anmelden Überspringen Gewünschte Applikation mit » «, » «, Λ Name, Vorname, Telefonnummer (optional) Bei der Anwahl des Menüs »GRUNDIG appLI- < > » « und » « wählen und mit »OK« bestä- und Geburtsdatum eingeben: CATION store« wird das „Anmeldemenü“ ein- tigen.
-
Seite 18: Der Grundig Online Store
Der GRUNDIG Online Store Applikationen herunterladen und instal- Applikationen deinstallieren Applikationen als Favoriten markieren lieren Applikation, die deinstalliert werden soll mit Sie können bevorzugte Applikationen als Favo- Im GRUNDIG Online Store, der Ihnen Online < > » «, » Λ «, »... - Seite 19 SMART INTER@CTIVE TV 4.0 FUNKTIONEN JUGENDSCHUTZEINSTELLUNGEN ----------------------- ------------------------------------------- Hauptmenü Menü mit »MENU« aufrufen. Menüs sperren Die Applikationen. Menüpunkt »Einstellungen« mit » «, Mit dieser Funktion können Sie folgende Me- Online Store Meine Apps < > » «, » « oder » «...
-
Seite 20: Jugendschutzeinstellungen
JUGENDSCHUTZEINSTELLUNGEN JUGENDSCHUTZEINSTELLUNGEN ------------------------------------------- ------------------------------------------- PIN-Code ändern Fernsehprogramme sperren Ein gesperrtes Fernsehpro- gramm ansehen Sie können statt des Werkscodes »1234« einen Sie können einzelne Fernsehprogramme mit persönlichen PIN-Code eingeben. Notieren Sie einem persönlichen PIN-Code sperren, zum Sie können ein durch den PIN-Code gesperrtes sich bitte Ihren persönlichen PIN-Code. -
Seite 21: Softwareversion Abrufen
GERÄTESOFTWARE ZUBEHÖR VERWALTEN -------------------------------------------------------------------------------------- -------------------------------------------------------------------------- Menü mit »MENU« aufrufen. Achtung: Sie können an Ihr Fernsehgerät umfangreiches Zubehör anschließen. Im folgend beschriebenen Während des Updates das Fernsehgerät Menüpunkt »Einstellungen« mit » «, » Λ «, Menü sehen Sie den Status des jeweiligen Gerä- nicht ausschalten! Nach erfolgreichen Up- <... -
Seite 22: Reset-Funktionen
RESET-FUNKTIONEN NETZWERK INSTALLATION ---------------------------------------------------------------------------------- ------------------------------------------------------------------ Menü mit »MENU« aufrufen. Einstellungen mit Kapitel „Erstinstallation und Anmeldung am Router für den Die Option »Kabel« mit » « or » Λ « wäh- Fernsehprogramme einstellen“ auf Seite 19 len und mit »OK« bestätigen. LAN-Betrieb Menüpunkt »Einstellungen«... -
Seite 23: Netzwerkinstallation
NETZWERK INSTALLATION NETZWERK INSTALLATION ------------------------------------------------------------------ ------------------------------------------------------------------ Manuelle Anmeldung Anmeldung an das Heimnetzwerk mit » « Betrieb über WLAN Wir empfehlen, während des Betriebes mit (rot) starten. der SMART Inter@ctive TV 4.0 Funktion Wenn keine automatische IP-Adresse vorhanden andere Geräte im Heimnetzwerk abzu- –... - Seite 24 NETZWERK INSTALLATION NETZWERK INSTALLATION ------------------------------------------------------------------ ------------------------------------------------------------------ Voraussetzungen Anmeldung an das Heimnetzwerk mit » « Automatische Anmeldung mit Eingabe Einstellungen > Netzwerk Dienstag (rot) starten. xx xxx xxxx des Netzwerk-Kennwortes Die meisten Heimnetze sind dynamisch, d.h. – Die Meldung »WPS-Taste an ...« wird die Daten für IP Adresse, Netzwerkmaske und Verwenden Sie diese Art der Anmeldung, wenn eingeblendet.
-
Seite 25: Name Des Fernsehgerätes Ändern
NETZWERK INSTALLATION NETZWERK INSTALLATION ------------------------------------------------------------------ ------------------------------------------------------------------ Hinweis: Manuelle Anmeldung Zeile »Netzmaske« mit » « wählen und mit Name des Fernsehgerätes »OK« bestätigen. Damit sich das Fernsehgerät am Heimnetz- ändern Wenn keine automatische IP-Adresse vorhanden Daten mit »1…0« eingeben und mit »OK« werk anmelden kann, muss der Netzwerk- ist, müssen Sie die Zugangsdaten für »IP Adres- Um Ihr Fernsehgerät im Netzwerk identifizieren... -
Seite 26: Fernsehgerät Bei Einem „Versteckten" Netzwerk Anmelden
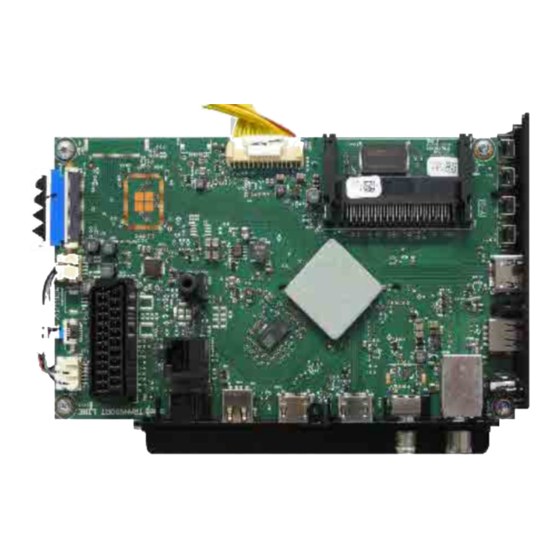
NETZWERK INSTALLATION WEITERE PROGRAMME EINSTELLEN ------------------------------------------------------------------ ------------------------------------- Fernsehgerät bei einem „ver- Zeile »Sicherheitstyp« mit » « oder » Λ « Signalinformationen anzeigen < > wählen und mit » « oder » « die benötigte steckten“ Netzwerk anmelden (nur bei digitalen Programmen) Option (WPA2) wählen. - Seite 54 GRUNDIG Service Chassis G5 Chassisplatte – Netzteil / Chassis Board – Power Supply VDDC IC100F VDDC C300 C302 C303 C304 C301 VDDC VDDC-> 5250mA VDDC 47UF 100NF 100NF VDDC 100NF 47UF VDDC VDDC VDDC VDDC VDDC MCP-> 300mA VDDC VDDC...
- Seite 55 GRUNDIG Service Chassis G5 Chassisplatte / Chassis Board – HDMI HDMIA HDMIC HDMID HDMIA-RX0_N HDMIC-RX0_N HDMID-RX0_N HDMIA-RX0_N HDMIC-RX0_N HDMID-RX0_N HDMIA-RX0_P HDMIC-RX0_P HDMID-RX0_P HDMIA-RX0_P HDMIC-RX0_P HDMID-RX0_P HDMIA-RX1_N HDMIC-RX1_N HDMID-RX1_N HDMIA-RX1_N HDMIC-RX1_N HDMID-RX1_N HDMIA-RX1_P HDMIC-RX1_P HDMID-RX1_P HDMIA-RX1_P HDMIC-RX1_P HDMID-RX1_P HDMIA-RX2_N HDMIC-RX2_N HDMID-RX2_N...
- Seite 56 GRUNDIG Service Chassis G5 Chassisplatte / Chassis Board – LAN, SCART, SPDIF, USB Service Socket R601 SCART S600 LEFT TP184 VGA-TX UART-TX UART-TX VGA-RX UART-RX UART-RX SCART_RIN+ RIGHT TP185 SCART_RIN+ C600 SCART_GIN- SCART_GIN- C601 SCART_GIN+ SCART_GIN+ 100R CKX-3.5-31(3P) TP183 SCART_BIN+...
- Seite 59 GRUNDIG Service Chassis G5 Chassisplatte / Chassis Board – RAM R1000 22R*4 R1001 22R*4 AVDD_DDR1 IC100A B_DDR3_A12 B-DDR3-A12 B_DDR3_DQL0 B-DDR3-DQL0 B_DDR3_A0 B_DDR3_BA1 B-DDR3-BA1 B_DDR3_DQL2 B-DDR3-DQL2 B_DDR3_A0 B_DDR3_A1 IC1000 B_DDR3_A1 B_DDR3_A2 K4B2G1646 B_DDR3_A2 B_DDR3_A3 R1002 22R*4 R1003 B_DDR3_A3 B_DDR3_DQL6 B-DDR3-DQL6 B_DDR3_A4...
- Seite 60 GRUNDIG Service Chassis G5 Chassisplatte / Chassis Board – FRC DVDD_DDR_DATA AVDDIO_DATA1 DVDD AVDDIO_DATA0 FRC_AVDD_MOD DVDD FRC_VDDP R1400 SPI_DI SPI_CK SPI_CZ LVDSxA SPI_DO A0x_P A0x_P FRC_TCON_ON A0x_N FRC_TCON_ON A0x_N A1x_P LDIM_U10_VSYNC A1x_P A1x_N 3D_SYNC_FRC_O A1x_N A2x_P NORMAL 3.3V POWER LDIM_U10_SPI_DI...
-
Seite 63: Ansicht Von Der Bestückungsseite / View Of Component Side
GRUNDIG Service Chassis G5 LED-Konverter / Converter ZNL193-05 Ansicht von der Bestückungsseite / View of Component Side POS. C2000 T 132 ZNL193-05 55'' C2001 T S2000 LED W2 L2003 L2008 L2007 L2009 C2002 B 37 D2009 D2001 C2008 C2003 T 132... - Seite 64 Netzteil / Power Supply ZNV194-03 Ansicht von der Bestückungsseite / View of Component Side POS. POS. C2000 T D2011 B 66 POZA2 FUSE T 10A 250V C2027 C2005 C2001 T D2012 T 166 C2002 T D2013 T 170 C2003 B 137 D2500 T 182 L2015 DC INPUT...
- Seite 65 Netzteil / Power Supply ZNV194-03 Ansicht von der Lötseite / View of Solder Side POS. POS. R2040 B 212 TP12 B 42 FID4 R2041 B 32 TP13 B 72 IC2002 D2011 R2042 B 60 TP14 B 46 FID3 R2043 B 81 TP15 B 48 C2007...
- Seite 66 Netzteil / Power Supply ZNV194-03 VBUS TR2000 R2001 100R C2003 VBUS R2005 100R 2.2NF R2002 EL2007 EL2010 EL2012 EL2000 DB2000 + C2000 + C2001 D2000 GBL408 D2006 C2024 68UF 68UF 0.22R R2008 R2009 R2010 UF4007F 2.2NF 450V 450V C2002 EL2001 3.3NF J2000 630V...
- Seite 67 GRUNDIG Service Chassis G5 Netzteil / Power Supply ZNV194-03 C2510 C2511 C2501 2.2NF 2.2NF TP70 2.2NF R2500 R2519 TP69 100R 100R C2500 12.5V 2.2NF D2500 100V J2506 R2515 ILED: 328mA (ADIM: Rtop: 200k, Rbot: 18k, RSENSE:1.2R) ILED: 203mA (ADIM: Rtop: 200k, Rbot: 18k//27k, RSENSE: 1.2R)
-
Seite 68: Ir/Led Board
Sie eine aktualisierte Version auf dem look for a current version at the service portal finden Sie eine aktualisierte Version auf dem look for a current version at the service portal Service-Portal „http://service.grundig.de“. “http://service.grundig.de”. Service-Portal „http://service.grundig.de“. “http://service.grundig.de”. 001.000 759551854300 GEH.-VORDERTEIL SCHWARZ... - Seite 69 If your “Product Code” or display variant is oder Ihre Display-Variante nicht aufgeführt sein, not mentioned in the spare parts list, please finden Sie eine aktualisierte Version auf dem look for a current version at the service portal Service-Portal „http://service.grundig.de“. “http://service.grundig.de”. 001.000 759551851500 GEH.-VORDERTEIL SCHWARZ FRONT CABINET BLACK 001.100...
- Seite 70 GRUNDIG Service GRUNDIG Service Chassis SU Chassis G5 Ersatzteilliste / Spare Parts List NUR FÜR INTERNEN GEBRAUCH / FOR INTERNAL USE ONLY 12 / 2016 CHASSISMODUL / CHASSIS BOARD G5 Pos. Part Number Description D400 759551832600 DIO-SMD ESD PRTR5V0U2X SOT143B...