Epson LQ-300+ Bedienungsanleitung
Quicklinks
All manuals and user guides at all-guides.com
®
24-pin dot matrix printer
All rights reserved. No part of this publication may be reproduced, stored in a retrieval system, or
transmitted in any form or by any means, electronic, mechanical, photocopying, recording, or
otherwise, without the prior written permission of SEIKO EPSON CORPORATION. The information
contained herein is designed only for use with this EPSON printer. EPSON is not responsible for any
use of this information as applied to other printers.
Neither SEIKO EPSON CORPORATION nor its affiliates shall be liable to the purchaser of this
product or third parties for damages, losses, costs, or expenses incurred by the purchaser or third parties
as a result of: accident, misuse, or abuse of this product or unauthorized modifications, repairs, or
alterations to this product, or (excluding the U.S.) failure to strictly comply with SEIKO EPSON
CORPORATION's operating and maintenance instructions.
SEIKO EPSON CORPORATION shall not be liable for any damages or problems arising from the
use of any options or any consumable products other than those designated as Original EPSON Products
or EPSON Approved Products by SEIKO EPSON CORPORATION.
EPSON and EPSON ESC/P are registered trademarks and EPSON ESC/P2 is a trademark of SEIKO
EPSON CORPORATION.
Microsoft, Windows, and Windows NT are registered trademarks of Microsoft Corporation.
IBM is a registered trademark of International Business Machines Corporation.
Adobe and Acrobat are registered trademarks and Acrobat Reader is a trademark of Adobe Systems
Incorporated.
General Notice: Other product names used herein are for identification purposes only and may be
trademarks of their respective owners. EPSON disclaims any and all rights in those marks.
Copyright © 2000 by SEIKO EPSON CORPORATION, Nagano, Japan.
Kapitel

Verwandte Anleitungen für Epson LQ-300+


Inhaltszusammenfassung für Epson LQ-300+
- Seite 1 SEIKO EPSON CORPORATION. The information contained herein is designed only for use with this EPSON printer. EPSON is not responsible for any use of this information as applied to other printers.
-
Seite 2: Where To Find Information
All manuals and user guides at all-guides.com Where to Find Information Quick Start Manual (this manual) Contains information about how to set up the printer, install the printer software and access your online documentation. It also provides instructions for daily operation. Keep this manual near your printer. -
Seite 3: Inhaltsverzeichnis
All manuals and user guides at all-guides.com Contents Contents ............3 Warnings, Cautions, and Notes . -
Seite 4: Warnings, Cautions, And Notes
Never touch the print head just after the printer has been used. Let the print head cool for a few minutes before touching it. ® NERGY ompliance ® As an NERGY partner, EPSON has determined that ® this product meets the NERGY guidelines for energy efficiency. ® The International... -
Seite 5: Unpacking The Printer
All manuals and user guides at all-guides.com Unpacking the Printer Besides the items shown in the illustration below, the printer box should include an EPSON printer software CD-ROM and a Notice Sheet. Check that everything has been included in the package. printer... -
Seite 6: Choosing A Place For The Printer
All manuals and user guides at all-guides.com Choosing a place for the printer Follow the guidelines below when selecting a location for your printer. Place the printer on a flat, stable surface. The printer will not operate properly if it is tilted or placed at an angle. -
Seite 7: Assembling The Printer
All manuals and user guides at all-guides.com Assembling the Printer This section provides you with information on how to get your printer up and running. See "Printer Parts" on the last page of this manual for the names of the individual printer parts. -
Seite 8: Installing Or Replacing The Ribbon Cartridge
All manuals and user guides at all-guides.com Hold one of the paper supports and push the tips into the notches on the edge guide. Repeat step 2 for the other paper support. Installing or replacing the ribbon cartridge Before installing the ribbon cartridge, make sure that the printer is not plugged into an electrical outlet. - Seite 9 All manuals and user guides at all-guides.com Slide the print head to the middle of the printer. Turn the ribbon-tightening knob in the direction of the arrow to remove any slack from the ribbon so it is easier to install.
- Seite 10 All manuals and user guides at all-guides.com Insert the ribbon cartridge into the printer as shown; then press both sides of the cartridge firmly to fit the plastic hooks into the printer slots. Use a pointed object, such as a ball point pen, to guide the ribbon between the print head and ribbon guide.
-
Seite 11: Plugging In The Printer
All manuals and user guides at all-guides.com Plugging in the printer Follow these steps to plug in the printer: Make sure the power switch on the printer is turned off. It is off when the side of the switch is pressed down. Check the label on the back of the printer to make sure the voltage required by the printer matches that of your electrical outlet. -
Seite 12: Running The Self Test
All manuals and user guides at all-guides.com Running the Self Test Use the built-in self test function to check that the printer is working properly. You can run the test with either continuous paper or single sheets. The procedure below describes the test using single sheets, which is the easier way. - Seite 13 All manuals and user guides at all-guides.com Slide the left edge guide until it locks in place at the guide mark. Next, adjust the right edge guide to match the width of your paper. Slide a sheet of paper down firmly between the edge guides until it meets resistance.
-
Seite 14: Connecting The Printer To Your Computer
All manuals and user guides at all-guides.com Here is part of a typical self-test printout: Note: If the self test did not print satisfactorily, see Chapter 4, “Troubleshooting” in the online User’s Guide. If it prints correctly, proceed to the next section. Connecting the Printer to Your Computer Your printer includes both an IEEE-1284-compatible parallel interface and an EIA- 232D serial interface. -
Seite 15: Using The Parallel Interface
All manuals and user guides at all-guides.com Using the parallel interface You need a shielded, twisted-pair cable no longer than 2 meters to use the parallel interface. Follow these steps to connect the printer to the computer using the parallel interface: Turn off both the computer and the printer. -
Seite 16: Using The Serial Interface
All manuals and user guides at all-guides.com Using the serial interface You need a serial cable that has a DB-25 male connector on the printer side to use the serial interface. Follow these steps to connect the printer to the computer using the serial interface: Turn off both the computer and the printer. -
Seite 17: Installing The Printer Software
Driver disk creation utility button and follow the on- screen instructions. If you are using the floppy disk version of the EPSON software, make a backup copy of the EPSON printer software disk or disks before you begin installation. -
Seite 18: Installing The Software In Windows 3.1 Or Nt 3.5X
Software" in the online User’s Guide. After you install the printer driver on Windows Me, 95, 98, 2000 or NT 4.0, you can install the EPSON Status Monitor 3 utility program. See "About the EPSON Status Monitor 3 Utility" in chapter 3 of the online User’s Guide for information on installing and using the Status Monitor. -
Seite 19: For Dos Programs
Choose the EPSON LQ-300+ printer at the appropriate step in the setup or installation procedure of your DOS application program. If the list in your application does not... -
Seite 20: Printing
All manuals and user guides at all-guides.com Printing Accessing the printer driver To access the printer driver, follow the steps below. Note: The steps below provide general guidelines on accessing the printer driver. How you access the printer driver may differ depending on your application. See your application manual for details. -
Seite 21: Printing On Single Sheets
All manuals and user guides at all-guides.com Under Windows NT 3.5x, in the Main window, open Print Manager and make sure your printer is highlighted, then click Printer and Properties. Finally click Details and Job Default. When you finish making your printer driver settings, click OK to apply the settings, or click Cancel to cancel your changes. -
Seite 22: Installing The Adobe Acrobat Reader
All manuals and user guides at all-guides.com Installing the Adobe Acrobat Reader Insert the EPSON printer software CD-ROM into your computer’s CD-ROM drive. Windows Me/98/95/2000/NT 4.0: The setup program on the CD-ROM will be started automatically and displays the start screen. If the setup program is not started automatically, click the Start button, then click Run and enter the command E:\Start.exe to start the setup program. -
Seite 23: Customer Support
Once the manuals have been installed on the hard disk, proceed as follows: Windows Me/98/95/2000/NT 4.0: Click the Start button, point to Programs, then point to EPSON. Click on the name of the online manual. The Acrobat Reader will be started automatically and the online manual opened. -
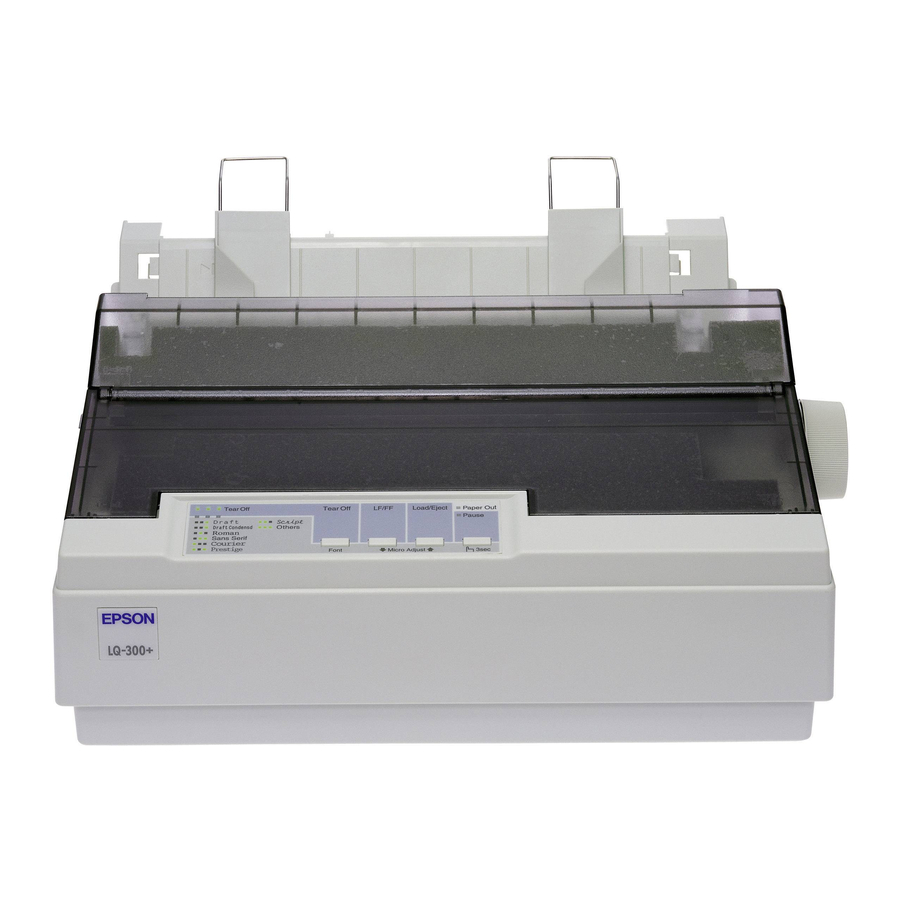
Seite 24: Printer Parts
All manuals and user guides at all-guides.com Printer Parts paper supports edge guides paper guide cover paper guide printer cover paper-release lever paper-feed knob control panel ribbon cartridge paper thickness lever serial interface paper tension unit parallel interface tractor power switch power cord... - Seite 25 EPSON-Produkt ist oder eine ausdrückliche Zulassung der SEIKO EPSON CORPORATION als ”EPSON Approved Product” hat. EPSON und EPSON ESC/P sind eingetragene Marken und EPSON ESC/P2 ist eine Marke der SEIKO EPSON CORPORATION. Microsoft, Windows und Windows NT sind eingetragene Marken der Microsoft Corporation.
-
Seite 26: Wo Sie Informationen Finden
All manuals and user guides at all-guides.com Wo Sie Informationen finden Schnellstart-Anleitung (dieses Handbuch) Liefert grundlegende Informationen zum Aufstellen des Druckers, zum Installieren der Druckersoftware und zum Installieren und Anzeigen der Online-Dokumentation. Außerdem erhalten Sie Anweisungen für den täglichen Gebrauch des Druckers. Bewahren Sie dieses Handbuch in der Nähe Ihres Druckers auf. - Seite 27 All manuals and user guides at all-guides.com Inhalt Inhalt ............3 Handbuch-Konventionen .
-
Seite 28: Handbuch-Konventionen
Berühren Sie den Druckkopf niemals direkt nach einem Druckvorgang. Warten Sie immer ein paar Minuten, bis er abgekühlt ist. ® NERGY ompatibilität ® EPSON, als Partner von NERGY , bestätigt, dass dieses ® Produkt den NERGY -Richtlinien zur sinnvollen Energienutzung entspricht. -
Seite 29: Drucker Auspacken
All manuals and user guides at all-guides.com Drucker auspacken Zum Lieferumfang gehören eine CD-ROM mit der Druckersoftware, ein Hinweisblatt sowie die unten abgebildeten Teile. Überprüfen Sie beim Auspacken des Druckers, ob alle Teile vorhanden und unbeschädigt sind. Drucker Papierstützen Walzenhandrad Netzkabel Farbbandkassette Hinweis:... -
Seite 30: Standort Für Den Drucker Wählen
All manuals and user guides at all-guides.com Standort für den Drucker wählen Bei der Auswahl des Druckerstandortes sollten Sie Folgendes berücksichtigen. Die Stellfläche für den Drucker muss stabil und absolut eben sein. Wenn der Drucker geneigt steht, kann er nicht störungsfrei arbeiten. Stellen Sie den Drucker in der Nähe des Computers auf, so dass das Schnittstellenkabel problemlos angeschlossen werden kann. -
Seite 31: Drucker Zusammenbauen
All manuals and user guides at all-guides.com Drucker zusammenbauen Folgen Sie den Anweisungen in diesem Abschnitt, um den Drucker betriebsbereit zu machen. Die Druckerteile und ihre Bezeichnungen werden auf der letzten Seite dieses Handbuchs im Abschnitt ”Druckerteile” aufgeführt. Walzenhandrad anbringen Wenn Sie den Drucker zusammenbauen, müssen Sie als Erstes das Walzenhandrad anbringen. -
Seite 32: Papierstützen Anbringen
All manuals and user guides at all-guides.com Papierstützen anbringen Bevor Sie den Drucker in Betrieb nehmen, müssen Sie die Papierstützen anbringen. Gehen Sie folgendermaßen vor, um die Papierstützen zu installieren: Ziehen Sie die Papierführung nach hinten. Richten Sie sie auf, und drücken Sie sie anschließend nach unten, bis sie einrastet. -
Seite 33: Farbbandkassette Installieren Oder Austauschen
All manuals and user guides at all-guides.com Farbbandkassette installieren oder austauschen Stellen Sie sicher, dass der Drucker nicht an die Stromversorgung angeschlossen ist, bevor Sie die Farbbandkassette installieren. Gehen Sie folgendermaßen vor, um die Farbbandkassette zu installieren oder auszutauschen: Klappen Sie die Druckerabdeckung hoch, und ziehen Sie sie dann nach oben ab. Vorsicht: Bewegen Sie den Druckkopf nie bei eingeschaltetem Drucker, da dies das Gerät beschädigen kann. - Seite 34 All manuals and user guides at all-guides.com Drehen Sie den Knopf zum Spannen des Farbbandes in Pfeilrichtung, so dass das Farbband straff gespannt ist und sich leichter installieren lässt. Setzen Sie die Farbbandkassette wie in der folgenden Abbildung dargestellt in den Drucker ein;...
- Seite 35 All manuals and user guides at all-guides.com Führen Sie das Farbband mit einem spitzen Objekt (z.B. einem Kugelschreiber) zwischen Druckkopf und Farbbandführung hindurch. Sie können dies durch Drehen am Spannknopf unterstützen; das Farbband darf weder verdreht noch geknittert sein. Schieben Sie den Druckkopf nach links und rechts, um sicherzustellen, dass er sich leicht bewegen lässt.
-
Seite 36: Drucker An Die Stromversorgung Anschließen
Achtung: Ist dies nicht der Fall, darf der Drucker keinesfalls an die Stromversorgung angeschlossen werden. Wenden Sie sich an Ihren EPSON-Händler. Wenn das Netzkabel druckerseitig noch nicht angeschlossen ist, stecken Sie es in den Netzanschluss an der Rückseite des Druckers. - Seite 37 All manuals and user guides at all-guides.com Gehen Sie folgendermaßen vor, um den Selbsttest durchzuführen: Stellen Sie sicher, dass der Drucker ausgeschaltet ist. Stellen Sie außerdem sicher, dass sich der Papierwahlhebel hinten in der Position für Einzelblattpapier befindet und dass die Papierführung aufgerichtet ist, wie in der folgenden Abbildung dargestellt.
- Seite 38 All manuals and user guides at all-guides.com Schieben Sie die linke Papierführungsschiene nach links, so dass sie an der Randmarkierung einrastet. Stellen Sie anschließend die rechte Papierführungsschiene auf die Breite des Papiers ein. Schieben Sie ein Einzelblatt zwischen die Papierführungsschienen, bis Sie einen Widerstand spüren.
-
Seite 39: Drucker An Den Computer Anschließen
All manuals and user guides at all-guides.com Die folgende Abbildung zeigt einen Ausschnitt eines typischen Selbsttestausdrucks: Hinweis: Wenn die Testseite nicht korrekt ausgedruckt wurde, lesen Sie Kapitel 4 ”Fehlerbehebung” im Online-Benutzerhandbuch. Arbeitet der Drucker ordnungsgemäß, fahren Sie mit dem nächsten Abschnitt fort. Drucker an den Computer anschließen Ihr Drucker verfügt sowohl über eine IEEE-1284-kompatible parallele Schnittstelle als auch über eine serielle EIA-232D-Schnittstelle. -
Seite 40: Parallele Schnittstelle
All manuals and user guides at all-guides.com Parallele Schnittstelle Für die parallele Schnittstelle benötigen Sie ein abgeschirmtes und verdrilltes Kabel von höchstens 2 m Länge. Gehen Sie folgendermaßen vor, um den Drucker über die parallele Schnittstelle an den Computer anzuschließen: Schalten Sie den Computer und den Drucker aus. -
Seite 41: Serielle Schnittstelle
All manuals and user guides at all-guides.com Stecken Sie das andere Ende des parallelen Schnittstellenkabels auf den parallelen Schnittstellenanschluss des Computers. (Befindet sich ein Massedraht am Ende des Kabels, verbinden Sie diesen mit dem Masseanschluss an der Rückseite des Computers.) Serielle Schnittstelle Für die serielle Schnittstelle benötigen Sie ein serielles Schnittstellenkabel mit einer DB-25-Stiftbuchse am Druckerende. -
Seite 42: Druckersoftware Installieren
Anwendungen Befehle an den Drucker schicken. Diese Befehle steuern Druckerfunktionen wie Druckqualität, Auflösung und Papierformat. EPSON Status Monitor 3 (Windows Me, 98, 95, 2000 oder NT 4.0) Das Utility EPSON Status Monitor 3 informiert Sie über Druckerfehler und zeigt Informationen zum Druckerstatus an. -
Seite 43: Druckersoftware Unter Windows Me, 98, 95, 2000
Laufwerk ein, und starten Sie das START.EXE-Programm. Klicken Sie in dem angezeigten Dialogfeld auf die Schaltfläche Druckertreiberdisketten erstellen, und folgen Sie den Anweisungen am Bildschirm. Wenn Sie die Diskettenversion der EPSON-Druckersoftware verwenden, erstellen Sie vor der Installation eine Sicherungskopie der Disketten. Schalten Sie den Drucker und den Computer aus. -
Seite 44: Software Unter Windows 3.1 Bzw. Nt 3.5X Installieren
Druckertreiber unter Windows 95, 98, Me, 2000 oder NT 4.0 installiert haben, können Sie das Utility EPSON Status Monitor 3 installieren. Nähere Informationen zur Installation und Verwendung des Utility EPSON Status Monitor 3 erhalten Sie im Abschnitt "Das Utility EPSON Status Monitor 3" in Kapitel 3 des Online- Benutzerhandbuchs. -
Seite 45: Für Dos-Programme
Programminstallation oder beim Konfigurieren des Programms auswählen. Wenn Ihre Anwendung einen Befehl enthält, mit dem Sie Ihren Drucker aus einer Liste auswählen können, wählen Sie den EPSON LQ-300+ aus. Wird der LQ-300+ nicht aufgeführt, wählen Sie den ersten verfügbaren Drucker aus der folgenden Liste:... - Seite 46 All manuals and user guides at all-guides.com Stellen Sie sicher, dass der richtige Drucker ausgewählt ist, und klicken Sie anschließend auf Drucker, Einrichten, Eigenschaften oder Optionen. (Möglicherweise müssen Sie eine Kombination dieser Schaltflächen anklicken.) Das Dialogfeld Eigenschaften (Windows 95/98/2000/Me) bzw. Dokumenteigenschaften (Windows NT 4.0) wird angezeigt.
-
Seite 47: Einzelblattpapier Bedrucken
All manuals and user guides at all-guides.com Wenn Sie die Einstellungen für den Druckertreiber abgeschlossen haben, klicken Sie auf OK, um die Einstellungen zu übernehmen, oder auf Abbrechen, um die Einstellungen auf ihre Standardwerte zurückzusetzen. Klicken Sie im Dialogfeld Drucken bzw. Druckereinrichtung auf OK, um den Druckauftrag zu starten. -
Seite 48: Adobe Acrobat Reader Installieren
All manuals and user guides at all-guides.com Hinweis: Wenn Adobe Acrobat Reader nicht auf Ihrem System installiert ist, wird das Handbuch nicht geöffnet, und eine Fehlermeldung wird angezeigt. Adobe Acrobat Reader installieren Legen Sie die CD-ROM mit der Druckersoftware in das CD-ROM-Laufwerk des Computers ein. -
Seite 49: Kundendienst
Handbuchs. Adobe Acrobat Reader wird automatisch gestartet, und das Online-Handbuch wird geöffnet. Kundendienst Falls Sie dringende Hilfe benötigen, können Sie sich telefonisch an den EPSON- Kundendienst wenden. Die Telefonnummer und weitere wichtige Informationen für Ihr Land finden Sie in der mit Ihrem Drucker mitgelieferten Kundendienstbroschüre. -
Seite 50: Druckerteile
All manuals and user guides at all-guides.com Druckerteile Papierstützen Papierführungsschienen Abdeckung der Papierführung Papierführung Druckerabdeckung Papierwahlhebel Walzenhandrad Walzenhandrad Bedienfeld Farbbandkassette Papierstärkehebel serieller Papierspanneinheit Schnittstellenanschluss Traktor paralleler Netzschalter Netzkabel Schnittstellenanschluss... - Seite 51 à la suite de l'utilisation d'accessoires ou de consommables autres que les produits originaux d'EPSON ou ceux qui sont agréés par la société SEIKO EPSON CORPORATION. EPSON et EPSON ESC/P sont des marques déposées et EPSON ESC/P2 est une marque de SEIKO EPSON CORPORATION.
- Seite 52 All manuals and user guides at all-guides.com Obtention d’informations Manuel Démarrage rapide (ce manuel) Ce manuel contient des informations sur l’installation de l’imprimante et du logiciel de l'imprimante ainsi que sur la consultation de la documentation en ligne. Il fournit égale- ment des instructions sur l'utilisation quotidienne de l'appareil.
- Seite 53 All manuals and user guides at all-guides.com n Table des matières Avertissement, Attention et Remarque......4 Symbole d'avertissement de la tête d'impression.
-
Seite 54: Avertissement, Attention Et Remarque
Laissez-la refroidir pendant quelques minutes avant de la toucher. ® onformité NERGY ® En sa qualité de partenaire NERGY , EPSON garantit que ce produit répond aux directives du programme NERGY ® d’économie d’énergie. ® Le programme international bureautique NERGY résulte du partenariat volontaire conclu avec l'industrie infor-... -
Seite 55: Déballage De L'imprimante
All manuals and user guides at all-guides.com n Déballage de l'imprimante En plus des éléments illustrés ci-dessous, le carton de l’imprimante doit comprendre un CD-ROM contenant le logiciel de l’imprimante EPSON et une Notice de déballage. Vérifiez que le carton contient bien tous les éléments. imprimante supports papier bouton d’alimentation en papier... -
Seite 56: Choix D'un Emplacement Pour L'imprimante
All manuals and user guides at all-guides.com Choix d’un emplacement pour l'imprimante Suivez les consignes suivantes pour choisir l’emplacement de votre imprimante : Posez l’imprimante sur une surface plane et stable. Elle ne fonctionnera pas cor- rectement si elle ne repose pas à l'horizontale. Choisissez un endroit où... -
Seite 57: Assemblage De L'imprimante
All manuals and user guides at all-guides.com n Assemblage de l’imprimante Cette section vous fournit des informations pour l’installation et la mise en marche de votre imprimante. Reportez-vous à la section « Composants de l'imprimante » à la dernière page de ce guide pour consulter les noms des composants de l’imprimante. -
Seite 58: Fixation Des Supports Papier
All manuals and user guides at all-guides.com Fixation des supports papier Vous devez installer les supports papier avant de commencer à utiliser l'imprimante. Procédez de la façon suivante pour fixer les supports papier sur l’imprimante : 1. Tirez le guide papier vers l’arrière, soulevez-le et appuyez fermement dessus pour le mettre en place. -
Seite 59: Installation Ou Remplacement De La Cartouche De Ruban
All manuals and user guides at all-guides.com Installation ou remplacement de la cartouche de ruban Avant d’installer la cartouche de ruban, assurez-vous que l’imprimante n’est pas raccor- dée à une prise électrique. Procédez de la façon suivante pour installer ou remplacer la cartouche de ruban. 1. - Seite 60 All manuals and user guides at all-guides.com 3. Tournez le bouton de tension du ruban dans le sens de la flèche afin de tendre le ruban pour faciliter son installation. 4. Insérez la cartouche de ruban dans l'imprimante, de la manière illustrée, puis appuyez fermement des deux côtés de la cartouche pour que les crochets en plastique pénètrent dans les fentes de l'imprimante.
-
Seite 61: Branchement De L'imprimante
All manuals and user guides at all-guides.com 5. En vous aidant d'un objet pointu, notamment un stylo à bille, faites passer le ruban entre la tête d'impression et le guide ruban. Tournez le bouton de tension du ruban pour faciliter sa mise en place. Il ne doit être ni tordu, ni froissé. 6. -
Seite 62: Exécution Du Test Automatique
All manuals and user guides at all-guides.com 2. Assurez-vous que la tension d'alimentation requise, qui figure sur l’étiquette appo- sée à l'arrière de l'imprimante, est bien identique à celle fournie par la prise électri- que. Attention : Si la tension nominale de l'imprimante ne correspond pas à celle de votre prise, contactez votre revendeur. - Seite 63 All manuals and user guides at all-guides.com 2. Tout en maintenant la touche LF/FF enfoncée, mettez l'imprimante sous tension. 3. Faites glisser le guide latéral gauche jusqu'à ce qu'il se verrouille au niveau du repère du guide. Ajustez ensuite le guide latéral droit en fonction de la largeur du papier.
- Seite 64 All manuals and user guides at all-guides.com 4. Insérez fermement une feuille entre les guides latéraux jusqu'à ce que vous rencon- triez de la résistance. L’imprimante charge la feuille automatiquement et commen- ce l’impression du test automatique. 5. Pour interrompre temporairement l'impression, appuyez sur la touche Pause. 6.
-
Seite 65: Connexion De L'imprimante À Votre Ordinateur
All manuals and user guides at all-guides.com n Connexion de l'imprimante à votre ordinateur Votre imprimante possède à la fois une interface parallèle compatible IEEE-1284 et une interface série EIA-232D. Avant de commencer, posez l'imprimante verticalement, de la manière illustrée ci-dessous. (Il est ainsi plus facile de raccorder le câble.) Connectez votre ordinateur à... -
Seite 66: Utilisation De L'interface Série
All manuals and user guides at all-guides.com 2. Branchez convenablement le connecteur du câble parallèle sur le port d'interface parallèle de l'imprimante. Rabattez les clips métalliques jusqu'à ce qu'ils s'emboî- tent correctement de chaque côté du connecteur. Remarque : Si l'extrémité du câble est munie d'un fil de masse, raccordez-le au connecteur de masse situé... - Seite 67 All manuals and user guides at all-guides.com 1. Mettez l’imprimante et l’ordinateur hors tension. 2. Branchez convenablement le connecteur du câble série sur le port d'interface série de l'imprimante. Serrez les vis de part et d'autre du connecteur. Remarque : Si l'extrémité...
-
Seite 68: Installation Du Logiciel De L'imprimante
L'utilitaire EPSON Remote! vous permet de modifier facilement les paramètres par défaut de l'imprimante à partir de l'écran de l'ordinateur. Reportez-vous à la section « Utilisation de l’utilitaire EPSON Remote! » du chapitre 3 du Guide de l’utilisateur en ligne. -
Seite 69: Installation Du Logiciel Sous Windows 3.1 Ou Nt 3.5X
NT 4.0, vous pouvez installer l'utilitaire EPSON Status Monitor 3. Pour plus d’infor- mations sur l’installation et l’utilisation de Status Monitor, reportez-vous à la section « A propos de l'utilitaire EPSON Status Monitor 3 » du chapitre 3 du Guide de l’utilisateur en ligne. -
Seite 70: Pour Les Applications Dos
Choisissez l'imprimante EPSON LQ-300+ à l'étape appropriée de la procédure d'instal- lation ou de configuration de votre application DOS. Si la liste affichée dans votre appli- cation ne comporte pas l'imprimante LQ-300+, choisissez la première imprimante... -
Seite 71: Impression
All manuals and user guides at all-guides.com Remarque : Si la liste de votre application ne propose aucune des alternatives ci-dessus, contactez l'éditeur du logiciel et renseignez-vous sur la disponibilité d'une mise à jour. n Impression Accès au pilote d'impression Suivez la procédure décrite ci-après pour accéder au pilote d’impression. -
Seite 72: Impression Sur Feuilles Simples
All manuals and user guides at all-guides.com 2. Assurez-vous que votre imprimante est sélectionnée et cliquez sur Imprimante, Configurer, Propriétés ou Options. (Il se peut que vous deviez cliquer sur plusieurs de ces boutons.) La boîte de dialogue Options (Windows 3.1) ou Propriétés du document (Windows NT 3.5x) s’affiche. -
Seite 73: Installation D'adobe Acrobat Reader
Si Adobe Acrobat Reader n'est pas installé sur votre ordinateur, le manuel ne s'ouvre pas et un message d'erreur s'affiche. Installation d’Adobe Acrobat Reader 1. Insérez le CD-ROM du logiciel de l'imprimante EPSON dans votre lecteur de CD- ROM. Windows Me/98/95/2000/NT 4.0 : Le programme d'installation qui figure sur le CD-ROM démarre automatiquement... - Seite 74 Remarque : Pour accéder au manuel en ligne à partir de votre disque dur, vous devez d'abord l'installer sur votre ordinateur. 1. Insérez le CD-ROM du logiciel de l'imprimante EPSON dans votre lecteur de CD- ROM. Windows Me/98/95/2000/NT 4.0 : Le programme d'installation qui figure sur le CD-ROM démarre automatiquement...
-
Seite 75: Support Technique
All manuals and user guides at all-guides.com n Support technique La ligne du support technique et du service après-vente EPSON est à votre disposition pour toute aide urgente. Vous trouverez le numéro de téléphone ainsi que d'autres infor- mations importantes, applicables dans votre pays, dans la brochure Service après-vente... -
Seite 76: Composants De L'imprimante
All manuals and user guides at all-guides.com n Composants de l’imprimante supports papier guides latéraux capot du guide papier guide papier capot de levier de l’imprimante dégagement du papier bouton d'alimentation en papier panneau de commande cartouche de ruban levier d'épaisseur du papier interface série unité... - Seite 77 All manuals and user guides at all-guides.com STAMPANTE A IMPATTO A 24 AGHI EPSON...
- Seite 78 Tutti i diritti riservati. È vietata la riproduzione di qualsiasi parte di questo manuale, in qualsiasi forma, senza l'esplicito permesso scritto della EPSON Italia. Il contenuto di questo manuale può essere modificato senza preavviso. Ogni cura è stata posta nella raccolta e nella verifica della documentazione contenuta in questo manuale;...
-
Seite 79: Parti Della Stampante
All manuals and user guides at all-guides.com Parti della stampante supporti della guide laterali carta coperchio del guidacarta guidacarta coperchio levetta di della rilascio carta stampante manopola pannello di controllo cartuccia del nastro levetta per lo spessore della carta interfaccia tendicarta seriale interfaccia... - Seite 80 All manuals and user guides at all-guides.com Indicatori e tasti del pannello di controllo Tasto LF/FF Indicatore Paper Out Indicatori Tear Off (Font)** Fa avanzare la carta Acceso quando non c'è Lampeggiano quando il riga per riga se carta nell'alimentatore modulo continuo è...
- Seite 81 Stampa ad alta velocità, che permette di stampare fino a 300 cps (caratteri al secondo) a 10 cpi (caratteri per pollice). La stampante è fornita insieme al driver di stampante e ad altri programmi, fra cui l’utility EPSON Status Monitor 3 per ® ®...
-
Seite 82: Convenzioni Utilizzate In Questa Guida
All manuals and user guides at all-guides.com Convenzioni utilizzate in questa guida In questa guida vengono usate le seguenti convenzioni: Pericolo: I paragrafi contrassegnati in questo modo contengono istruzioni che devono essere seguite attentamente per evitare danni o lesioni all'operatore. Attenzione: queste istruzioni devono essere osservate per evitare danni alle apparecchiature. - Seite 83 All manuals and user guides at all-guides.com Collegate la stampante a una presa elettrica dotata di messa a terra. Evitate di utilizzare prese di corrente a cui sono allacciati impianti di condizionamento, fotocopiatrici o altri dispositivi che si accendono e si spengono con regolarità. Non utilizzate un cavo di alimentazione danneggiato.
- Seite 84 Specifiche E NERGY ® Come partner del programma NERGY EPSON ha fatto in modo che questa stampante soddisfi le specifiche del programma NERGY ® , che ha lo scopo di rendere le apparecchiature elettroniche più efficienti dal punto di vista energetico.
-
Seite 85: Come Ottenere Assistenza
EPSON o ai servizi di assistenza offerti da EPSON Italia. Assistenza clienti La rete dei Centri di Assistenza Tecnica Autorizzati EPSON è in continua espansione: per consentire ai clienti di avere nominativi e indirizzi sempre aggiornati, abbiamo attivato un numero verde... - Seite 86 All manuals and user guides at all-guides.com Il sito Internet All'indirizzo del sito Internet di Epson Italia http://www.epson.it potrete trovare informazioni su: tutti i prodotti EPSON; eventi e fiere a cui l’azienda partecipa; come ottenere supporto tecnico; i Centri di Assistenza Tecnica Autorizzati;...
-
Seite 87: Installazione Della Stampante
All manuals and user guides at all-guides.com Installazione della stampante Disimballaggio della stampante Oltre ai componenti indicati nella seguente illustrazione, la confezione della stampante dovrebbe contenere un CD ROM del software per la stampante e un foglio di avvertenze. Controllate che tutto quanto sia stato incluso nella confezione. - Seite 88 All manuals and user guides at all-guides.com Attenzione: La stampante è disponibile in vari modelli progettati per tensioni di alimentazione diverse e non è possibile cambiare la tensione della stampante. Se l'etichetta posta sul retro non riporta la tensione corretta, rivolgetevi al rivenditore. Dovete rimuovere tutti i materiali d'imballaggio prima di installare e accendere la stampante.
- Seite 89 All manuals and user guides at all-guides.com Evitate di utilizzare prese elettriche controllate da interruttori a parete o da timer automatici. L'interruzione di corrente potrebbe cancellare informazioni dalla memoria della stampante o del computer. Evitate inoltre prese collegate allo stesso circuito utilizzato per apparecchiature ad elevato assorbimento che possono causare variazioni di tensione.
- Seite 90 All manuals and user guides at all-guides.com Assemblaggio della stampante Questa sezione fornisce informazioni per assemblare e mettere in funzione la stampante. Consultate “Parti della stampante” nella prima pagina di questo manuale per i nomi dei singoli componenti. Installazione della manopola per l’alimentazione della carta Il primo passo da compiere per assemblare la stampante è...
- Seite 91 All manuals and user guides at all-guides.com Inserimento dei supporti per la carta Prima di utilizzare la stampante dovete installare i supporti per la carta. Seguite questi passi per installare i supporti per la carta sulla stampante: 1. Tirate il guidacarta verso l’esterno. Sollevatelo e spingetelo con decisione fino a che non si adatta in posizione.
- Seite 92 All manuals and user guides at all-guides.com 3. Ripetete il passo 2 per l’altro supporto per la carta. Installazione o sostituzione della cartuccia del nastro Prima di installare la cartuccia del nastro, assicuratevi che la stampante non sia collegata alla presa di corrente. Seguite questi passi per installare o sostituire la cartuccia del nastro: 1.
- Seite 93 All manuals and user guides at all-guides.com 2. Fate scivolare la testina di stampa fino al centro della stampante. 3. Girate la manopola tendinastro in direzione della freccia per tendere il nastro e rendere così più semplice l’installazione. Installazione della stampante...
- Seite 94 All manuals and user guides at all-guides.com 4. Inserite la cartuccia del nastro nella stampante come mostrato qui di seguito; spingete quindi con decisione su entrambi i lati della cartuccia per inserire i ganci di plastica negli alloggiamenti posti sulla stampante. Installazione della stampante...
- Seite 95 All manuals and user guides at all-guides.com 5. Utilizzate un oggetto appuntito, come ad esempio la punta di una penna a sfera, per inserire il nastro fra la testina di stampa e il guidanastro. Ruotate la manopola tendinastro per favorire il posizionamento del nastro che non deve essere rigirato o spiegazzato.
- Seite 96 All manuals and user guides at all-guides.com Collegamento della stampante all’alimentazione Seguite questi passi per collegare la stampante all’alimentazione: 1. Assicuratevi che la stampante sia spenta. La stampante è spenta quando la parte contrassegnata con N dell’interruttore di alimentazione è spinta verso il basso. 2.
- Seite 97 All manuals and user guides at all-guides.com Esecuzione del test automatico Utilizzate il test interno automatico per controllare che la stampante stia funzionando correttamente. Potete eseguire il test sia con la carta a modulo continuo sia con i fogli singoli; in questa sezione viene descritto il procedimento più...
- Seite 98 All manuals and user guides at all-guides.com 2. Accendete la stampante tenendo premuto il tasto LF/FF. 3. Fate scivolare la guida laterale sinistra fino a farla scattare in posizione in corrispondenza della tacca posta sul guidacarta. Successivamente, spostate la guida laterale destra fino a farla corrispondere con la larghezza della carta.
- Seite 99 All manuals and user guides at all-guides.com 4. Fate scivolare con decisione un foglio di carta fra le guide laterali fino a quando non incontra resistenza. La stampante caricherà il foglio automaticamente e inizierà a stampare il test automatico. 5. Per sospendere temporaneamente il test, premete il tasto PAUSE.
-
Seite 100: Collegamento Della Stampante Al Computer
All manuals and user guides at all-guides.com Collegamento della stampante al computer La vostra stampante è dotata di un’interfaccia parallela compatibile IEEE-1284 e di un’interfaccia seriale EIA-232D. Prima di cominciare, ponete la stampante in posizione verticale, come mostrato nel seguito. (In questo modo risulterà più semplice connettere il cavo.) Collegate il vostro computer all’interfaccia desiderata come descritto nel seguito. - Seite 101 All manuals and user guides at all-guides.com Utilizzo dell’interfaccia parallela Per utilizzare l’interfaccia parallela è necessario un doppino ritorto schermato lungo non più di due metri. Seguite questi passaggi per collegare la stampante al computer utilizzando l’interfaccia parallela: 1. Spegnete sia il computer sia la stampante. 2.
- Seite 102 All manuals and user guides at all-guides.com Nota: Se il cavo parallelo è dotato di un cavo di messa a terra, collegatelo al connettore posto sulla destra della porta dell’interfaccia parallela. 3. Inserite l’altro capo del cavo nella porta dell’interfaccia parallela del computer.
- Seite 103 All manuals and user guides at all-guides.com Utilizzo dell’interfaccia seriale Per utilizzare l’interfaccia seriale è necessario un cavo che abbia un connettore maschio DB-25 sull’estremità da collegare alla stampante. Seguite questi passaggi per collegare la stampante al computer utilizzando l’interfaccia seriale: 1.
- Seite 104 All manuals and user guides at all-guides.com Nota: Se il cavo seriale è dotato di un cavo di messa a terra, collegatelo al connettore posto sulla destra della porta dell’interfaccia. 3. Inserite l’altra estremità del cavo nella porta dell’interfaccia seriale del computer e stringete le viti poste su entrambi i lati del connettore.
-
Seite 105: Installazione Del Software Della Stampante
All manuals and user guides at all-guides.com Installazione del software della stampante Dopo aver collegato la stampante al computer, dovete installare il software incluso nel CD-ROM del software EPSON fornito con la stampante. Il software della stampante include: Driver di stampante Il driver di stampante è... - Seite 106 All manuals and user guides at all-guides.com Installazione del software in Windows Me, 98, 95, 2000, o NT 4.0 Seguite i passi descritti nel seguito per installare il software in Windows Me, 98, 95, 2000, o NT 4.0: Nota: L'installazione del software della stampante sotto Windows 2000 o NT 4.0 potrebbe richiedere i privilegi di amministratore di rete.
- Seite 107 4. Selezionate la stampante dall’elenco, quindi seguite le istruzioni sullo schermo. Quando installate il driver della stampante sotto Windows Me, 98, 95, 2000 o NT 4.0, viene anche installata l’utility EPSON Status Monitor 3. Per le informazioni su come avviare e utilizzare il software, consultate il Capitolo 3, “Utilizzo del software della stampante”.
- Seite 108 All manuals and user guides at all-guides.com Nota: Se volete fare una versione su dischetto del software della stampante incluso nel CD-ROM, digitate EPSETUP invece di SETUP. Nella finestra di dialogo che appare, fate clic sul pulsante dell’utility Creazione disco driver e seguite le istruzioni sullo schermo. 4.
- Seite 109 Selezionate la stampante EPSON LQ-300+ al passo appropriato della procedura di impostazione o di installazione del vostro programma applicativo DOS. Se l'elenco dell'applicazione non...
- Seite 110 All manuals and user guides at all-guides.com Installazione della stampante...
- Seite 111 All manuals and user guides at all-guides.com ® Impresora matricial de 24 agujas Manual del Usuario...
- Seite 112 IBM es una marca comercial registrada de International Business Machines Corporation. Aviso general: Otros nombres de productos se utilizan solamente con fines de identificación y pueden ser marcas comerciales de sus respectivos propietarios. EPSON renuncia a todos y cada uno de los derechos sobre estas marcas.
- Seite 113 Monitor 3 para Microsoft Windows Me, 98, 95, 2000 o NT 4.0. La utilidad EPSON Status Monitor 3 le permite comprobar el estado de la impresora de forma rápida y sencilla. Atenciones, Precauciones y Notas Este manual utiliza las siguientes convenciones: Las Atenciones deben seguirse escrupulosamente para evitar daños personales.
-
Seite 114: Instrucciones Importantes De Seguridad
All manuals and user guides at all-guides.com Instrucciones importantes de seguridad Lea estas instrucciones de seguridad antes de utilizar la impresora. Además, siga todas las advertencias e instrucciones que aparecen escritas en la impresora. No coloque la impresora sobre una superficie inestable, o cerca de un radiador o fuente de calor. - Seite 115 All manuals and user guides at all-guides.com En las siguientes condiciones debe desconectar la impresora y ponerse en contacto con el Servicio Técnico Oficial EPSON más próximo. Si el cable de alimentación o el conector están dañados. Si ha penetrado líquido en el interior de la impresora.
- Seite 116 Deje enfriar el cabezal de impresión unos minutos antes de tocarlo. ® ormativa NERGY ® Como miembro de NERGY , EPSON ha decidido que este producto cumpla con las especificaciones del Programa Internacional ® NERGY para un mejor aprovechamiento de la energía. ®...
- Seite 117 Además de los elementos mostrados en la siguiente figura, la caja de la impresora debe contener un Welcome Pack que incluye el CD-ROM del software de la impresora EPSON y una Hoja de instrucciones. Compruebe que la caja incluya todos los elementos descritos.
-
Seite 118: Elegir Un Lugar Para La Impresora
All manuals and user guides at all-guides.com Precaución: Existen varias versiones de la impresora, diseñadas para funcionar bajo diferentes voltajes, y no es posible ajustar la impresora para su utilización a un voltaje distinto. Si la etiqueta de la parte posterior de la impresora no muestra el voltaje correcto para su país, póngase en contacto con su distribuidor. - Seite 119 All manuals and user guides at all-guides.com Coloque la impresora cerca de una toma de corriente, de forma que pueda desconectar fácilmente el cable de alimentación. Evite las tomas eléctricas controladas por conmutadores de pared o por temporizadores automáticos. El corte accidental de alimentación puede borrar información de la memoria de la impresora o del ordenador.
- Seite 120 All manuals and user guides at all-guides.com Instalar la impresora Siga los pasos de esta sección para instalar la impresora y empezar a trabajar con ella. En la sección “Partes de la impresora”, en la última página de este manual, encontrará los nombres de las partes de la impresora individual.
- Seite 121 All manuals and user guides at all-guides.com Instalar los soportes del papel Antes de empezar a utilizar la impresora, debería instalar los soportes del papel. Siga los pasos descritos a continuación para instalar los soportes del papel en la impresora: 1.
- Seite 122 All manuals and user guides at all-guides.com Instalar o sustituir el cartucho de cinta Antes de instalar el cartucho de cinta, compruebe que la impresora no esté conectada a una toma de corriente. Siga los pasos descritos a continuación para instalar o sustituir el cartucho de cinta: 1.
- Seite 123 All manuals and user guides at all-guides.com 3. Gire el mando tensor de la cinta en la dirección de la flecha para tensarla y facilitar su instalación. 4. Inserte el cartucho de cinta en la impresora de la forma mostrada en la figura; a continuación, presione con firmeza ambos lados del cartucho para encajar los ganchos de plástico en las ranuras de la impresora.
- Seite 124 All manuals and user guides at all-guides.com 5. Utilice un objeto puntiagudo, por ejemplo un bolígrafo, para guiar la cinta entre el cabezal de impresión y la guía de la cinta. Gire el mando tensor de la cinta para facilitar el avance correcto de ésta (no debe quedar torcida ni arrugada).
-
Seite 125: Conectar La Impresora
All manuals and user guides at all-guides.com Conectar la impresora Siga los pasos descritos a continuación para conectar la impresora: 1. Compruebe que el conmutador de alimentación de la impresora esté desactivado. Lo está si el lado N del conmutador está pulsado. 2. - Seite 126 All manuals and user guides at all-guides.com Ejecutar el auto test La función de auto test incorporada sirve para comprobar que la impresora funciona correctamente. Puede realizar el test tanto con papel continuo como con hojas sueltas. El procedimiento detallado a continuación describe el test más sencillo, utilizando hojas sueltas.
- Seite 127 All manuals and user guides at all-guides.com 2. Active la impresora mientras mantiene pulsado el botón LF/FF. 3. Desplace la guía lateral izquierda hasta que quede bloqueada en posición, en la marca de la guía. A continuación, ajuste la guía lateral derecha para que coincida con la anchura del papel.
- Seite 128 All manuals and user guides at all-guides.com 4. Inserte una hoja de papel entre las guías laterales hasta que ofrezca resistencia. La impresora cargará la hoja automáticamente y empezará a imprimir el auto test. 5. Si desea interrumpir la impresión momentáneamente, pulse el botón PAUSE.
- Seite 129 All manuals and user guides at all-guides.com Conectar la impresora al ordenador Esta impresora dispone de un interface paralelo compatible IEEE- 1284 y de un interface serie EIA-232D. Antes de empezar, coloque la impresora en posición vertical, tal como se muestra en la figura. (Esta posición facilita la conexión del cable.) Conecte el ordenador al interface deseado, de la forma descrita a continuación.
- Seite 130 All manuals and user guides at all-guides.com 2. Conecte con firmeza el cable paralelo al puerto de interface paralelo de la impresora. Apriete los clips metálicos hasta que queden bloqueados en su posición, a ambos lados del conector. Nota: Si el cable dispone de un cable de masa en uno de sus extremos, conéctelo al conector de masa situado a la derecha del puerto de interface paralelo.
- Seite 131 All manuals and user guides at all-guides.com Utilizar el interface serie Para poder utilizar el interface serie, necesitará un cable serie que disponga de un conector macho DB-25 en el lado de la impresora. Siga los pasos descritos a continuación para conectar la impresora al ordenador mediante el interface serie: 1.
- Seite 132 “controla”, la impresora. Con él podrá definir ajustes como la calidad de impresión, la resolución y el tamaño del papel. Utilidad EPSON Status Monitor 3 (Windows Me, 98, 95, 2000 o NT 4.0) EPSON Status Monitor 3 le notifica los errores de la impresora y visualiza el estado de ésta.
- Seite 133 Crear discos del driver y siga las instrucciones que aparezcan en pantalla. Si utiliza la versión en disquetes del software de EPSON, realice una copia de seguridad del disco (o discos) del software de la impresora EPSON antes de iniciar la instalación.
- Seite 134 4. Seleccione la impresora en la lista y siga las instrucciones en pantalla. Si instala el controlador de la impresora en Windows Me, 98, 95, 2000 o NT 4.0, también se instalará la utilidad EPSON Status Monitor 3. Si desea más información acerca de cómo iniciar y utilizar el software, consulte el Capítulo 3, “Utilizar el software de la...
- Seite 135 All manuals and user guides at all-guides.com 3. Seleccione Ejecutar en el menú Archivo. Aparecerá el cuadro de diálogo Ejecutar. En el cuadro de la Línea de comando, escriba D:SETUP. (Si la letra de la unidad de CD-ROM no es la “D”, o si utiliza la versión en disquetes, sustituya la “D”...
- Seite 136 Seleccione la impresora EPSON LQ-300+ en el paso correspondiente del procedimiento de configuración o de instalación de la aplicación de DOS. Si la lista de la aplicación no...
- Seite 137 All manuals and user guides at all-guides.com Partes de la impresora soportes del guías laterales papel tapa de la guía del papel guía del papel tapa de la palanca de impresora liberación del papel mando panel de control cartucho de tinta palanca de grosor del papel interface serie...
- Seite 138 All manuals and user guides at all-guides.com...
-
Seite 139: Guia Do Utilizador
SEIKO EPSON CORPORATION que não assume qualquer responsabilidade de patente no que respeita ao uso das informações aqui contidas. A EPSON não se responsabiliza por quaisquer erros ou omissões, nem por avarias resultantes do uso da informação aqui contida. - Seite 140 All manuals and user guides at all-guides.com Introdução Descrição da Impressora ....... . . 3 Instruções de Segurança .
- Seite 141 A impressora é fornecida com o controlador de impressão e outro software, incluindo o utilitário EPSON Status Monitor 3 para ® ® Microsoft Windows Me, 98, 95, 2000 ou NT 4.0. O utilitário EPSON Status Monitor 3 permite verificar o estado da impressora de uma forma simples e rápida. Introdução...
-
Seite 142: Descrição Da Impressora
All manuals and user guides at all-guides.com Descrição da Impressora Suportes de Guias de margem papel Tampa do suporte Suporte de de admissão de admissão de papel papel Alavanca de Tampa da selecção do impressora modo de alimentação Punho Painel de controlo Cassete de fita Alavanca... - Seite 143 All manuals and user guides at all-guides.com Indicadores luminosos e teclas do painel de controlo Indicador luminoso Paper Tecla LF/FF Indicadores luminosos Tear Off l Alimenta o papel (Font)** l Acende quando o linha a linha quando l Ficam intermitentes quando o sistema de alimentação pressionada uma papel contínuo está...
-
Seite 144: Instruções De Segurança
All manuals and user guides at all-guides.com Instruções de Segurança Leia estas instruções de segurança antes de utilizar a impressora. Siga todos os avisos e instruções assinalados na impressora. Coloque a impressora sobre uma base estável e afaste-a de radiadores ou de fontes de calor. Coloque a impressora sobre uma superfície plana. - Seite 145 All manuals and user guides at all-guides.com Desligue a impressora e recorra aos serviços de um técnico especializado nas seguintes situações: i. Se o cabo de corrente ou a ficha estiverem danificados. ii. Se algum líquido se tiver infiltrado na impressora. iii.
-
Seite 146: Simbologia Utilizada No Manual
All manuals and user guides at all-guides.com Simbologia Utilizada no Manual Este manual utiliza as seguintes convenções: Atenção: Mensagens que devem ser rigorosamente respeitadas a fim de evitar danos para o utilizador. Importante: Mensagens que contêm instruções que devem ser seguidas para não provocar danos no equipamento. -
Seite 147: Programa Energy Star
Utilizadores de Língua Inglesa Utilização das opções A Epson Lda. (Reino Unido) não se responsabiliza por quaisquer avarias ou problemas provocados pela utilização de opções ou produtos não reconhecidos como sendo produtos genuínos EPSON ou produtos aprovados pela EPSON Lda. (Reino Unido). -
Seite 148: Desembalar A Impressora
Desembalar a Impressora Para além dos itens apresentados na figura seguinte, a caixa da impressora deve conter o CD-ROM do software da impressora EPSON e uma folha de aviso. Certifique-se de que a embalagem inclui todos os componentes. Impressora Suportes de papel... -
Seite 149: Escolher Um Local Para A Impressora
Serviço de Assistência a Clientes EPSON. Terá de retirar todos os materiais de protecção colocados na impressora antes de a instalar e ligar à corrente. Para retirar esses materiais, siga as instruções indicadas na folha de aviso que... - Seite 150 All manuals and user guides at all-guides.com Coloque a impressora junto a uma tomada para que possa desligar facilmente o cabo de corrente. Nota para utilizadores de língua francesa: Placez l’imprimante près d’une prise de contact où la fiche peut être débranchée facilement.
- Seite 151 All manuals and user guides at all-guides.com Instalar a Impressora Esta secção fornece informações sobre como instalar e utilizar a impressora. Consulte a secção relativa à descrição da impressora apresentada na Introdução para saber o nome dos componentes da impressora. Instalar o punho O punho deve ser o primeiro elemento a ser instalado na impressora.
- Seite 152 All manuals and user guides at all-guides.com Instalar os suportes de papel Terá de instalar os suportes de papel antes de começar a utilizar a impressora. Para instalar os suportes de papel na impressora, execute as seguintes operações: 1. Empurre o suporte de admissão de papel para trás. Levante- -o e pressione-o firmemente até...
- Seite 153 All manuals and user guides at all-guides.com Instalar ou substituir a cassete de fita Antes de instalar a cassete de fita, certifique-se de que a impressora não está ligada à corrente. Para instalar ou substituir a cassete de fita, execute as seguintes operações: 1.
- Seite 154 All manuals and user guides at all-guides.com 3. Rode o botão de esticar a fita na direcção indicada pela seta. Esta operação permite eliminar a folga existente na fita e facilita a sua instalação. 4. Introduza a cassete de fita na impressora, conforme indica a figura.
- Seite 155 All manuals and user guides at all-guides.com 5. Utilize um objecto pontiagudo, por exemplo, o bico de uma esferográfica, para colocar a fita entre a cabeça de impressão e o guia de fita. Rode o botão de esticar a fita, de forma a assegurar o correcto funcionamento desta.
- Seite 156 Importante: Se as voltagens não coincidirem, consulte o Serviço de Assistência a Clientes EPSON. Não ligue o cabo de corrente. 3. Se o cabo de corrente ainda não estiver ligado à impressora, ligue-o à tomada existente na impressora.
- Seite 157 All manuals and user guides at all-guides.com Executar o Auto-Teste O auto-teste permite verificar se a impressora funciona correctamente. Pode executar o auto-teste em papel contínuo ou em folhas soltas. O procedimento apresentado em seguida explica como efectuar o teste com folhas soltas, que constitui a forma mais fácil de o fazer.
- Seite 158 All manuals and user guides at all-guides.com 2. Pressione a tecla LF/FF ao mesmo tempo que liga a impressora. 3. Desloque o guia de margem esquerdo até o prender na posição assinalada pelo indicador de margem. Em seguida, ajuste o guia de margem direito em função da largura do papel.
- Seite 159 All manuals and user guides at all-guides.com 4. Insira uma folha de papel entre os guias de margem até encontrar resistência. A impressora alimenta a folha automaticamente e começa a imprimir o auto-teste. 5. Para interromper a impressão, pressione a tecla PAUSE. 6.
- Seite 160 All manuals and user guides at all-guides.com Ligar a Impressora ao Computador Esta impressora integra uma interface paralela compatível IEEE- 1284 e uma interface série EIA-232D. Antes de iniciar, coloque a impressora na posição vertical, conforme indica a figura (este procedimento facilita a ligação do cabo).
- Seite 161 All manuals and user guides at all-guides.com Utilizar a interface paralela Para utilizar a interface paralela, necessitará de um cabo blindado de par entrelaçado, cujo comprimento não deve exceder os 2 metros. Para ligar a impressora ao computador através da interface paralela, execute as seguintes operações: 1.
- Seite 162 All manuals and user guides at all-guides.com Nota: Se o cabo possuir um fio de terra, ligue-o ao conector de terra situado à direita da interface paralela. 3. Introduza a outra extremidade do cabo na interface paralela do computador. Se o cabo possuir um fio de terra, ligue-o ao contacto de terra situado no painel posterior do computador.
- Seite 163 All manuals and user guides at all-guides.com Utilizar a interface série Para utilizar a interface série, necessitará de um cabo série com uma ficha macho DB-25 para ligação à impressora. Para ligar a impressora ao computador através da interface série, execute as seguintes operações: 1.
- Seite 164 All manuals and user guides at all-guides.com Nota: Se o cabo possuir um fio de terra, ligue-o ao conector de terra situado à direita da interface série. 3. Introduza a outra extremidade do cabo na interface série do computador e, em seguida, aperte os parafusos existentes no conector.
- Seite 165 “controlar” a impressora. Com este software, pode efectuar definições de impressão, como, por exemplo, qualidade de impressão, resolução e formato de papel. O utilitário EPSON Status Monitor 3 (Windows Me, 98, 95, 2000 ou NT 4.0) O EPSON Status Monitor 3 avisa-o quando ocorre algum erro de impressão e apresenta informações sobre o estado da...
- Seite 166 Utilitário de criação de disquetes do controlador (Driver disk creation utility) e siga as instruções apresentadas no ecrã. Se estiver a utilizar a versão em disquete do software EPSON, faça uma cópia de segurança das disquetes de software da impressora EPSON antes de iniciar a instalação.
- Seite 167 4. Seleccione a impressora na lista e, em seguida, siga as instruções apresentadas no ecrã. Quando instalar o controlador de impressão em Windows Me, 98, 95, 2000 ou NT 4.0, o utilitário EPSON Status Monitor 3 também será instalado. Para obter informações sobre como iniciar e utilizar o software, consulte a secção relativa à...
- Seite 168 All manuals and user guides at all-guides.com Instalar o software em Windows 3.1 ou NT 3.5x Para instalar o software da impressora em sistemas com o Windows 3.1 ou NT 3.5x, execute as operações apresentadas em seguida. Nota: É possível que necessite de privilégios de administrador para instalar o software da impressora em Windows NT 3.5x.
- Seite 169 Seleccione a impressora EPSON LQ-300+ na altura devida do processo de instalação ou configuração da aplicação do DOS. Se a impressora LQ-300+ não constar da lista de impressoras da aplicação, seleccione a primeira impressora disponível a partir da...
- Seite 170 All manuals and user guides at all-guides.com Nota: Se a sua aplicação não possuir uma alternativa adequada, contacte o fabricante do software para saber se é posssível obter uma actualização. Instalar a Impressora...
- Seite 171 EPSON-printer. EPSON draagt geen verantwoordelijkheid voor het toepassen van de verschafte informatie op andere printers. SEIKO EPSON CORPORATION noch zijn filialen kunnen door de koper van dit product of door derden verantwoordelijk worden gesteld voor schade, verliezen of onkosten ontstaan als gevolg van foutief gebruik of misbruik van dit product, of onbevoegde wijzigingen en reparaties.
- Seite 172 All manuals and user guides at all-guides.com Informatiebronnen Gids voor snelle starters (dit document) Deze gids toont u hoe u de printer bedrijfsklaar maakt, de printersoftware installeert en toegang verkrijgt tot de on line-documentatie. Daarnaast vindt u in deze gids stapsgewijze instructies voor het uitvoeren van afdruktaken.
- Seite 173 All manuals and user guides at all-guides.com Inhoudsopgave Inhoudsopgave..........3 Waarschuwingen, voorzorgsmaatregelen en opmerkingen .
-
Seite 174: Waarschuwingen, Voorzorgsmaatregelen En Opmerkingen
Raak de printkop nooit aan wanneer de printer pas een afdruktaak heeft beëindigd. Laat de printkop eerst een aantal minuten afkoelen. Strenge energienormen ® NERGY -partner heeft EPSON bepaald dat dit ® product voldoet aan de richtlijnen van het NERGY programma inzake zuinig energieverbruik. ®... -
Seite 175: De Printer Uitpakken
All manuals and user guides at all-guides.com De printer uitpakken Naast de items die hieronder zijn afgebeeld, moet de doos een cd-rom met EPSON- printersoftware en een instructieblad bevatten. Controleer of de verpakking volledig is. printer papiersteunen papiertoevoerknop netsnoer lintcartridge Opmerking: Bij sommige printermodellen zit het netsnoer bij levering reeds vast aan de printer. -
Seite 176: Een Plaats Voor De Printer Kiezen
All manuals and user guides at all-guides.com Een plaats voor de printer kiezen Neem de onderstaande richtlijnen in acht bij het kiezen van een standplaats voor de printer. Plaats de printer op een vlakke en stabiele ondergrond. De printer functioneert niet goed wanneer hij scheef staat. -
Seite 177: De Printer Monteren
All manuals and user guides at all-guides.com De printer monteren Dit gedeelte bevat informatie over de montage en ingebruikname van de printer. Raadpleeg ”Printeronderdelen” op de laatste pagina van deze handleiding voor de namen van de afzonderlijke delen van de printer. De papiertoevoerknop installeren De eerste stap bestaat uit het aanbrengen van de papiertoevoerknop. -
Seite 178: De Lintcartridge Installeren Of Vervangen
All manuals and user guides at all-guides.com 2. Neem een van de papiersteunen vast en duw de uitsteeksels in de inkepingen op de zijgeleider. 3. Herhaal stap 2 voor de andere papiersteun. De lintcartridge installeren of vervangen Voordat u de lintcartridge installeert, moet de stekker uit het stopcontact zijn verwijderd. - Seite 179 All manuals and user guides at all-guides.com 2. Schuif de printkop naar het midden van de printer. 3. Draai vervolgens de lintspanknop in de richting van de pijl om het lint te spannen en de installatie ervan te vereenvoudigen.
- Seite 180 All manuals and user guides at all-guides.com 4. Plaats de lintcartridge in de printer zoals weergegeven. Druk vervolgens stevig op beide zijden van de cartridge om de plastic haken in de sleuven van de printer te bevestigen. 5. Plaats het lint met een puntig voorwerp (bijvoorbeeld met de punt van een balpen) tussen de printkop en de lintgeleider.
-
Seite 181: De Printer Aansluiten Op Het Lichtnet
All manuals and user guides at all-guides.com Wanneer de afdrukkwaliteit afneemt, dient u de lintcartridge te vervangen. Om de oude lintcartridge te vervangen moet u eerst de printkop naar het midden van de printer verplaatsen. Verwijder dan de cartridge door deze aan beide zijden op te heffen en uit de printer te trekken. -
Seite 182: De Zelftest Uitvoeren
All manuals and user guides at all-guides.com De zelftest uitvoeren Gebruik de ingebouwde zelftestfunctie om te controleren of de printer juist functioneert. U kunt de test met kettingpapier of met losse bladen uitvoeren. Onderstaande procedure beschrijft de test met losse bladen, hetgeen de gemakkelijkste manier is. Volg deze stappen om de zelftest uit te voeren: 1. - Seite 183 All manuals and user guides at all-guides.com 3. Verschuif de linkerzijgeleider tot deze op het merkteken vastklikt. Stel vervolgens de rechterzijgeleider in op de breedte van het papier. 4. Plaats een vel papier met de afdrukzijde omlaag stevig tussen de zijgeleiders en duw dit naar binnen tot u een weerstand voelt.
-
Seite 184: De Printer Op De Computer Aansluiten
All manuals and user guides at all-guides.com Hier ziet u een deel van een typische zelftestafdruk: Opmerking: Als de zelftest niet naar behoren is afgedrukt, raadpleegt u hoofdstuk 4 "Probleemoplossing" van de on line-Gebruikershandleiding. Als ze echter juist is afgedrukt, gaat u naar het volgende gedeelte. De printer op de computer aansluiten De printer is uitgerust met een IEEE-1284-compatibele, parallelle interface en een EIA- 232D seriële interface. - Seite 185 All manuals and user guides at all-guides.com Volg deze stappen om de printer op de parallelle poort van uw computer aan te sluiten: 1. Zet de computer en de printer uit. 2. Sluit de connector van de parallelle kabel stevig aan op de parallelle interface van de printer.
-
Seite 186: De Seriële Interface Gebruiken
All manuals and user guides at all-guides.com De seriële interface gebruiken U hebt een seriële kabel nodig met een DB-25-mannetjesstekker aan de kant van de printer om de seriële interface te kunnen gebruiken. Volg deze stappen om de printer op de seriële poort van uw computer aan te sluiten: 1. -
Seite 187: De Printersoftware Installeren
Zie ”Informatie over de standaardinstellingen van de printer” in hoofdstuk 2 van de on line-Gebruikershandleiding. De printersoftware installeren Nadat u de printer op de computer hebt aangesloten, installeert u de EPSON- printersoftware die zich op de bijgeleverde cd-rom bevindt. De printersoftware omvat: printerdriver De printerdriver is het programma dat de printer aanstuurt. -
Seite 188: De Printersoftware Installeren Onder Windows 3.1 Of Nt 3.5X
3 "De printersoftware gebruiken" in de on line-Gebruikershandleiding. Nadat de printerdriver is geïnstalleerd onder Windows Me, 98, 95, 2000 of NT 4.0, kunt u het hulpprogramma EPSON Status Monitor 3 installeren. Zie "Over EPSON Status Monitor 3" in hoofdstuk 3 van de on line-Gebruikershandleiding voor meer informatie over de installatie en het gebruik van de Status Monitor. -
Seite 189: Voor Dos-Gebruikers
Als u wilt afdrukken vanuit DOS-toepassingen, moet u de printer of een andere beschikbare printer in de lijst met printers van uw toepassing selecteren. Kies EPSON LQ-300+ wanneer tijdens de configuratie of installatie van de DOS- toepassing naar een printer wordt gevraagd. Als de LQ-300+ niet in de printerlijst van... -
Seite 190: Afdrukken
All manuals and user guides at all-guides.com Opmerking: Als geen enkele van deze printers in de printerlijst voorkomt, neemt u contact op met de fabrikant van uw software om na te gaan of er een update beschikbaar is. Afdrukken De printerdriver openen Open de printerdriver als volgt. -
Seite 191: Afdrukken Op Losse Vellen
All manuals and user guides at all-guides.com Windows 3.1 en Windows NT 3.5x 1. Klik in het menu File (Bestand) van uw toepassing op Print Setup (Printerinstelling) of Print (Afdrukken). Het dialoogvenster Print (Afdrukken) of Print Setup (Printerinstelling) verschijnt. 2. Controleer of uw printer geselecteerd is en klik op Printer, Setup, Properties (Eigenschappen) of Options (Opties). -
Seite 192: Adobe Acrobat Reader Installeren
Als Adobe Acrobat Reader niet op uw systeem is geïnstalleerd, wordt de handleiding niet geopend en verschijnt er een foutmelding. Adobe Acrobat Reader installeren 1. Plaats de bijgeleverde cd-rom met EPSON-printersoftware in de cd-rom-lezer. Windows Me/98/95/2000 en Windows NT 4.0 Het installatieprogramma op de cd-rom start automatisch en toont het startvenster. - Seite 193 Klik op de naam van de on line-handleiding. Acrobat Reader wordt automatisch gestart en de on line-handleiding wordt geopend. Windows 3.1x/NT 3.5x: Open de programmagroep EPSON. Klik op de naam van de on line- handleiding. Acrobat Reader wordt automatisch gestart en de on line- handleiding wordt geopend.
-
Seite 194: Klantendienst
All manuals and user guides at all-guides.com Klantendienst EPSONs Service and Support-helpdesk staat voor u klaar als u dringend hulp nodig hebt. U vindt het telefoonnummer en verdere belangrijke informatie voor uw land in de Service and Support-brochure die met de printer wordt meegeleverd. Printeronderdelen papiersteunen zijgeleiders... - Seite 195 škodo, izgube ali stroške, ki jih kupec ali tretje osebe utrpijo kot posledico nesreče, napačne uporabe ali zlorabe tega izdelka, nedovoljenih sprememb, popravil ali dopolnitev tega izdelka oziroma (razen v ZDA) ravnanja, ki ni skladno z navodili družbe SEIKO EPSON CORPORATION za uporabo in vzdrževanje.
-
Seite 196: Varnostne In Okoljske Informacije
All manuals and user guides at all-guides.com 1. Varnostne in okoljske informacije Oznake za opozorila, razdelke, ki svetujejo previdnost, in opombe Opozorila morate skrbno upoštevati, da se izognete telesnim poškodbam. Previdnostne nasvete morate upoštevati, da se izognete poškodbam opreme. Opombe vsebujejo pomembne informacije in uporabne nasvete za uporabo tiskalnika. - Seite 197 All manuals and user guides at all-guides.com Preden začnete čistiti napajalni kabel tiskalnika, ga iztaknite, pri čiščenju pa vedno uporabljajte le vlažno krpo. Tiskalnika ne smete politi s tekočino. Tiskalnika ne skušajte popraviti sami, razen tako, kot je izrecno opisano v tem priročniku.
- Seite 198 All manuals and user guides at all-guides.com 2. Odstranjevanje embalaže tiskalnika opore za papir kaseta s trakom gumb za podajanje tiskalnik papirja napajalni kabel list z obvestili priročnik za CD-ROM s V nekaterih državah je namestitev programsko priključen neposredno opremo na tiskalnik.
- Seite 199 All manuals and user guides at all-guides.com 3. Dve opori za papir pritrdite na vodilo roba. 4. Drugi dve opori pritrdite na napenjalno enoto za papir. 5. Odstranite pokrov tiskalnika. Tiskalna glava mora stati 10 cm (4 palce) od leve strani.
- Seite 200 All manuals and user guides at all-guides.com 6. Gumb za napenjanje traku obrnite v smeri puščice, tako da trak ne bo ohlapen. 7. Kaseto s trakom vstavite v tiskalnik. S koničastim predmetom, na primer s kemičnim svinčnikom, namestite trak med tiskalno glavo in vodilo traku. Obračajte gumb za napenjanje traku, dokler ni trak pravilno nameščen;...
- Seite 201 All manuals and user guides at all-guides.com 4. Priključevanje tiskalnika na računalnik Priključevanje tiskalnika Tiskalnik in računalnik izklopite, nato pa nanju priključite vmesnik. vzporedni vmesnik zaporedni vmesnik Priklop tiskalnika 1. Izklopite tiskalnik. 2. Če napajalni kabel ni pritrjen na tiskalnik, ga priključite na ustrezno vtičnico na hrbtni strani tiskalnika.
- Seite 202 All manuals and user guides at all-guides.com 5. Namestitev programske opreme za tiskalnik Za uporabnike operacijskega sistema Windows XP Če želite namestiti tiskalniški gonilnik, sledite spodnjim navodilom. Kako namestiti tiskalniški gonilnik 1. Izklopite tiskalnik in ga nato priključite na računalnik. 2.
-
Seite 203: Epson Status Monitor
Status Monitor 3. (CD-ROM preiščite z možnostjo Explore (Razišči).) 3. V mapi EPSON Status Monitor 3 dvokliknite stmsetup.exe. Ko se zažene namestitveni program za EPSON Status Monitor 3, sledite navodilom na zaslonu. Za uporabnike operacijskega sistema Windows Me ali 2000 Opomba: Za namestitev tiskalniške programske opreme v operacijskem sistemu Windows 2000... - Seite 204 All manuals and user guides at all-guides.com Za uporabnike operacijskega sistema Windows 98, 95, 3.1, NT 4.0 ali NT 3.5x Opomba: Za namestitev tiskalniške programske opreme v operacijskem sistemu Windows NT utegnete potrebovati skrbniške pravice. Če naletite na težave, se za več...
- Seite 205 Če želite tiskalnik upravljati iz programov za DOS, morate trenutni tiskalnik ali drugega, ki je na voljo, izbrati s seznama tiskalnikov v svojem programu. Tiskalnik EPSON LQ-300+ izberite pri ustreznem koraku namestitve ali nastavitve programa za DOS. Če tiskalnika LQ-300+ ni na seznamu v programu, izberite s spodnjega seznama prvega, ki je na voljo.
- Seite 206 All manuals and user guides at all-guides.com 6. Uporaba referenčnega priročnika Referenčni priročnik vsebuje podrobne informacije o funkcijah tiskalnika, dodatnih izdelkih, tiskalniški programski opremi in odpravljanju težav ter tehnične podatke. Referenčni priročnik na CD-ROM-u odprete takole: 1. Vstavite CD-ROM s tiskalniško programsko opremo v pogon CD-ROM. 2.
- Seite 207 šteta, gubitaka ili troškova na štetu kupca ili trećih strana nastalih zbog: nezgode, pogrešne uporabe ili zloporabe ovog proizvoda ili neovlaštenih izmjena, popravaka ili modifikacija ovog proizvoda, ili (izuzev za SAD) nepridržavanja uputa za rad i održavanje od tvrtke SEIKO EPSON CORPORATION.
-
Seite 208: Važne Sigurnosne Upute
All manuals and user guides at all-guides.com 1. Sigurnosne i radne informacije Upozorenja, oprezi i napomene Upozorenja treba ih se strogo pridržavati radi sprječavanja tjelesnih ozljeda. Oprezi treba ih se pridržavati radi sprječavanja šteta na uređaju. Napomene sadrže važne informacije i korisne savjete vezane uz rad pisača. - Seite 209 All manuals and user guides at all-guides.com Nemojte prolijevati tekućine po pisaču. Osim ako to nije izričito navedeno u ovome priručniku, nemojte pokušavati sami popravljati pisač. Iskopčajte pisač i odnesite ga ovlaštenom serviseru u ovim slučajevima: ako je oštećen kabel za napajanje ili utikač ako je u pisač...
- Seite 210 All manuals and user guides at all-guides.com 2. Raspakiranje pisača držači papira pisaća vrpca dugme za uvlačenje pisač papira kabel za napajanje kartica s Instalacijski CD-ROM sa U nekim državama upozorenjima priručnik softverom može biti pričvršćen za pisač. Vađenje zaštitnog materijala Izvadite zaštitni materijal prema uputama na kartici s upozorenjima.
- Seite 211 All manuals and user guides at all-guides.com 3. Na bočnu vodilicu pričvrstite dva držača papira. 4. Preostala dva držača papira pričvrstite na uređaj za napinjanje papira. 5. Skinite poklopac pisača. Provjerite je li ispisna glava udaljena barem 10 cm od lijevog ruba.
- Seite 212 All manuals and user guides at all-guides.com 6. Dugme za napinjanje vrpce okrenite u smjeru strelice i napnite vrpcu. 7. Stavite pisaću vrpcu u pisač. Naoštrenim predmetom, kao što je kemijska olovka, provucite vrpcu između ispisne glave i vodilice vrpce. Okrenite dugme za napinjanje vrpce kako bi sjela na svoje mjesto;...
- Seite 213 All manuals and user guides at all-guides.com 4. Priključivanje pisača na računalo Priključivanje pisača Provjerite jesu li pisač i računalo isključeni, a zatim ih povežite kabelom. Paralelno sučelje Serijsko sučelje Ukopčavanje pisača 1. Provjerite je li pisač isključen. 2. Ako kabel za napajanje nije priključen na pisač, ukopčajte ga u utičnicu na stražnjoj strani pisača.
- Seite 214 All manuals and user guides at all-guides.com 5. Instaliranje softvera pisača Za korisnike sustava Windows XP Slijedi postupak instaliranja upravljačkog programa pisača. Kako instalirati upravljački program pisača 1. Isključite pisač, a zatim ga priključite na računalo. 2. Uključite pisač. 3. Uključite računalo i pokrenite sustav Windows XP. 4.
- Seite 215 All manuals and user guides at all-guides.com O programu EPSON Status Monitor 3 Ako program EPSON Status Monitor 3 koristite sa sustavom Windows XP, instalirajte EPSON Status Monitor 3 s CD-a sa softverom pisača priloženog uz pisač. Nakon dovršetka instalacije upravljačkog programa pisača, instalirajte EPSON Status Monitor 3.
- Seite 216 All manuals and user guides at all-guides.com Za korisnike sustava Windows 98, 95, 3.1, NT 4.0 ili NT 3.5x Napomena: Za instaliranje softvera pisača u sustavu Windows NT potrebno je imati administratorske ovlasti. Imate li problema, detaljnije informacije zatražite od administratora. Niže navedeni primjeri odnose se na operacijski sustav Windows 98.
- Seite 217 U odgovarajućem koraku instalacijskog postupka DOS programa odaberite pisač EPSON LQ-300+. Ako u programu na popisu ne možete pronaći pisač LQ-300+, odaberite prvi dostupan pisač iz donje tablice. LQ-300...
- Seite 218 All manuals and user guides at all-guides.com 6. Korištenje referentnog priručnika U Referentnom priručniku možete pronaći detaljne informacije o funkcijama pisača, dodatnim proizvodima, softveru pisača, rješavanju problema i tehničke podatke o pisaču. Referentni priručnik možete otvoriti s CD-ROM-a na sljedeći način: 1.
- Seite 219 Мајкрософт, Виндоус и Виндоус NT се заштитени марки на Microsoft Corporation во САД и/или во други земји. Општа забелешка: Другите споменати имиња на производи во документот служат само за препознавање и може да се заштитени знаци на нивните сопственици. EPSON не полага право на ниедно од правата на тие знаци.
- Seite 220 All manuals and user guides at all-guides.com 1. Информации за безбедноста и за животната средина Предупредувања, претпазливости и белешки Предупредување мора да се следи внимателно за да се избегнат телесни повреди. Претпазливо мора да се почитува за да се избегне оштетување на Вашата опрема.
- Seite 221 All manuals and user guides at all-guides.com Ако користите продолжен гајтан за печатачот, проверете дали вкупната ампеража на сите апарати приклучени на продолжниот гајтан е во рамките на дозволената ампеража на продолжниот. Исто така, проверете дали вкупната ампеража на сите апарати вклучени во...
- Seite 222 All manuals and user guides at all-guides.com Избегнувајте да го користите или чувате печатачот на места подложни на брзи промени на температурата и влажноста на воздухот. Нека биде подалеку од директна сончева светлина, топлински извори, голема влажност или прав. Избегнувајте места подложни на удари и на вибрации. 2.
- Seite 223 All manuals and user guides at all-guides.com 3. Составување на печатачот 1. Проверете дали печатачот е исклучен и неприклучен во струја. 2. Пикнете го тркалцето за местење на хартијата во страничната дупка на печатачот. Повлечете го држачот за хартија наназад. Кренете го, па...
- Seite 224 All manuals and user guides at all-guides.com 5. Извадете го капакот на печатачот. Гледајте главата за печатење да биде сместена 10 см (4 инчи) од левиот раб. 6. Завртете го тркалцето на касетата со лентата во насока на стрелката за да ја затегнете лентата ако е лабава. 7.
- Seite 225 All manuals and user guides at all-guides.com 4. Поврзување на печатачот со компјутерот Поврзување на печатачот Откако ¸е утврдите дека печатачот и компјутерот се исклучени, приклучете го кабелот за поврзување во печатачот и во компјутерот. Паралелен ме|усклоп Сериски ме|усклоп Приклучување на печатачот во електричната мрежа 1.
- Seite 226 All manuals and user guides at all-guides.com 5. Инсталирање на софтверот за печатачот За корисниците на Виндоус XP За да го инсталирате драјверот за печатачот, постапете како што е опишано подолу. Како се инсталира драјверот за печатачот 1. Исклучете го печатачот, па поврзете го печатачот со Вашиот компјутер.
- Seite 227 За EPSON Status Monitor 3 Кога го користите EPSON Status Monitor 3 со Виндоус XP, инсталирајте го EPSON Status Monitor 3 што е на ЦД-то со софтвер што се испорачува со печатачот. Кога ¸е заврши инсталирањето на драјверот за печатачот, се инсталира...
- Seite 228 All manuals and user guides at all-guides.com 3. Одберете Install Software (инсталирај го софтверот), па кликнете на 4. Следете ги напатствијата на екранот. За корисниците на Виндоус 98, 95, 3.1, NT 4.0 или NT 3.5x Забелешка: За инсталирање на софтверот за печатачот во Виндоус NT се потребни...
- Seite 229 одберете печатачот што го користите или друг достапен печатач од списокот на печатачите во Вашата апликација. Одберете го печатачот EPSON LQ-300+ во соодветната фаза на поставувањето или процедурата за инсталирање во Вашата апликација под ДОС. Ако на списокот во Вашата апликација го нема печатачот...
- Seite 230 All manuals and user guides at all-guides.com Ако мислите да користите боја, мора да го одберете LQ-300. Другите печатачи не можат да печатат во боја. Забелешка: Ако на списокот во Вашата апликација нема соодветна алтернатива, контактирајте со произведувачот на софтверот да видите дали има некаква надградба.
- Seite 231 (izuzev SAD) nedostataka, što je strogo u skladu sa uputstvima za rad i održavanje SEIKO EPSON CORPORATION. SEIKO EPSON CORPORATION i preduzeća u njihovom vlasništvu neće biti odgovorni za bilo kakva oštećenja ili probleme koje proizilaze iz korišćenja bilo kojih opcija ili potrošnih materijala, osim onih pomenutih kao originalnih EPSON proizvoda ili odobrenih za EPSON od strane SEIKO EPSON CORPORATION-a.
- Seite 232 All manuals and user guides at all-guides.com 1. Informacije o sigurnosti i okolini Upozorenja, mere opreza i beleške Upozorenja pažljivo pratite da bi izbegli telesne povrede. Mere opreza poštovanjem mera opreza izbegavate povređivanje opreme. Beleške sadrže važne informacije i korisne savete o radu štampača. Simboli upozorenja za vruće delove Ovaj simbol se nalazi na glavi štampača i ostalim delovima, a ukazuje na to da su verovatno vrući.
- Seite 233 All manuals and user guides at all-guides.com Nemojte da prolivate tečnost na štampač. Osim ako nije izričito pomenuto u ovim uputstvima, nemojte da pokušavate da sami servisirate štampač. Isključite štampač i u sledećim slučajevima prepustite servis kvalifikovanom licu: Ako je kabl za napajanje oštećen. Ako je tečnost ušla u štampač.
- Seite 234 All manuals and user guides at all-guides.com 2. Kako ćete da raspakujete svoj štampač podloga za papir traka za štampač ručka za uvlačenje štampač papira kabl za napajanje Tabela s Priručnik za CD-ROM softver U nekim zemljama beleškama postavljanje isporučuje se zajedno sa štampačem.
- Seite 235 All manuals and user guides at all-guides.com 3. Pričvrstite dve podloge za papir na rubnu vođicu. 4. Pričvrstite dve druge podloge za papir na jedinicu za zatezanje papira. 5. Skinite poklopac štampača. Proverite da li je glava štampača u poziciji 10 cm (4 inča) od leve strane uređaja.
- Seite 236 All manuals and user guides at all-guides.com 6. Okrenite ručku za zatezanje trake u pravcu strelice da uklonite bilo kakvu nezategnutost trake. 7. Stavite traku za štampač u uređaj. Koristite šiljat predmet kao što je hemijska olovka za guranje trake između glave štampača i vođice za traku.
- Seite 237 All manuals and user guides at all-guides.com 4. Priključivanje štampača na kompjuter Priključivanje štampača Pripazite da štampač i kompjuter budu isključeni, potom spojite interfejs sa štampačem i kompjuterom. Paralelni interfejs Serijski interfejs Priključivanje na štampač 1. Pazite da štampač bude isključen. 2.
- Seite 238 Windows XP, deinstalirajte postojeći drajver štampača pre nego instalirate novi. O EPSON Status Monitor 3 Kad koristite EPSON Status Monitor 3 sa Windows XP, instalirajte EPSON Status Monitor 3 koji je uključen na CD-ROM softvera za štampač koji se isporučuje sa štampačem.
- Seite 239 1. Stavite CD-ROM softvera štampača koji se isporučuje sa štampačem. Kad se pojavi ekran instalacije, kliknite dugme Cancel (Odustani) da zatvorite ekran. 2. Izaberite folder EPSON Status Monitor 3 na CD-u drajvera štampača. (Pretražujte CD-ROM pomoću Explore.) 3. Dvaput kliknite stmsetup.exe u folderu EPSON Status Monitor 3.
- Seite 240 All manuals and user guides at all-guides.com 1. Pazite da štampač bude isključen, potom stavite CD sa softverom za štampač u CD-ROM. Pojaviće se dijaloški okvir instalacije. Beleška: Ako se ne pojavi dijaloški okvir programa za instalaciju, dvaput kliknite Setup.exe na CD-ROM-u. 2.
- Seite 241 štampač koji koristite ili neki drugi štampač sa liste štampača svoje aplikacije. Izaberite EPSON LQ-300+ štampač na odgovarajućem koraku u postavljanju ili proceduri instalacije svog DOS aplikacionog programa. Ako lista u aplikaciji ne uključuje štampač LQ-300+ izaberite prvi štampač na donjoj listi.
- Seite 242 All manuals and user guides at all-guides.com...