Inhaltsverzeichnis
Werbung
Verfügbare Sprachen
Verfügbare Sprachen
Quicklinks
MANUALE D'INSTALLAZIONE USO E MANUTENZIONE
INSTALLATION, USE AND MAINTENANCE MANUAL
INSTALLATIONS-, BETRIEBS- UND INSTANDHALTUNGSANLEITUNG
IT -
Radiatori elettrici a fluido termovettore a controllo elettronico
EN - Electronically managed thermal vector fluid-filled electrical radiators
DE -
Elektronisch gesteuerte elektrische heizkörpen mit wärmetragender flüssigkeit
MULTI
eBlitz Wi-fi
ITIT1
IST 03 F106
Werbung
Kapitel
Inhaltsverzeichnis

Verwandte Anleitungen für Fondital eBlitz Wi-fi


Inhaltszusammenfassung für Fondital eBlitz Wi-fi
- Seite 1 IST 03 F106 MANUALE D’INSTALLAZIONE USO E MANUTENZIONE INSTALLATION, USE AND MAINTENANCE MANUAL INSTALLATIONS-, BETRIEBS- UND INSTANDHALTUNGSANLEITUNG eBlitz Wi-fi IT - Radiatori elettrici a fluido termovettore a controllo elettronico EN - Electronically managed thermal vector fluid-filled electrical radiators DE - Elektronisch gesteuerte elektrische heizkörpen mit wärmetragender flüssigkeit...
-
Seite 3: Installations-, Betriebs- Und Instandhaltungsanleitung
MANUALE D’INSTALLAZIONE USO E MANUTENZIONE IT ………………………………………………………Pag. 1 INSTALLATION, USE AND MAINTENANCE MANUAL EN ………………………………………………………Pag.23 INSTALLATIONS-, BETRIEBS- UND INSTANDHALTUNGSANLEITUNG DE ………………………………………………………Pag.45... -
Seite 5: Inhaltsverzeichnis
GENTILE CLIENTE, ringraziandola per la preferenza da Lei espressa e prima di installare e/o utilizzare il prodotto La invitiamo a leggere con attenzione questo manuale riguardante il corretto modo d’installazione, impiego e manutenzione dell’apparecchio. Le ricordiamo inoltre che il presente libretto deve accompagnare il radiatore nel caso di un suo trasferimento ad altra destinazione di installazione. -
Seite 6: Avvertenze
AVVERTENZE Sul radiatore compare un’ e tichetta che riporta il simbolo illustrato qui a fianco, il cui significato è: per evitare il surriscaldamento dell’apparecchio NON COPRIRE IL RADIATORE con indumenti, stoffe od oggetti vari. Il radiatore non deve in nessun caso: - essere ricoperto in parte o completamente - essere a diretto contatto o a distanza ravvicinata con tende, mobili, ecc. -
Seite 7: Collegamenti Elettrici
COLLEGAMENTI ELETTRICI IMPORTANTE Durante l’installazione, la manutenzione e la pulizia, l’apparecchio non deve essere alimentato elettricamente. L’apparecchio deve essere alimentato esclusivamente con una tensione di 230 Vac. Il radiatore viene fornito con cavo di alimentazione a 3 fili come da tabella seguente: Marrone Fase Grigio o Blu... -
Seite 8: Installazione Dell'apparecchio
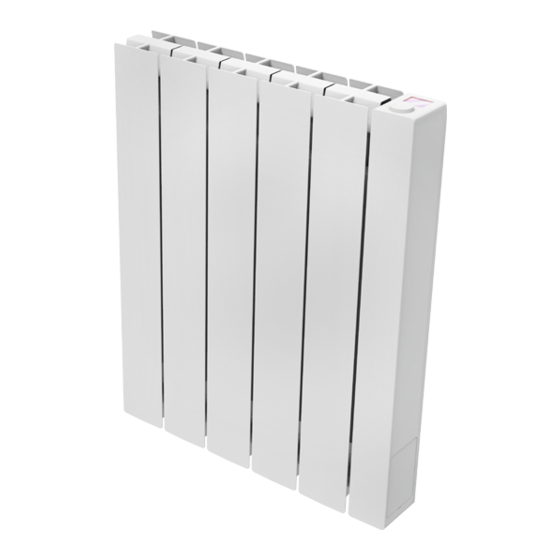
INSTALLAZIONE DELL’APPARECCHIO Per ottenere i migliori risultati in termini di resa termica e comfort del vostro apparecchio vi 30 cm raccomandiamo di installare il radiatore, se possibile, sottofinestra o in prossimità di zone ad alta dispersione termica dell’ambiente da riscaldare. Il radiatore non deve essere installato in una nicchia o sotto una presa di corrente. - Seite 9 Con una matita segnare la posizione dei fori T1 e T2: I punti T1 e T2 segnati corrispondono alla posizione dei fori per le viti inferiori. Posizionare la staffa in modo che le asole inferiori della staffa corrispondano ai segni T1 e T2 :. Con una livella verificare che la staffa sia dritta e segnare la posizione dei due fori superiori U1 e U2 .
- Seite 10 Posizionare la staffa e inserire le viti con le rondelle. Quindi serrare le viti: Posizionare le parti plastiche superiori della staffa: Montare i due blocchi inferiori e ruotarli fino a quando si sente un primo scatto “clack”. Posizionare il radiatore appoggiandolo alla parte superiore delle staffe e facendolo poi ruotare. Spingere il radiatore fino a quando risulterà...
-
Seite 11: Regolazione E Programmazione
Se è necessario rimuovere il radiatore una volta installato agire sui blocchi plastici inferiori spostandoli in direzione orizzontale e poi ruotandoli : REGOLAZIONE E PROGRAMMAZIONE PANNELLO DI CONTROLLO L’apparecchio ha un interruttore ON/OFF nella parte posteriore del fianco plastico di destra (1). Per alimentare elettricamente il radiatore posizionare l’interruttore su I. -
Seite 12: Decrizione Dei Modi Di Funzionamento
DECRIZIONE DEI MODI DI FUNZIONAMENTO Premendo la manopola si accede al MENU e selezionando la voce MODE mediante altra pressione è possibile scegliere fra varie modalità di funzionamento: • SEMPLICE (manuale) • PROGRAMMAZIONE • TEMPORANEO MODE Un riquadro sul display indica la modalità che si sta scegliendo, premendola manopola si valida la scelta. Selezionando il simbolo si torna al menu precedente. -
Seite 13: Modalità Temporanea
4.3.3 MODALITÀ TEMPORANEA La scelta di questa modalità permette di impostare una temperatura diversa da quella programmata/impostata per un periodo di tempo limitato, che va da 30 minuti a 24 ore, terminato il quale l’apparecchio torna a funzionare alla temperatura precedentemente selezionata in modalità... -
Seite 14: Programmazione
In modo PROGRAMMA è possibile modificare le temperature COMFORT e/o ECO semplicemente ruotando PROG SA 10:30 la manopola, la nuova impostazione sarà mantenuta fino al momento in cui interverrà il nuovo cambio 20.0°C automatico di temperatura impostato nel programma. DEROGA Sul display comparirà... -
Seite 15: Ritorno Alla Programmazione Di Fabbrica
4.5.2 RITORNO ALLA PROGRAMMAZIONE DI FABBRICA In PROGRAMMAZIONE selezionare PROG. DEF. e premere la manopola. Selezionando potete annullare l’ o perazione. Premendo RESET potete confermare il ritorno alla programmazione impostata da fabbrica PROGRAMMAZIONE PROG. DEF. PROG. DEF. PROG. DEF. RESET RESET PARAMETRI Dai menu SIMPLE/ PROGRAMMA (PROG) / TEMPORANEO premendo la manopola per accedere al MENU e quindi selezionando... -
Seite 16: Dettagli Di Alcune Funzioni
6. REGOLAZIONE DI FABBRICA: consente ti tornare all’impostazione di fabbrica dei parametri. Selezionare VALIDARE e mantenere premuta la manopola per circa 5 secondi per riconfigurare i parametri di fabbrica. 7. RESTRIZIONI: Selezionando questa opzione nel menu PARAMETRI è possibile: Configurare la temperatura massima ammessa: la temperatura massima può essere regolata da 22 a 30 °C (30 °C è la regolazione di fabbrica). -
Seite 17: Blocco Tasti
BLOCCO TASTI Per bloccare i tasti (manopola) da una delle modalità SIMPLE/PROGRAMMA(PROG)/TEMPORANEO premere e mantenere premuta la manopola per alcuni secondi e quindi selezionare BLOCCO. Sul display resta indicata la modalità di funzionamento, se si tocca la manopola sul display appare il simbolo del lucchetto ad indicare il blocco. -
Seite 18: Registrazione E Associazione Radiatore
Dallo stesso menu è anche possibile: Selezionando STATO verificare lo stato di connessione del radiatore: connesso / non connesso. Sul display l’icona è accesa stabilmente se il radiatore è connesso. Sul display l’icona lampeggia se il radiatore non è ancora connesso, seguire la procedura più avanti descritta per connetterlo. Selezionando RESET CONN. - Seite 19 Premi “VAI ALLE IMPOSTAZIONI WI-FI, apparirà la schermata delle impostazioni Wi-Fi del sistema operativo (figura 06). Tra le reti visibili comparirà la rete del radiatore “DOMUS Wi-FI …”. Switch Wi-Fi network Configure Wi-Fi Nota: se la rete DOMUS non compare verificare nelle impostazioni Wi-Fi del telefono che non sia selezionata l’...
- Seite 20 4.11.2 Funzionamento della APP Dalla APP potrai gestire ogni singolo radiatore, gruppi di radiatori o anche radiatori in diverse abitazioni, potrai impostare molte delle funzioni del radiatore e la sua programmazione, nonché monitorare la temperatura giornaliera per verificare che corrisponda a quanto da te desiderato.
-
Seite 21: Pulizia Del Radiatore
PULIZIA DEL RADIATORE Per la vostra sicurezza, prima di ogni operazione di pulizia, togliere l’alimentazione elettrica portando l’interruttore in posizione 0. Le operazioni di pulizia vanno eseguite a radiatore spento e freddo. Per la pulizia del corpo scaldante non impiegare prodotti abrasivi o corrosivi, utilizzare ad esempio acqua saponata e asciugare poi il corpo con l’aiuto di un panno morbido. - Seite 22 PROBLEMA STATO DEL RADIATORE POSSIBILE CAUSA SOLUZIONE La rilevazione apertura Funzione abilitata L’abbassamento di tempera- ---- finestra non funziona corret- tura nei locali non ha supera- tamente to il valore di 5 °C nel tempo previsto oppure Il radiatore è in posizione Cambiare la posizione del tale per cui la sonda non è...
-
Seite 23: Garanzia
GARANZIA Il corpo in lega di alluminio è garantito da difetti di fabbricazione per 10 anni a partire dalla data di acquisto. Le componenti elettriche ed elettroniche sono garantite 2 anni a partire dalla data di acquisto del radiatore. Affinché la garanzia sia valida è necessario presentare un documento che attesti la data di acquisto (ricevuta fiscale, fattura, scontrino fiscale). -
Seite 24: Caratteristiche Dell'apparecchio
N.B: tutti i radiatori Fondital sono prodotti con un’ e tichetta d’identificazione che ne permette la rintracciabilità. Questa etichetta attesta la conformità alle direttive UE ed alle norme elettriche. -
Seite 25: Informazioni Secondo Il Regolamento Europeo 2015/1188 Del 28 Aprile 2015
INFORMAZIONI SECONDO IL REGOLAMENTO EUROPEO 2015/1188 DEL 28 APRILE 2015 eBlitz Wi-Fi 750 W / 1000 W / 1250 W / 1500 W / 1800 W Identificativo del modello: Dato Simbo- Valore Unità Dato Unità Potenza termica Tipo di potenza termica/controllo della temperatura ambiente:... -
Seite 26: Dichiarazione Di Conformita
40, 25079 Vobarno (BS) Italia si dichiara che i RADIATORI ELETTRICI PER RISCALDAMENTO Modello eBLITZ Wi-Fi prodotti da FONDITAL S.p.A. sono costruiti in conformità alle Direttive europee ed ai Regolamenti europei: DIRETTIVA 2014/53/UE: “RED” DIRETTIVA 2014/35/UE : “Bassa Tensione” DIRETTIVA 2014/30/UE: “Compatibilità Elettromagnetica”... - Seite 27 DEAR CUSTOMER, WE THANK YOU FOR YOUR CONFIDENCE. BEFORE INSTALLING AND/OR USING THE PRODUCT, PLEASE READ CAREFULLY THIS MANUAL CONCERNING THE CORRECT INSTALLATION, USE AND MAINTENANCE OF THE APPLIANCE. WE REMIND YOU AS WELL THAT THIS MANUAL MUST ACCOMPANY THE RADIATOR IN CASE OF TRANSFER TO ANOTHER PLACE OF INSTALLATION.
-
Seite 28: Warnings
WARNINGS The symbol shown here appears on a label on the radiator, whose meaning is: to avoid the overheating of the appliance, DO NOT COVER THE RADIATOR with clothes or other objects. The radiator shall in no case: - be covered in part or in full - be in direct contact or too close to curtains, furniture, etc. -
Seite 29: Electrical Connections
ELECTRICAL CONNECTIONS IMPORTANT During installation, maintenance and cleaning, the appliance must not be powered. The appliance must be powered only with 230 Vac voltage. The radiator is supplied with a power cable with 3 wires as per table below: Brown Phase Blue or Grey Neutral... -
Seite 30: Installation Of The Appliance
INSTALLATION OF THE APPLIANCE To achieve the best results in terms of heat output and comfort of your appliance, we recommend to 30 cm install the radiator, if possible, under a window or near areas with high heat loss of the room to heat. The radiator must not be installed in a niche or under a power outlet. - Seite 31 Using a pencil, mark the position of holes T1 and T2: Marked points T1 and T2 correspond to the position of the holes for the lower screws. Place the bracket so that the lower slots of the bracket match the marks T1 and T2 : Using a spirit level, check that the bracket is straight and mark the position of the two upper holes U1 and U2 .
- Seite 32 Position the bracket and insert the screws with washers. Then tighten the screws:: Position upper plastic parts of the bracket: Fit the two lower clamps and rotate them until you hear a first click. Position the radiator by leaning it on the upper part of the brackets and then rotating it. Push the radiator until it is automatically locked by lower plastic clamps The operation is over only when locking hooks are blocked and the radiator is fixed on the wall, without any possibility of movement.
-
Seite 33: Adjustment And Programming
If necessary, remove the radiator and operate on the lower plastic clamps by moving them horizontally and then rotating them: ADJUSTMENT AND PROGRAMMING CONTROL PANEL The appliance has an ON/OFF switch on the rear of the right plastic side (1). To power the radiator, position the switch to I. -
Seite 34: Description Of Operating Modes
DESCRIPTION OF OPERATING MODES Press the knob to access the MENU, press again to select MODE item and select one of the operating modes: • SIMPLE (manual) • PROGRAMMING • TEMPORARY MODE A box on the display indicates the mode you are selecting, press the knob to confirm the selection. Select to return to the previous menu. -
Seite 35: Temporary Mode
4.3.3 TEMPORARY MODE The selection of this mode allows setting a temperature different from the programmed/set temperature for a limited period of time, ranging from 30 minutes to 24 hours, after which the appliance returns to operate at the previous temperature selected in SIMPLE or PROGRAM mode. -
Seite 36: Programming
The maximum default temperature is 30 °C, but it can be changed using “MAX TEMP. ” parameter of PROG SA 10:30 PARAMETERS/RESTRICTIONS menu. 20.0°C In PROGRAM mode, it is possible to change COMFORT and/or ECO temperatures by simply turning the EXEMPTION knob: the new setting will be maintained until the new automatic temperature change set in the program UNTIL 17:00... -
Seite 37: Returning To Factory Programming
4.5.2 RETURNING TO FACTORY PROGRAMMING In PROGRAMMING select DEF. PROG. and press the knob. Select to cancel the operation. Press RESET to confirm the return to the factory programming. PROGRAMMING DEF. PROG. DEF. PROG. DEF. PROG. RESET RESET PARAMETERS From SIMPLE / PROGRAM / TEMPORARY menus, press the knob to access the MENU and then select PARAMETERS to adjust/set the following parameters: WINDOW OPENING DETECTION (WINDOW): enabled/disabled type function. -
Seite 38: Details Of Some Functions
6. FACTORY SETTINGS: allows returning to the factory parameter setting. Select VALIDATE and press and hold the knob for approx. 5 seconds to reconfigure the factory settings. 7. RESTRICTIONS: Select this option in the PARAMETERS menu to: Set the maximum permitted temperature: the maximum temperature can be adjusted from 22 to 30 °C, 30 °C is the factory setting Lock the use of PARAMETERS or the use of both PARAMETERS and PROGRAMMING (PAR &... -
Seite 39: Key Lock
KEY LOCK It is possible to lock the device to avoid an improper or unintentional use, for instance for children protection or in a public space To lock the keys (knob) from one of SIMPLE/PROGRAM/TEMPORARY modes, press and hold the knob for a few seconds and then select LOCK. -
Seite 40: Radiator Registration And Pairing
In the same menu it is also possible to: Select STATUS to check the radiator connection status: connected / not connected. On the display, the icon is steady ON if the radiator is connected and flashes if the radiator is not yet connected. Follow the procedure described below to connect it. - Seite 41 be displayed (figure 04): Enter the network password if required. Press, “CONFIGURE”, the Switch Wi-Fi network Configure Wi-Fi screen shown in figure 05 will be displayed. Press “GO TO WI-FI SETTINGS”, the Wi-Fi setting page of the operating system will be displayed (figure 06). Select the Wi-Fi network you want this thermostat to connect to Go to settings and select the Wi-Fi network of the...
-
Seite 42: App Operation
4.11.2 APP operation From the APP, you can manage every single radiator, groups of radiators or even radiators in different buildings, you can set many of the functions of the radiator and its programming, as well as monitor the daily temperature to make sure that it meets your needs. You can add new radiators to your personal list at any time and give them a name to easily recognise them. -
Seite 43: Radiator Cleaning
RADIATOR CLEANING For your safety, before any cleaning operation, disconnect power supply. Cleaning operations must be carried out with radiator off and cold. Do not use abrasive or corrosive products to clean the heating body. Use, for instance, soapy water and then dry the body using a soft cloth. - Seite 44 PROBLEM STATE OF THE RADIATOR PROBABLE CAUSE SOLUTION Window opening detection Function enabled Lowering of temperature in ---- does not work properly the rooms has not exceeded 5°C in the time provided or The position of the radiator Relocate the radiator. does not allow the probe to detect the temperature correctly.
-
Seite 45: Warranty
WARRANTY The body in aluminum alloy is warranted against manufacturing defects for 10 years from date of purchase. Electric and electronic components are warranted for 2 years from the date of purchase of the radiator. To validate your warranty, it is necessary to produce a document attesting the date of purchase (tax receipt, invoice, sales receipt). -
Seite 46: Characteristics Of The Appliance
Frequency band 2412 MHz ÷ 2474 MHz Maximum transmitted radio frequency power 17,5 dBm Model Power Nr of elements Width Height Depth Net weight eBlitz Wi-Fi 750 W 1000 W 1000 1250 W 1250 13,7 1500 W 1500 17,1 1800 W... -
Seite 47: Information Requirements For The Regulation (Eu) 2015/1188 Of 28 April 2015
SPACE HEATERS IN ACCORDANCE WITH ANNEX II, POINT 3.A.I.2, OF THE REGULATION (EU) 2015/1188 OF 28 APRIL 2015 IMPLEMENTING DIRECTIVE 2009/125/EC. Model identifiers: eBlitz Wi-Fi 750 W / 1000 W / 1250 W / 1500 W / 1800 W Item Symbol Value... -
Seite 48: Declaration Of Conformity
ELECTRICAL RADIATORS FOR HEATING Model eBlitz Wi-Fi produced by FONDITAL S.p.A. are manufactured according to Regulations: The Radio Equipment Regulations 2017 and amendments. Electrical Equipment (Safety) Regulations 2016 and amendments. Electromagnetic Compatibility Regulations 2016 and amendments. The Restriction of the Use of Certain Hazardous Substances in Electrical and Electronic Equipment Regulations 2012. - Seite 49 SEHR GEEHRTER KUNDE, WIR DANKEN IHNEN FÜR DEN VORZUG, DEN SIE UNS GEGEBEN HABEN UND BITTEN SIE, VOR DER INSTALLATION UND/ODER DER VERWENDUNG DIESES PRODUKTS DIESE ANLEITUNG BEZÜGLICH DER KORREKTEN INSTALLATIONS-, NUTZUNGS- UND INSTANDHALTUNGSWEISE DES GERÄTS ZU LESEN. BITTE BEACHTEN SIE AUCH, DASS DIESES ANLEITUNGSHEFT DEN HEIZKÖRPER IM FALL SEINER INSTALLATION AN EINEM ANDEREN EINSATZORT BEGLEITEN MUSS.
-
Seite 50: Hinweise
HINWEISE Am Heizkörper ist eine Etikette angebracht, auf der das nebenstehende Symbol zu sehen ist und das folgende Bedeutung hat: zum Vermeiden einer Überhitzung des Geräts DEN HEIZKÖRPER NICHT ABDECKEN bzw. keine Kleidungsstücke, Tücher oder andere Gegenstände darüber legen. Der Heizkörper darf auf keinen Fall: - weder teilweise noch vollkommen abgedeckt werden;... -
Seite 51: Elektrische Anschlüsse
ELEKTRISCHE ANSCHLÜSSE WICHTIG Während der Installation, der Wartung und der Reinigung darf das Gerät nicht elektrisch versorgt werden. Das Gerät darf ausschließlich mit einer Spannung von 230 Vac versorgt werden. Das Gerät wird mit einem 3-adrigen Stromkabel gemäß folgender Tabelle geliefert: Braun Phase Blau oder Grau... -
Seite 52: Installation Des Geräts
INSTALLATION DES GERÄTS Für den Erhalt der besten Ergebnisse in Bezug auf die Wärmeleistung und den von Ihrem Gerät gebotenen 30 cm Komfort empfehlen wir Ihnen, den Heizkörper, soweit möglich, unter einem Fenster oder in der Nähe von Bereichen des zu beheizenden Raums zu installieren, in denen eine hohe Wärmestreuung gegeben ist. Der Heizkörper darf nicht in Nischen oder unter einem Stromanschluss installiert werden. - Seite 53 3. Mit einem Bleistift die Position für die Bohrungen T1 und T2 markieren: 4. Die markierten Punkte T1 und T2 entsprechen der Position der Bohrungen für die unteren Schrauben. Den Bügel so positionieren, dass die unteren Langlöcher des Bügels mit den Markierungen T1 und T2 übereinstimmen: 5.
- Seite 54 7. Den Bügel positionieren und die Schrauben mit Unterlegscheiben ansetzen. Dann die Schrauben anziehen: 8. Die oberen Kunststoffteile des Bügels anordnen: 9. Die beiden unteren Blöcke montieren und so lange drehen, bis ein erstes Einrastgeräusch zu hören ist. 10. Den Heizkörper anordnen und ihn dabei am oberen Teil der Bügel anlegen und ihn dann drehen. Den Heizkörper so lange andrücken, bis er als automatisch von den unteren Kunststoff-Feststellvorrichtungen blockiert resultiert er Arbeitsschritt ist erst dann abgeschlossen, wenn die Blockierverankerungen blockiert sind und der Heizkörper als fest an der Wand befestigt resultiert, ohne dass er sich in irgendeiner Weise bewegen...
-
Seite 55: Einstellung Und Programmierung
11. Falls ein installierter Heizkörper entfernt werden muss, muss auf die unteren Kunststoff-Feststellvorrichtungen eingewirkt werden, die dazu auf der Waagrechten verschoben, dann gedreht werden müssen: EINSTELLUNG UND PROGRAMMIERUNG 4.1. STEUERPANEL Das Gerät ist an der Rückseite der rechten Kunststoffflanke (1) mit einem EIN/AUS- Schalter ausgestattet. -
Seite 56: Beschreibung Der Betriebsmodi
4.3. BESCHREIBUNG DER BETRIEBSMODI Durch Drücken des Drehknopfs öffnet sich das MENÜ und durch erneutes Drücken auf das Feld MODUS ist die Wahl zwischen den verschiedenen Betriebsmodi möglich: • BETRIEBFREUNDLICH (manuell) • PROGRAMMIERUNG • TEMPORÄR MODE Ein Kästchen im Display zeigt den gewählten Modus an. Durch Drücken des Drehknopfs wird die Wahl bestätigt. Durch Wahl des Symbols erfolgt der Rücksprung in das vorherige Menü. -
Seite 57: Betriebsmodus „Temporär
4.3.3. BETRIEBSMODUS „TEMPORÄR“ Die Wahl dieses Betriebsmodus ermöglicht es, für einen begrenzten Zeitraum von 30 Minuten bis 24 Stunden eine von der programmierten/eingestellten Temperatur abweichende Temperatur einzustellen, nach deren Ablauf das Gerät wieder mit der zuvor gewählten Temperatur im Betriebsmodus EINFACH oder PROGRAMM arbeitet. Wenn dieser Betriebsmodus aktiviert ist, zeigt das Display die verbleibende Zeit bis zum Umschalten in den vorherigen Betriebsmodus an (Countdown). -
Seite 58: Programmierung
EINSCHRÄNKUNGEN geändert werden. PROG SA 10:30 Im Betriebsmodus PROGRAMM ist es möglich, die Temperaturen der Modi KOMFORT und ECO durch 20.0°C einfaches Drehen des Drehknopfs zu ändern. Die neue Einstellung wird bis zur erneuten automatischen Temperaturänderung, die im Programm eingestellt wurde, beibehalten. BIS 17:00 Am Display erscheint die Meldung ABWEICHUNG und die Uhrzeit, zu der die Heizung auf die zuvor eingestellte Programmierung zurückschaltet. -
Seite 59: Rücksetzen Auf Die Werkseinstellungen
4.5.2. RÜCKSETZEN AUF DIE WERKSEINSTELLUNGEN Unter PROGRAMMIERUNG STANDARDPROGR. auswählen und den Drehknopf drücken. Durch das Markieren von kann der Vorgang abgebrochen werden. Durch Drücken auf RESET können Sie das Zurücksetzen auf die werksseitig eingestellte Programmierung bestätigen. PROGRAMMIERUNG STANDARDPROG. STANDARDPROG. STANDARDPR. RESET PROG. -
Seite 60: Einzelheiten Zu Einigen Funktionen
6. WERKSEINSTELLUNG: Ermöglicht das Rücksetzen der Parameter auf die Werkseinstellung. VALIDIEREN markieren, dann den Drehknopf ungefähr 5 Sekunden lang gedrückt halten, um die Parameter der Werkseinstellungen wieder herzustellen. 7. EINSCHRÄNKUNGEN: Die Wahl dieser Option im Menü PARAMETER macht Folgendes möglich: Die Konfiguration der maximal zulässigen Temperatur: Die maximale Temperatur kann von 22 bis 30 °C eingestellt werden. -
Seite 61: Tastenperre
4.9. TASTENPERRE Um die Tasten (Drehknopf) in einem der Betriebsmodi SIMPLE/PROG/VORLÄUFIG zu sperren, den Drehknopf einige Sekunden lang gedrückt halten und dann SPERREN wählen. Der Betriebsmodus wird weiterhin am Display angezeigt. Wird der Drehknopf berührt, erscheint am Display das Vorhängeschloss- Symbol als Hinweis auf die Sperre. -
Seite 62: Registrieren Und Verknüpfen Des Heizkörpers
Vom gleichen Menü aus ist auch Folgendes möglich: Durch Markieren der Angabe STATUS kann der Verbindungsstatus des Heizkörpers überprüft werden: Verbunden/ nicht verbunden. Das Symbol leuchtet permanent am Display, wenn der Heizkörper verbunden ist. Das Symbol blinkt am Display, wenn der Heizkörper noch nicht verbunden ist. Zum Verbinden das nachstehend beschriebene Verfahren befolgen. Durch Markieren der Angabe RESET VERBIND. - Seite 63 (Abbildung 04). Geben Sie bei Bedarf das Netzwerkkennwort ein. Drücken Configure Wi-Fi Switch Wi-Fi network Sie „KONFIGURIEREN“. Es erscheint die Bildschirmseite auf Abbildung 05. Drücken Sie „AUF WI-FI EINSTELLUNGEN GEHEN“. Die Wi-Fi- Select the Wi-Fi network you want this thermostat to Einstellungsseite des Betriebssystems öffnet sich (Abbildung connect to Go to settings and select the Wi-Fi network of the...
-
Seite 64: Funktion Der App
4.11.2 Funktion der APP Von der APP aus können Sie jeden einzelnen Heizkörper, Heizkörpergruppen oder sogar Heizkörper in verschiedenen Häusern verwalten, Sie können viele der Heizkörperfunktionen und deren Programmierung einstellen sowie die Tagestemperatur überwachen, um sicherzustellen, dass sie Ihren Wünschen entspricht. -
Seite 65: Reinigung Des Heizkörpers
REINIGUNG DES HEIZKÖRPERS Trennen Sie zum Schutz ihrer Sicherheit vor jeder Reinigung die Stromversorgung. Die Reinigungsarbeiten müssen an einem ausgeschalteten und kalten Heizkörper erfolgen. Verwenden Sie für das Reinigen des Heizkörpers keine reibenden oder ätzenden Produkte. Verwenden Sie beispielsweise Seifenwasser und trocknen Sie den Heizkörper mit einem weichen Lappen ab. Verwenden Sie zum Reinigen der Kunststoffteile nur ein trockenes Tuch und vermeiden Sie den Kontakt mit Chemikalien oder Alkohol DEFEKTE... - Seite 66 PROBLEM ZUSTAND DES HEIZKÖRPERS MÖGLICHE URSACHE LÖSUNG Die Erfassung eines geöff- Funktion aktiviert. Die Temperaturabnahme in ---- neten Fensters funktioniert den Räumen hat den Wert nicht korrekt. von 5 °C nicht erreicht oder Der Heizkörper befindet sich Die Position des Heizkörpers in einer Position, in der er ändern.
-
Seite 67: Garantie
GARANTIE Der aus Aluminiumlegierung hergestellte Heizkörper wird 10 Jahre ab dem Kaufdatum gegen Fabrikationsfehler garantiert. Die elektrischen und elektronischen Komponenten werden für 2 Jahre ab dem Kaufdatum des Heizkörpers gewährleistet. Damit die Garantie als gültig anerkannt werden kann, muss ein Dokument vorgelegt werden, welches das Datum des Kaufs bestätigt (Kassenzettel, Rechnung, Quittung). -
Seite 68: Eigenschaften Des Geräts
Namen geben, damit sie leichter zu erkennen sind. MERKE: Alle Fondital Heizkörper werden mit einer Typenetikette versehen, anhand derer eine entsprechende Rückverfolgung des Produkts möglich ist. Diese Etikette bestätigt die Konformität mit den EWGRichtlinien und den Normen für Elektrogeräte. -
Seite 69: Erforderliche Angaben Zu Elektrischen Einzelraumheizgeräten
ERFORDERLICHE ANGABEN ZU ELEKTRISCHEN EINZELRAUMHEIZGERÄTEN.VERORDNUNG (EU) 2015/1188 VOM 28. APRIL 2015 ZUR DURCHFÜHRUNG DER RICHTLINIE 2009/125/EG Modellkennung(en): eBlitz Wi-Fi 750 W / 1000 W / 1250 W / 1500 W / 1800 W Angabe Symbol Wert Einheit Angabe Einheit Potenza termica Art der Wärmeleistung/... -
Seite 70: Konformitätserklärung
Via Cerreto 40, 25079 Vobarno (BS) Italia erklart, dass die ELEKTRISCHEN HEIZKÒRPER Modell eBLITZWi-Fi die von der FONDITAL S.p.A. hergestellt werden, in Obereinstimmung mit den Europaischen Richtlinien und den Europaischen Verordnungen: Richtlinie 2014/53/UE: „RED” Richtlinie 2014/35/UE : „Niederspannung” Richtlinie 2014/30/UE: „Elektromagnetische Verträglichkeit”... - Seite 71 DE - 67...
- Seite 72 Eigenschaften zu ändern. El productor se reserva el derecho de aportar a sus productos las modificaciones que considere necesarias o útiles, sin perjudicar las características esenciales. DE - 68 Fondital IST 03 F 106 - 01 Novembre 2020 (11/2020)