DJI Intelligent Battery Station Bedienungsanleitung

Verwandte Anleitungen für DJI Intelligent Battery Station


Inhaltszusammenfassung für DJI Intelligent Battery Station
- Seite 1 T30/T10 Intelligent Battery Station User Guide 使用說明 ユーザーガイド 사용자 가이드 คู ่ ม ื อ การใช้ ง าน Hướng dẫn sử dụng Bedienungsanleitung Guía del usuario Guide de l'utilisateur Guida dell'utente Gebruiksaanwijzing Manual do utilizador Guia do usuário Руководство пользователя...
- Seite 3 사용자 가이드 คู ่ ม ื อ การใช้ ง าน Hướng dẫn sử dụng Bedienungsanleitung Guía del usuario Guide de l'utilisateur Guida dell'utente Gebruiksaanwijzing Manual do utilizador Guia do Usuário PT-BR Руководство пользователя Compliance Information © 2021 DJI All Rights Reserved.
- Seite 4 Fonte de alimentação de comutação CPX-3000W* Зарядная станция для аккумуляторов Импульсный источник питания CPX-3000W* * CPX-3000W Switching Power Supply is not included in the package for some regions. Please contact DJI or a DJI authorized dealer for further information. * 部分國家或地區包裝內不含 CPX-3000W 開關電源模組,詳情請聯繫 DJI 或 DJI 授權經銷商。 * CPX-3000W スイッチング電源は一部地域ではパッケージに含まれておりません。詳細情報については DJI または DJI 正規代理店にお...
- Seite 5 * A fonte de alimentação alternada CPX-3000W não está incluída na embalagem em algumas regiões. Contacte a DJI ou um revendedor autorizado para mais informações. * A fonte de alimentação de comutação CPX-3000W não está incluída no pacote de algumas regiões. Entre em contato com a DJI ou com um revendedor autorizado da DJI para mais informações.
- Seite 6 1. The power cable of the AC input current is 16 A. Use a power outlet that can provide a current exceeding 16 A for the T10 Intelligent Battery Station and use two separate power outlets of a total current exceeding 32 A for the T30 Intelligent Battery Station. A certain power margin is required for safety.
- Seite 7 Users can check the battery charging status LEDs and the warning indicator on the operation panel of the battery station to confirm if there are any errors. The battery station can be connected to a remote controller using a USB-C cable and users can launch the DJI MG or DJI AGRAS app to check more detailed information regarding any errors. Additionally, the battery station has the following functions: overcurrent protection, overcharging protection, under-voltage protection, overheating protection, and status display.
-
Seite 8: Operation Panel
1. Loosen the screws and remove the front panel. 2. Insert the CPX-3000W switching power supply into the battery station as shown below. The T30 Intelligent Battery Station has two CPX-3000W switching power supplies while the T10 Intelligent Battery Station has one. - Seite 9 1. Connect the battery station to a power outlet. 2. Connect the battery station to the PC using a USB-C cable. 3. Visit www.dji.com to download DJI Assistant 2 for MG. Install and run the software. 4. Press the power button to power on the battery station.
- Seite 10 5. Use your DJI account to log in and click “Battery Station / Inverter Generator” and follow the prompts to finish activation. Make sure the PC or smart device is connected to the internet during activation. Internet Using the Battery Station Up to two batteries can be connected to the T30/T10 Intelligent Battery Station. Follow the instructions below to use the battery station.
- Seite 11 For more information about how to check if there are any errors during self-diagnosis, refer to the LEDs and Warning Indicator Description. Alternatively, connect the battery station to a remote controller and launch the DJI MG or DJI Agras app for more detailed information about the errors.
-
Seite 12: Updating Firmware
If there are any abnormalities, connect the battery station to a remote controller and run the DJI MG or DJI Agras app to check more information. If the app indicates that a module is abnormal or broken, contact DJI or a DJI authorized dealer. -
Seite 13: Storage And Maintenance
1. Download DJI Assistant 2 for MG at https://www.dji.com/t30/downloads or https://www.dji.com/ t10/downloads. 2. Launch DJI Assistant 2 for MG and log in with your DJI account. 3. Power on the battery station and connect the station to a computer via the USB-C port. -
Seite 14: Specifications
Approx. 5.5 kg (without CPX- Approx. 5.1 kg (without CPX- Weight 3000W Switching Power Supply) 3000W Switching Power Supply) Note: Refer to the CPX-3000W Switching Power Supply Product Information for current, input and output voltage. © 2021 DJI All Rights Reserved. - Seite 15 12. 使用充電管家對電池進行充電前,請仔細閱讀電池的相關安全說明及使用注意,並嚴格按照裡面的內容 進行操作。 13. 移動或搬運充電管家時,不要拉扯電池充電線。 14. 請選擇開闊場地進行充電,務必遠離電池存放區域。為保證充電安全,充電時,電池與充電管家、電池 與電池之間的距離需大於 30 cm,以免因為發熱集中而導致充電管家或電池故障,甚至造成火災等嚴重 後果。 15. 充電時,請遠離可燃物,切勿將充電管家或電池放置於地毯上進行充電。 16. 充電管家可透過 T10、T30 或 T20 植保無人飛機遙控器或 DJI ASSISTANT 2 for MG 調整軟體啟動和升 級韌體。 透過連接遙控器升級和啟動充電管家前,請確保已將遙控器韌體升級至最新版本。 簡 介 T30/T10 智能充電管家 (以下簡稱 「充電管家」 ) 均可連接 2 顆電池。 充電過程中, 充電管家可執行與電池的通訊, 並根據目前電池可接受的電流大小智能調整充電電流。充電管家具備全新的自我修復功能,即使在充電過程 中發生散熱孔堵塞等非致命性問題時也能自動調整充電電流,確保充電持續進行。...
- Seite 16 8. 交流電源連接埠 4. 充電線連接頭固定位 9. 交流電源防塵網 5. 把手 10. 地線連接埠 控制面板 1. 電池充電狀態 LED 燈 × 2 每個 LED 燈對應指示插入充電連接埠位置的電池充電狀態。 2. 警告燈 當出現充電異常時,警告燈將會亮起。若警告燈為黃色,請透過 USB-C 連接線連接充電管家至遙控器, 查看異常警示訊息。若警告燈為紅色,請停止充電,確保排除異常後才可再次充電。 3. 啟動 / 停止 按下以打開或關閉充電管家。關閉充電管家時,建議先按下啟動 / 停止按鈕,再拔出 AC 電源線。 © 2021 DJI All Rights Reserved.
- Seite 17 組裝充電管家 出廠時,如 CPX-3000W 開關電源模組未安裝至充電管家,請按照以下步驟進行組裝: 1. 鬆開螺絲,取下充電管家前面板。 2. 將 CPX-3000W 開關電源模組裝入充電管家圖示位置。T30 智能充電管家需裝入兩個電源模組;T10 智能 充電管家需裝入一個電源模組。 T30 智能充電管家: T10 智能充電管家: 3. 使用螺絲將前面板安裝回原位置。 © 2021 JI All Rights Reserved.
- Seite 18 2. 使用 USB-C 連接線連接充電管家至遙控器。 3. 打開充電管家電源開關。 4. 執行應用程式,並根據應用程式提示啟動充電管家。 方法二:使用 DJI Assistant 2 for MG 啟動: 1. 將充電管家連接至交流電源。 2. 使用 USB-C 連接線連接充電管家至電腦。 3. 前往 www.dji.com 下載並安裝 DJI Assistant 2 for MG 調整軟體,然後執行。 4. 打開充電管家電源開關。 5. 使用 DJI 帳號登入,點擊「電池管家 / 充電站」,然後根據提示啟動充電管家。 啟動時,請確保電腦或遙控器可以連接網際網路。 網際網路 使用充電管家...
- Seite 19 若在室內使用 T30 智能充電管家,建議僅使用一條 AC 電源線,此時最大輸出功率減半。 為達到良好的充電體驗,請將充電線從固定位取下,繞回至另一側連接電池。 3. 確認所有線已正確連接,按下控制面板的「啟動 / 停止」按鈕,此時充電管家控制面板 2 個電池充電狀態 LED 燈、警告燈將會同步點亮,再同步熄滅,然後已插入相應電池的 LED 燈將會呈黃燈恆亮。此時,充 電管家完成自動檢測,且已正常啟動。如自動檢測過程出現異常,請查閱 LED 燈及警告燈描述章節了解 異常原因,或連接至遙控器後打開應用程式獲取詳細的異常情況描述。 4. 充電管家自動檢測正常後將對電池進行充電。如果同時連接 2 顆電池,充電管家將會按照電池剩餘電量, 由高到低依次進行充電。 連接充電管家前,請確保充電管家的各個端口、輸入線束無堵塞、破損、斷線、短路等明顯缺陷。 充電前,請檢查待充電池,確保各個端口及線束沒有破損、斷線等明顯缺陷。 務必連接好電池後再啟動充電管家。 充電管家會根據電池的性能調整充電電流。例如,一般情況下當溫度低於 15℃ 時,充電電流將被 限制,電池充電時間延長。電池充電時間與電池型號和溫度相關,溫度越低,電池的充電時間越長。 不同的電池的低溫以及高溫禁止充電溫度不同, 具體的電池可充電溫度範圍請查看電池的相關文件。 LED 燈及警告燈描述 充電過程中, 當其中某顆電池異常時 (如斷線、 高溫、 低溫、 電壓過大、 電流過大) , 相應編號的 LED 燈將會提示。 充電完成後,LED 燈將會呈綠燈恆亮,此時請斷開充電管家和電池的連接。...
- Seite 20 3. 執行 DJI MG 應用程式或大疆農業應用程式,並根據提示進行韌體下載升級。韌體下載過程中需要連接網 際網路。 使用 DJI Assistant 2 for MG 升級 1. 請透過以下網址下載 DJI Assistant 2 for MG 調整軟體:https://www.dji.com/t30/downloads 或 https:// www.dji.com/t10/downloads。 2. 啟動 DJI Assistant 2 for MG 調整軟體,接著使用 DJI 帳號登入以進入主介面。 3. 開啟充電管家,並在 20 秒連接充電管家的 USB-C 連接埠與電腦。...
- Seite 21 連接充電管家前,請確保充電管家的各個端口、輸入線束無堵塞、破損、斷線、短路等明顯缺陷。 充電管家升級過程中,嚴禁接插電池。 線上升級過程中,請勿斷開裝置間的連接。 確保在整個升級過程中,個人電腦可以存取網際網路。 升級過程中出現失敗提示時,請嘗試重新升級。 存放和保養 存放充電管家 充電完成或不使用充電管家時,請斷開電池充電線與電池的連接,並斷開 AC 電源線,然後按照下圖所示將 電池充電線固定至連接頭固定位,以妥善保護。 1. 將電池充電線繞回至另一側位置。 2. 確保線材上部卡在圖示中的位置,然後將電池充電線連接頭卡入其固定位進行固定。 請勿將充電管家存放在陽光直射、雨淋或潮濕的環境中。 充電管家應遠離熱源、高壓、水、可燃性氣體、腐蝕劑等危險物品存放。 保養充電管家 請定期清潔交流電源防塵網和前面板防塵網,以保證充電效果。 規格參數 T30 智能充電管家 T10 智能充電管家 參數 (型號:CHX503-7000) (型號:CHX503-3500) -5℃ 至 45℃ 運作環境溫度 300×280×230 mm 尺寸 輸出頻道 T30 智能飛行電池 T10/T16/T20 智能飛行電池 適用智能電池 約...
- Seite 22 DJI が提供する安全で合法的な使用方法に関する説明を注意深くお読みください。指示と警告に従わ なかった場合、ご自身や他の人に重傷を負わせたり、またはお客様の DJI 製品および周辺の他の物 の破損につながる恐れがあります。本製品を使用することにより、本書をよく読み、本文書および 本製品のすべての関連文書に記載されている利用規約を理解し、順守することに同意したとみなさ れます。本製品を適切な目的のためにのみ使用することに同意するものとします。本製品の使用中 の行動とこれに伴う結果には、ユーザーが全面的に責任を負うことに同意するものとします。本製 品の使用により直接または間接的に発生する損害、傷害、およびその他法的責任に対して、DJI は一 切責任を負いません。 DJI は、SZ DJI TECHNOLOGY CO., LTD.(以下「DJI」と省略)およびその関連会社の商標です。本書 に記載されている製品、 ブランドなどの名称は、 その所有者である各社の商標または登録商標です。 本製品および本書は、不許複製 • 禁無断転載を原則とする DJI の著作物のため、DJI から書面による 事前承認または許諾を得ることなく、本製品または文書のいかなる部分も、いかなる方法によって も複製することは固く禁じられています。 本書およびその他すべての付属書は、DJI 独自の裁量で変更されることがあります。最新の製品情報 については、http://www.dji.com にアクセスして、本製品に対応する製品ページをクリックしてご 覧ください。 この文書は複数の言語で提供されています。言語版によって相違がある場合には、英語版が優先さ れます。 警告 1. 本電源ケーブルの AC 入力電流は 16 A です。T10 インテリジェント バッテリーステーションに対 しては 16 A を超える電流を供給する電源コンセントを使用し、T30 インテリジェント バッテリ...
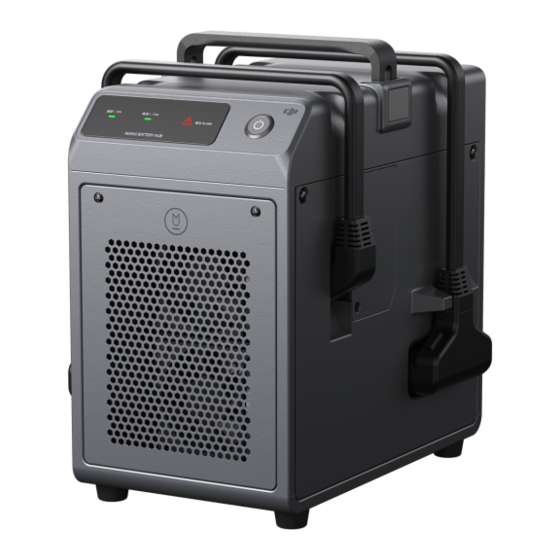
- Seite 23 ユーザーはバッテリーステーションの操作パネル上にあるバッテリー充電ステータス LED と警告イ ンジケーターでエラー発生の有無を確認できます。本バッテリーステーションは USB-C ケーブルを 使用して送信機に接続することができ、ユーザーは DJI MG または DJI AGRAS アプリを起動してエ ラーに関する詳細情報を確認することができます。さらに、本バッテリーステーションには、過電 流保護、過充電保護、低電圧保護、過熱保護、ステータス表示などの機能もあります。 本ユーザーガイドの一般的説明は T30 インテリジェント バッテリーステーションと T10 インテリジェ ント バッテリーステーションの両方に該当します。本ユーザーガイドの図は、実際の製品とは異なる 場合があります。以下の例では T30 インテリジェント バッテリーステーションを使用しています。 概要 バッテリーステーション 1. 操作パネル 6. 充電ケーブル 2. 充電ケーブルの固定 7. USB-C ポートカバー 3. フロントパネル防塵カバー 8. 電源ポート 4. 充電ケーブル収納部 9. AC 電源防塵カバー 5. ハンドル 10. GND ポート © 2021 DJI All Rights Reserved.
- Seite 24 3. 電源ボタン バッテリーステーションがエラーを検知し 電源ボタンを押してバッテリーステーショ た場合、 警告インジケーターが点灯します。 ンの電源をオン/オフします。ステーショ もしインジケーターが黄色に点灯した場 ンの電源をオフにするには電源ボタンを押 合、USB-C ケーブルを使用しバッテリース してから AC 電源ケーブルをコンセントか テーションを送信機に接続してエラーが発 ら抜くことをお勧めします。 バッテリーステーションの取り付け CPX-3000W スイッチング電源が工場出荷時に取り付けられていなかった場合には、以下の指示に従 い取り付けてください。 1. ネジを緩めて、フロントパネルを取り外します。 2. 以下で示すように CPX-3000W スイッチング電源をバッテリーステーションに挿入します。T30 インテリジェント バッテリーステーションには 2 個の CPX-3000W スイッチング電源があり、一 方 T10 インテリジェント バッテリーステーションには 1 個あります。 © 2021 DJI All Rights Reserved.
- Seite 25 T30 インテリジェント バッテリーステ T10 インテリジェント バッテリース ーション: テーション: 3. パネルを取り付けて、ネジを使ってしっかりと固定します。 アクティベーション バッテリーステーションは、初めて使用する前にアクティベーションする必要があります。警報イ ンジケーターが緑色に点灯している場合は、バッテリーステーションがまだアクティベーションさ れていません。以下の指示に従い、バッテリーステーションのアクティベーションを行います: 方法 1:DJI MG アプリまたは DJI Agras アプリの使用 1. バッテリーステーションを電源コンセントに接続します。 2. USB-C ケーブルを使用し、バッテリーステーションを送信機に接続します。 3. 電源ボタンを押して、バッテリーステーションの電源をオンにします。 4. アプリを実行し、プロンプトに従ってアクティベーションを終了します。 方法 2:DJI Assistant 2 for MG の使用 1. バッテリーステーションを電源コンセントに接続します。 2. USB-C ケーブルを使用し、バッテリーステーションをパソコンに接続します。 3. www.dji.com から DJI Assistant 2 for MG をダウンロードします。ソフトウェアをインストールし て起動します。...
- Seite 26 5. お使いの DJI アカウントでログインし、 「バッテリーステーション/インバータージェネレーター」 をクリックしてからプロンプトに従いアクティベーションを終了します。 アクティベーション中、パソコンまたはスマートデバイスがインターネットに接続されている ことを確認してください。 インター ネット バッテリーステーションの使用 T30/T10 インテリジェント バッテリーステーションは最大 2 個のバッテリーと接続ができます。以 下の指示に従ってバッテリーステーションを使用してください。 1. バッテリーステーションを電源コンセントに接続します。 T30 インテリジェント バッテリーステーションを使用するときには、 各 AC 電源ケーブルは、 定格電流 16 A を超える別々の AC 電源コンセントまたはテーブルタップに必ず接続してく ださい。 16 A 超 16 A 超 2. バッテリーをバッテリーステーションに接続します。 T30 インテリジェント バッテリーステーションを屋内で使用するときには、1 本の AC 電源 ケーブルのみ使用することをお勧めします。この場合の最大出力電力は半分まで減少します。 充電バッテリーは、必ず、充電ケーブルをバッテリーステーションに固定した側と同じ側 に置いてください。...
- Seite 27 ーター ケーター バッテリーステーションのアクティベーションの準 緑色に点灯 備完了またはローダー段階 黄色に 黄色に点灯 緑色に点灯 自己診断とバッテリーステーションの電源が正常 点灯 バッテリーステーションのバッテリーへの接続準備 緑色に点灯 完了 バッテリーステーションのログがエクスポートされ、 黄色に 黄色の 2 回点 充電は停止されました。ログのエクスポート終了後 点灯 滅が継続 にバッテリーステーションを再起動します 充電インジケーター: LED の点滅パタ 警告音 説明 ーン その番号に対応する位置にあるバッテリーは接続さ 黄色に点灯 れ、充電待ちです その番号に対応する位置にあるバッテリーは充電中 緑色点滅 です © 2021 DJI All Rights Reserved.
- Seite 28 赤色点灯 メインボードに異常があり使用不可となっています 2 回鳴動 異常がある場合は、バッテリーステーションを送信機に接続して DJI MG アプリを実行し、詳細情報 を確認してください。アプリがモジュールの異常や損傷を示した場合は、DJI や DJI の正規代理店に ご連絡ください。 ファームウェアの更新 送信機または DJI Assistant 2 for MG を使用してファームウェアのアップデートを行うには、以下の 手順に従ってください。 ファームウェアのアップデートがある場合は、 アプリから通知があります。 送信機の使用 1. バッテリーステーションを USB-C ケーブルを使用して送信機に接続し、バッテリーステーション を電源コンセントに接続します。 2. 送信機の電源を入れ、操作パネルの電源ボタンを押してバッテリーステーションの電源を入れ ます。 3. DJI MG または DJI Agras アプリを実行し、プロンプトに従ってファームウェアをアップデートし ます。アップデート中は、送信機がインターネットに接続されていることを確認してください。 © 2021 DJI All Rights Reserved.
- Seite 29 DJI Assistant 2 for MG の使用 1. DJI Assistant 2 for MG を https://www.dji.com/t30/downloads ま た は https://www.dji.com/t10/ downloads からダウンロードします。 2. DJI Assistant 2 for MG を起動し、DJI アカウントでログインします。 3. バッテリーステーションの電源を入れ、USB-C ポートでステーションをパソコンに接続します。 4.「バッテリーステーション/インバータージェネレーター」を選択し、左側パネル上の [ ファーム ウェア更新 ] をクリックします。 5. 更新したいファームウェアバージョンを選択します。 6. ファームウェアがダウンロードされるのを待ちます。ファームウェアの更新が自動的に開始され ます。 7. ファームウェア更新が完了すると、ステーションの電源が自動的に再起動されます。 バッテリーステーションの使用前に、バッテリーステーションのポートやケーブルに明ら かな不具合(故障、破損、短絡など)がないことを確認してください。 バッテリーステーションのファームウェアをアップデートしている間は、バッテリーを接 続しないでください。 バッテリーステーションのファームウェアをアップデートしている間は、バッテリーステ ーションの接続を外さないでください。 パソコンがインターネットに接続していることを必ず確認してください。 更新に失敗した場合は再試行してください。...
- Seite 30 T10 インテリジェント フライト 仕様 バッテリー バッテリー (モデル:CHX503-7000) (モデル:CHX503-3000) 動作環境温度範囲 -5 ~ 45℃ サイズ 300 × 280 × 230 mm 出力チャンネル T30 インテリジェント フライト T10/T16/T20 インテリジェント 対応バッテリー バッテリー フライトバッテリー 約 5.5 kg(CPX-3000W スイッチ 約 5.1 kg(CPX-3000W スイッチ 重量 ング電源を除く) ング電源を除く) 注:電流および入出力電圧については CPX-3000W スイッチング電源製品情報を参照してください。 © 2021 DJI All Rights Reserved.
- Seite 31 DJI는 SZ DJI TECHNOLOGY CO., LTD.(약어로 ‘DJI’) 및 해당 자회사의 상표입니다. 본 문서에 표시된 제품명, 브랜드 등은 해당 소유 회사의 상표 또는 등록 상표입니다. DJI는 본 제품 및 문서의 저작권과 함께 모든 권리를 보 유합니다. 본 제품 또는 문서의 어떠한 부분도 DJI의 사전 서면 허가 또는 동의 없이 어떠한 형식으로도 재생산할 수...
- Seite 32 배터리 스테이션은 계속 충전합니다. 사용자는 배터리 스테이션의 조작 패널에 있는 배터리 충전 상태 LED와 경고 표시등을 확인하여 오류가 있는지 확 인할 수 있습니다. USB-C 케이블을 사용하여 배터리 스테이션을 조종기에 연결할 수 있으며 사용자는 DJI MG 또 는 DJI AGRAS 앱을 실행하여 오류에 관한 자세한 정보를 확인할 수 있습니다. 또한 배터리 스테이션에는 과전류...
- Seite 33 1. 나사를 풀고 전면 패널을 분리합니다. 2. 아래 그림과 같이 CPX-3000W 스위칭 전력 공급 장치를 배터리 스테이션에 넣으십시오. T30 인텔리전트 배터 리 스테이션에는 2개의 CPX-3000W 스위칭 전력 공급 장치가 있으며, T10 인텔리전트 배터리 스테이션에는 1 개가 있습니다. © 2021 DJI All Rights Reserved.
- Seite 34 2. USB-C 케이블을 이용해 배터리 스테이션을 PC에 연결합니다. 3. www.dji.com에서 MG용 DJI Assistant 2를 다운로드합니다. 소프트웨어를 설치하고 실행합니다. 4. 전원 버튼을 한 번 눌러 배터리 스테이션을 켭니다. 5. 사용자의 DJI 계정을 이용하여 로그인하고 ‘배터리 스테이션/인버터 제너레이터’를 누르고 메시지에 따라 활성화 를 완료합니다. 활성화하는 동안 PC 또는 스마트 기기가 인터넷에 연결되어 있도록 하십시오.
- Seite 35 LED만 유일하게 켜진 상태를 유지합니다. 이는 자가 진단이 완료되고 기기가 정상적으로 작동한다는 것을 나타 냅니다. 자가 진단 중에 오류가 있는지 확인하는 방법에 대한 자세한 내용은 해당 LED 및 경고 표시등 설명을 참 조하십시오. 또는, 배터리 스테이션을 조종기에 연결하고 DJI MG 또는 DJI Agras 앱을 실행하여 오류에 대한 자세한 정보를 확인하십시오.
- Seite 36 급이 제한되어 있습니다. CPX-3000W 스위칭 전력 공급 장치를 사용할 수 없거나 빨간색으로 계속 한 번씩 깜박임 팬이 작동하지 않습니다. CPX-3000W에 심각한 오류가 발생했으며 출력이 없습 빨간색으로 계속 한 번씩 계속 한 번씩 경고음이 울림 깜박임 니다. © 2021 DJI All Rights Reserved.
- Seite 37 계속 2번씩 경고음이 울림 빨간색으로 유지 메인 보드가 비정상이고 사용할 수 없습니다. 이상이 있으면 배터리 스테이션을 조종기에 연결하고 DJI MG 또는 DJI Agras 앱을 실행하여 자세한 정보를 확인 하십시오. 앱에서 모듈이 비정상이거나 파손된 것으로 나타나면 DJI 또는 DJI 공인 딜러에게 문의하십시오. 펌웨어 업데이트...
- Seite 38 약 5.5 kg (CPX-3000W 스위칭 전력 공급 약 5.1 kg (CPX-3000W 스위칭 전력 공급 무게 장치 제외) 장치 제외) 유의 사항: CPX-3000W 스위칭 전력 공급 장치 제품 정보에서 전류와 입력 및 출력 전압을 참조하십시오. © 2021 DJI All Rights Reserved.
- Seite 39 . โปรดดู ค ู ่ ม ื อ การใช้ ง านแบตเตอรี ่ ส ำ า หรั บ คำ า แนะนำ า เพิ ่ ม เติ ม เพื ่ อ ความปลอดภั ย ก่ อ นการใช้ ง าน . อย่ า ถูื อ เครื ่ อ งชาร์ จ แบตเตอรี ่ ท ี ่ บ ริ เ วณสายชาร์ จ มิ ฉ ะนั � น สายไฟอาจเสี ย หายได้ © 2021 DJI All Rights Reserved.
- Seite 40 . พอร์ ต พลั ง งาน . ที ่ เ ก็ บ สายชาร์ จ . ฝาปิ ด กั น ฝุ่ น ของพอร์ ต พลั ง งาน . ด้ า มจั บ . พอร์ ต © 2021 DJI All Rights Reserved.
- Seite 41 สองตั ว ส่ ว นเครื ่ อ งชาร์ จ แบตเตอรี ่ อ ั จ ฉริ ย ะ จะมี ส วิ ต ชิ ง เพาเวอร์ ซ ั พ พลาย 3000W จะมี เ พี ย งหน้ ่ ง ตั ว © 2021 DJI All Rights Reserved.
- Seite 42 วิ ธิ์ ี ท ี ่ : การใช้ DJI Assistant 2 for MG . เชื ่ อ มต่ อ เครื ่ อ งชาร์ จ แบตเตอรี ่ ก ั บ ปลั � กไฟ . เชื ่ อ มต่ อ เครื ่ อ งชาร์ จ แบตเตอรี ่ ก ั บ...
- Seite 43 โปรดตรวจสอบให ้ แ น ่ ใ จว ่ า ได ้ ว างแบตเตอร ี ่ ส ำ า หร ั บ ชาร ์ จ ไว ้ ใ นด ้ า นเด ี ย วก ั บ สายชาร ์ จ ท ี ่ ย ้ ด ก ั บ เคร ื ่ อ งชาร ์ จ แบตเตอรี ่ © 2021 DJI All Rights Reserved.
- Seite 44 กะพริ บ เป็ นสี เ ขี ย ว ชาร์ จ แบตเตอรี ่ ท ี ่ อ ยู ่ ใ นตำ า แหน่ ง ที ่ ส อดคล้ อ งกั บ หมายเลขเต็ ม แล้ ว สี เ ขี ย วค้ า ง © 2021 DJI All Rights Reserved.
- Seite 45 ปฏิิ บ ั ต ิ ต ามคำ า แนะนำ า ด้ า นล่ า งเพื ่ อ อั ป เดตเฟิ ร์ ม แวร์ โ ดยใช้ ร ี โ มทคอนโทรลหรื อ ผู ้ ใ ช้ จ ะได้ ร ั บ DJI Assistant 2 for MG แจ้ ง ผ่ า นแอปเมื ่ อ พร้ อ มสำ า หรั บ การอั ป เดตเฟิ ร์ ม แวร์...
- Seite 46 DJI Assistant 2 for MG การใช้ ที ่ . ดาวน์ โหลด DJI Assistant 2 for MG https //www com/t30/downloads หรื อ https //www com/ t10/downloads . เปิ ด ใช้ DJI Assistant 2 for MG แล้ ว เข้ า สู ่ ร ะบบด้ ว ยบั ญ ชี...
- Seite 47 หมายเหตุ : โปรดดู ข ้ อ มู ล ผลิ ต ภั ณ ฑ์์ ส วิ ต ชิ ง เพาเวอร์ ซ ั พ พลาย 3000W สำ า หรั บ กระแสไฟฟ้ า แรงดั น ไฟฟ้ าขาเข้ า และขาออก © 2021 DJI All Rights Reserved.
- Seite 48 3. Sản phẩm này được sử dụng để sạc máy bay được sử dụng trong hoạt động bảo vệ thực vật. Trước khi sử dụng máy bay, hãy đảm bảo rằng bạn hiểu và tuân thủ luật pháp và quy định của địa phương, và phải được các cơ quan chính phủ liên quan chấp thuận và cho phép, nếu cần thiết. 4. KHÔNG sử dụng sản phẩm này dưới ánh nắng trực tiếp, mưa, hoặc ở môi trường ẩm ướt. 5. Để trạm sạc pin tránh xa nguồn nhiệt, áp suất, nước, khí dễ cháy và chất ăn mòn. 6. Trạm sạc pin nên được đặt trong môi trường có nhiệt độ từ 23° đến 113°F (-5° đến 45°C). 7. Đặt trạm sạc pin trên bề mặt phẳng và chắc chắn. Để tránh nguy cơ hỏa hoạn, cần đảm bảo rằng thiết bị được cách điện đúng cách và có đủ không gian thông khí (ít nhất 50 cm). 8. Nếu có hỏa hoạn, hãy dùng bình cứu hỏa dùng bột. Bình cứu hỏa dùng chất lỏng có thể dẫn đến nguy cơ chập điện. 9. KHÔNG rút dây cáp AC hoặc cáp sạc trong khi đang sử dụng trạm sạc pin. Tháo pin sau khi sạc xong. 10. Nếu thấy nhiệt độ tăng rõ rệt, hãy lau trạm sạc pin hoặc các cổng nguồn điện bằng khăn khô sạch. 11. KHÔNG sử dụng trạm sạc pin khi trời mưa bão. 12. Vui lòng xem hướng dẫn sử dụng pin để biết thêm hướng dẫn an toàn trước khi sử dụng. 13. KHÔNG cầm cáp sạc để di chuyển trạm sạc pin. Nếu không, dây cáp có thể bị hư hại. © 2021 DJI All Rights Reserved.
-
Seite 49: Giới Thiệu
16. Để kích hoạt hoặc cập nhật phần sụn (firmware), có thể kết nối trạm sạc pin với DJI ASSISTANT 2 cho MG hoặc bộ điều khiển từ xa của T10, T30 hoặc T20. Đảm bảo rằng bộ điều khiển từ xa đã được cập nhật lên phiên bản mới nhất trước khi kích hoạt hoặc cập nhật trạm sạc pin. Giới thiệu Trạm sạc pin thông minh T30/T10 có thể kết nối tối đa là với hai pin. Trong khi sạc, trạm sạc pin theo dõi trạng thái của pin và có thể tự động điều chỉnh dòng sạc nếu cần thiết. Trạm sạc pin vẫn tiếp tục sạc ngay cả khi các lỗ thông gió bị bịt kín. Người dùng có thể kiểm tra các đèn LED trạng thái sạc và đèn cảnh báo trên bảng điều khiển của trạm sạc pin để xem có xảy ra lỗi không. Trạm sạc pin có thể được kết nối với một bộ điều khiển từ xa bằng cách sử dụng một USB-C và người dùng có thể khởi chạy ứng dụng DJI MG hoặc DJI AGRAS để kiểm tra các thông tin chi tiết hơn về các lỗi đã xảy ra. Ngoài ra, trạm sạc pin có các chức năng sau đây: bảo vệ quá dòng, bảo vệ sạc quá mức, bảo vệ điện thế thấp, bảo vệ quá nhiệt và hiển thị trạng thái. Các mô tả chung trong hướng dẫn sử dụng này áp dụng cho cả Trạm sạc pin thông minh T30 và Trạm sạc pin thông minh T10. Ảnh minh họa trong hướng dẫn sử dụng này có thể có khác so với sản phẩm thực tế. Trạm sạc pin thông minh T30 được sử dụng làm ví dụ dưới đây. Tổng quan Trạm sạc pin 1. Bảng điều khiển 6. Cáp sạc 2. Kẹp cáp sạc 7. Nắp che cổng USB-C 3. Nắp chống bụi mặt trước của 8. Cổng nguồn điện AC bảng điều khiển 9. Nắp chống bụi cho nguồn AC 4. Hốc cài cáp sạc 10. Cổng GND 5. Tay xách © 2021 DJI All Rights Reserved. - Seite 50 Nhấn để bật và tắt trạm sạc pin. Bạn nên phát hiện trạng thái bất thường. Nếu đèn nhấn nút nguồn và rút cáp nguồn AC để tắt báo chuyển sang màu vàng sáng ổn định, nguồn trạm sạc. hãy kết nối trạm pin với bộ điều khiển từ xa Lắp trạm sạc pin Nếu bộ chuyển đổi nguồn điện CPX-3000W chưa được lắp vào trạm sạc pin trước khi xuất xưởng, hãy làm theo hướng dẫn bên dưới để lắp. 1. Tháo ốc vít và tháo tấm vỏ trước. 2. Lắp bộ chuyển đổi nguồn điện CPX-3000W vào trạm sạc pin như hình dưới đây. Trạm sạc pin thông minh T30 có hai bộ chuyển đổi nguồn điện CPX-3000W, còn Trạm sạc T10 chỉ có một bộ. © 2021 DJI All Rights Reserved.
- Seite 51 Cần phải kích hoạt trạm sạc pin trước khi sử dụng lần đầu tiên. Nếu đèn cảnh báo sáng xanh ổn định có nghĩa là trạm sạc pin chưa được kích hoạt. Làm theo các bước dưới đây để kích hoạt trạm sạc pin: Phương pháp 1: Sử dụng ứng dụng DJI MG hoặc DJI Agras 1. Kết nối trạm sạc pin với nguồn điện. 2. Kết nối trạm sạc pin với bộ điều khiển từ xa bằng cáp USB-C.
- Seite 52 Trạm sạc pin thông minh T30/T10 có thể kết nối tối đa là với hai pin. Làm theo hướng dẫn dưới đây để sử dụng trạm sạc pin. 1. Kết nối trạm sạc pin với nguồn điện. Khi sử dụng Trạm sạc pin thông minh T30, mỗi cáp nguồn AC phải được kết nối với một ổ cắm hoặc dải nguồn AC riêng biệt có dòng định mức lớn hơn 16 A. > 16 A > 16 A 2. Kết nối pin vào trạm sạc pin. Khi sử dụng trạm sạc pin thông minh T30 trong nhà, chỉ nên sử dụng một cáp nguồn AC để giảm một nửa công suất đầu ra tối đa. Đảm bảo rằng đã bố trí pin đang sạc ở cùng phía nối cáp sạc vào trạm sạc pin. © 2021 DJI All Rights Reserved.
- Seite 53 Việc tự chẩn đoán và nguồn điện cấp của trạm sạc pin Màu vàng ổn định ổn định định vẫn bình thường Màu xanh ổn Trạm sạc pin đã sẵn sàng để kết nối với pin định Màu vàng Nháy vàng hai lần Nhật ký trạm sạc pin đang được xuất và nó đã ngừng ổn định liên tục sạc. Khởi động lại trạm sạc pin sau khi đã xuất nhật ký Đèn báo sạc: Kiểu nháy của đèn Âm thanh cảnh báo Mô tả Pin ở vị trí tương ứng với chữ số đã được kết nối và Màu vàng ổn định đang đợi sạc Nhấp nháy xanh Pin ở vị trí tương ứng với chữ số đang được sạc Màu xanh ổn định Pin ở vị trí tương ứng với chữ số đã được sạc đầy © 2021 DJI All Rights Reserved.
- Seite 54 1. Kết nối trạm sạc pin với một bộ điều khiển từ xa bằng cáp USB-C và kết nối trạm sạc pin với nguồn điện. 2. Bật nguồn bộ điều khiển từ xa và nhấn nút nguồn trên bảng điều khiển để bật nguồn trạm sạc pin. 3. Chạy ứng dụng DJI MG hoặc DJI Agras và làm theo lời nhắc để cập nhật phần sụn. Đảm bảo rằng bộ điều khiển từ xa luôn được kết nối với internet trong khi cập nhật. Sử dụng DJI Assistant 2 cho MG 1. Tải xuống DJI Assistant 2 cho MG tại https://www.dji.com/t30/downloads hoặc https://www.dji.com/ t10/downloads. © 2021 DJI All Rights Reserved.
- Seite 55 2. Khởi chạy DJI Assistant 2 cho MG và đăng nhập bằng tài khoản DJI của bạn. 3. Bật nguồn trạm sạc pin và kết nối trạm với máy tính qua cổng USB-C. 4. Chọn “Trạm sạc pin/Máy phát biến tần” và nhấp vào Cập nhật phần sụn trên bảng điều khiển bên trái. 5. Chọn phiên bản phần sụn mà bạn muốn cập nhật. 6. Chờ tải xuống phần sụn. Phần sụn sẽ tự động bắt đầu cập nhật. 7. Trạm sẽ tự động khởi động lại sau khi hoàn tất cập nhật phần sụn. Trước khi sử dụng trạm sạc pin, cần đảm bảo rằng cổng và cáp của trạm sạc không có hư hỏng rõ ràng (ví dụ như kẹt, nứt vỡ hoặc đoản mạch). KHÔNG kết nối pin trong khi đang cập nhật phần sụn của trạm sạc pin. KHÔNG kết nối trạm sạc pin trong khi đang cập nhật phần sụn của trạm sạc. Đảm bảo rằng máy tính được kết nối với internet. Thử lại nếu cập nhật không thành công. Bảo quản và bảo dưỡng Bảo quản trạm sạc pin Khi không sử dụng trạm sạc pin, hãy ngắt kết nối pin ra khỏi trạm sạc và ngắt kết nối trạm sạc với nguồn điện. Thực hiện các bước sau để cố định cáp sạc một cách an toàn. 1. Sau khi ngắt kết nối pin, cuộn dây cáp lên trên trạm sạc pin. 2. Đảm bảo rằng đầu cáp sạc được gắn chắc vào khoang chứa tương ứng ở mặt bên của trạm sạc pin. KHÔNG bảo quản sản phẩm này dưới ánh nắng trực tiếp, mưa hoặc ở môi trường ẩm ướt. Để trạm sạc pin tránh xa nguồn nhiệt, áp suất, nước, khí dễ cháy và chất ăn mòn. © 2021 DJI All Rights Reserved.
-
Seite 56: Thông Số Kỹ Thuật
Pin máy bay thông minh T30 Pin máy bay thông minh T10 Thông số kỹ thuật (Model: CHX503-7000) (Model: CHX503-3000) Phạm vi Nhiệt độ Công tác -5° đến 45°C (23° đến 113°F) Kích thước 300×280×230 mm Kênh đầu ra Pin Máy bay Thông minh T10/ Pin tương thích Pin Máy bay Thông minh T30 T16/T20 Khoảng 5,5 kg (không có Bộ Khoảng 5,1 kg (không có Bộ Trọng lượng chuyển đổi nguồn điện chuyển đổi nguồn điện CPX-3000W) CPX-3000W) Lưu ý: Tham khảo Thông tin về sản phẩm Bộ chuyển đổi nguồn điện CPX-3000W để biết dòng điện, điện áp đầu vào và đầu ra. © 2021 DJI All Rights Reserved. -
Seite 57: Haftungsausschluss
Intelligent Battery Station T30 zwei separate Steckdosen, die zusammen eine Stromstärke von mehr als 32 A zulassen. Eine gewisse Leistungsreserve ist aus Sicherheitsgründen erforderlich. 2. Schließen Sie die zwei Netzkabel der T30 Intelligent Battery Station bei der Verwendung in Innenräumen NICHT an dieselbe Steckdose an, um einen Kurzschluss zu vermeiden. - Seite 58 Überstromschutz, Überladungsschutz, Unterstromschutz, Überhitzungsschutz und Statusanzeige. Die allgemeinen Beschreibungen in diesem Benutzerhandbuch gelten sowohl für die T30 Intelligent Battery Station als auch für die T10 Intelligent Battery Station. Die Abbildungen in diesem Benutzerhandbuch können vom tatsächlichen Produkt abweichen. Nachfolgend wird die T30 Intelligent Battery Station als Beispiel verwendet.
-
Seite 59: Montage Der Akkuladestation
1. Lösen Sie die Schrauben und entfernen Sie die Frontblende. 2. Setzen Sie das Schaltnetzteil CPX-3000W wie unten gezeigt in die Akkuladestation ein. Die T30 Intelligent Battery Station verfügt über zwei CPX-3000W Schaltnetzteile, die T10 Intelligent Battery Station über eines. - Seite 60 1. Verbinden Sie die Akkuladestation mit einer Steckdose. 2. Schließen Sie die Akkuladestation mit einem USB-C-Kabel an den PC an. 3. Besuchen Sie www.dji.com, um den DJI Assistant 2 für MG herunterzuladen. Installieren und starten Sie die Software. 4. Drücken Sie die Netztaste, um die Akkuladestation einzuschalten.
-
Seite 61: Verwendung Der Akkuladestation
5. Melden Sie sich mit Ihrem DJI-Konto an und klicken Sie auf „Akkustation / Wechselrichter/ Generator“ und befolgen Sie die Eingabeaufforderungen, um die Aktivierung abzuschließen. Achten Sie darauf, dass Ihr PC bzw. Ihr Mobilgerät während der Aktivierung mit dem Internet verbunden ist. -
Seite 62: Beschreibung Der Leds Und Der Warnanzeige
Gerät normal funktioniert. Weitere Informationen zum Überprüfen, ob während der Eigendiagnose Fehler vorliegen, finden Sie unter „Beschreibung der LEDs und Warnanzeigen“. Schließen Sie alternativ die Akkuladestation an eine Fernsteuerung an und starten Sie die DJI MG- oder DJI Agras-App, um detaillierte Informationen zu den Fehlern einzusehen. 4. Wenn während der Eigendiagnose keine Fehler festgestellt werden, beginnt die Akkuladestation mit dem Aufladen der Akkus. -
Seite 63: Aktualisieren Der Firmware
Bei Fehlern schließen Sie die Akkuladestation an eine Fernsteuerung an und starten Sie die DJI MG- App, um weitere Informationen anzuzeigen. Wenn die App anzeigt, dass ein Modul fehlerhaft oder defekt ist, wenden Sie sich bitte an DJI oder einen autorisierten DJI-Händler. -
Seite 64: Aufbewahrung Und Wartung
1. Laden Sie den DJI Assistant 2 für MG unter https://www.dji.com/t30/downloads oder https://www. dji.com/t10/downloads herunter. 2. Starten Sie den DJI Assistant 2 für MG und melden Sie sich mit Ihrem DJI-Konto an. 3. Schalten Sie die Akkuladestation ein und verbinden Sie diese über den USB-C-Anschluss mit einem Computer. -
Seite 65: Wartung Der Akkuladestation
Kompatibler Akku T30 Intelligent Flight Battery Battery Ca. 5,5 kg (ohne CPX-3000W Ca. 5,1 kg (ohne CPX-3000W Gewicht Schaltnetzteil) Schaltnetzteil) Hinweis: Informationen zu Strom, Eingangs- und Ausgangsspannung finden Sie in den Produktinformationen des CPX-3000W Schaltnetzteils. © 2021 DJI Alle Rechte vorbehalten. - Seite 66 Este producto y el documento están sujetos a derechos de autor de titularidad de DJI, que se reserva todos los derechos. No se permite la reproducción total ni parcial de este documento o producto en forma alguna sin el consentimiento previo por escrito o la autorización de DJI.
- Seite 67 La estación de baterías se puede conectar a un control remoto con un cable USB-C, y los usuarios pueden iniciar la aplicación DJI MG o DJI AGRAS para comprobar información más detallada sobre cualquier error. Además, la estación de baterías tiene las siguientes funciones: protección contra sobrecorriente, protección contra sobrecarga, protección contra carga...
-
Seite 68: Panel De Funcionamiento
2. Inserte la fuente de alimentación de conmutación CPX-3000W en la estación de baterías de la forma indicada a continuación. Mientras que la Estación de Baterías Inteligentes T30 tiene dos fuentes de alimentación de conmutación CPX-3000W, la T10 tiene una. © 2021 DJI Todos los derechos reservados. - Seite 69 1. Conecte la estación de baterías a una toma de corriente. 2. Conecte la estación de baterías al PC con un cable USB-C. 3. Visite el sitio web www.dji.com para descargar DJI Assistant 2 para MG. Instale y ejecute el software.
- Seite 70 5. Inicie sesión con su cuenta de DJI, haga clic en “Battery Station/Inverter Generator” (Estación de baterías/Generador inversor), y siga las indicaciones para completar la activación. Asegúrese de que el PC o dispositivo inteligente esté conectado a Internet durante la activación.
- Seite 71 Una alternativa sería conectar la estación de baterías a un control remoto e iniciar la aplicación DJI MG o DJI Agras para acceder a información más detallada sobre los errores. 4. Si no se detectan errores durante el autodiagnóstico, la estación de baterías empieza a cargar las baterías. Si se conectan dos baterías al mismo tiempo, la estación las carga según el nivel de...
-
Seite 72: Actualización Del Firmware
2. Encienda el control remoto y presione el botón de encendido en el panel de funcionamiento para encender la estación de baterías. 3. Inicie la aplicación DJI MG o DJI Agras y siga las indicaciones para actualizar el firmware. Asegúrese de que el control remoto que vaya a utilizar esté conectado a Internet durante la actualización. -
Seite 73: Almacenamiento Y Mantenimiento
1. Descargue DJI Assistant 2 para MG en la página https://www.dji.com/t30/downloads o https:// www.dji.com/t10/downloads. 2. Abra DJI Assistant 2 para MG e inicie sesión con su cuenta de DJI. 3. Encienda la estación de baterías y conéctela a un PC a través del puerto USB-C. -
Seite 74: Especificaciones
CPX-3000W) conmutación CPX-3000W) Nota: Consulte la información de producto correspondiente a la fuente de alimentación de conmutación CPX-3000W para acceder a datos sobre corriente, así como tensión de entrada y salida. © 2021 DJI Todos los derechos reservados. - Seite 75 DJI décline toute responsabilité quant aux dégâts, aux blessures ou aux problèmes découlant directement ou indirectement de l’utilisation de ce produit. DJI est une marque commerciale de SZ DJI TECHNOLOGY CO., LTD. (« DJI » en abrégé) et de ses sociétés affiliées. Les noms de produits, de marques, etc., apparaissant dans le présent document sont des marques commerciales ou des marques déposées de leurs détenteurs respectifs.
-
Seite 76: Vue D'ensemble
La station de batterie peut se connecter à une radiocommande à l’aide d’un câble USB-C et les utilisateurs peuvent lancer l’application DJI MG ou DJI AGRAS pour voir plus de détails concernant les erreurs. En outre, la station de batterie intègre les fonctions suivantes : protection contre les surintensités, protection contre la surcharge, protection contre les sous-... - Seite 77 2. Insérez la commutation d’alimentation CPX-3000W dans la station de batterie comme indiqué ci-dessous. La station de batteries intelligente T30 dispose de deux commutations d’alimentation CPX-3000W tandis que la station de batteries intelligente T10 en possède une. © 2021 DJI Todos los derechos reservados.
- Seite 78 2. Connectez la station de batterie à votre PC à l’aide d’un câble USB-C. 3. Allez sur www.dji.com pour télécharger DJI Assistant 2 pour MG. Installez et lancez le logiciel. 4. Maintenez le bouton d’alimentation enfoncé pour mettre la station de batterie sous tension.
- Seite 79 5. Utilisez votre compte DJI pour vous connecter et cliquez sur « Battery Station / Inverter Generator (Station de batterie / Générateur à onduleur) » et suivez les invites pour terminer l’activation. Assurez-vous que votre PC ou appareil mobile possède un accès Internet pendant l’activation.
- Seite 80 à la description des indicateurs d’avertissement et des voyants. Alternativement, connectez la station de batterie à une radiocommande et lancez l’application DJI MG ou DJI Agras pour consulter le détail des erreurs. 4. Si aucune erreur n’est détectée pendant l’autodiagnostic, la station de batterie commence la charge des batteries.
-
Seite 81: Mise À Jour Du Firmware
En cas d’anomalie, veuillez connecter la station de batterie à une radiocommande et lancer l’application DJI MG ou DJI Agras pour en savoir plus. Si l’application indique qu’un module présente une anomalie ou est endommagé, veuillez contacter DJI ou un revendeur DJI agréé. -
Seite 82: Stockage Et Entretien
1. Téléchargez DJI Assistant 2 pour MG à l’adresse https://www.dji.com/t30/downloads ou https:// www.dji.com/t10/downloads. 2. Lancez DJI Assistant 2 pour MG et connectez-vous à l’aide de votre compte DJI. 3. Mettez la station de batterie sous tension et connectez la station à un ordinateur via le port USB-C. -
Seite 83: Caractéristiques Techniques
Environ 5,1 kg (sans Poids l’alimentation à l’alimentation à commutation CPX-3000W) commutation CPX-3000W) Remarque : Consultez les informations sur le produit de l’alimentation à commutation CPX-3000W pour la tension du courant d’entrée et de sortie. © 2021 DJI Todos los derechos reservados. - Seite 84 DJI o ad altri oggetti che si trovano nelle vicinanze. Utilizzando il prodotto, l’utente dichiara di aver letto attentamente il presente documento e di comprendere e accettare i termini e condizioni del presente e dei documenti pertinenti a questo prodotto.
-
Seite 85: Panoramica Generale
È possibile collegare la stazione di ricarica a un radiocomando per mezzo di un cavo USB-C, e gli utenti possono avviare l’app DJI MG o DJI AGRAS per visualizzare informazioni più dettagliate in merito a eventuali errori. -
Seite 86: Pannello Operativo
2. Inserire l’alimentatore a commutazione CPX-3000W nella stazione di ricarica, come mostrato qui di seguito. La Stazione di ricarica per batteria intelligente T30 dispone di due alimentatori a commutazione CPX-3000W, mentre quella T10 di uno. © 2020 DJI Todos los derechos reservados. - Seite 87 2. Collegare la stazione di ricarica al PC per mezzo di un cavo USB-C. 3. Andare su www.dji.com per scaricare DJI Assistant 2 per MG. Installare ed eseguire il software. 4. Premere una volta il pulsante di accensione per accendere la stazione di ricarica.
- Seite 88 Accertarsi di posizionare la batteria in ricarica sullo stesso lato in cui il cavo di ricarica è fissato alla stazione di ricarica. 3. Verificare che tutti i cavi siano collegati correttamente, quindi premere il pulsante di accensione sul pannello operativo della stazione di ricarica. I due LED e l’indicatore di avviso lampeggeranno simultaneamente. Dopo l’accensione, le uniche spie rimaste accese saranno i LED sullo stato © 2020 DJI Todos los derechos reservados.
- Seite 89 In alternativa, collegare la stazione di ricarica al radiocomando e avviare l’app DJI MG o DJI Agras per visualizzare ulteriori informazioni dettagliate sugli errori. 4. Se non sono stati rilevati errori durante l’auto-diagnosi, la stazione di ricarica avvierà la ricarica delle batterie.
-
Seite 90: Aggiornamento Del Firmware
La scheda madre è anomala e non disponibile continuo In caso di anomalie, collegare la stazione di ricarica a un radiocomando ed eseguire l’app DJI MG o DJI Agras per verificare altre informazioni. Se l’app indica che un modulo presenta un’anomalia o è rotto, contattare DJI o un distributore autorizzato DJI. -
Seite 91: Conservazione E Manutenzione
1. Scaricare DJI Assistant 2 per MG su https://www.dji.com/t30/downloads o https://www.dji.com/ t10/downloads. 2. Avviare DJI Assistant 2 per MG e accedere al proprio account DJI. 3. Accendere la stazione di ricarica e collegarla a un computer per mezzo della porta USB-C. -
Seite 92: Specifiche Tecniche
Circa 5,1 kg (senza Peso l’alimentatore a commutazione l’alimentatore a commutazione CPX-3000W) CPX-3000W) Nota: per conoscere la corrente a la tensione di ingresso e uscita, fare riferimento alle Informazioni sul prodotto Alimentatore a commutazione CPX-3000W. © 2020 DJI Todos los derechos reservados. - Seite 93 1. De voedingskabel van de ingangsstroom is 16 A. Gebruik een stopcontact dat een stroom van meer dan 16 A kan leveren voor het T10 Intelligent Battery Station en gebruik twee aparte stopcontacten met een totale stroomcapaciteit van meer dan 32 A voor het T30 Intelligent Battery Station.
- Seite 94 De algemene beschrijvingen in deze gebruikershandleiding gelden voor zowel het T30 Intelligent Battery Station als het T10 Intelligent Battery Station. De afbeeldingen in deze gebruikershandleiding kunnen afwijken van het eigenlijke product. Het T30 Intelligent Battery Station wordt hieronder als voorbeeld gebruikt.
- Seite 95 1. Draai de schroeven los en verwijder het frontpaneel. 2. Plaats de CPX-3000W-schakelvoeding in het accustation zoals hieronder weergegeven. Het T30 Intelligent Battery Station heeft twee CPX-3000W-schakelvoedingen, terwijl het T10 Intelligent Battery Station er één heeft. ©...
- Seite 96 1. Sluit het accustation aan op een stopcontact. 2. Sluit het accustation met een USB C-kabel aan op de pc. 3. Bezoek www.dji.com om DJI Assistant 2 voor MG te downloaden. Installeer en start de software. 4. Druk op de aan-/uitknop om het accustation in te schakelen.
- Seite 97 5. Gebruik uw DJI-account om in te loggen en klik op "Battery Station / Inverter Generator" en volg de aanwijzingen om de activering te voltooien. Zorg ervoor dat de pc of het slimme apparaat tijdens de activering is aangesloten op het internet.
- Seite 98 Of sluit het accustation aan op een afstandsbediening en start de DJI MG- of DJI-Agras app voor meer gedetailleerde informatie over de fouten. 4. Als er tijdens de zelfdiagnose geen fouten worden gedetecteerd, begint het accustation de accu's op te laden.
-
Seite 99: Firmware Updaten
Hoofdbord vertoont afwijkingen en niet beschikbaar continu Sluit bij afwijkingen het accustation aan op een afstandsbediening en voer de DJI MG- of DJI Agras-app uit om meer informatie te controleren. Als de app aangeeft dat een module afwijkingen vertoont of kapot is, neem dan contact op met DJI of een door DJI geautoriseerde dealer. -
Seite 100: Opslag En Onderhoud
1. Download DJI Assistant 2 voor MG op https://www.dji.com/t30/downloads of https://www.dji.com/ t10/downloads. 2. Start DJI Assistant 2 voor MG en log in met uw DJI-account. 3. Schakel het accustation in en sluit het station via de USB-C-poort op een computer aan. -
Seite 101: Technische Gegevens
T10/T16/T20 Intelligent Flight Compatibele accu T30 Intelligent Flight Battery Battery Ca. 5,5 kg (zonder CPX-3000W- Ca. 5,1 kg (zonder CPX-3000W- Gewicht schakelvoeding) schakelvoeding) Opmerking: Raadpleeg de productinformatie van de CPX-3000W-schakelvoeding voor stroom, ingangs- en uitgangsspanning. © 2020 DJI Todos los derechos reservados. -
Seite 102: Exoneração De Responsabilidade
DJI ou em danos noutros objetos que se encontrem nas proximidades. Ao utilizar o produto, o utilizador está a confirmar que leu cuidadosamente este documento e que compreende e aceita cumprir os termos e condições deste documento... -
Seite 103: Visão Geral
15. Mantenha a estação de bateria afastada de materiais inflamáveis enquanto carrega. NÃO coloque a estação de bateria ou baterias em carregamento num cobertor ou quaisquer superfícies alcatifadas quando estiver em utilização. 16. Para ativação ou atualizações de firmware, a estação de bateria pode ser ligada ao DJI ASSISTANT 2 para MG ou o telecomando de T10, T30 ou T20. Certifique-se de que o telecomando foi atualizado para a versão mais recente antes de ativar ou atualizar a estação de bateria. - Seite 104 2. Insira a fonte de alimentação alternada CPX-3000W na estação de bateria como mostrado abaixo. A estação de bateria inteligente T30 possui duas fontes de alimentação alternada CPX- 3000W, enquanto que a estação de bateria inteligente T10 possui uma. © 2020 DJI Todos los derechos reservados.
- Seite 105 2. Ligue a estação de bateria ao computador utilizando um cabo USB-C. 3. Visite www.dji.com para descarregar o DJI Assistant 2 para MG. Instale e execute o software. 4. Prima o botão de alimentação para ligar a estação de bateria.
- Seite 106 5. Utilize a sua conta DJI para iniciar sessão e clique em “Estação de bateria / Gerador inversor” e siga os avisos para finalizar a ativação. Certifique-se de que o computador ou dispositivo inteligente está ligado à internet durante a ativação. Internet Usar a Estação de Bateria A estação de bateria inteligente T30/T10 pode ligar até duas baterias. Siga as instruções abaixo para utilizar a estação de bateria.
- Seite 107 LED e Descrição do indicador de avisos. Em alternativa, ligue a estação de bateria a um telecomando e inicie a aplicação DJI MG ou DJI Agras para mais informações detalhadas sobre os erros.
- Seite 108 Luz vermelha O quadro principal apresenta anomalia ou está sinais sonoros continuamente acesa indisponível continuamente Se existir qualquer anomalia, ligue a estação de bateria ao telecomando e execute a aplicação DJI MG ou a aplicação DJI Agras para verificar mais informações. Se a aplicação indicar que um módulo apresenta anomalias ou está danificado, contacte a DJI ou um revendedor autorizado da DJI. © 2020 DJI Todos los derechos reservados.
-
Seite 109: Utilizar O Telecomando
1. Descarregue o DJI Assistant 2 para MG em https://www.dji.com/t30/downloads ou https://www. dji.com/t10/downloads. 2. Inicie o DJI Assistant 2 para MG e inicie a sessão na sua conta DJI. 3. Ligue a estação de bateria e ligue a estação a um computador através de uma porta USB-C. - Seite 110 Aproximadamente 5,1 kg (sem a Peso fonte de alimentação alternada fonte de alimentação alternada CPX-3000W) CPX-3000W) Nota: Consulte a informação do produto Fonte de alimentação alternada CPX-3000W para informações sobre corrente, tensão de entrada e de saída. © 2020 DJI Todos los derechos reservados.
-
Seite 111: Isenção De Responsabilidade
. Leia com cuidado este documento por inteiro e todas as práticas seguras e legais fornecidas pela DJI antes do uso. A não leitura e o não cumprimento das instruções e advertências podem resultar em lesões graves para si ou terceiros, em danos no produto da DJI ou a outros objetos que se encontrem nas proximidades. - Seite 112 A estação de bateria pode ser conectada a um controle remoto usando um cabo USB-C e os usuários podem iniciar o aplicativo DJI MG ou DJI AGRAS para ver informações mais detalhadas sobre quaisquer erros.
- Seite 113 2. Insira a fonte de alimentação de comutação CPX-3000W na estação de bateria, conforme exibido abaixo. A estação de bateria inteligente T30 tem duas fontes de alimentação comutadas CPX-3000W, enquanto a estação de bateria inteligente T10 tem uma. © 2021 DJI Todos los derechos reservados.
- Seite 114 1. Conecte a estação de bateria a uma tomada elétrica. 2. Conecte a estação de bateria ao computador usando um cabo USB-C. 3. Visite www.dji.com para baixar o DJI Assistant 2 para MG. Instale e execute o software. 4. Pressione o botão Liga/desliga para ligar a estação de bateria.
- Seite 115 5. Use sua conta DJI para fazer login e clique em “Battery Station/Inverter Generator” (Estação de bateria/gerador inversor) e siga as instruções para concluir a ativação. Certifique-se de que seu computador ou dispositivo inteligente esteja conectado à internet durante a ativação. Internet Como usar a estação de bateria A estação de bateria inteligente T30/T10 pode ser conectada com até duas baterias. Siga as instruções abaixo para usar a estação de bateria.
- Seite 116 LEDs e indicador de advertência. Uma alternativa é conectar a estação de bateria a um controle remoto e iniciar o aplicativo DJI MG ou DJI Agras para informações mais detalhadas sobre os erros. 4. Se nenhum erro for detectado durante o autodiagnóstico, a estação de bateria começará a carregar as baterias.
- Seite 117 Se houver alguma anormalidade, conecte a estação de bateria a um controle remoto e execute o aplicativo DJI MG ou DJI Agras para mais informações. Se o aplicativo indicar que um módulo está anormal ou quebrado, entre em contato com a DJI ou com um revendedor autorizado da DJI.
- Seite 118 2. Ligue o controle remoto e pressione o botão Liga/desliga no painel operacional para ligar a estação de bateria. 3. Execute o aplicativo DJI MG ou DJI Agras e siga as instruções para atualizar o firmware. Certifique-se de que o controle remoto permaneça conectado à internet durante a atualização. Com o DJI Assistant 2 para MG 1.
- Seite 119 Aprox. 5,1 kg (sem fonte de Peso alimentação de comutação alimentação de comutação CPX-3000W) CPX-3000W) Observação: consulte as informações do produto da fonte de alimentação de comutação CPX- 3000W para corrente, tensão de entrada e de saída. © 2021 DJI Todos los derechos reservados.
-
Seite 120: Отказ От Ответственности
компаний. Названия продуктов, торговых марок и т. д., содержащиеся в данном документе, являются товарными знаками или зарегистрированными товарными знаками соответствующих компаний. Этот продукт и документ DJI охраняются авторским правом. Все права защищены. Никакая часть данного продукта или документа не может быть воспроизведена в какой-либо форме без предварительного письменного согласия или разрешения DJI. Компания DJI вправе единолично вносить изменения в содержание данного и всех сопутствующих документов. Для получения обновленной информации о продукте посетите сайт http://www.dji.com и выберите страницу, соответствующую данному продукту. Этот документ доступен на нескольких языках. В случае расхождения между различными версиями преимущественную силу имеет версия на английском языке. -
Seite 121: Общий Вид
Чтобы узнать, возникли ли какие-либо ошибки, пользователи могут проверить светодиодные индикаторы состояния заряда аккумулятора и индикатор предупреждения на панели управления зарядной станции. Зарядную станцию можно подключить к пульту управления с помощью кабеля USB-C, тогда пользователи смогут открыть приложение DJI MG или DJI AGRAS для получения более подробной информации об ошибках. Зарядная станция оснащена следующими функциями: защита от сверхтоков, защита от избыточного заряда, защита от недостаточного... -
Seite 122: Панель Управления
3. Кнопка питания Нажмите, чтобы включить или выключить 2. Индикатор предупреждения Индикатор предупреждения загорится, зарядную станцию. Для выключения если зарядная станция обнаружит зарядной станции рекомендуется нажать неисправность. Если индикатор кнопку питания и отсоединить от нее загорится желтым, подключите зарядную кабель питания переменного тока. Установка зарядной станции Если импульсный источник питания CPX-3000W не был установлен в зарядную станцию перед ее отправкой с завода, следуйте инструкциям по его установке ниже. 1. Ослабьте винты и снимите переднюю панель. 2. Установите импульсный источник питания CPX-3000W в зарядную станцию, как показано ниже. У зарядной станции для аккумуляторов Intelligent Battery T30 два импульсных источника питания CPX-3000W, а у зарядной станции для аккумуляторов Intelligent Battery T10 — один. © 2020 DJI Todos los derechos reservados. - Seite 123 3. Установите панель и закрепите ее при помощи винтов. Активация Активируйте зарядную станцию перед первым использованием. Если индикатор предупреждения загорелся зеленым, это означает, что зарядная станция не активирована. Следуйте инструкциям ниже, чтобы активировать зарядную станцию: Способ 1: использование приложения DJI MG или DJI Agras 1. Подсоедините зарядную станцию к розетке. 2. Подключите зарядную станцию к пульту управления с помощью кабеля USB-C. 3. Нажмите кнопку питания для включения зарядной станции. 4. Откройте приложение и следуйте инструкциям для завершения активации.
- Seite 124 кабель питания переменного тока должен быть подключен к отдельной розетке переменного тока или к блоку розеток с током более 16 A. > 16 A > 16 A 2. Подключите аккумулятор к зарядной станции. При использовании зарядной станции для аккумуляторов Intelligent Battery T30 в помещении рекомендуется использовать только один кабель питания переменного тока, т. к. это наполовину снижает максимальную выходную мощность. Убедитесь, что заряжаемый аккумулятор находится на той же стороне, где кабель зарядки приклеплен к зарядной станции. © 2020 DJI Todos los derechos reservados.
- Seite 125 Состояние зарядной станции: Индикатор Индикатор Светодиоды кнопки Описание предупреждения питания Непрерывный Зарядная станция готова к активации или зеленый загружается Непрерывный Непрерывный Непрерывный Самодиагностика и питание зарядной желтый желтый зеленый станции в порядке Непрерывный Зарядная станция готова к подключению зеленый аккумулятора Продолжительное Экспортируется журнал зарядной станции, Непрерывный двойное мигание зарядка остановлена. Перезагрузите желтый желтым зарядную станцию после экспорта журнала © 2020 DJI Todos los derechos reservados.
- Seite 126 однократное мигание источника питания CPX-3000W, питание ограничено желтым Продолжительное Импульсный источник питания CPX-3000W однократное мигание недоступен или остановился вентилятор красным Продолжительное Продолжительный В работе CPX-3000W произошла критическая однократное мигание однократный сигнал ошибка, нет мощности на выходе красным Непрерывный Продолжительный Главная плата неисправна и недоступна красный двукратный сигнал При возникновении неисправностей подключите зарядную станцию к пульту управления и откройте приложение DJI MG или DJI Agras для получения более подробной информации. Если в приложении указано, что модуль неисправен или поврежден, обратитесь в компанию DJI или к ее официальному представителю. © 2020 DJI Todos los derechos reservados.
- Seite 127 DJI Assistant 2 для MG следуйте инструкциям ниже. При наличии обновлений ПО пользователи получают оповещение в приложении. Использование пульта управления 1. Подключите зарядную станцию к пульту управления при помощи кабеля USB-C и подключите ее к розетке. 2. Включите пульт и нажмите кнопку питания на панели управления, чтобы подключить зарядную станцию. 3. Откройте приложение DJI MG или DJI Agras и следуйте инструкциям для обновления ПО. Убедитесь, что пульт управления во время обновления подключен к Интернету. Использование DJI Assistant 2 для MG 1. Загрузите DJI Assistant 2 для MG на https://www.dji.com/t30/downloads или https://www.dji.com/ t10/downloads. 2. Запустите DJI Assistant 2 для MG и войдите в учетную запись DJI. 3. Включите зарядную станцию и подключите ее к компьютеру через разъем USB-C. 4. Выберите «Battery Station / Inverter Generator» (зарядная станция / инвертор) и нажмите...
-
Seite 128: Технические Характеристики
7000) 3000) Диапазон рабочих температур −5…45 °C Размеры 300 × 280 × 230 мм Канал выхода Аккумулятор Intelligent Flight Аккумулятор Intelligent Flight Совместимые аккумуляторы Battery T30 Battery T10/T16/T20 Приблиз. 5,5 кг (без Приблиз. 5,1 кг (без Масса импульсного источника импульсного источника питания CPX-3000W) питания CPX-3000W) Примечание: для получения значений тока и напряжения на входе и выходе обратитесь к информации об импульсном источнике питания CPX-3000W. © 2020 DJI Todos los derechos reservados. - Seite 129 EU Compliance Statement: SZ DJI TECHNOLOGY CO., LTD. hereby declares that this device tämä laite on direktiivin 2014/53/EU olennaisten vaatimusten ja sen muiden asiaankuuluvien is in compliance with the essential requirements and other relevant provisions of the Directive ehtojen mukainen. 2014/53/EU. Kopio EU:n vaatimustenmukaisuusvakuutuksesta on saatavana verkossa osoitteessa www.dji. A copy of the EU Declaration of Conformity is available online at www.dji.com/euro-compliance com/euro-compliance EU contact address: DJI GmbH, Industriestrasse 12, 97618, Niederlauer, Germany Yhteystiedot EU:ssa: DJI GmbH, Industriestrasse 12, 97618, Niederlauer, Germany GB Compliance Statement: SZ DJI TECHNOLOGY CO., LTD. hereby declares that this RÁITEAS Comhlíonta an AE: Dearbhaíonn SZ DJI TECHNOLOGY CO., LTD. leis seo go bhfuil an device is in compliance with the essential requirements and other relevant provisions of Radio gléas seo de réir na gceanglas riachtanach agus na bhforálacha ábhartha eile sa Treoir 2014/53/AE. Equipment Regulations 2017. Tá coip de Dhearbhú Comhréireachta an AE ar fáil ar líne ag www.dji.com/euro-compliance A copy of the GB Declaration of Conformity is available online at www.dji.com/euro-compliance Seoladh teagmhála san AE: DJI GmbH, Industriestrasse 12, 97618, Niederlauer, Germany Declaración de cumplimiento UE: SZ DJI TECHNOLOGY CO., LTD. por la presente declara Dikjarazzjoni ta’ Konformità tal-UE: SZ DJI TECHNOLOGY CO., LTD. hawnhekk tiddikjara li que este dispositivo cumple los requisitos básicos y el resto de provisiones relevantes de la...
- Seite 130 Keskkonnasäästlik kasutuselt kõrvaldamine aracılığıyla genel toplama noktasına bertaraf işlemi ücretsiz olarak yapılmaktadır. Eski cihazların Vanu elektriseadmeid ei tohi ära visata koos olmejäätmetega, vaid tuleb koguda ja kasutuselt kõrvaldada eraldi. Kohaliku omavalitsuse elektroonikaromude kogumispunktis on äraandmine sahibi, cihazları bu toplama noktalarına veya benzer toplama noktalarına getirmekten eraisikutele tasuta. Vanade seadmete sellistesse või sarnastesse kogumispunktidesse sorumludur. Bu az miktardaki kişisel çabayla, değerli ham maddelerin geri dönüştürülmesine ve toimetamise eest vastutavad seadmete omanikud. Selle väikese isikliku panusega aitate kaasa toksik maddelerin işleme alınmasına katkıda bulunmuş olursunuz. väärtusliku toorme ringlussevõtule ja mürgiste ainete töötlemisele. Utilizavimas nekenkiant aplinkai Senų elektrinių prietaisų negalima išmesti kartu su buitinėmis atliekomis; juos būtina utilizuoti atskirai. Tokių prietaisų utilizavimas per komunalinius atliekų surinkimo punktus yra nemokamas. Elektrinių prietaisų savininkai utilizuojamus prietaisus privalo priduoti į atitinkamus arba analogiškus atliekų surinkimo punktus. Tokiu būdu, įdėdami nedaug pastangų, prisidėsite prie vertingų medžiagų perdirbimo ir aplinkos apsaugojimo nuo toksinių medžiagų. © 2021 DJI All Rights Reserved.
- Seite 131 ○ ○ ○ ○ (铜合金) 内部线材 × ○ ○ ○ ○ ○ 其他配件 × ○ ○ ○ ○ ○ 本表格依据 SJ/T 11364 的规定编制。 ○:表示该有害物质在该部件所有均质材料中的含量均在 GB/T 26572 规定的限量要求以下。 ×:表示该有害物质至少在该部件的某一均质材料中的含量超出 GB/T 26572 规定的限量要求。 (产品符合欧盟 ROHS 指令环保要求) © 2021 DJI All Rights Reserved.
- Seite 132 For the latest information on Agras products, scan the Facebook or YouTube QR code. Download the latest version from www.dji.com/t30 or www.dji.com/t10 This content is subject to change. If you have any questions about this document, please contact DJI by sending a message to DocSupport@dji.com AGRAS and are trademarks of DJI. Copyright © 2021 DJI All Rights Reserved.