Herunterladen Inhalt Inhalt Diese Seite drucken
La Sommeliere PRESTIGE VIP 160 Bedienungsanleitung
Vorschau ausblenden Andere Handbücher für PRESTIGE VIP 160:

Werbung

Verfügbare Sprachen

Verfügbare Sprachen

VIP 160 - VIP 185 - VIP 196
FR
Mode d'emploi
GB
Instructions for use
DE
Bedienungsanleitung

Werbung

Inhaltsverzeichnis
loading

Inhaltszusammenfassung für La Sommeliere PRESTIGE VIP 160

  • Seite 1 VIP 160 - VIP 185 - VIP 196 Mode d’emploi Instructions for use Bedienungsanleitung...
  • Seite 2 ATTENTION Pour votre sécurité et pour une Sécurité des enfants et des autres personnes vulnérables utilisation correcte de l’appareil, avant d’installer et d’utiliser l’ap- Cet appareil peut être utilisé ● pareil pour la première fois, lisez par des enfants âgés de 8 ans attentivement cette notice, y et plus et par des personnes à...
  • Seite 3 Si vous décidez de mettre au l’intérieur de cet appareil, car ● rebut l’appareil, débranchez- elles pourraient s’y déverser. le de la prise murale, coupez ATTENTION — Si le cordon ● le câble de connexion (aussi d’alimentation est endom- proche de l’appareil que vous magé, vous devez le rempla- le pouvez) et retirez la porte cer immédiatement auprès de...
  • Seite 4 Liquide réfrigérant Sécurité électrique De l’isobutane réfrigérant (R600a) Nous ne pouvons pas être ● est utilisé dans le circuit réfrigérant tenus pour responsables de tout de l’appareil ; Il s’agit d’un gaz incident causé par une mau- naturel hautement inflammable, vaise installation électrique.
  • Seite 5: Utilisation Quotidienne

    Débranchez votre appareil Lorsque vous débranchez l’ap- ● ● avant de procéder au change- pareil, tenez toujours la prise ment de l’ampoule. dans vos mains et ne tirez pas sur le cordon. Cet appareil fonctionne sur ● un courant à phase unique de N’exposez pas l’appareil direc- ●...
  • Seite 6 Attention ! Il est recommandé d’attendre ● Nettoyage et entretien au moins quatre heures avant Avant tout entretien, débran- de brancher l’appareil au cou- ● chez l’appareil et coupez le rant, afin que le compresseur courant. soit bien alimenté en huile. Ne nettoyez pas l’appareil Une bonne circulation de l’air ●...
  • Seite 7: Protection De L' Environnement

    PROTECTION DE L’ ENVIRONNEMENT ÉCONOMIES D’ÉNERGIE Pour limiter la consommation ● Les matériaux d’emballage de cet électrique de votre appareil: appareil sont recyclables. Installez-le dans un endroit ● Participez à leur recyclage et contribuez approprié (voir chapitre «Instal- ainsi à la protection de l’environnement en les déposant dans les conteneurs munici- lation de votre appareil»).
  • Seite 8 R600a Instructions de sécurité Attention: N’obstruer fuite). Le type de fluide frigori- aucune grille de ventila- gène est indiqué sur la plaque tion de l’appareil. signalétique. Attention : Ne pas stocker Attention: Ne pas utiliser d’appa- de substances explo- reils électriques dans les com- sives comme les bombes partiments de l’appareil, sauf si d’aérosol avec un propul-...
  • Seite 9: Inhaltsverzeichnis

    Sommaire Caracteristiques tech- niques ATTENTION ..........2 PROTECTION DE L’ ENVIRONNEMENT ..7 Le câblage et les raccordements électriques Dépannage ..........9 des systèmes d’alimenta¬tion électrique Caracteristiques techniques .......9 doivent respecter les normes électriques (locales et nationales) en vigueur. Consul- Pour apprendre à connaître votre tez ces normes avant toute installation de cave à...
  • Seite 10: Pour Apprendre À Connaître Votre Cave À Vin

    Pour apprendre à connaître votre cave à vin Éclairage Panneau de commande Filtre à charbon Clayette en bois Joint d’étanchéité Plaque signalétique Plinthe Serrure Pieds réglables fig.1...
  • Seite 11: Avant La Mise En Service

    Avant la mise en service À réception, contrôler que l’appareil n’est Mise en service et installation pas endommagé. Les dommages dûs Pour des raisons de sécurité et de fonction- au transport doivent être notifiés à votre nement, l’appareil ne doit pas être placé à fournisseur avant toute utilisation de votre l’extérieur.
  • Seite 12: Installation

    Installation La surface sur laquelle l’appareil est placé doit être plane et horizontale. Ne pas utiliser de cadre ou autre support. L’appareil peut être installé comme unité indépendante le long d’un mur, être encas- tré dans un élément de cuisine, ou placé côte à...
  • Seite 13: Mise En Place

    Les pièces intercalaires au dos de l’appa- reil sont là pour assurer la circulation d’air. Monter les deux caches livrés avec l’appa- reil (voir fig. 5). Max. 85 kg. fig. 7 fig. 5 Mise en place Il est important que l’appareil soit placé sur une surface parfaitement plane.
  • Seite 14: Utilisation Et Fonctionnement

    Utilisation et fonctionnement fig. 9 Commande électronique régnant dans la partie inférieure de l’appa- reil. L’indicateur de température est équipé La commande électronique assure le main- d’un filtre intégré simulant la température tien des températures programmées dans régnant dans les bouteilles. C’est pourquoi les deux parties de l’appareil.
  • Seite 15: Alarme De Porte

    Renversement de porte peut être programmée en dessous du point de réglage réel du capteur placé dans le Nous vous recommandons d’utiliser un bas de l’appareil. technicien pour un renversement éventuel de porte. Réglage de la température dans le bas de l’appareil Eclairage permanent Appuyer sur la touche SET2.
  • Seite 16: Dégivrage, Nettoyage Et Entretien

    Réglage zone unique pour Le thermostat de protection conservation à long terme contre le gel Pour la conservation longue durée des vins, L’appareil est équipé d’un thermostat de le réglage recommandé est de 12/12 °C. Un protection contre le gel qui prennent le réglage identique dans le haut et dans le bas contrôle et exécuter l’appareil en mode de permettra au système réfrigérant d’assurer...
  • Seite 17: Recherche De Pannes Éventuelles

    Recherche de pannes éventuelles Panne Cause possible Remède L’appareil ne fonc- L’appareil est éteint. Appuyer sur le bouton marche- tionne pas arrêt. Panne de courant ; fusible grillé Contrôler l’alimentation élec- ou disjoncteur déclenché ; prise trique. Contrôler le fusible ou le mal enfoncée.
  • Seite 18: Garantie, Pièces De Rechange Et Service Après-Vente

    Garantie, pièces de rechange et service après-ven- Pièces de rechange Les pannes ou les dommages dûs directe- ment ou indirectement à une utilisation in- ors de la commande de pièces de correcte ou fautive, un entretien insuffisant, rechange, indiquer le type, numéro de un encastrement, une mise en place ou un produit, le numéro de série et de production raccordement incorrect, un incendie, un ac-...
  • Seite 19: Mise Au Rebut

    Mise au rebut Avis aux utilisateurs concernant la est passible d’une amende. collecte et l’élimination des piles et des Pour les utilisateurs profession- appareils électriques et électroniques nels au sein de l’Union euro- usagés. péenne Si vous souhaitez vous défaire de Apposé...
  • Seite 20 Warning For your own safety and for above, and by persons who the proper utilisation of the are physically, sensorially or appliance, read this manual mentally handicapped, or who carefully, including the warn- have not learned to use the ings and recommendations, appliance, providing they are before installing the appliance supervised by a person famil-...
  • Seite 21: General Safety

    sure that the latch is disabled CAUTION — Do not damage ● before selling or scrapping the the refrigerating circuit. old appliance. This will prevent CAUTION — Do not use ● the appliance from being trans- electrical appliances inside the formed into a trap for children.
  • Seite 22: Electrical Safety

    Caution: Fire risk Electrical safety If the refrigerating circuit is dam- We decline any liability in ● aged: respect of incidents caused by poor electrical installation. Avoid open flames or any Do not extend the power cable. ● ● source of combustion. Do not use an extension ca- ble, or adapter, or multi-way Ensure that the room in which...
  • Seite 23 The appliance operates on a Keep the appliance away from ● ● single phase 220~240 V / 50 candles, luminaires and open Hz power supply. The appli- flames, in order to avoid fire ance must be connected to an risk. earthed wall socket, in accord- This appliance is only designed ●...
  • Seite 24 Caution! Cleaning supply, so that the compressor and servicing fluid feed is correct. Before carrying out servicing, ● Proper air circulation is neces- ● switch off the power supply sary to avoid overheating. To and disconnect the appliance. ensure sufficient ventilation, When cleaning the appliance, observe the installation recom- ●...
  • Seite 25: Protection Of The Environment

    PROTECTION OF THE Do not put food that is still hot ● into the appliance. ENVIRONMENT To ensure that the appliance ● operates properly, clean the condenser regularly (see The packaging materals with this “Routine servicing of your ap- appliance may be recycled. pliance”).
  • Seite 26 R600a Safety instructions Caution: Do not obstruct erating fluid type is specified on the ventilation grills on the the power cabinet identification appliance. plate. Caution: Do not store ex- Caution: Do not use electrical plosive substances, such equipment in the compartments as aerosol cans containing of the appliance, unless they are an inflammable propellant,...
  • Seite 27: Technical Data

    Technical data Contents Warning ............2 Wiring and connections in power supply PROTECTION OF THE ENVIRONMENT ..7 systems must been all applicable (local and Contents ............9 national) electrical codes. Consult these codes lengths and sizes prior to cabinet Technical data ..........9 installation.
  • Seite 28: Get To Know Your Wine Cooler

    Get to know your wine cooler Lighting Control panel Charcoal filter Wooden shelf Sealing strip Nameplate Kick plate Lock Adjustable feet fig.1...
  • Seite 29: Before Use

    Before use Installation and start-up On receipt, check to ensure that the ap- Placement pliance has not been damaged during For safety and operational reasons, the ap- transport. Transport damage should be pliance must not be installed outdoors. reported to the local distributor before the wine cooler is put to use.
  • Seite 30: Installation

    Installation The surface on which the appliance is to be placed must be level. Do not use a frame or similar. The appliance can be installed as a free- standing unit against a wall, built into a closet or lined up with other appliances. It is important that the appliance be well ventilated and that air can circulate unhin- dered above, below and around it.
  • Seite 31 The distance pieces on the rear of the ap- pliance ensure sufficient air circulation. Fit the two caps supplied with the appliance as Max. 85 kg. shown in fig. 6. fig. 8 fig. 6 Setting up It is important that the appliance be abso- lutely level.
  • Seite 32: Operation And Function

    Operation and function fig. 9 Electronic control a built-in filter which simulates the actual temperature in the bottles. Consequently, The electronic control ensures that the the indicator does not react on short-term temperatures set at the top and at the bot- fluctuations of the air temperature.
  • Seite 33 Temperature setting at the bot- Permanent lighting tom of the appliance For presentation purposes of your wine, you can turn the lights permanently. Please Push SET2. Then the temperature at the press the light switch image twice. If the bottom of the appliance can be adjusted up controller is placed inside the cabinet press and down by means of the “up and down”...
  • Seite 34: Defrosting, Cleaning And Maintenance

    However, the temperature in the room will gradually affect the temperature in the cabinet through its door and sides, creating a slight temperature gradient from top to bottom. The controls will maintain the set temperature at the bottom of the cabinet, and any deviation from the setting will therefore occur at the top.
  • Seite 35: Fault Finding

    Fault finding Fault Possible cause Remedy The appliance is not The appliance is switched off. Press the on/off switch. working. Power failure; the fuse is blown; Check that power is connected. the appliance is not plugged in Reset the fuse. correctly.
  • Seite 36: Warranty, Spare Parts And Service

    Warranty, spare parts and service Warranty disclaimer Spare parts Faults and damage caused directly or When ordering spare parts, please state indirectly by incorrect operation, misuse, the type, serial and product numbers of insufficient maintenance, incorrect building, your appliance. This information is given on installation or mains connections.
  • Seite 37: Disposal

    Disposal For business users in the Euro- Information for Users on Collection pean Union. and Disposal of Old Equipment and If you wish to discard electrical and used Batteries electronic equipment, please contact These symbols on the products, your dealer or supplier for further packaging, and/or accompanying information.
  • Seite 38 Warnung Lesen Sie die Bedienungsan- gemacht werden. leitung, einschließlich der da- rin enthaltenen Warnhinweise Sicherheit von Kindern und und nützlichen Tipps, zu Ihrer hilfsbedürftigen Personen Sicherheit und zum korrekten Gebrauch des Geräts vor der Das Gerät kann von Kindern ● Installation und Inbetriebnah- im Alter von 8 Jahren und me des Geräts aufmerksam...
  • Seite 39 Netzkabel abschneiden (mög- des Gerätes auf, da sie dort lichst dicht am Gerät) und die auslaufen können. Tür entfernen, damit Kinder ACHTUNG! Ist das Netzkabel ● nicht damit spielen und einen beschädigt, muss es zur Ver- Stromschlag erleiden oder sich meidung der Stromschlagge- im Geräteinneren einschließen fahr umgehend durch den Her-...
  • Seite 40: Elektrosicherheit

    entzündliches Gas, das umwelt- Prüfen, dass die Wandsteck- ● schädigend ist. Beim Transport dose nicht beschädigt ist. Eine und der Installation des Geräts Wandsteckdose in schlechtem prüfen, dass keine Komponenten Zustand kann zur Überhitzung des Kältekreislaufs beschädigt des Geräts und seiner Explosi- sind.
  • Seite 41 Ist das Netzkabel beschädigt, Das Gerät ist ausschließlich ● ● es nicht selbst austauschen, zur Lagerung von Wein und sondern den Kundendienst Getränken bestimmt. kontaktieren. Das Gerät ist schwer. Seien ● Der Netzstecker muss leicht Sie vorsichtig, wenn Sie das ●...
  • Seite 42 Scheuermitteln reinigen. Überhitzung zu vermeiden. Zur Gewährleistung einer ausrei- Zum Entfernen von Eis keine ● chenden Belüftung die ange- scharfen oder spitzen Gegen- gebenen Installationshinweise stände verwenden. Stattdes- beachten. sen einen Kunststoffschaber verwenden. Möglichst vermeiden, dass das ● Gerät die Wand berührt und/ Wichtiger Hinweis zur oder mit heissen Bauteilen Installation!
  • Seite 43: Umweltschutz

    Durch die periodische Reini- Umweltschutz ● gung des Kondensators den optimalen Betrieb des Gerätes sicherstellen (siehe Abschnitt Die Verpackungsmaterialien des ”Regelmäßige Pflege des Ge- Gerätes sind recycelbar. rätes”). Leisten Sie einen Beitrag zum Umwelt- Die Türdichtungen periodisch ● schutz und entsorgen Sie die Verpackung kontrollieren und prüfen, dass in den dafür vorgesehenen Gelben Tonnen, damit sie recycelt werden kann.
  • Seite 44: Sicherheitshinweise

    R600a Sicherheitshinweise Achtung! Die Lüftungsgitter Achtung! In den Fächern des des Gerätes nicht versper- Gerätes keine Elektrogeräte ren. verwenden, außer sie wurden vom Hersteller ausdrücklich Achtung! In dem Gerät keine empfohlen. explosionsfähigen Stoffe, wie z.B. Spraydosen mit Das Gerät entspricht allen geltenden entzündlichem Treibgas, europäischen Richtlinien und ihren lagern.
  • Seite 45: Technische Daten

    Inhalt Technische Daten Warnung .............2 Verkabelung und Anschlüsse in Stromver- Technische Daten ........9 sorgungssystemen müssen allen (örtlichen Lernen Sie Ihren Weinschrank und nationalen) Elektrovorschriften entspre- zu kennen ..........10 chen. Machen Sie sich vor dem Einbau mit den Angaben in diesen Vorschriften vertraut Vor dem Gebrauch ........11 Dieses Gerät entspricht den einschlägigen Inbetriebnahme und Installation ....11...
  • Seite 46: Lernen Sie Ihren Weinschrank Zu Kennen

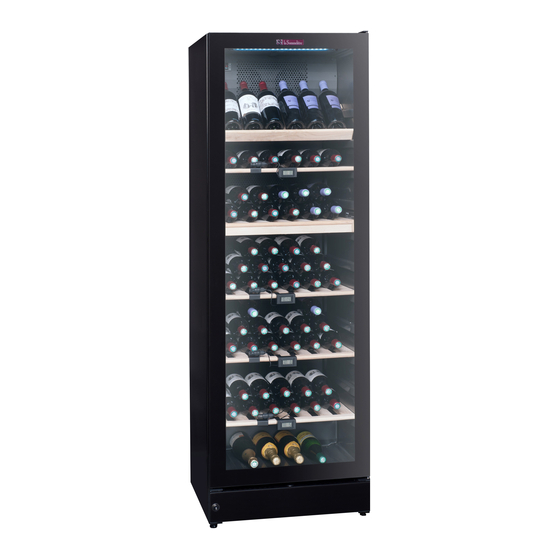
    Lernen Sie Ihren Weinschrank zu kennen Beleuchtung Kohlefilter Holzfach Dichtleiste Typenschild Türgriff Fußleiste Bedienungselemente Schloss Einstellbare Füße Abb.1...
  • Seite 47: Vor Dem Gebrauch

    Vor dem Gebrauch Inbetriebnahme und Installation Aufstellort Kontrollieren Sie das Gerät sofort bei Lieferung auf eventuelle Beschädigungen. Aus Sicherheits- und betriebstechnischen Transportschäden sind dem Händler zu Gründen darf das Gerät nicht im Freien melden, bevor das Gerät in Gebrauch aufgestellt werden. genommen wird.
  • Seite 48 Installation Die Unterlage zum Aufstellen des Schranks muss eben sein. Verwenden Sie keinen Rahmen o.ä. Der Schrank kann frei an einer Wand stehen, in ein Schrank eingebaut werden oder neben anderen Schränken aufgestellt werden Der Schrank muss ausreichend belüftet sein, und die Luftzirkulation über und unter ihm sowie seitlich vom Schrank darf nicht behindert sein.
  • Seite 49: Belüftung

    Belüftung Max. 85 kg. Die Abstandsstücke auf der Rückseite des Schranks sichern die erforderliche Luftzirku- lation. Die beiden Abdeckungen montieren, die zusammen mit dem Schrank mitgeliefert werden (siehe Abb. 5) (Zwei verschiedene Modelle) Abb.7 Abb. 5 Aufstellung Der Schrank muss waagerecht stehen. Der Schrank kann durch Drehen der einstellba- ren Füße ausgerichtet werden (siehe Abb.
  • Seite 50: Bedienung Und Funktion

    Bedienung und Funktion raturanzeige hat ein eingebautes Filter mit dem die Temperatur in den Flaschen simuliert wird. Deshalb reagiert die Anzeige nicht auf kurzzeitige Änderungen der Luft- temperatur z.B nach dem Öffnen der Tür Temperatureinstellung Der Termostat hat eine Kindersicherung. Sie wird durch gleichzeitiges drücken der Abb.
  • Seite 51: Alarmfunktion

    Alarmfunktion Das Licht ist immer an wenn die Tür geöff- net ist. Der Alarm wird durch einen Piepton und eine Anzeige im Display signalisiert. Alarm bei zu hoher Temperatur: Piepton Mehrzoneneinstellung für und die Anzeige blinkt zwischen „HtA“ und Serviertemperierung aktueller Temperatur.
  • Seite 52: Der Frostschutzthermostat

    auftreten. Der Unterschied liegt zwischen 0–3 °C, abhängig von der Umgebungstemperatur. Der Frostschutzthermostat Der Kühlschrank verfügt über einen Frost- schutzthermostat der die Kontrolle im Falle einer Störung übernimmt und den Schrank in den Sicherheitsmodus überführt. Im Sicherheitsmodus liegt die Schranktempe- ratur zwischen 2 °C und 4 °C.
  • Seite 53: Fehlersuche

    Fehlersuche Fehler Mögliche Ursache Abhilfe Der Schrank re- Der Schrank ist abgeschaltet Ein-/Ausschalter betätigen. agiert nicht. Stromausfall; Sicherung hat Prüfen, ob der Strom ange- angesprochen; Netzstecker nicht schlossen ist. Die Sicherung richtig eingesteckt. muss intakt/eingeschaltet sein. Es läuft Wasser Das Tauwasserabflussrohr ist Tauwasserrinne und Abflussloch auf den Boden des verstopft.
  • Seite 54: Reklamation, Ersatzteile Und Service

    Reklamation, Ersatzteile und Service Ersatzteile Der Lieferant haftet nicht für Fehler oder Schäden, die direkt oder indirekt durch Bitte bei der Ersatzteilbestellung Typ- und Fehlbedienung, Missbrauch, mangelhafte Seriennummer sowie Produktnummer an- Wartung, fehlerhaften Einbau, fehlerhafte geben. Diese Angaben finden Sie auf dem Aufstellung oder fehlerhaften Anschluss Typenschild.
  • Seite 55: Entsorgung

    Entsorgung Benutzerinformation zur Sammlung und Für geschäftliche Nutzer in der Europäischen Union. Entsorgung von veralteten Geräten und benutzten Batterien. Wenn Sie elektrische oder elektro- nische Geräte entsorgen möchten, Diese Symbole auf den Produkten, wenden Sie sich wegen genauerer Verpackungen und/oder Begleitdo- Informationen bitte an Ihren Händler kumenten bedeuten, dass benutzte oder Lieferanten.
  • Seite 56 LA SOMMERLIÉRE...
  • Seite 60 LA SOMMELIERE 143 boulevard Pierre Lefaucheux 72230 ARNAGE (France) Nous nous réservons le droit d’apporter toutes modifications à nos produits Reserving the right to alter specifications without prior notice Recht auf Änderungen vorbehalten 8060901 rev 01...

Diese Anleitung auch für:

Prestige vip 185Prestige vip 196

Inhaltsverzeichnis