Bose Acoustimass 6 Series III Bedienungsanleitung
Vorschau ausblenden
Andere Handbücher für Acoustimass 6 Series III:
- Bedienungsanleitung (18 Seiten) ,
- Bedienungsanleitung (110 Seiten)
Inhaltsverzeichnis

Verwandte Anleitungen für Bose Acoustimass 6 Series III


Inhaltszusammenfassung für Bose Acoustimass 6 Series III
- Seite 1 Acoustimass ® Series III Acoustimass ® Series IV H O M E E N T E R T A I N M E N T S P E A K E R S Y S T E M S !"#$%"&%'(%)*+*$ !%)+%*#*$,-*(%+.#*$ /-*#-(%0)+0+,."#1+2*+ 3%4"#+5,--*6+'1+*$...
-
Seite 2: Zu Ihrer Sicherheit
Kaufdatum: _______________________________________ Bewahren Sie die Kaufquittung und Garantiekarte zusammen mit dieser Bedienungsanleitung auf. ©2006 Bose Corporation. Dieses Dokument darf ohne vorherige schriftliche Genehmigung weder ganz noch teilweise reproduziert, verändert, vertrieben oder auf andere Weise verwendet werden. Hergestellt unter Lizenz von Dolby Laboratories. Der Begriff und das Symbol „Dolby“ sind Warenzeichen von Dolby Laboratories. Vertraulich und... -
Seite 3: Inhaltsverzeichnis
Dansk Deutsch Italiano Nederlands Svenska NHALTSVERZEICHNIS UFBAU Bevor Sie beginnen ................Auspacken des Kartons . -
Seite 4: Ufbau
Nederlands Italiano Deutsch Dansk UFBAU Bevor Sie beginnen Mit dem Home-Entertainment-Lautsprechersystem Bose ® Acoustimass ® 6 Serie III bzw. Acoustimass 10 Serie IV haben Sie eine gute Wahl getroffen. Das Acoustimass 6 umfasst fünf kleine Cube Speaker, während das System Acoustimass 10 vier Cube Speaker Array und einen vorderen Center-Lautsprecher beinhaltet. -
Seite 5: Aufstellen Der Lautsprecher Für Realistischen Heimkino-Sound
Erschütterungen leicht verrutschen. Um dies zu vermeiden, können Sie die mitgelieferten Gummifüße auf der Unterseite des vorderen Center-Lautsprechers anbringen. Hinweis: Sie können kostenlos zusätzliche Gummifüße bei Bose anfordern. Eine Liste mit Kontaktinformationen finden Sie im Versandkarton. • Mit einem System Acoustimass wird der vordere Center-Lautsprecher wird im vorderen Bereich des Zimmers und in der Nähe des Fernsehgeräts aufgestellt. -
Seite 6: Vordere Linke Und Rechte Lautsprecher
Svenska Nederlands Italiano Deutsch Dansk UFBAU Vordere linke und rechte Lautsprecher Diese Lautsprecher sollen ein Klangbild erzeugen, das breiter als der Bildschirm ist und Zuschauern überall im Raum natürlich vorkommt. • Stellen Sie diese beiden vorderen Lautsprecher auf beiden Seiten des Fernsehgeräts auf. •... -
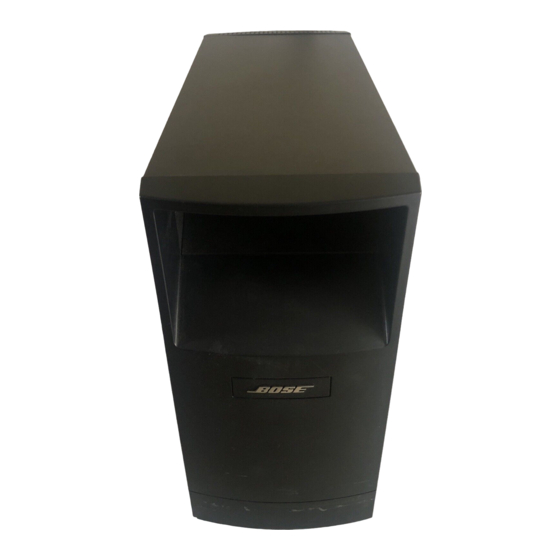
Seite 7: Aktives Acoustimass ® Modul
Dansk Deutsch Italiano Nederlands Svenska UFBAU Aktives Acoustimass Modul ® Dank der Acoustimass ® -Lautsprechertechnologie ist es schwierig, die Quelle der tiefen Frequenzen zu orten. Sie können das Modul also nach Belieben verstecken. Beachten Sie dabei die folgenden Richtlinien: • Stellen Sie das Modul auf derselben Seite des Raums wie den Fernsehbildschirm auf. •... - Seite 8 Svenska Nederlands Italiano Deutsch Dansk UFBAU 2. Verwenden Sie die mitgelieferten Lautsprecherkabel (15,2 m) für die Lautsprecher im rückwärtigen Raumbereich (Abbildung 5). Stecken Sie die Stecker in die folgenden Buchsen am Modul: • RR in die mit „Right Rear“ gekennzeichnete Buchse. •...
-
Seite 9: Anschließen Des Acoustimass ® -Moduls An Den Receiver
Dansk Deutsch Italiano Nederlands Svenska UFBAU Anschließen des Acoustimass ® -Moduls an den Receiver Das Systemeingangskabel ist 6,1 m lang und wird an den Surround Receiver angeschlossen. Anders als die Lautsprecherkabel verfügt dieses Eingangskabel über einen mehrpoligen Stecker, der in den Audioeingang des Moduls gesteckt wird (Abbildung 6). Abbildung 6 Eingangsbuchse des Moduls Anschluss des System-... -
Seite 10: Überprüfen Der Anschlüsse
Netzkabel des Acoustimass-Moduls in eine Steckdose. Schließen Sie auch den Receiver an eine Steckdose an. Hinweis: Bose empfiehlt die Verwendung eines Marken-Spannungsschutzgeräts an jedem elektronischen Gerät. Spannungsschwankungen und -spitzen können elektronische Komponenten in den allermeisten Systemen beschädigen. Durch die Verwendung eines hochwertigen Spannungsschutzes (im Elektronikfachhandel erhältlich) lassen sich die meisten... -
Seite 11: Erwendung Ihres Systems
Dansk Deutsch Italiano Nederlands Svenska ERWENDUNG HRES YSTEMS Optimale Nutzung der Heimkinolautsprecher Nachdem Sie die Systemverbindungen hergestellt und das Modul an die Stromversorgung angeschlossen haben, ist Ihr Acoustimass ® -System jetzt einsatzbereit. Am besten machen Sie sich nun mit den Steuerungen und integrierten Schutzvorrichtungen vertraut, mit denen das Audio des Systems geregelt wird (Abbildung 9). -
Seite 12: Einstellungen Für Den Digitalen Surround Sound-Receiver
Svenska Nederlands Italiano Deutsch Dansk ERWENDUNG HRES YSTEMS Einstellungen für den digitalen Surround Sound-Receiver ® Der Lautsprecher der Systeme Acoustimass 6 Serie III oder Acoustimass 10 Serie IV sind mit der Audioausgabe von digitalen Surround Receivern vollständig kompatibel. Die integrierte Signalverarbeitung des Systems unterstützt die volle Tieffrequenzwiedergabe von allen Kanälen. -
Seite 13: Referenz
Audioquelle ab, und orientieren Sie sich an den folgenden Lösungsvorschlägen. ® Falls das Problem weiterhin besteht, vereinbaren Sie mit Ihrem Bose -Fachhändler einen Wartungstermin. Alternativ können Sie sich auch direkt an Bose wenden. Eine Liste mit Kontaktinformationen finden Sie im Versandkarton. Problem Lösung System funktioniert •... -
Seite 14: Kundendienst
Füllen Sie bitte den Informationsteil der Karte aus, und schicken Sie diese an Bose. Ihre Garantierechte sind jedoch unabhängig davon gültig. Zubehör Bose bietet das folgende Zubehör in passenden Farben für Ihr System an, damit Sie Ihr Acoustimass-Lautsprechersystem noch besser genießen können. • UTS-20 Tischstative •... -
Seite 15: Technische Daten
Dansk Deutsch Italiano Nederlands Svenska EFERENZ Technische Daten Lautsprecher-Driver System Acoustimass 10: • 10 Cube Speaker Arrays und vorderer Center-Lautsprecher: zwei Twiddler -Lautsprecher 2,5" (6,35 cm) • Aktives Acoustimass Modul: zwei Woofer (13 cm) System Acoustimass 6: • Cube Speaker: ein Twiddler -Lautsprecher 2,5"... - Seite 16 ©2007 Bose Corporation, The Mountain, Framingham, MA 01701-9168 USA AM294680 Rev.04...
- Seite 17 TX-NR535 AV RECEIVER Basic Manual Advanced Manual found here http://www.onkyo.com/manual/txnr535/adv/en.html...
-
Seite 18: Before Start
Before Start About the Basic Manual Features Supplied Accessories The Basic Manual leads you through the fundamental steps The unit is designed to be connected in between the TV to enjoy the AV Receiver from connections to TV, speaker and the playback devices such as Blu-ray disc player. Indoor FM antenna --- (1) system and playback devices, to necessary functions for Video signal from the playback devices will be sent through... - Seite 19 Step 1: Connections Personal computer HDMI HDMI HDMI cable To use the ARC function, connect to the ARC compatible HDMI jack of the TV. HDMI HDMI HDMI Blu-ray Disc/ DVD player HDMI Game console Game console Set-top box/Digital Satellite/Cable video recorder, etc. set-top box, etc.
- Seite 20 Step 1: Connections Connecting Components without HDMI If the connected turntable does not have built-in Type of cables audio equalizer, you need to install an external audio The video/audio jacks other than HDMI jacks also have a equalizer between the unit and the turntable. Contact the preassigned input selector button on the front panel.
- Seite 21 Step 1: Connections Front R Front L Connecting speakers Important: The power cord must be connected only after all Center other connections are completed. Connection of each speaker: Correctly connect + and -. Using the colored labels for speaker cables will help correct connection.
- Seite 22 Step 1: Connections labels to the + side on the both ends of each channel's cable Network connection Other connections will help correct connection. The subwoofer jack supports You can enjoy Internet radio and DLNA by connecting the connection of a subwoofer with built-in power amplifier. Set unit to LAN.
- Seite 23 Step 2: Setting Up Connect the speaker setup microphone to the Turning the power on Making automatic speaker setting SETUP MIC jack on the unit. SETUP MIC jack Connect the power cord to the outlet ( ). Press zON/ The AccuEQ Room Calibration function, our proprietary STANDBY on the main unit or zRECEIVER on the remote technology, collects the test tones coming from each controller to turn the unit on or to standby mode.
- Seite 24 Step 2: Setting Up When the measurement is completed, the Select and set the authentication method. Making Wi-Fi setting measurement result is displayed. W i - F i S e t u p Items to be checked before starting the procedure A c c u E Q R o o m C a l i b r a t i o n Wi-Fi connection requires an access point such as P l e a s e s e l e c t t h e a u t h e n t i c...
- Seite 25 Step 2: Setting Up PIN code: Select this method when the automatic setting HDMI Through HDMI Setup button of the access point is beyond the reach. Select "PIN code" with the cursor buttons and press ENTER to display The function allows transmission from players to the TV the 8-digit PIN code.
-
Seite 26: Playing Back
Step 3: Playing Back z RECEIVER button: Turns the unit on or into standby Playing the player and TV mode. REMOTE MODE/INPUT SELECTOR buttons: Switches the input to be played. Press RCV on the remote controller and press 1 Cursor buttons and ENTER button: Moves the cursor zRECEIVER to turn the power on. - Seite 27 Step 3: Playing Back Press TUNING on the unit. Listening modes Changing the Display Brightness: Press DIMMER on the remote controller several times to select the desired The automatic search for a radio station starts. brightness. (North American and Taiwanese models) Searching stops when one is found.
- Seite 28 Step 3: Playing Back Pairing InstaPrevue: Select to preview videos input from the HDMI Using the Home menu input jacks collectively in a single screen. The screen has a Pairing is necessary when using the Bluetooth-enabled main window (current input video) and sub windows (other device for the first time.
- Seite 29 Step 3: Playing Back Bass, Treble: Adjust volume of the front speaker. Information: Display the audio information. Performing ZONE playback It cannot be set if the listening mode is Pure Audio Listening Mode: Select the listening mode from the (European, Australian and Asian models) or Direct. Press ZONE2 on the remote controller, point the categories of "MOVIE/TV", "MUSIC"...
-
Seite 30: Parts Name
Parts Name (European, Australian (European, Australian and Asian models) and Asian models) Front Panel zON/STANDBY button: Turns the unit on or into MEMORY button: Registers or deletes a station. PHONES jack: Stereo headphones with a standard plug standby mode. TUNING MODE button: Switches the tuning mode. are connected. - Seite 31 Parts Name Display Lights in the following conditions. "Z2": ZONE 2 output is on. / "HDMI": HDMI signals are input and HDMI input selector is selected. / "ARC": Audio signals are input from ARC compatible TV and TV/CD input selector is selected.
- Seite 32 Troubleshooting The AV receiver turns off unexpectedly. ovens, game consoles, etc.). If this does not solve How to reset: Perform steps 1 and 2 below. "Clear" will the problem, stop using other devices which emit appear on the display and the unit returns to standby. The AV receiver will automatically enter standby mode electromagnetic waves.
- Seite 33 Specifications Amplifier Section AM Tuning Frequency Range Dimensions (W × H × D) 522/530 kHz - 1611/1710 kHz 435 mm × 150 mm × 329 mm Rated Output Power Preset Channel 17-1/8" × 5-7/8" × 12-15/16" All channels: Weight 65 watts minimum continuous power per channel, 7.6 kg (16.8 lbs.) (North American and Taiwanese) 8 ohm loads, 2 channels driven from 20 Hz to 20 kHz, with a 8.1 kg (17.9 lbs.) (Others)
- Seite 34 License and Trademark Information InstaPrevue and the InstaPrevue logo are trademarks or registered trademarks Precautions of Silicon Image, Inc. in the United States and other countries. Apple, iPod and iPhone are trademarks of Apple Inc., registered in the U.S. and other countries.
- Seite 35 – Dyrektywy 1999/5/EC. – Eu, Onkyo Corporation, declaro que o TX-NR535 cumpre os requisitos essenciais e outras provisões relevantes da Directiva 1999/5/EC. – Directivei 1999/5/CE. – – Onkyo Corporation izjavlja, da je ta TX-NR535 v skladu z bistvenimi – Onkyo Corporation vakuuttaa täten että TX-NR535 tyyppinen laite on direktiivin 1999/5/EY oleellisten vaatimusten ja sitä...
- Seite 36 Kitahama Chuo Bldg, 2-2-22 Kitahama, Chuo-ku, OSAKA 541-0041, JAPAN http://www.onkyo.com/ The Americas 18 Park Way, Upper Saddle River, N.J. 07458, U.S.A. For Dealer, Service, Order and all other Business Inquiries: Tel: 201-785-2600 Fax: 201-785-2650 http://www.us.onkyo.com/ For Product Support Team Only: 1-800-229-1687 Europe Liegnitzerstrasse 6, 82194 Groebenzell, GERMANY...
- Seite 37 Si un autre type de borne est utilisé pour la connexion, Support for Spotify Connect Supporto per Spotify Connect réglez le volume sur l'équipement audio placé dans une pièce séparée. Spotify Connect can be supported by updating the unit's Spotify Connect può essere supportato tramite Afin de profiter de la musique Spotify dans la pièce firmware.
- Seite 38 Unterstützung für Spotify Connect Opmerkingen voor gebruik van de multi-zonefunctie Automatiskt strömpåslag Om te genieten van muziek van Spotify in een aparte Genom att slå på nätverks-standby kan du använda Spotify Connect kann durch Aktualisierung der Firmware ruimte, selecteert u „NET” als de invoer van de aparte funktionen för automatiskt strömpåslag när du använder des Geräts unterstützt werden.