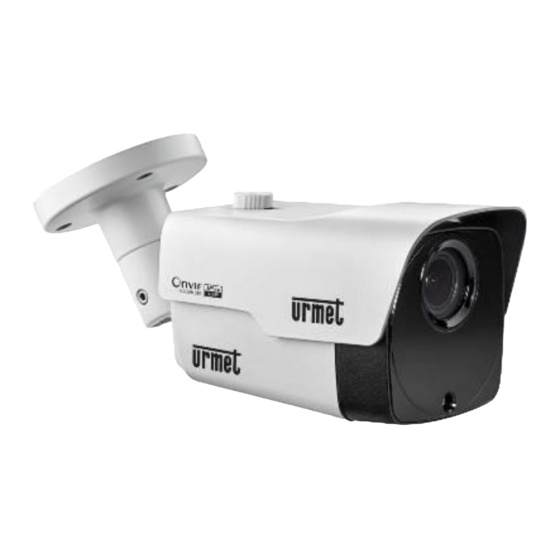
urmet 1099/500 Schnellanleitung
H.265 ip camera
Verfügbare Sprachen
Verfügbare Sprachen
Kapitel

Verwandte Anleitungen für urmet 1099/500


Inhaltszusammenfassung für urmet 1099/500
- Seite 1 H.265 IP Camera Series IF YOU LOVE YOUR BUILDING...
-
Seite 74: Index
Schnellanleitung H.265 IP CAMERA SERIES INDEX INDEX ..................74 Allgemeine Informationen ............75 WICHTIGE HINWEISE ................75 Installation ................78 INSTALLATION BULLET KAMERA ............... 78 INSTALLATION DER MINI-DOME-KAMERAS ..........81 INSTALLATION DER MINI-FLAT KAMERA............ 82 INSTALLATION VANDALENSICHERE DOME KAMERA ........84 IP-Konfiguration der Aufnahmeeinheit........ -
Seite 75: Allgemeine Informationen
Allgemeine Informationen Sehr geehrter Kunde, vielen Dank für den Kauf dieses Produktes. Dieses Dokument beschreibt die Installation und die ersten Bedienschritte der URMET IP Kamera Serie. Lesen dieses Dokument vor Verwendung des Gerätes sorgfältig. Es enthält Informationen über die korrekte und sichere Verwendung. - Seite 76 Stromschlägen kommen. Wenden Sie sich in diesem Fall an Ihren Fachhändler oder einen autorisierten Installateur. Installationshinweise Installieren Sie die Kamera nicht in einer Umgebung, wo sie Regen oder Feuchtigkeit ausgesetzt ist. Verwenden Sie in diesen Fällen die dafür vorgesehenen Wetterschutzvorrichtungen. Vermeiden Sie es, das Objektiv direkt gegen die Sonne oder intensive Lichteinstrahlung zu richten, auch bei ausgeschalteter Kamera.
- Seite 77 Verluste oder Schäden durch Diebstahl. Führen Sie vor Inbetriebnahme des Geräts eine Probeaufnahme durch, um sicherzustellen, dass die Aufnahme fehlerfrei erfolgt. Beachten Sie bitte, dass URMET S.p.A. keine Haftung für Datenverluste oder Schäden übernimmt, die auf falsche Videoüberwachungseinstellungen, Missbrauch und unsachgemäßen Betrieb des Geräts oder technische Ausfälle zurückzuführen sind.
-
Seite 78: Installation
Das Gerät unterstützt bis zu 10 Unicast-Verbindungen gleichzeitig, d. h. der Video-Stream kann je nach verfügbarer Bandbreite an maximal 10 dezentrale Überwachungsplätze (Rechner oder Smartphone) gleichzeitig übertragen werden Installation INSTALLATION BULLET KAMERA Deckenmontage Die drei Dübel in die Decke einsetzen und das Gerät mit den drei Befestigungsschrauben anbringen. - Seite 79 Wandmontage Die drei Dübel in die Wand einsetzen und das Gerät mit den drei Befestigungsschrauben anbringen. SD-Karten Installation...
- Seite 80 SD-Karten Installation Kamera 1099/208 ACHTUNG: Dieser Vorgang sollte von qualifiziertem Fachpersonal ausgeführt werden. Entfernen Sie die drei Schrauben der Frontavbeckung 1. Entfernen der Schraube die den SD-Karteneinschub sichert 2. Einsetzen der SD-Karte in den SD-Karteneinschub 3. Den Karteneinschub wieder auf der Hauptplatine einsetzen 4.
-
Seite 81: Installation Der Mini-Dome-Kameras
INSTALLATION DER MINI-DOME-KAMERAS Deckenmontage 1. Markieren Sie die Befestigungslöcher mittels der Bohrschablone an dem Ort, an welchen die Kamera montiert werden soll. 2. Den Befestigungsrings durch Drehen im Uhrzeigersinn entfernen. 3. Die Befestigungslöcher anhand der Bohrschablone bohren und das Kameragehäuses mittels Dübeln und Schrauben an der Decke montieren. -
Seite 82: Installation Der Mini-Flat Kamera
Komplettierung der Installation. SD-Karten Installation INSTALLATION DER MINI-FLAT KAMERA Deckenmontage 1. Markieren Sie die Befestigungslöcher mittels der Bohrschablone an dem Ort, an welchen die Kamera montiert werden soll. 2. Die Befestigungslöcher anhand der Bohrschablone bohren und das Kameragehäuses mittels Dübeln und Schrauben an der Decke montieren. 3. - Seite 83 Bohrschablone Gehäuse SD-Karten Installation Einschieben der SD-Karte in den Karteneinschub (siehe Pfeil)
-
Seite 84: Installation Vandalensichere Dome Kamera
INSTALLATION VANDALENSICHERE DOME KAMERA Deckenmontage 1. Den Aufkleber in der korrekten Position anbringen. 2. Das vordere Bauteile entfernen, indem die drei Befestigungsschrauben mit Hilfe eines Schraubendrehers gelöst werden. 3. Den Sockel anbringen, indem Öffnungen zum Anbringen rund um den Aufkleber angebracht, die vier Dübel dort eingesetzt werden und alles mit den vier Befestigungsschrauben befestigt wird. -
Seite 85: Ip-Konfiguration Der Aufnahmeeinheit
SD-Karten Installation IP-Konfiguration der Aufnahmeeinheit Nach dem Einschalten der Stromversorgung der Kamera muss diese in ihrem eigenen Haus- oder Büronetzwerk konfiguriert werden. Sollten mehrere Kameras in demselben Netzwerk zu installieren sein, wird empfohlen, jeweils eine Kamera zu installieren und zu konfigurieren. VERBINDUNG IM IP-NETZWERK MIT DHCP-SERVICE Für die schnelle Installation der Kamera im Netzwerk mit automatischer Zuordnung (DHCP) wird der IP-Kamera automatisch eine IP-Adresse zugeordnet. - Seite 86 Befinden sich die gesuchte IP-Adresse und die IP-Adresse des PC nicht in demselben Netzwerk, kann der Benutzer die IP-Adresse, die Subnet mask und andere Parameter der IP-Kamera unter Verwendung der Software “Device Config. Tool” ändern. Anfangs das Gerät auswählen, um die IP-Adresse zu ändern und anschließend die neue IP-Adresse, die Subnet mask, das Gateway und Username/Password eingeben.
- Seite 87 • Warten auf den Download des Web Plugins, nach Download die Installation bestätigen. • Auswahl “Install” und warten bis die Installation abgeschlossen ist. 4. Nach abgeschlossener Installation den Internet Explorer schließen und den Internet Explorer erneut öffnen. Die IP-Adresse der Kamera in die Adressleiste des Internet Explorers eingeben, es erscheint nun wie unten abgebildet die Anmeldemaske der IP-Kamera.
- Seite 88 5. Nun “Login” auswählen, um in die LIVE-Ansicht zu gelangen. 6. Die Tasten oben links betätigen, um den Videofluss auszuwählen (Mainstream, Substream oder Mobile Stream). DS1099-044E...
-
Seite 89: Ptz-Steuerung
PTZ-STEUERUNG (PTZ-Steuerung) durch Auswahl des Symbols erscheint das folgende Fenster:Auf den Autofocus-Kameramodellen mit AF-Optik liegt die folgende PTZ-Schnittstelle vor... - Seite 90 Es können 8 unterschiedliche Winkel auf der Kreissteuerung ausgewählt werden: • PTZ Speed: 0 – 10 gibt die unterschiedlichen PTZ- Geschwindigkeiten an. • ZOOM verringert oder erhöht den ZOOM. • FOCUS verringert oder erhöht den FOCUS. • Restore gibt erneut die werkseitigen Werte ein. Auf den Autofocus-Kameramodellen mit DF-Optik liegt die folgende PTZ- Schnittstelle vor: DS1099-044E...
- Seite 91 Stellt den Zoom manuell ein (+ erhöht / - verringert) Step/-/+ Step: definiert die Ausführungsgeschwindigkeit des Zoom Zoom Stellt die Scharfeinstellung manuell ein (+ erhöht / - verringert) Step/-/+ Focus Step: definiert die Ausführungsgeschwindigkeit der Scharfeinstellung Diese Funktion gestattet die persönliche Auslegung des Scharfeinstellungsmodus der Kamera.
-
Seite 92: Alarm Bewegungserkennung
Führt die Scharfeinstellung automatisch aus AutoFocus Wiederherstellung der werkseitigen Werte der PTZ-Sch- Restore nittstelle (einschließlich Scharfeinstellung) Aktualisiert die Parameter der PTZ-Schnittstelle mit den erfolgten Parameteränderungen (einschließlich der Refresh Scharfeinstellung) ALARM BEWEGUNGSERKENNUNG Die Kamera ermöglicht es bei Bewegungserkennung Alarme zu generieren. Diese Funktion kann in den Ferneinstellungen unter Alarm→Bewegung aktiviert und konfiguriert werden. -
Seite 93: Funktion Abschreckung (Nur Für Kamera 1099/208)
Folgende Konfigurationsparameter stehen zur Verfügung: • Freigabe: Erlaubt die Freigabe der Erfassung mit PIR Sensor • Sensibilität: Bestimmt die Sensibilität der Alarmerfassung • Nachaufzeichnung: Bestimmt die Zeit in Sekunden der Aufzeichnung • Sende E-Mail: Freigabe des E-Mailversands im Alarmfall • Abschreckung: Freigabe der Aktionen zur Abschreckung im Alarmfall •... -
Seite 94: Alarmton
ALARMTON Die Kamera ist mit einem Mikrofon ausgestattet, welches einen Alarm generiert wenn Geräusche wahr genommen werden. Diese Funktion kann in den Ferneinstellungen unter Alarm→Erfassung Geräusche aktiviert und konfiguriert werden. Folgende Konfigurationsparameter stehen zur Verfügung: • Freigabe: Gestattet die Freigabe der Geräuscherkennung •... -
Seite 95: Software Für Mobile Geräte
Tablet) Plattformen verwendet. Der Beschreibung der Mobile Client Software folgen. SMARTPHONE-GERÄTE Mobile Software Urmet IUVS plus URMET iUVS plus ist eine CCTV-Applikation für iOS und Android, Smartphone, Pad und Tablet, die mit allen URMET-Geräten, d.h. sowohl des Typs IPCam (Codec H265) als auch DVR/NVR/HVR (alle Codecs) kompatibel ist. -
Seite 96: Hauptfunktionen
WICHTIGER HINWEIS Für mehr Details zur Nutzung der App und Beschreibung der Merkmale, informieren Sie sich in der der Bedienungsanleitung der IP-Kamera oder nutzen Sie den Online Support in der Urmet iUVS plus. KORREKTE ENTSORGUNG VON ALTGERÄTEN (Elektroschrott) Diese Kennzeichnung auf dem Produkt, den Zubehörteilen oder der Dokumentation weist darauf hin, dass das Produkt und die elektronischen Zubehörteile wie z. - Seite 97 Die aktualisierte Version dieser Schnellanleitung, das vollständige Handbuch, die Software und die Firmware der Geräte können unter www.urmet.com heruntergeladen werden. Öffnen Sie die Produktseite, indem Sie den folgenden QR-Code mit Ihrem Smartphone scannen und dann den Abschnitt DOCUMENTATION AND RESOURCES auswählen.
- Seite 98 DS1099-044E...