Herunterladen Inhalt Inhalt Diese Seite drucken

Werbung

Verfügbare Sprachen
  • DE

Verfügbare Sprachen

  • DEUTSCH, seite 23
07
ELPLL
07
ELPLM
06
ELPLM
04
ELPLS
04
ELPLW
04
ELPLR
2
9
16
23
30
37
44
51

Werbung

Inhaltsverzeichnis
loading

Inhaltszusammenfassung für Epson ELPLL07

  • Seite 1 ELPLL ELPLM ELPLM ELPLS ELPLW ELPLR...
  • Seite 2 同梱品一覧 下記のチェックリストをご覧になり、同梱品を確認してください。万一、不足や不良があ りましたら、お手数ですがお買い求めいただいた販売店までご連絡ください。 Y レンズユニット(レンズカバー付き) Y 取扱説明書(本書) 安全にお使いいただくために お買い上げいただきまして、ありがとうございます。本ユニットを安全に正しくお使いい ただくために、本書をよくお読みください。不明な点はいつでも解決できるように、その 後はすぐに見られる場所に大切に保存してください。 本書および製品には、製品を安全に正しくお使いいただき、お客様や他の人への危害や財 産への損害を未然に防止するために、絵表示が使われています。その表示と意味は次のと おりです。内容をよくご理解いただいた上で本文をお読みください。 この表示を無視して誤った取り扱いをすると、人が死亡または重 傷を負う可能性が想定される内容を示しています。 この表示を無視して誤った取り扱いをすると、人が傷害を負う可 能性が想定される内容および物的損害のみの発生が想定される内 容を示しています。 v 本製品をプロジェクターに着脱する際は、事前にプロジェクターから電源ケーブルを 外してください。 電源ケーブルを接続したままの状態で着脱を行うと感電の原因となります。 v 本製品をプロジェクターに装着する際は確実に装着し、その後で本製品およびフロン トカバーが外れないことを確認してください。 万一、不完全な状態で装着していると本製品およびフロントカバーが落下し事故やけ がの原因となります。 プロジェクターに本製品を装着する際は指を挟まないでください。けがの原因となりま す。...
  • Seite 3 取り扱い・保管上のご注意 故障や誤動作、破損の原因となりますので、次の内容を守ってお使いください。 v高温・多湿になるところに、放置しないでください。特に窓を閉め切った自動車の中や 直射日光が当たる場所、熱器具のそばなど、異常に温度が高くなる場所に長時間放置す ると故障や変形の原因となります。 v分解や改造をしないでください。 vプロジェクターの動作・保存温度を守って使用・保管してください。 v水に濡らさないでください。 v落としたり、衝撃を加えたりしないでください。本製品を置く際は、平らな安定した場 所に置いてください。 vレンズユニットのコネクター部分は触らないでください。 レンズユニットの取り付けと取り外し プロジェクターにレンズユニットを取り付けたり、取り外したりする作業は、プロジェク ターを平らな安定した場所に置いて行ってください。 プロジェクターが天吊り設置されているときは、天吊り金具からプロジェクターを取り外 してから作業をしてください。 取り付け方 お使いのレンズによってはイラストと形状が異なることがありますが、やり方はすべて同 じです。 あらかじめ、# 2 の + ドライバーをご用意ください。 注意 vプロジェクターのレンズ装着部を上に向けた状態でレンズユニットを装着しないでくだ さい。ホコリやゴミが入る原因となります。 vレンズ部分に手や指が触れないように作業してください。レンズ面に指紋や皮脂が付く と投写品質が劣化します。 vレンズシフトを行っているときは、事前にシフト位置を中央に合わせてからレンズユ ニットを交換してください。...
  • Seite 4 操作 インターフェイスカバーを取り外します。 固定ネジをゆるめます。 開閉スイッチを押し上げたままカバーを まっすぐに引き抜きます。 フロントカバーを取り外します。 固定ネジを 固定ネジ 2 本を ゆるめます。 ゆるめます。 カバーをまっすぐに引き抜きます。 レンズなしモデルの場合は、左図をご覧になりプ ロジェクターのレンズ装着部からカバーを外しま す。 取り外したカバーは保管願います。 レンズ付きモデルの場合は、プロジェクターのレ ンズ装着部から標準ズームレンズを外します。 標準ズームレンズの取り外しは「取り外し方」をご 覧ください。 sp.6...
  • Seite 5 レンズユニットの後ろ側のレンズカバーを外しま す。 レンズユニットを単体で保管・移動するときはレ ンズカバーが必要となります。取り外したカバー は保管願います。 白い丸印 レンズユニットの白い丸印を真上に向けた状態で レンズ装着部にまっすぐ挿入します。 レンズユニットをしっかり支えた状態でロックレ バーを時計回りに動かしてロックします。ロック 後は、レンズユニットが外れないことを確認して ください。 フロントカバーを取り付けます。取り付け後は、 カバーが外れないことを確認してください。 固定ネジを 固定ネジ 2 本を 締めます。 締めます。 カバーをガイドに 沿って装着します。...
  • Seite 6 インターフェイスカバーを取り付けます。 固定ネジを締めます。 カバーをガイドに沿って装着します。 注意 vリアプロ用ワイドレンズ(ELPLR04)は固定焦点のためズーム調整機能はありません。 プロジェクターの操作パネルで [Lens] ボタンやリモコンの [ ズーム ] ボタンを押しても 機能しません。 vリアプロ用ワイドレンズ(ELPLR04)はレンズシフトに対応していません。必ず、プ ロジェクターのレンズシフトを上下、左右とも中央位置に設定した状態でお使いくださ い。 取り外し方 注意 vレンズユニットを取り付けた後は、必要なとき以外は取り外さないでください。プロ ジェクター内部にホコリやゴミが入り込むと投写品質の劣化や故障の原因となります。 vレンズシフトを行っているときは、事前にシフト位置を中央に合わせてからレンズユ ニットを交換してください。...
  • Seite 7 操作 インターフェイスカバーを取り外します。 固定ネジをゆるめます。 開閉スイッチを押し上げたままカバーを まっすぐに引き抜きます。 フロントカバーを取り外します。 固定ネジを 固定ネジ 2 本を ゆるめます。 ゆるめます。 カバーをまっすぐに引き抜きます。 レンズユニットロックレバーをつまんだまま、反 時計回りに回します。 レンズユニットが外れますので、まっすぐに引き 抜きます。...
  • Seite 8 スクリ−ンサイズと投写距離 58 ページの表を参考にして、スクリーンに映像が最適な大きさで映るように設置してく ださい。それぞれの値は目安です。 仕様一覧 ELPLR04 ELPLW04 ELPLS04 ELPLM06 ELPLM07 ELPLL07 焦点距離 27.32 ∼ 36.00 ∼ 55.43 ∼ 80.59 ∼ 118.98 ∼ 16.15mm 37.04mm 57.35mm 83.3mm 121.1mm 165.39mm ズーム比 1 ∼ 1.37 1 ∼ 1.61 1 ∼ 1.5 1 ∼ 1.5 1 ∼...
  • Seite 9: Safety Instructions

    Included Items List Check the following list to confirm that you have all of the supplied items. If by any chance there is anything missing or damaged, please contact your dealer. Y Lens unit (with lens cover) Y User's Guide (this guide) Safety Instructions Thank you very much for purchasing this product.
  • Seite 10 Handling and Storing the Lens Unit Pay close attention to the following contents when handling and storing the lens unit. vDo not store in locations with high temperatures or high humidity. It may in particular be damaged or deformed by leaving it for extended periods in locations with unusually high temperatures such as in direct sunlight or next to a heater.
  • Seite 11 Procedure Remove the interface cover. Loosen the fixing screw. While pulling up the open-close switch, pull the interface cover straight out. Remove the front cover. Loosen the Loosen the two fixing screw. fixing screws. Pull the cover straight out. Remove the cover on the lens mount as shown in the illustration if the projector does not have a lens.
  • Seite 12 Remove the lens cover from the rear end of the lens unit. Use the cover when storing or transporting the lens unit on its own. Keep the cover for future use. White circle Insert the lens unit straight into the lens insertion section with the white circle on the lens on top.
  • Seite 13 Replace the interface cover. Tighten the fixing screw. Install the cover along the guide. Caution vBecause the wide lens for rear projection (ELPLR04) has a fixed focus, there is no zoom adjustment function. The [Lens] button on the control panel and [Zoom] button on the remote control do not adjust the zoom.
  • Seite 14 Procedure Remove the interface cover. Loosen the fixing screw. While pulling up the open-close switch, pull the interface cover straight out. Remove the front cover. Loosen the Loosen the two fixing screw. fixing screws. Pull the cover straight out. Pinch the lock lever of the lens unit and turn it counterclockwise.
  • Seite 15: Specifications

    See the table on page 58 to choose the best position for your projector. The values are only a guide. Specifications ELPLR04 ELPLW04 ELPLS04 ELPLM06 ELPLM07 ELPLL07 27.32 to 36.00 to 55.43 to 80.59 to 118.98 to Focusing Length 16.15 mm 37.04 mm...
  • Seite 16: Consignes De Sécurité

    Liste des élément fournis Vérifiez, à l'aide de la liste suivante, que vous disposez bien de tous les éléments fournis. Si un élément s'avérait manquant ou endommagé, contactez votre revendeur. Y Unité d'objectif (avec couvercle d'objectif) Y Guide de l’utilisateur (ce guide) Consignes de sécurité...
  • Seite 17 Manipulation et stockage de l'unité d'objectif Manipulez et rangez l'objectif en tenant compte des points suivants. vNe stockez pas l'unité dans un local exposé à de hautes températures ou un taux d'humidité élevé. En particulier, il peut être endommagé ou déformé s'il est exposé longtemps à...
  • Seite 18 Procédure Retirez le capot d'interface. Desserrez la vis de fixation. Tout en soulevant le loquet d'ouverture-fermeture, tirez tout droit le capot de l'interface. Remove the front cover. Desserrez la Desserrez les deux vis de fixation. vis de fixation. Retirez le capot. Retirez le couvercle de la monture d'objectif comme indiqué...
  • Seite 19 Retirez le couvercle d'objectif de l'arrière de l'unité d'objectif. Utilisez ce couvercle pour entreposer ou transporter l'unité d'objectif séparément. Conservez le couvercle pour un usage futur. Rond blanc Insérez l'objectif dans la section d'insertion, en veillant à ce que le rond blanc de l'objectif se trouve en haut.
  • Seite 20 Replacez le capot d'interface. Serrez la vis de fixation. Installez le capot le long du guide. Mise en garde vComme l'objectif grand angle pour rétroprojection (ELPLR04) possède une mise au point fixe, il ne comporte pas de fonction d'ajustement du zoom. La touche [Lens] du panneau de commande et la touche [Zoom] de la télécommande n'ajustent pas le zoom.
  • Seite 21 Procédure Retirez le capot d'interface. Desserrez la vis de fixation. Tout en soulevant le loquet d'ouverture-fermeture, tirez tout droit le capot de l'interface. Remove the front cover. Desserrez la Desserrez les deux vis de fixation. vis de fixation. Retirez le capot. Pincez le levier de verrouillage de l'objectif et tournez-le dans le sens inverse des aiguilles d'une montre.
  • Seite 22: Caractéristiques Techniques

    Reportez-vous au tableau de la page 58 pour choisir l’emplacement idéal pour le projecteur. Ces valeurs sont données à titre d’information. Caractéristiques techniques ELPLR04 ELPLW04 ELPLS04 ELPLM06 ELPLM07 ELPLL07 Longueur de mise au 27,32 à 36,00 à 55,43 à 80,59 à 118,98 à 16,15 mm...
  • Seite 23: Liste Mitgelieferter Teile

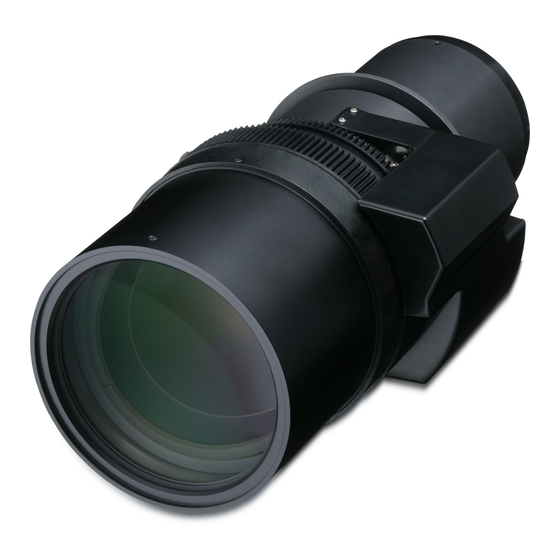
    Liste mitgelieferter Teile Überprüfen Sie die folgende Liste, um sich zu vergewissern, dass alle Teile mitgeliefert wurden. Wenden Sie sich bitte an Ihren Händler, falls etwas fehlt oder beschädigt ist. Y Objektiv (mit Objektivabdeckung) Y Bedienungsanleitung (dieses Handbuch) Sicherheitsanweisungen Wir bedanken uns bei Ihnen für den Kauf dieses Produkts. Lesen Sie diese Anleitung sorgfältig durch, damit Sie das Gerät ordnungsgemäß...
  • Seite 24: Handhabung Und Aufbewahrung Des Objektivs

    Handhabung und Aufbewahrung des Objektivs Beachten Sie bitte besonders die folgenden Hinweise bei Umgang mit und bei der Lagerung des Objektivs. vNicht an Orten aufbewahren, an denen hohe Temperaturen oder hohe Luftfeuchtigkeit herrschen. Vor allem könnte es beschädigt werden oder sich verformen, wenn es längere Zeit hohen Temperaturen ausgesetzt ist, z.
  • Seite 25 Vorgehen Schnittstellenabdeckung abnehmen. Lösen Sie die Befestigungsschraube. Halten Sie den Öffnen/Schließen-Schalter gezogen und ziehen Sie die Schnittstellenabdeckung gerade heraus. Frontabdeckung abnehmen. Lösen Sie die Lösen Sie die Befestigungs- Befestigungsschraube. schraube. Ziehen Sie die Abdeckung gerade heraus. Nehmen Sie die Abdeckung an der Objektivfassung ab, wie in der Abbildung gezeigt, wenn der Projektor kein Objektiv hat.
  • Seite 26 Nehmen Sie die Abdeckung vom hinteren Ende des Objektivs ab. Verwenden Sie die Abdeckung, wenn Sie das Objektiv aufbewahren oder getrennt transportieren. Bewahren Sie die Abdeckung zur zukünftigen Verwendung auf. Weißer Kreis Halten Sie das Objektiv beim Ansetzen an das Gehäuse so, dass der weiße Kreis oben ist.
  • Seite 27 Die Schnittstellenabdeckung ersetzen. Ziehen Sie die Befestigungsschrauben fest. Die Abdeckung entlang der Führung einbauen. Gefahr vDa das Weitwinkelobjektiv für Rück-Projektion (ELPLR04) einen Festfokus besitzt, gibt es keine Zoomfunktion. Mit der [Lens]-Taste auf dem Bedienungsfeld des Projektors und der [Zoom]-Taste auf der Fernbedienung kann das Zoom nicht eingestellt werden. vMit dem Weitwinkelobjektiv für Rück-Projektion (ELPLR04) ist kein Objektivversatz möglich.
  • Seite 28 Vorgehen Schnittstellenabdeckung abnehmen. Lösen Sie die Befestigungsschraube. Halten Sie den Öffnen/Schließen-Schalter gezogen und ziehen Sie die Schnittstellenabdeckung gerade heraus. Frontabdeckung abnehmen. Lösen Sie die Lösen Sie die Befestigungs- Befestigungsschraube. schraube. Ziehen Sie die Abdeckung gerade heraus. Drücken Sie den Verriegelungshebel der Objektiveinheit und drehen Sie ihn gegen den Uhrzeigersinn.
  • Seite 29: Leinwandgröße Und Projektionsabstand

    Wählen Sie die optimale Position für Ihren Projektor anhand der Tabelle auf Seite 58 aus. Die Angaben sind lediglich Orientierungswerte. Technische Daten ELPLR04 ELPLW04 ELPLS04 ELPLM06 ELPLM07 ELPLL07 27,32 bis 36,00 bis 55,43 bis 80,59 bis 118,98 bis Brennweite 16,15 mm...
  • Seite 30: Elenco Dei Componenti In Dotazione

    Elenco dei componenti in dotazione Controllare l'elenco seguente per confermare di disporre di tutti i componenti in dotazione. In caso di componenti mancanti o danneggiati, contattare il rivenditore di zona. Y Unità obiettivo (con copriobiettivo) Y Guida utente (questa guida) Istruzioni sulla sicurezza Grazie per aver acquistato questo prodotto.
  • Seite 31 Uso e immagazzinamento dell'unità obiettivo Prestare particolare attenzione agli argomenti seguenti quando si maneggia e si ripone l’unità obiettivo. vNon riporre l'unità in luoghi soggetti a temperature elevate o ad un alto tasso di umidità. In particolare potrebbe essere danneggiata o deformata se lasciata per periodi di tempo prolungati in luoghi eccezionalmente caldi, (sotto la luce diretta del sole o accanto a un termosifone).
  • Seite 32 Procedura Rimuovere il coperchio dell'interfaccia. Allentare la vite di fissaggio. Mentre si solleva il selettore di apertura/chiusura, estrarre il coperchio dell'interfaccia. Rimuovere il coperchio anteriore. Allentare la vite Allentare le due di fissaggio. viti di fissaggio. Estrarre il coperchio. Rimuovere il coperchio sulla ghiera dell’obiettivo come mostrato nell’illustrazione se il proiettore non è...
  • Seite 33 Rimuovere il copriobiettivo dall'estremità posteriore dell'unità obiettivo. Utilizzare il copriobiettivo durante l'immagazzinamento o il trasporto della singola unità obiettivo. Conservare il copriobiettivo per un eventuale utilizzo futuro. Anello bianco Inserire l'unità obiettivo nella sezione di inserimento dell'obiettivo con il cerchio bianco sull'obiettivo verso l'alto.
  • Seite 34 Riposizionare il coperchio dell'interfaccia. Serrare le viti di fissaggio. Installare il coperchio lungo la guida. Precauzione vDato che il grandangolo per la retroproiezione (ELPLR04) presenta una messa a fuoco fissa, la funzione di regolazione dello zoom non è disponibile. Il pulsante [Lens] sul pannello di controllo e il pulsante [Zoom] sul telecomando non regolano lo zoom.
  • Seite 35 Procedura Rimuovere il coperchio dell'interfaccia. Allentare la vite di fissaggio. Mentre si solleva il selettore di apertura/chiusura, estrarre il coperchio dell'interfaccia. Rimuovere il coperchio anteriore. Allentare la vite Allentare le due di fissaggio. viti di fissaggio. Estrarre il coperchio. Afferrare la leva di bloccaggio dell'unità obiettivo e ruotarla in senso antiorario.
  • Seite 36 La tabella a pagina 58 fornisce informazioni per stabilire quale sia la posizione migliore per il proiettore. I valori sono indicativi. Specifiche ELPLR04 ELPLW04 ELPLS04 ELPLM06 ELPLM07 ELPLL07 Lunghezza di messa a Da 27,32 a Da 36,00 a Da 55,43 a Da 80,59 a Da 118,98 a 16,15 mm...
  • Seite 37: Instrucciones De Seguridad

    Lista de elementos incluidos Compruebe la siguiente lista para confirmar que dispone de todos los elementos suministrados. Si faltara alguno de los elementos, o si estuvieran dañados, póngase en contacto con su distribuidor. Y Objetivo (con tapa) Y Manual de usuario (este manual) Instrucciones de seguridad Muchas gracias por adquirir este producto.
  • Seite 38 Manejar y almacenar el objetivo Preste atención a los aspectos siguientes cuando maneje y guarde el objetivo. vNo lo almacene en lugares con temperaturas o humedad elevadas. En concreto, podría dañar o deformarse si lo dejase durante mucho tiempo en lugares con temperaturas anormalmente elevadas, como bajo la luz directa del sol o cerca de un aparato de calefacción.
  • Seite 39 Procedimiento Quite la cubierta de interfaz. Afloje el tornillo de fijación. Manteniendo hacia arriba el interruptor de apertura-cierre, tire de la cubierta de interfaz directamente hacia fuera. Quite la cubierta de frontal. Afloje el tornillo Afloje los dos de fijación. tornillos de fijación.
  • Seite 40 Retire la tapa del extremo posterior del objetivo. Utilice la tapa cuando almacene o transporte solamente el objetivo. Conserve la cubierta para utilizarla en el futuro. Círculo blanco Inserte directamente la unidad del objetivo en la sección de inserción del objetivo con el círculo blanco del objetivo en la parte superior.
  • Seite 41 Vuelva a colocar la cubierta de interfaz. Apriete los tornillos de fijación. Instale la cubierta a lo largo de la guía. Precaución vEl objetivo gran angular para la proyección posterior (ELPLR04) tiene un enfoque fijo, por lo que no dispone de función de ajuste del zoom. El botón [Lens] del panel de control y el botón [Zoom] del control remoto no ajustan el zoom.
  • Seite 42 Procedimiento Quite la cubierta de interfaz. Afloje el tornillo de fijación. Manteniendo hacia arriba el interruptor de apertura-cierre, tire de la cubierta de interfaz directamente hacia fuera. Quite la cubierta de frontal. Afloje el tornillo Afloje los dos de fijación. tornillos de fijación.
  • Seite 43: Especificaciones

    Consulte la tabla de la página 58 para seleccionar la mejor posición para el proyector. Los valores son orientativos. Especificaciones ELPLR04 ELPLW04 ELPLS04 ELPLM06 ELPLM07 ELPLL07 De 27,32 a De 36,00 a De 55,43 a De 80,59 a De 118,98 a Longitud de enfoque 16,15 mm...
  • Seite 44 随附项目列表 请检查以下列表以确认您具有所有随附项目。 万一有任何项目丢失或损坏,请与经销商联 系。 Y 镜头单元 (带镜头盖) Y 使用说明书 (即本说明书) 安全使用须知 非常感谢您购买本产品。请认真阅读本文档以安全、正确地使用本镜头单元。为了能够快速 解决任何不明白的问题,请将本说明书放在容易取阅的地方。 本说明书内和产品上都使用了符号,指出可能对用户或他人造成的伤害以及财产受损的风 险,以便您能够安全、正确地使用本产品。指示及其含义如下。请确保在阅读本说明书之前 正确理解这些指示。 此符号指示一些信息,若忽视这些信息,则可能由于错误处理而导 警告 致死亡或人身伤害。 此符号指示一些信息,若忽视这些信息,则可能由于错误操作而导 小心 致人身伤害或物品损坏。 警告 v 连接或拆卸本产品之前,请断开投影机的电源线。 在连接电源线的情况下连接或拆卸本产品可能触电。 v 将镜头单元连接到投影机上后,确保镜头单元与前盖均安装牢固,且不会摔落。 如果这些组件连接不正确,就可能掉落下来,从而造成严重人身伤害,并可能损坏投影 机。 小心 将本产品连接到投影机上时,请小心不要夹着手指。不然可能造成人身伤害。...
  • Seite 45 处理和存放镜头单元 处置和存放镜头单元时,请密切注意以下事项。 v请勿存放在高温或高湿的地方。将镜头单元长时间放在温度极高的地方 (例如阳光直射或 靠近加热器的地方) ,尤其会使它损坏或变形。 v请勿将本产品拆开或改装。 v请在不超过投影机存放温度的地方使用和存放本产品。 v请勿弄湿本产品。 v请勿使其掉落或遭受撞击。放下本产品时,请确保将其放在平整、稳定的表面。 v请勿触摸镜头单元的连接部。 拆卸和连接镜头单元 从投影机上拆装镜头单元时,请将投影机放在稳固的平面上。 如果投影机安装在天花板上,请提前将其从天花板上卸下。 连接 插图中的镜头形状可能依所用镜头而不同,但连接方法相同。 提前准备好 2 号十字螺丝刀。 小心 v当投影机的镜头插入部分面朝上时,请勿连接镜头单元。灰尘或污垢可能会进入投影机。 v尽量不要用手或手指接触镜头部分。如果指纹或油污留在镜头表面,投影质量会变差。 v如果已完成镜头移动,在更换镜头单元之前,请将镜头移动设定在中心。...
  • Seite 46 步骤 取下接口盖。 松开固定螺丝。 在上拉开关按钮的同时, 将接口盖平直拉出。 取下前盖。 松开固定 松开两颗固定 螺丝。 螺丝。 将前盖平直拉出。 如果投影机没有镜头,则按图中所示取下镜头座上的镜 头盖。 请妥善保存镜头盖,以备将来使用。 如果投影机有内置镜头,请将标准变焦镜头卸下。 有关如何拆卸标准变焦镜头的详细信息,请参阅 “拆 卸” 。 s 第 48 页...
  • Seite 47 从镜头单元的后端取下镜头盖。 单独存放或运送镜头单元时,请使用镜头盖。请妥善保 存镜头盖,以备将来使用。 白圈 将镜头单元直接插入镜头插入部分,使镜头上的白圈位 于顶部。 在握住镜头单元的同时,顺时针转动锁杆,直至将其锁 定。检查镜头是否能拆卸下来。 更换前盖。更换好前盖后,确保它不会掉落下来。 拧紧固定 拧紧两颗固定 螺丝。 螺丝。 沿导轨安装好盖口。...
  • Seite 48 重新盖上接口盖。 拧紧固定螺丝。 沿导轨安装好盖口。 小心 v因为用于后投影的广角镜头 (ELPLR04) 具有固定焦距,所以没有变焦调节功能。控制面板 上的 [Lens] 按钮和遥控器上的 [Zoom] 按钮无法调整变焦。 v用于后投影的广角镜头 (ELPLR04) 与镜头移动功能不兼容。请在垂直和水平镜头移动设置 为中间位置时使用该广角镜头。 拆卸 小心 v镜头单元安装后,除非必要,否则请勿拆卸。如果灰尘或污垢进入投影机,则投影质量会 变差,而且可能引起故障。 v如果已完成镜头移动,在更换镜头单元之前,请将镜头移动设定在中心。...
  • Seite 49 步骤 取下接口盖。 松开固定螺丝。 在上拉开关按钮的同时, 将接口盖平直拉出。 取下前盖。 松开固定 松开两颗固定 螺丝。 螺丝。 将前盖平直拉出。 捏住镜头单元的锁杆并逆时针转动。 将松开的镜头单元平直拉出。...
  • Seite 50 屏幕尺寸和距离 请参阅第 58 页上的表格,选择投影机的最佳位置。这些值仅作参考。 规格 ELPLR04 ELPLW04 ELPLS04 ELPLM06 ELPLM07 ELPLL07 27.32 至 36.00 至 55.43 至 80.59 至 118.98 至 聚焦长度 16.15 mm 37.04 mm 57.35 mm 83.3 mm 121.1 mm 165.39 mm 1 至 1.37 1 至 1.61 1 至...
  • Seite 51 包含的項目清單 檢查下列清單,確定你有所有隨附的項目。如發現任何項目欠缺或損壞,請與經銷商聯絡。 Y 鏡頭組件 (附有鏡頭蓋) Y 使用說明書 (本說明書) 安全使用須知 感謝購買本產品。細心閱讀本文件,以安全及正確地使用本組件。將本資訊放在容易觸及的 地方,可讓你快速解決疑難。 本說明書中和產品上都會標示符號,向用戶或其他人指出可能發生的傷害及造成財產損失的 風險,讓您安全且正確地使用產品。使用須知及其意義說明如下。務必先正確了解使用須 知,再閱讀說明書。 若忽略此符號,可能導致處理不當,造成傷亡。 警告 若忽略此符號,可能導致處理不當,造成人身傷害或財產受損。 小心 警告 v 連接或移除本產品之前,請先從投影機拔下電源線。 電源線連接時連接或移除本產品,可能會造成電擊。 v 將鏡頭裝上投影機後,請確定鏡頭與前蓋牢牢地固定,不會掉下。 若未以正確的方式安裝,鏡頭與前蓋可能掉下,導致人員受重傷或損壞投影機。 小心 連接本產品到投影機時,小心勿夾住手指。否則可能會造成損傷。...
  • Seite 52 處理及儲存鏡頭組件 使用與儲存鏡頭時,請特別注意以下事項。 v切勿將組件儲存在高溫或高濕度的位置。尤其是長時間放置於異常高溫的位置時,例如直 射陽光或暖氣機旁,可能會造成損壞或變形。 v切勿拆散或重組組件。 v在不超過投影機儲存溫度的地方使用及儲存組件。 v切勿將組件弄濕。 v切勿跌落組件或讓組件受撞擊。放下組件時,確定將組件放在平滑穩定的表面上。 v請勿碰觸鏡頭的連接部位。 移除及連接鏡頭組件 將鏡頭裝上投影機或自投影機卸下時,請將投影機放置於穩固的平坦表面上。 若投影機安裝於天花板上,請先將投影機自天花板上卸下。 連接 視使用的鏡頭而定,圖示中的形狀可能不盡相同,但方法完全相同。 請事先備妥 #2 十字螺絲起子。 小心 v投影機的鏡頭插入部分朝上時,請勿連接鏡頭組件。否則灰塵或髒汙可能會進入投影機。 v請勿以手或手指直接碰觸鏡頭部分。若鏡頭表面沾上指紋或油漬,投影品質會受影響。 v若完成鏡頭移動作業,請將鏡頭移動調整至中央位置後再裝回鏡頭組件。...
  • Seite 53 步驟 取下介面蓋。 鬆開固定螺絲。 向上拉起開啟 - 關閉開關, 同時直接拉出介面蓋。 取下前蓋。 鬆開 2 顆固定 鬆開固定 螺絲。 螺絲。 將蓋子拉出。 如投影機未安裝鏡頭,請依圖示卸下從鏡頭座取下護 蓋。 請保留護蓋,以供未來使用。 若投影機內部已安裝鏡頭,請卸下標準的變焦鏡頭。 如需卸下標準變焦鏡頭的詳細資訊,請參閱 " 移除 "。 s 第 55 頁...
  • Seite 54 移除鏡頭組件後端的鏡頭蓋。 單獨儲存或運送鏡頭組件時請使用鏡頭蓋。請保留護 蓋,以供未來使用。 白圈 將鏡頭的白環朝上,再將鏡頭組件直接插入鏡頭的插入 部位。 托緊鏡頭組件並順時針旋轉鎖桿,直到鎖緊為止。檢查 鏡頭是否有 未接合的縫隙。 重新蓋上前蓋。在裝回前蓋後,請確定前蓋不會掉落。 拴緊 2 顆固定 拴緊固定 螺絲。 螺絲。 順著導軌裝上蓋子。...
  • Seite 55 重新蓋上介面蓋。 拴緊固定螺絲。 順著導軌裝上蓋子。 小心 v由於後投影廣角鏡頭 (ELPLR04) 的焦距是固定的,因此沒有變焦調整功能。控制面板上的 [Lens] 鍵與遙控器上的 [Zoom] 鍵並非用於調整變焦。 v後投影廣角鏡頭 (ELPLR04) 與鏡頭切換不相容。當垂直與水平鏡頭移動調整至中央位置時 使用鏡頭。 移除 小心 v非必要時,請勿在安裝後卸下鏡頭。請將鏡頭移動調整至中央位置後再裝回鏡頭組件。 v若完成鏡頭移動作業,請將鏡頭移動調整至中央位置後再裝回鏡頭組件。...
  • Seite 56 步驟 取下介面蓋。 鬆開固定螺絲。 向上拉起開啟 - 關閉開關,同時直接拉出介面蓋。 將蓋子拉出。 取下前蓋。 鬆開 2 顆固定 鬆開固定 螺絲。 螺絲。 將蓋子拉出。 壓住鏡頭組件的鎖桿,依逆時針方向旋轉。 鏡頭組件鬆開後直接取下鏡頭組件。...
  • Seite 57 畫面大小和投影距離 請參閱第 58 頁的圖表,選擇投影機的最佳位置。 所列數值僅供參考。 規格 ELPLR04 ELPLW04 ELPLS04 ELPLM06 ELPLM07 ELPLL07 27.32 至 36.00 至 55.43 至 80.59 至 118.98 至 聚焦長度 16.15 mm 37.04 mm 57.35 mm 83.3 mm 121.1 mm 165.39 mm 1 至 1.37 1 至 1.61 1 至...
  • Seite 58 スクリーンサイズと投写距離 /Screen Size and Distance/Taille et distance de l’écran/Leinwandgröße und Projektionsabstand/Distanza e dimensioni dello schermo/Tamaño de la pantalla y distancia/ 投写距離 /  Projection distance/  Distance de projection/  Projektionsabstand/  Distanza di proiezione/  Distancia de proyección/   レンズ中心 /  Center of lens/  Centre de l'objectif/  Objektivmitte/  Centro dell’obiettivo/...
  • Seite 59 ELPLL07 f EB-Z8000WU/Z8450WU/Z8455WU Unit:cm ① 4:3 ② ③ ④ ⑤ 120^90 839 ∼ 1184 -19 ∼ 111 160^120 1130 ∼ 1590 -26 ∼ 148 200^150 1420 ∼ 1995 -32 ∼ 185 240^180 1710 ∼ 2401 -39 ∼ 221 300^230 2146 ∼ 3009 -48 ∼...
  • Seite 60 f EB-Z8050W/Z8350W/Z8355W Unit:cm ① 4:3 ② ③ ④ ⑤ 120^90 829 ∼ 1170 -18 ∼ 110 160^120 1116 ∼ 1571 -24 ∼ 146 200^150 1403 ∼ 1972 -30 ∼ 183 240^180 1690 ∼ 2372 -37 ∼ 219 300^230 2121 ∼ 2973 -46 ∼...
  • Seite 61 f EB-Z10000/Z10005/Z8150 Unit:cm ① 4:3 ② ③ ④ ⑤ 120^90 647 ∼ 918 -5 ∼ 97 160^120 874 ∼ 1235 -7 ∼ 129 200^150 1100 ∼ 1552 -8 ∼ 161 240^180 1326 ∼ 1868 -10 ∼ 193 300^230 1666 ∼ 2343 -13 ∼...
  • Seite 62 ELPLM07 f EB-Z8000WU/Z8450WU/Z8455WU Unit:cm ① 4:3 ② ③ ④ ⑤ 120^90 563 ∼ 864 -19 ∼ 111 160^120 759 ∼ 1160 -26 ∼ 148 200^150 955 ∼ 1456 -32 ∼ 185 240^180 1150 ∼ 1752 -39 ∼ 221 300^230 1444 ∼ 2196 -48 ∼...
  • Seite 63 f EB-Z8050W/Z8350W/Z8355W Unit:cm ① 4:3 ② ③ ④ ⑤ 120^90 554 ∼ 851 -18 ∼ 110 160^120 747 ∼ 1142 -24 ∼ 146 200^150 939 ∼ 1433 -30 ∼ 183 240^180 1132 ∼ 1724 -37 ∼ 219 300^230 1421 ∼ 2161 -46 ∼...
  • Seite 64 f EB-Z10000/Z10005/Z8150 Unit:cm ① 4:3 ② ③ ④ ⑤ 120^90 433 ∼ 670 -5 ∼ 97 160^120 585 ∼ 901 -7 ∼ 129 200^150 738 ∼ 1133 -8 ∼ 161 240^180 890 ∼ 1364 -10 ∼ 193 300^230 1118 ∼ 1711 -13 ∼...
  • Seite 65 ELPLM06 f EB-Z8000WU/Z8450WU/Z8455WU Unit:cm ① 4:3 ② ③ ④ ⑤ 120^90 387 ∼ 594 -19 ∼ 111 160^120 521 ∼ 797 -26 ∼ 148 200^150 654 ∼ 999 -32 ∼ 185 240^180 788 ∼ 1202 -39 ∼ 221 300^230 988 ∼ 1505 -48 ∼...
  • Seite 66 f EB-Z8050W/Z8350W/Z8355W Unit:cm ① 4:3 ② ③ ④ ⑤ 120^90 381 ∼ 585 -18 ∼ 110 160^120 512 ∼ 784 -24 ∼ 146 200^150 643 ∼ 983 -30 ∼ 183 240^180 775 ∼ 1183 -37 ∼ 219 300^230 972 ∼ 1482 -46 ∼...
  • Seite 67 f EB-Z10000/Z10005/Z8150 Unit:cm ① 4:3 ② ③ ④ ⑤ 120^90 299 ∼ 462 -5 ∼ 97 160^120 403 ∼ 621 -7 ∼ 129 200^150 507 ∼ 779 -8 ∼ 161 240^180 611 ∼ 937 -10 ∼ 193 300^230 767 ∼ 1175 -13 ∼...
  • Seite 68 ELPLS04 f EB-Z8000WU/Z8450WU/Z8455WU Unit:cm ① 4:3 ② ③ ④ ⑤ 120^90 251 ∼ 410 -19 ∼ 111 160^120 338 ∼ 549 -26 ∼ 148 200^150 424 ∼ 688 -32 ∼ 185 240^180 510 ∼ 828 -39 ∼ 221 300^230 640 ∼ 1036 -48 ∼...
  • Seite 69 f EB-Z8050W/Z8350W/Z8355W Unit:cm ① 4:3 ② ③ ④ ⑤ 120^90 247 ∼ 403 -18 ∼ 110 160^120 332 ∼ 540 -24 ∼ 146 200^150 417 ∼ 677 -30 ∼ 183 240^180 502 ∼ 814 -37 ∼ 219 300^230 630 ∼ 1020 -46 ∼...
  • Seite 70 f EB-Z10000/Z10005/Z8150 Unit:cm ① 4:3 ② ③ ④ ⑤ 120^90 194 ∼ 319 -5 ∼ 97 160^120 261 ∼ 428 -7 ∼ 129 200^150 329 ∼ 537 -8 ∼ 161 240^180 396 ∼ 646 -10 ∼ 193 300^230 497 ∼ 809 -13 ∼...
  • Seite 71 ELPLW04 f EB-Z8000WU/Z8450WU/Z8455WU Unit:cm ① 4:3 ② ③ ④ ⑤ 120^90 189 ∼ 260 -19 ∼ 111 160^120 254 ∼ 349 -26 ∼ 148 200^150 320 ∼ 438 -32 ∼ 185 240^180 385 ∼ 527 -39 ∼ 221 300^230 483 ∼ 660 -48 ∼...
  • Seite 72 f EB-Z8050W/Z8350W/Z8355W Unit:cm ① 4:3 ② ③ ④ ⑤ 120^90 186 ∼ 256 -18 ∼ 110 160^120 250 ∼ 343 -24 ∼ 146 200^150 314 ∼ 431 -30 ∼ 183 240^180 379 ∼ 518 -37 ∼ 219 300^230 475 ∼ 649 -46 ∼...
  • Seite 73 f EB-Z10000/Z10005/Z8150 Unit:cm ① 4:3 ② ③ ④ ⑤ 120^90 146 ∼ 201 -5 ∼ 97 160^120 197 ∼ 270 -7 ∼ 129 200^150 248 ∼ 340 -8 ∼ 161 240^180 299 ∼ 409 -10 ∼ 193 300^230 376 ∼ 513 -13 ∼...
  • Seite 74 ELPLR04 f EB-Z8000WU/Z8450WU/Z8455WU Unit:cm Unit:cm ① 4:3 ① 16:9 ② ③ ④ ⑤ ② ③ ④ ⑤ 120^90 130^75 160^120 180^100 200^150 220^120 240^180 270^150 300^230 330^190 410^300 440^250 610^460 660^370 890^670 1070^600 Unit:cm ① 16:10 ② ③ ④ ⑤ 130^81 180^110 220^130...
  • Seite 75 f EB-Z8050W/Z8350W/Z8355W Unit:cm Unit:cm ① 4:3 ① 16:9 ② ③ ④ ⑤ ② ③ ④ ⑤ 120^90 130^75 160^120 180^100 200^150 220^120 240^180 270^150 300^230 330^190 410^300 440^250 610^460 660^370 890^670 1070^600 Unit:cm ① 16:10 ② ③ ④ ⑤ 130^81 180^110 220^130 270^169...
  • Seite 76 f EB-Z10000/Z10005/Z8150 Unit:cm Unit:cm ① 4:3 ① 16:9 ② ③ ④ ⑤ ② ③ ④ ⑤ 120^90 130^75 160^120 180^100 200^150 220^120 240^180 270^150 300^230 330^190 410^300 440^250 610^460 660^370 890^670 1014^570 Unit:cm ① 16:10 ② ③ ④ ⑤ 130^81 180^110 220^130 270^169...

Diese Anleitung auch für:

Elplm07Elplm06Elpls04Elplw04Elplr04

Inhaltsverzeichnis