Herunterladen Inhalt Inhalt Diese Seite drucken
Inhaltsverzeichnis

Werbung

Verfügbare Sprachen
  • DE

Verfügbare Sprachen

  • DEUTSCH, seite 62
CD RDS RECEIVER
AUTORADIO CD RDS
SINTOLETTORE CD RDS
REPRODUCTOR DE CD CON RECEPTOR RDS
CD RDS-EMPFÄNGER
CD RDS-ONTVANGER
CD RDS ПРИЕМНИК
Owner's Manual
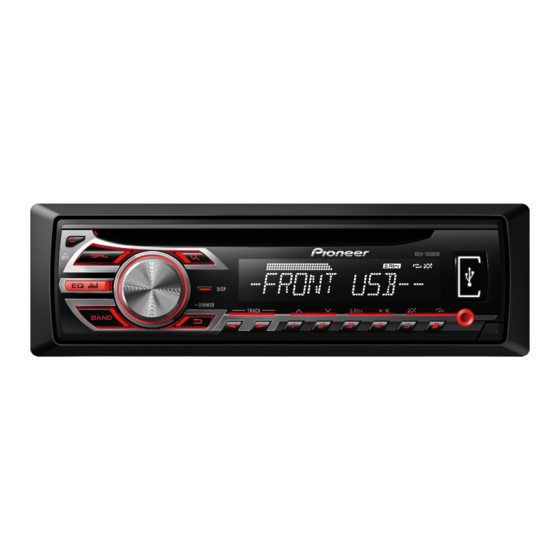
DEH-1500UB
Mode d'emploi
Manuale d'istruzioni
DEH-1500UBG
Manual de instrucciones
Bedienungsanleitung
DEH-1500UBA
Handleiding
Руководство пользователя
DEH-1500UBB

Werbung

Inhaltsverzeichnis
loading

Inhaltszusammenfassung für Pioneer DEH-1500UB

  • Seite 1 CD RDS RECEIVER AUTORADIO CD RDS SINTOLETTORE CD RDS REPRODUCTOR DE CD CON RECEPTOR RDS CD RDS-EMPFÄNGER CD RDS-ONTVANGER CD RDS ПРИЕМНИК Owner’s Manual DEH-1500UB Mode d’emploi Manuale d’istruzioni DEH-1500UBG Manual de instrucciones Bedienungsanleitung DEH-1500UBA Handleiding Руководство пользователя DEH-1500UBB...
  • Seite 2: Before You Start

    EU, in Switzerland and Norway may return their liquids. used electronic products free of charge to desig- ! The Pioneer CarStereo-Pass is for use only in nated collection facilities or to a retailer (if you Germany. purchase a similar new one).
  • Seite 3: Operating This Unit

    CAUTION Local seek tuning is on. menu will not be displayed. ! Use an optional Pioneer USB cable (CD- 50 (50 kHz)—100 (100 kHz) # If you prefer not to set up at this time, turn M.C. 2 Press M.C. to confirm the selection.
  • Seite 4: Basic Operations

    Section Operating this unit Operating this unit Notes Tuner Removing the front panel to protect your unit from Selecting a source ! You can set up the menu options from the 1 Press SRC/OFF to cycle between: theft Basic operations system menu.
  • Seite 5 Section Operating this unit Operating this unit Press one of the preset tuning buttons Searching for an RDS station by PTY information OTHERS (others) Local seek tuning lets you tune in to only those to 6/ ) to select the desired station. You can search for general types of broadcasting radio stations with sufficiently strong signals for EDUCATE (Education), DRAMA (Drama), CUL-...
  • Seite 6: Audio Adjustments

    Section Operating this unit Operating this unit Switching the display Use M.C. to select the desired file name Playing songs on a USB storage device Pausing playback (or folder name). 1 Open the USB port cover. 1 Press 4/PAUSE to pause or resume. 2 Plug in the USB storage device using a USB Selecting the desired text information Enhancing compressed audio and restoring rich...
  • Seite 7: System Menu

    Section Operating this unit Operating this unit ! SUB.W, SUB.W CTRL and HPF SETTING are Only frequencies lower than those in the selected SLA (source level adjustment) 1 Press M.C. to display the setting mode. not available when REAR/REAR is selected in range are outputted from the subwoofer.
  • Seite 8 Section Operating this unit Operating this unit Turn M.C. to change the menu option LANGUAGE (multi-language) Sound from this system is automatically muted or SP-P/O MODE (rear output and preout setting) and press to select INITIAL. attenuated when a signal from equipment with a This unit can display the text information from a The rear speaker leads output and the RCA output mute function is received.
  • Seite 9: Installation

    — Cover any disconnected cable connectors 5 Wired remote input (DEH-1500UBG, DEH- Turn M.C. to switch to YES. with insulating tape. 1500UBB and DEH-1500UB only) — Do not shorten any cables. Hard-wired remote control adapter can be Press M.C. to select.
  • Seite 10: Power Cord

    5 cm 2 Power amp (sold separately) c Yellow/black (DEH-1500UBG, DEH-1500UBB 3 Connect with RCA cables (sold separately) and DEH-1500UB only) 4 To Rear output or subwoofer output If you use an equipment with Mute function, 5 Rear speaker or subwoofer...
  • Seite 11: Additional Information

    # Make sure that the unit is installed securely in side with the notched tab down. When you contact your dealer or your nearest place. An unstable installation may cause skipping Pioneer Service Center, be sure to note the error Insert the supplied extraction keys into Symptom Cause Action or other malfunctions.
  • Seite 12 Appendix Additional information Additional information Use only conventional, fully circular discs. Do not Message Cause Action Message Cause Action Message Cause Action use shaped discs. FORMAT Sometimes Wait until the SKIPPED The connected Play an audio file ERROR-19 Communication Perform one of READ there is a delay message disap-...
  • Seite 13 CAUTION brake or accelerator pedal. files stored on a USB storage device that has nu- ! Pioneer cannot guarantee compatibility with merous folder hierarchies. all USB mass storage devices and assumes Depending on the USB storage device, the follow- no responsibility for any loss of data on ing problems may occur.
  • Seite 14: Russian Character Chart

    Appendix Additional information Additional information Example of a hierarchy Specifications Number of channels ..2 (stereo) D: C D: C D: C D: C D: C MP3 decoding format ..MPEG-1 & 2 Audio Layer 3 WMA decoding format ..Ver. 7, 7.1, 8, 9, 10, 11, 12 (2 ch : Р...
  • Seite 16: Avant De Commencer

    à des points de collecte spécifiés ou à de l’appareil. un revendeur (sous réserve d’achat d’un produit ! Le Pioneer CarStereo-Pass est utilisable seu- similaire). lement en Allemagne. Dans les pays qui ne sont pas mentionnés ci- ! Maintenez le niveau d’écoute à...
  • Seite 17 Tournez M.C. pour passer à YES. est activée. fonction AF ou TA est en service, l’incrément d’ac- ! Utilisez un câble USB Pioneer optionnel (CD- triever) # Si vous n’effectuez aucune opération dans les cord passe automatiquement à 100 kHz. Il peut U50E) pour connecter le périphérique de...
  • Seite 18 Section Utilisation de l’appareil Utilisation de l’appareil Pour terminer la configuration, tournez Syntoniseur Retrait de la face avant pour protéger l’appareil Choix d’une source M.C. pour sélectionner YES. 1 Appuyez sur SRC/OFF pour parcourir les op- contre le vol # Si vous souhaitez modifier à nouveau le réglage, Opérations de base 1 Appuyez sur la touche de retrait pour libérer la tions disponibles :...
  • Seite 19: Utilisation De L'appareil

    Section Utilisation de l’appareil Utilisation de l’appareil Enregistrement et rappel des Recherche d’une station RDS en utilisant le code L. CLASS (Musique classique légère), CLASSIC Quand la fonction AF est utilisée, la fonction de re- stations pour chaque gamme (Musique classique) cherche des stations régionales limite la sélection Vous pouvez rechercher une station qui diffuse un aux stations qui diffusent des programmes régio-...
  • Seite 20: Périphériques De Stockage Usb

    Section Utilisation de l’appareil Utilisation de l’appareil Changement de l’affichage Utilisez M.C. pour sélectionner le nom de SEEK (réglage de la touche droite/gauche) Avance ou retour rapide fichier (ou nom de dossier) souhaité. 1 Appuyez de manière prolongée sur c ou d. Vous pouvez assigner une fonction aux touches ! Lors de la lecture d’un disque d’audio Sélection des informations textuelles souhaitées...
  • Seite 21: Réglages Sonores

    Section Utilisation de l’appareil Utilisation de l’appareil ! SUB.W, SUB.W CTRL et HPF SETTING ne Opérations à l’aide de touches Réglages des fonctions 1 Appuyez sur M.C. pour afficher le mode de ré- sont pas disponibles lorsque REAR/REAR est spéciales Appuyez sur M.C.
  • Seite 22: Menu Système

    Section Utilisation de l’appareil Utilisation de l’appareil Menu système Cet appareil est équipé d’une sortie haut-parleur Quand vous ne voulez pas que les sons graves de 12H/24H (notation temporelle) d’extrêmes graves qui peut être mise en service la gamme de fréquence de la sortie haut-parleur Important 1 Appuyez sur M.C.
  • Seite 23 Section Utilisation de l’appareil Utilisation de l’appareil Mise en service ou hors service Tournez M.C. pour sélectionner la fonc- SP-P/O MODE (réglage de la sortie arrière et du tion du menu système. de l’atténuateur de luminosité préamp) Une fois sélectionnées, les fonctions du menu système suivantes peuvent être ajustées.
  • Seite 24: Installation

    8 Noir (masse du châssis) — Ne câblez jamais le câble négatif du haut-par- câble rouge à la borne qui détecte l’utilisa- 1500UBG, DEH-1500UBB et DEH-1500UB 9 Bleu/blanc tion de la clé de contact peut entraîner le dé- leur directement à la masse.
  • Seite 25: Montage Avant/Arrière Din

    Section Installation Installation e Connecteur ISO Installation Montage avant/arrière DIN Serrez deux vis de chaque côté. Dans certains véhicules, il est possible que Cet appareil peut être installé correctement soit Important le connecteur ISO soit divisé en deux. Dans en montage frontal ou en montage arrière. ! Vérifiez toutes les connexions et tous les sys- ce cas, assurez-vous de connecter les deux Utilisez des pièces disponibles dans le...
  • Seite 26: Informations Complémentaires

    Messages d’erreur tendue. peut changer Quand vous contactez votre distributeur ou le lors de la sélec- Service d’entretien agréé par Pioneer le plus tion d’un autre proche, n’oubliez pas de noter le message d’er- dossier ou reur. d’une autre plage ou pen- dant l’avance...
  • Seite 27 Annexe Informations complémentaires Informations complémentaires Lecteur de CD Périphérique de stockage USB Message Causes possi- Action correc- Message Causes possi- Action correc- Message Causes possi- Action correc- Message Causes possi- Action correc- bles tive bles tive bles tive bles tive ! Connectez un N/A USB L’appareil USB...
  • Seite 28 Annexe Informations complémentaires Informations complémentaires Conseils sur la manipulation Formats audio compressés La condensation peut perturber temporairement Fixez fermement le périphérique de stockage USB compatibles (disque, USB) le fonctionnement du lecteur. Laissez celui-ci s’a- lors de la conduite. Ne laissez pas le périphérique Disques et lecteur dapter à...
  • Seite 29 PRÉCAUTION stockage USB. riphérique de stockage USB avec de nombreuses ! Pioneer ne garantit pas la compatibilité avec La vente de ce produit comporte seulement une Pour spécifier la séquence de lecture, la mé- hiérarchies de dossiers.
  • Seite 30: Caractéristiques Techniques

    Annexe Informations complémentaires Informations complémentaires Ce produit intègre une technologie détenue par Caractéristiques techniques Disques utilisables ... Disques compacts Rapport signal/bruit ..94 dB (1 kHz) (réseau IEC-A) Microsoft Corporation, qui ne peut être utilisée Nombre de canaux ... 2 (stéréo) Généralités et distribuée que sous licence de Microsoft Format de décodage MP3...
  • Seite 32: Prima Di Iniziare

    ! Il CarStereo-Pass Pioneer può essere usato presso il rivenditore al dettaglio (se l’acquisto è solo in Germania. stato eseguito presso un rivenditore di questo ! Mantenere sempre il volume basso abba- tipo).
  • Seite 33: Funzionamento Dell'unità

    È attiva la funzione di riprodu- ATTENZIONE # Se non si effettuano operazioni per 30 secondi, il nizzazione cambia automaticamente a 100 kHz. Se ! Utilizzare un cavo USB Pioneer opzionale zione) zione cartella. menu di configurazione non sarà visualizzato.
  • Seite 34: Funzionamento Di Base

    Sezione Funzionamento dell’unità Funzionamento dell’unità Per completare le impostazioni, ruotare Sintonizzatore Rimozione del frontalino per proteggere l’unità dai Selezione di una sorgente M.C. per selezionare YES. 1 Premere SRC/OFF per passare in rassegna: furti # Se si desidera modificare nuovamente l’imposta- Funzionamento di base 1 Premere il tasto di rimozione per sganciare il TUNER (Sintonizzatore)—CD (Lettore CD)—...
  • Seite 35 Sezione Funzionamento dell’unità Funzionamento dell’unità Memorizzazione e richiamo delle Ricerca di una stazione RDS tramite le informazio- L. CLASS (Musica classica leggera), CLASSIC (Mu- La ricerca di sintonia in modo locale consente di stazioni per ciascuna banda ni PTY sica classica) sintonizzare solo le stazioni radio con segnali È...
  • Seite 36 Sezione Funzionamento dell’unità Funzionamento dell’unità CD/CD-R/CD-RW e dispositivi Note Operazioni con i pulsanti speciali Passaggio da audio compresso a CD-DA ! Le informazioni di testo TRACK INFO e di memoria USB 1 Premere BAND. FILE INFO cambieranno automaticamente. Selezione di un intervallo di ripetizione ! A seconda della versione di iTunes utilizzata Passaggio da un dispositivo di memoria per la ri- Funzionamento di base...
  • Seite 37: Regolazione Dell'audio

    Sezione Funzionamento dell’unità Funzionamento dell’unità ! SUB.W CTRL e HPF SETTING non sono di- Ruotare M.C. per modificare l’opzione di Questa unità è dotata di un’uscita subwoofer che 1 Premere M.C. per visualizzare la modalità di menu; premere per selezionare FUNCTION. sponibili se l’impostazione SUB.W è...
  • Seite 38: Menu Di Sistema

    Sezione Funzionamento dell’unità Funzionamento dell’unità Menu di sistema Se si desidera che i suoni bassi provenienti dalla PW SAVE (risparmio energetico) 1 Premere M.C. per visualizzare la modalità di gamma di frequenza dell’uscita subwoofer non Importante impostazione. Attivando questa funzione, è possibile ridurre il siano riprodotti dagli altoparlanti anteriori o poste- 2 Premere M.C.
  • Seite 39 Sezione Funzionamento dell’unità Funzionamento dell’unità Ruotare M.C. per selezionare la funzione Ruotare M.C. per selezionare la funzione Ruotare M.C. per visualizzare DEMO OFF, SP-P/O MODE (uscita posteriore e impostazione del menu iniziale. del menu di sistema. quindi premere per selezionare. pre-out) Dopo aver effettuato la selezione, è...
  • Seite 40: Installazione

    Giallo/nero (solo per i modelli DEH-1500UBG, ! Non collegare mai il cavo blu/bianco al ter- terra negativa. DEH-1500UBB e DEH-1500UB) — Altoparlanti con uscita nominale da 50 W e minale di alimentazione dell’amplificatore di .Se si utilizza un apparecchio dotato di fun- impedenza nominale compresa tra 4 W e 8 W.
  • Seite 41 Sezione Installazione Installazione — potrebbe procurare lesioni al passeggero in Note Montaggio DIN anteriore Serrare due viti su ciascun lato. ! Modifica delle impostazioni di menu iniziali caso di arresto improvviso del veicolo. Inserire la fascetta di montaggio nel cru- ! Se si surriscalda il laser a semiconduttore di questa unità.
  • Seite 42: Informazioni Supplementari

    Messaggi di errore bilmente. selezionato po- tuta. Se si contatta il rivenditore o il Centro assistenza trebbe cambiare Pioneer più vicino, accertarsi di annotare il mes- quando si sele- saggio di errore. ziona una car- tella o un brano diverso, o quan-...
  • Seite 43 Appendice Informazioni supplementari Informazioni supplementari Lettore CD Dispositivo di memoria USB Messaggio Causa Azione Messaggio Causa Azione Messaggio Causa Azione Messaggio Causa Azione ! Collegare un di- N/A USB Il dispositivo ERROR-19 Errore di comu- Eseguire una ERROR-07, Il disco è spor- Pulire il disco.
  • Seite 44 Appendice Informazioni supplementari Informazioni supplementari Linee guida per l’uso corretto Compatibilità audio La formazione di condensa potrebbe temporanea- Durante la guida fissare saldamente il dispositivo compresso (dischi, USB) mente limitare le prestazioni del lettore. In tal di memoria USB. Non lasciar cadere il dispositivo Dischi e lettori caso, lasciarlo raggiungere una temperatura più...
  • Seite 45 ATTENZIONE La fornitura di questo prodotto prevede il trasfe- quenza di registrazione sul dispositivo di memo- ! Pioneer non garantisce la compatibilità con rimento di una licenza esclusivamente per uso ria USB. tutti i dispositivi di memoria USB e non si as-...
  • Seite 46: Dati Tecnici

    Appendice Informazioni supplementari Informazioni supplementari Dati tecnici Subwoofer (mono): Sintonizzatore MW Frequenze ....50 Hz/63 Hz/80 Hz/100 Hz/ Gamma di frequenze ..da 531 kHz a 1 602 kHz 125 Hz/160 Hz/200 Hz Generali Sensibilità ......25 µV (rapporto S/R: 20 dB) Pendenza ....
  • Seite 48: Antes De Comenzar

    Las viviendas privadas en los estados miembros ! El CarStereo-Pass de Pioneer solo debe usar- de la UE, en Suiza y Noruega pueden devolver se en Alemania. gratuitamente sus productos electrónicos usa- ! Mantenga siempre el volumen lo suficiente- dos en los centros de recolección previstos o...
  • Seite 49 Pulse M.C. para cambiar a YES. Sintonización por búsqueda tonía cambia automáticamente a 100 kHz. Puede ! Utilice un cable USB Pioneer opcional (CD- # El menú de configuración desaparecerá si no se local activada. que convenga ajustar el paso de sintonía a 50 kHz U50E) para conectar el dispositivo de alma- utiliza la unidad durante 30 segundos.
  • Seite 50: Utilización De Esta Unidad

    Sección Utilización de esta unidad Utilización de esta unidad Para cerrar la configuración, gire M.C. y Sintonizador Extracción del panel delantero para proteger la Selección de una fuente seleccione YES. 1 Pulse SRC/OFF para desplazarse entre: unidad contra robo # Si prefiere volver a cambiar la configuración, gire Funcionamiento básico 1 Pulse el botón de soltar para liberar el panel TUNER (sintonizador)—CD (reproductor de...
  • Seite 51 Sección Utilización de esta unidad Utilización de esta unidad Almacenamiento y recuperación Búsqueda de una emisora RDS por información OTHERS (otros) La sintonización por búsqueda local le permite de emisoras para cada banda sintonizar solo las emisoras de radio con señales EDUCATE (educación), DRAMA (drama), CULTU- Se pueden buscar programas de tipo general, lo suficientemente intensas como para asegurar...
  • Seite 52 Sección Utilización de esta unidad Utilización de esta unidad CD/CD-R/CD-RW y dispositivos Notas Operaciones con botones especiales Cambio entre audio comprimido y CD-DA ! TRACK INFO y FILE INFO la información de de almacenamiento USB 1 Pulse BAND. texto cambiará automáticamente. Selección de un intervalo de repetición de repro- ! Según la versión de iTunes utilizada para gra- Cambio entre dispositivos de memoria de repro-...
  • Seite 53: Ajustes De Audio

    Sección Utilización de esta unidad Utilización de esta unidad Gire M.C. para cambiar la opción de FADER (ajuste de ecualizador) La sonoridad compensa las deficiencias en los in- Cuando no desee que se generen los sonidos menú y pulse para seleccionar FUNCTION. tervalos de frecuencias bajas y altas cuando se es- bajos del intervalo de frecuencias de salida de Una vez seleccionado, se puede ajustar la fun-...
  • Seite 54 Sección Utilización de esta unidad Utilización de esta unidad Pulse M.C. para acceder al menú princi- Gire M.C. para visualizar ILLUMI y púlselo La unidad puede buscar automáticamente una SP-P/O MODE (ajuste de la salida posterior y del pal. para realizar la selección. emisora diferente con el mismo programa, incluso preamplificador) durante la recuperación de emisoras presintoni-...
  • Seite 55: Instalación

    Sección Utilización de esta unidad Instalación — Nunca corte el aislamiento del cable de ali- Gire M.C. para seleccionar la función del Gire M.C. para visualizar DEMO OFF y Conexiones menú del sistema. púlselo para realizar la selección. mentación de esta unidad para compartir la Importante Una vez seleccionado, se pueden ajustar las si- corriente con otros equipos.
  • Seite 56 La posición de las patillas del conector ISO terior y del preamplificador) en la página 54. zonas que alcancen altas temperaturas, 1500UBG, DEH-1500UBB y DEH-1500UB) será diferente según el tipo de vehículo. Co- La salida de graves de esta unidad es mo-...
  • Seite 57: Montaje Delantero Din

    Sección Instalación Instalación Montaje delantero DIN Apriete los dos tornillos en cada lado. Retirada y colocación del panel delantero Puede extraer el panel delantero para proteger Inserte el manguito de montaje en el sal- la unidad contra robo. picadero. Pulse el botón de soltar, empuje el panel delan- Si realiza la instalación en un espacio poco pro- tero hacia arriba y tire de él hacia sí.
  • Seite 58: Información Adicional

    Transfiera los ar- con su concesionario o con el servicio técnico Síntoma Causa Resolución tado aparece en nes. chivos de audio al oficial de Pioneer más cercano. blanco. dispositivo de al- La pantalla No ha realizado Realice la opera- macenamiento vuelve auto- ninguna opera- ción de nuevo.
  • Seite 59 Apéndice Información adicional Información adicional Dispositivo de almacenamiento No es posible reproducir discos CD-R/RW no fina- Mensaje Causa Resolución Mensaje Causa Resolución lizados. CHECK USB El conector Compruebe que ERROR-23 El dispositivo de El dispositivo de No toque la superficie grabada de los discos. USB o el cable el conector USB o almacenamien-...
  • Seite 60 1 Cree un nombre del archivo que incluya nú- PRECAUCIÓN (32 kHz, 44,1 kHz, 48 kHz para énfasis) ! Pioneer no garantiza la compatibilidad con meros que especifiquen la secuencia de re- Jerarquía de carpetas reproducibles: hasta ocho Versiones de etiqueta ID3 compatibles: 1.0, 1.1, todos los dispositivos de almacenamiento producción (p.
  • Seite 61: Especificaciones

    Apéndice Información adicional Información adicional Para reproductores de audio portátiles USB, la por ejemplo, aplicaciones de pago por escucha Especificaciones Relación de señal a ruido ........94 dB (1 kHz) (red IEC-A) secuencia es diferente y depende del reproduc- (pay-audio) o audio bajo demanda (audio-on-de- Número de canales ..
  • Seite 62 IEC 60825-1:2007 klassifiziert ist. kaufen). tionieren, dann wenden Sie sich an Ihren Händ- In den Ländern, die hier nicht aufgeführt sind, ler oder an die nächstgelegene PIONEER- LASER KLASSE 1 wenden Sie sich hinsichtlich der zu beachten- Kundendienststelle. den Entsorgungsweise bitte an die zuständige Gemeindeverwaltung.
  • Seite 63: Bedienung Des Geräts

    USB-Speichergeräts ein optionales USB- # Bedienen Sie das Gerät nicht innerhalb von (Wieder- Die Titel- oder Ordner-Wieder- Kabel von Pioneer (CD-U50E), da direkt an 30 Sekunden, wird das Setup-Menü nicht angezeigt. holwieder- holwiedergabe ist eingeschal- diese Einheit angeschlossene Zusatzgeräte...
  • Seite 64: Grundlegende Bedienvorgänge

    Abschnitt Bedienung des Geräts Bedienung des Geräts ! Setzen Sie die Frontplatte weder direkter Son- FM STEP (UKW-Kanalraster) Entfernen der Frontplatte zum Schutz vor Dieb- Wählen einer Programmquelle nenbestrahlung noch hohen Temperaturen 1 Drücken Sie SRC/OFF, um zwischen den fol- stahl Bei der Suchlaufabstimmung wird normalerweise aus.
  • Seite 65 Abschnitt Bedienung des Geräts Bedienung des Geräts Tuner Speichern und Abrufen von Suchen nach RDS-Stationen anhand eines Pro- L. CLASS (Leichte klassische Musik), CLASSIC Radiostationen für jedes Band grammtyps (Klassische Musik) Grundlegende Bedienvorgänge Sie können nach Programmen eines allgemeinen Verwendung der Stationstasten OTHERS (Sonstiges) Typs suchen, wie die, die nachfolgend aufgelistet Wahl eines Bands (Wellenbereich)
  • Seite 66 Abschnitt Bedienung des Geräts Bedienung des Geräts CD/CD-R/CD-RW-Discs und Hinweise LOCAL (Lokal-Suchlaufabstimmung) Umschalten zwischen dem komprimierten Audio- ! Die Textinformation TRACK INFO und USB-Speichermedien format und CD-DA Mit der Lokal-Suchlaufabstimmung wird nur nach FILE INFO ändert sich automatisch. 1 Drücken Sie BAND. ! Abhängig vom Mediadateityp bzw.
  • Seite 67: Audio-Einstellungen

    Abschnitt Bedienung des Geräts Bedienung des Geräts ! SUB.W, SUB.W CTRL und HPF SETTING ste- Bedienvorgänge mit speziellen Funktionseinstellungen 1 Drücken Sie auf M.C., um den Einstellmodus hen nicht zur Verfügung, wenn in Tasten Drücken Sie auf M.C., um das Hauptmenü SP-P/O MODE die Option REAR/REAR ge- aufzurufen.
  • Seite 68 Abschnitt Bedienung des Geräts Bedienung des Geräts Systemmenü Dieses Gerät ist mit einem Subwoofer-Ausgang Wenn die im Ausgabe-Frequenzbereich des Sub- 1 Drücken Sie auf M.C., um den Einstellmodus ausgestattet, der ein- und ausgeschaltet werden woofers enthaltenen Basstöne nicht über den Wichtig aufzurufen.
  • Seite 69 Abschnitt Bedienung des Geräts Bedienung des Geräts Drehen Sie M.C., um die Grundmenü- Drücken und halten Sie SRC/OFF ge- PW SAVE (Energiesparmodus) SP-P/O MODE (Heckausgang- und Preout-Einstel- Funktion zu wählen. drückt, bis das Hauptmenü im Display er- lungen) scheint. Wenn Sie diese Funktion einschalten, reduzieren Nach der Auswahl können die folgenden Grund- Sie den Verbrauch von Batterieleistung.
  • Seite 70: Installation

    Abschnitt Bedienung des Geräts Installation — Führen Sie das gelbe Batteriekabel nicht Bei Anzeige einer Anschlüsse durch ein Loch in den Motorraum, um die unerwünschten Anzeige Wichtig Verbindung mit der Fahrzeugbatterie herzu- ! Bei der Installation des Geräts in einem Schalten Sie die unerwünschte Anzeige anhand stellen.
  • Seite 71 Automatikantennenrelais (max. 300 mA 12 V Gleichspannung). Leistungsverstärker (separat c Gelb/Schwarz (nur für DEH-1500UBG, DEH- erhältlich) 1500UBB und DEH-1500UB) Führen Sie diese Verkabelungen beim Gebrauch Wenn Sie ein Gerät mit Stummschaltfunk- eines optionalen Verstärkers durch. 1 Netzkabelzugang tion verwenden, verbinden Sie diesen Draht...
  • Seite 72: Front-/Rückmontage Nach Din

    Abschnitt Installation Installation ! Installieren Sie dieses Gerät keinesfalls an DIN-Frontmontage Ziehen Sie auf jeder Seite zwei Schrau- Ziehen Sie das Gerät aus dem Armaturen- folgenden Orten: ben fest. brett. Führen Sie den Montagerahmen in das — Orte, an denen das Gerät die Steuerung des Armaturenbrett ein.
  • Seite 73: Zusätzliche Informationen

    Vor der Kontaktaufnahme mit Ihrem Händler ändern, sobald und dann wieder FORMAT Nach dem Wie- Warten Sie bis die oder der nächstgelegenen Pioneer-Kunden- ein anderer Ord- zum CD-Player READ dergabestart ist Anzeige erlischt dienststelle sollten Sie sich die angezeigte Feh- ner oder Musik- zurück.
  • Seite 74: Handhabungsrichtlinien

    Anhang Zusätzliche Informationen Zusätzliche Informationen Handhabungsrichtlinien Meldung Ursache Abhilfemaßnah- Meldung Ursache Abhilfemaßnah- Meldung Ursache Abhilfemaßnah- Discs und Player SKIPPED Das ange- Spielen Sie eine CHECK USB Der USB-An- Stellen Sie sicher, ERROR-19 Kommunikation Führen Sie einen Verwenden Sie ausschließlich Discs, die eines der schlossene Audio-Datei ab, schluss oder...
  • Seite 75: Kompatible Komprimierte Audio-Formate (Discs, Usb- Speichermedien)

    Anhang Zusätzliche Informationen Zusätzliche Informationen USB-Speichermedium Das häufige Einlegen und Auswerfen einer Wischen Sie die Discs zum Reinigen mit einem M3u-Spielliste: Nicht kompatibel DualDisc kann zu Kratzern auf der Disc führen, weichen Tuch von der Mitte zum Rand hin ab. MP3i (MP3 interaktiv), mp3 PRO: Nicht kompati- die wiederum, wenn sie besonders ausgeprägt Falls Sie Fragen zu Ihrem USB-Speichermedium...
  • Seite 76: Reihenfolge Der Audio-Dateien

    Disc VORSICHT len, um dadurch die gewünschte Wiederga- Die Bereitstellung dieses Produkts erfolgt in Ver- ! Pioneer kann nicht die Kompatibilität mit bereihenfolge festzulegen (z. B. 001xxx.mp3 bindung mit einer Lizenz zur privaten, nicht- Abspielbare Ordnerstruktur: bis zu acht Ebenen allen USB-Speichermedien gewährleisten...
  • Seite 77: Technische Daten

    Anhang Zusätzliche Informationen Technische Daten Kompatible Discs ..... Compact Disc Signal-Rauschabstand ..94 dB (1 kHz) (IEC-A-Netz) Anzahl der Kanäle .... 2 (Stereo) Allgemein MP3-Decodiermodus ..MPEG-1 und 2 Audio Layer 3 Stromversorgung ..... 14,4 V Gleichspannung (Tole- WMA-Decodiermodus ..Vers. 7, 7.1, 8, 9, 10, 11, 12 (2- ranz 10,8 V bis 15,1 V) Kanal-Audio) Erdungssystem ....
  • Seite 78: Vóór U Begint

    Noorwegen kunnen particulieren afgedankte veroorzaken. elektronische producten gratis bij de daarvoor ! De Pioneer CarStereo-Pass wordt alleen in bestemde verzamelplaatsen inleveren. Als u een Duitsland gebruikt. soortgelijk nieuw product koopt, kunt u het afge-...
  • Seite 79: Bediening Van Het Toestel

    ! Sluit een USB-opslagapparaat via een # Als u op dit moment geen instellingen wilt lokale zenders is ingescha- 50 kHz. Pioneer USB-kabel (CD-U50E, optioneel) op maken, draait u M.C. naar NO. Indrukken om te se- keld. 1 Draai aan M.C. en selecteer de FM-afstemstap.
  • Seite 80 Hoofdstuk Bediening van het toestel Bediening van het toestel Opmerkingen Tuner Het voorpaneel tegen diefstal verwijderen Een signaalbron selecteren ! U kunt de menu-opties instellen in het sys- 1 Druk op de toets Verwijderen om het voorpa- 1 Druk op SRC/OFF om over te schakelen tus- Basisbediening teemmenu.
  • Seite 81 Hoofdstuk Bediening van het toestel Bediening van het toestel Zenders voor de verschillende RDS-zenders zoeken via PTY-informatie OTHERS (andere) Als deze functie is ingeschakeld, stemt het toestel frequentiebanden opslaan en U kunt naar bepaalde soorten uitzendingen zoe- alleen af op zenders waarvan het signaal vol- EDUCATE (educatief), DRAMA (theater), CUL- oproepen ken, zoals de uitzendingen die in het volgende ge-...
  • Seite 82 Hoofdstuk Bediening van het toestel Bediening van het toestel Cd/cd-r/cd-rw-discs en USB- Opmerkingen Bediening met speciale toetsen Overschakelen tussen gecomprimeerde audio en ! De tekstinformatie onder TRACK INFO en opslagapparaten cd-da FILE INFO wordt automatisch bijgewerkt. 1 Druk op BAND. Een herhaalbereik selecteren ! Afhankelijk van het mediabestandstype en Basisbediening...
  • Seite 83: Audio-Instellingen

    Hoofdstuk Bediening van het toestel Bediening van het toestel S.RTRV (sound retriever) BALANCE (balansinstelling) SUB.W (subwoofer aan/uit) Als u wilt dat de luidsprekers voorin of achterin geen lage tonen (uit het frequentiebereik van de Deze verbetert automatisch de weergave van ge- Dit toestel is voorzien van een in- en uitschakel- 1 Druk op M.C.
  • Seite 84: De Dimmer In- Of Uitschakelen

    Hoofdstuk Bediening van het toestel Bediening van het toestel Systeemmenu PW SAVE (energiezuinige stand) FM STEP (FM-afstemstap) 1 Druk op M.C. om de instellingenmodus weer Belangrijk te geven. Met deze functie wordt het energieverbruik van de Standaard wordt er bij automatisch afstemmen 2 Druk op M.C.
  • Seite 85 Hoofdstuk Bediening van het toestel Installatie — Verwijder nooit de isolatie van de voedingska- Systeemmenu Druk op M.C. om het hoofdmenu weer te Verbindingen geven. bel van dit toestel om andere apparaten van Belangrijk Houd SRC/OFF ingedrukt tot het toestel stroom te voorzien.
  • Seite 86 (maximaal 300 mA,   12 V gelijkstroom).   c Geel-zwart (alleen DEH-1500UBG, DEH- 1500UBB en DEH-1500UB) 1 Systeemafstandsbediening Als u apparatuur met dempingsfunctie ge- Laat voldoende Verbinden met blauw-witte kabel. 5 cm ruimte vrij bruikt, verbindt u deze draad met de draad 2 Versterker (apart verkrijgbaar) voor audiodemping op die apparatuur.
  • Seite 87: Aanvullende Informatie

    Steek de meegeleverde uittreksleutels in uw leverancier of Pioneer-servicecentrum. ander fragment de beide kanten van het toestel totdat ze op DIN-achtermontage selecteert of hun plaats klikken.
  • Seite 88 Aanhangsel Aanvullende informatie Aanvullende informatie Cd-speler USB-opslagapparaat Melding Oorzaak Actie Melding Oorzaak Actie Melding Oorzaak Actie Melding Oorzaak Actie ! Gebruik een op- N/A USB Het aangesloten ERROR-19 Communicatie- Probeer de vol- ERROR-07, De disc is vuil. Reinig de disc. FORMAT Na het begin Wacht tot het be-...
  • Seite 89: Aanwijzingen Voor Het Gebruik

    Aanhangsel Aanvullende informatie Aanvullende informatie Aanwijzingen voor het gebruik Condens en vocht kunnen de werking van de spe- Maak het USB-opslagapparaat stevig vast voordat Bemonsteringsfrequentie: 32 kHz, 44,1 kHz, 48 ler tijdelijk negatief beïnvloeden. Laat de speler in u gaat rijden. Zorg dat het niet op de grond valt Discs en de player een warmere omgeving ongeveer een uur op tem- omdat het dan onder het rem- of gaspedaal te-...
  • Seite 90: Volgorde Van Audiobestanden

    De afspeelvolgorde is gelijk aan de volgorde LET OP apparaat met een uitgebreide mappenstructuur. waarin de bestanden zijn opgenomen op het ! Pioneer garandeert geen compatibiliteit met Dit product is uitsluitend bedoeld voor niet-com- USB-opslagapparaat. alle USB-opslagapparaten en kan niet verant- mercieel privégebruik.
  • Seite 91: Technische Gegevens

    Aanhangsel Aanvullende informatie Technische gegevens Signaal-tot-ruisverhouding ........94 dB (1 kHz) (IEC-A-netwerk) Aantal kanalen ....2 (stereo) Algemeen MP3-decoderingsformaat Spanningsbron ....14,4 V gelijkstroom (10,8 tot ........MPEG-1 & 2 Audio Layer 3 15,1 V toelaatbaar) WMA-decoderingsformaat Aarding ......Negatief ........
  • Seite 92: В Случае Возникновения Неполадок

    Перед началом эксплуатации Перед началом эксплуатации Благодарим Вас за покупку этого изделия шего изделия с соблюдением обязательных ! Pioneer CarStereo-Pass предназначен для компании PIONEER. процедур по обработке, утилизации и вто- использования только в Германии. ричной переработке и, таким образом, пред- ! Всегда...
  • Seite 93 звука) тройств USB используйте USB-кабель Поверните M.C. для выбора YES. вляет 50 кГц. При включении функции AF или Pioneer (CD-U50E, приобретается отдель- Включена настройка с # Если в течение 30 секунд не выполняется ни- TA шаг настройки автоматически меняется на...
  • Seite 94: Основные Операции

    Раздел Управление данным устройством Управление данным устройством Тюнер Чтобы закончить настройку, поверни- Снятие передней панели в целях защиты от Выбор источника сигнала те M.C. и выберите YES. кражи 1 Нажимайте кнопку SRC/OFF для выбора из Основные операции # Если понадобится вновь изменить настройку, 1 Чтобы...
  • Seite 95 Раздел Управление данным устройством Управление данным устройством Сохранение и вызов из памяти Использование функций PTY BSM (запоминание лучших станций) POP MUS (поп-музыка), ROCK MUS (рок-музы- радиостанций для каждого Можно настроиться на радиостанцию с по- ка), EASY MUS (легкая музыка), OTH MUS Функция...
  • Seite 96 Раздел Управление данным устройством Управление данным устройством Переключение дисплея Выбор и воспроизведение Выбор дорожки 1 Нажмите M.C., чтобы включить или выклю- фалов/дорожек из списка 1 Нажмите кнопку c или d. чить функцию НОВОСТИ. Выбор текстовой информации Нажмите кнопку , чтобы отобразить Ускоренная...
  • Seite 97 Раздел Управление данным устройством Управление данным устройством Функции с использованием Настройка функций ! Функции SUB.W, SUB.W CTRL и 1 Для отображения установочного меню на- HPF SETTING недоступны, если в режиме специальных кнопок Нажмите M.C., чтобы открыть главное жмите M.C. SP-P/O MODE выбрано REAR/REAR. Под- меню.
  • Seite 98 Раздел Управление данным устройством Управление данным устройством Меню системы Это устройство имеет выход канала сабвуфе- Если Вы не хотите, чтобы низкочастотные 1 Для отображения установочного меню на- ра, который можно включать и выключать. звуки из диапазона частот выхода канала саб- Важно...
  • Seite 99 Раздел Управление данным устройством Управление данным устройством ! Вы также можете выбрать другую на- Поворачивайте M.C. для прокрутки Звук/уровень звукового сигнала данной систе- SP-P/O MODE (настройка выхода заднего ка- стройку регулятора освещенности, удер- пунктов меню; нажмите, чтобы выбрать мы автоматически понижается при получении нала...
  • Seite 100 Раздел Управление данным устройством Установка Соединения Нажмите M.C., чтобы открыть главное — Запрещается подключать желтый провод меню. дисплея к аккумуляторной батарее авто- Важно мобиля через сверленое отверстие в отсе- ! При установке данного устройства в авто- Поворачивайте M.C. для прокрутки ке...
  • Seite 101 антенны с электроприводом (макс. 300 мА 12 В постоянного тока). Усилитель мощности c Желтый/черный (только для DEH- (приобретается отдельно) 1500UBG, DEH-1500UBB и DEH-1500UB) Используйте данную схему подсоединения Если используется оборудование, имею- при использовании дополнительного усили- щее функцию приглушения звука, данный...
  • Seite 102 Раздел Установка Установка Переднее/заднее крепление ! Не используйте детали, не разрешенные Заднее крепление стандарта DIN Вытяните устройство из приборной производителем к использованию, по- панели автомобиля. стандарта DIN Совместите отверстия на кронштейне скольку это может стать причиной неис- Для данного изделия предусмотрена воз- и...
  • Seite 103: Устранение Неисправностей

    изменяется. няться при вы- ник сигнала, а произведения ставителю или в ближайший сервисный боре другой затем обратно и появлением центр Pioneer, обязательно запомните сооб- папки или до- на проигрыва- звука. щение об ошибке. рожки, а также тель компакт- Композиции Перенесите ау- NO AUDIO при...
  • Seite 104: Рекомендации По Обращению С Изделием

    Приложение Дополнительная информация Дополнительная информация Рекомендации по Для очистки компакт-диска протрите диск мяг- Сообщение Причина Действие Сообщение Причина Действие обращению с изделием кой тканью от центра к краю. Все файлы на Перенесите ау- Сбой связи. Выполните сле- PROTECT ERROR-19 Конденсация может временно ухудшить рабо- запоминаю- диофайлы, не...
  • Seite 105: Дополнительная Информация

    Приложение Дополнительная информация Дополнительная информация Запоминающее устройство USB Диск Частая загрузка и извлечение двойного диска Совместимая версия тегов ID3: 1.0, 1.1, 2.2, может привести к появлению царапин на 2.3, 2.4 (теги ID3 версии 2.x имеют приоритет диске. Серьезные царапины могут создать С...
  • Seite 106: Последовательность Воспроизведения Аудиофайлов

    тельности, в которой они записаны на запо- Авторское право и минающем устройстве USB. ВНИМАНИЕ Для выбора алгоритма воспроизведения ре- товарные знаки ! Pioneer не гарантирует совместимость со комендуется выполнить следующие дей- всеми устройствами USB mass storage и ствия. iTunes не несет ответственности за любую поте- 1 Присвойте...
  • Seite 107: Технические Характеристики

    Формат сигнала WAV ..Linear PCM и MS ADPCM Аудио (без компрессии) правительства Российской Федерации № Максимальная выходная мощность 720 от 16.06.97 компания Pioneer Europe ........50 Вт × 4 70 Вт × 1/2 W (для сабвуфе- NV оговаривает следующий срок службы ра) изделий, официально...
  • Seite 108 Col.Lomas de Chapultepec, Mexico, D.F. 11000 TEL: 55-9178-4270 先鋒股份有限公司 台北市內湖區瑞光路407號8樓 電話: 886-(0)2-2657-3588 先鋒電子(香港)有限公司 香港九龍長沙灣道909號5樓 電話: 852-2848-6488 ã 2012 PIONEER CORPORATION. All rights reserved. ã 2012 PIONEER CORPORATION. Tous droits de reproduction et de traduction réservés. Printed in Thailand Imprimé en Thaïlande <KOKZX> <12F00000> <QRD3130-A/N> EW...

Diese Anleitung auch für:

Deh-1500ubaDeh-1500ubbDeh-1500ubg

Inhaltsverzeichnis