Inhaltsverzeichnis
Werbung
Verfügbare Sprachen
Verfügbare Sprachen
Quicklinks
Werbung
Kapitel
Inhaltsverzeichnis

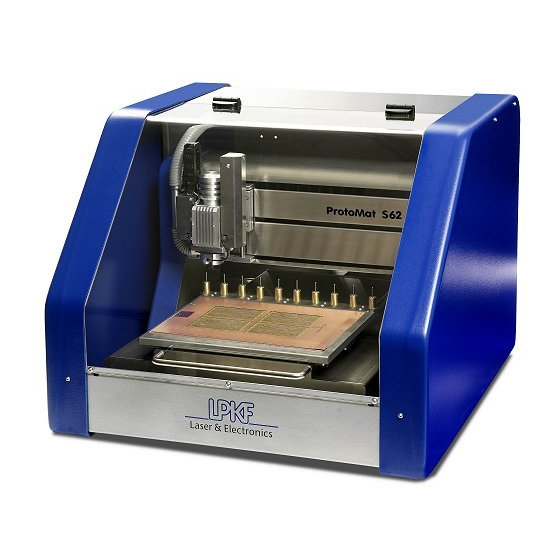
Verwandte Anleitungen für LPKF ProtoMat S42


Inhaltszusammenfassung für LPKF ProtoMat S42
- Seite 1 Vision-System installieren TechNote Artikelnummer: 120802 Version: 3.0...
- Seite 2 Dieses Dokument und der gesamte Inhalt des Dokuments als Ganzes oder in Teilen sind urheberrechtlich geschützt. Die Wiedergabe, Übersetzung oder Vervielfältigung des Inhalts als Fotokopie oder in jeglicher digitalen Form ist nur mit schriftlicher Genehmigung der Firma LPKF Laser & Electronics AG zulässig. Deutsches Originaldokument...
-
Seite 3: Inhaltsverzeichnis
2.1 Benötigte Werkzeuge ..................6 2.2 Benötigte Hilfsmittel ..................6 Vision-System montieren..................7 Federeinstellung am Bearbeitungskopf .............9 Vision-System konfigurieren ................10 Kundenservice ....................15 Anhang........................ 16 7.1 Tabellenverzeichnis ..................16 7.2 Revisionstabelle ..................16 V. 3.0 | LPKF Laser & Electronics AG 3/17... -
Seite 4: Zweck Dieser Technote
Sicherheitshinweise in der ausführlichen Dokumentation, um einen sicheren und störungsfreien Betrieb des Systems sicherzustellen. Zielgruppe Diese TechNote ist ausschließlich für die Zielgruppe Mitarbeiter und Kunden der LPKF Laser & Electronics AG vorgesehen. 4/17 LPKF Laser & Electronics AG | V. 3.0... -
Seite 5: Geltungsbereich
In der folgenden Tabelle sind die relevanten Dokumentationen aufgeführt, die für die Inhalte der TechNote von Bedeutung sind: Dokumentation Artikelnummer Bedienungsanleitung ProtoMat S42 123746 Bedienungsanleitung ProtoMat S62 121883 Bedienungsanleitung ProtoMat S100 117269 Kompendium CircuitPro PM 10055300 Tab. 2: Relevante Dokumentationen V. 3.0 | LPKF Laser & Electronics AG 5/17... -
Seite 6: Werkzeuge Und Hilfsmittel
Benötigte Werkzeuge Menge Bezeichnung Artikelnummer Abbildung Kreuzschlitz-Schraubendreher - Tab. 3: Benötigte Werkzeuge Benötigte Hilfsmittel Menge Bezeichnung Artikelnummer Abbildung CircuitPro PM – FR4-Basismaterial mit einer 115968 18 μm Kupferschicht Tab. 4: Benötigte Hilfsmittel 6/17 LPKF Laser & Electronics AG | V. 3.0... -
Seite 7: Vision-System Montieren
1. Entfernen Sie den Kühlkörper vom Bearbeitungskopf. Abb. 1: Montage der Kamera Bearbeitungskopf Kühlkörper Kamera 2. Schrauben Sie die Kamera mit den mitgelieferten Schrauben linksbündig am Bearbeitungskopf an. Abb. 2: Schrauben am Bearbeitungskopf V. 3.0 | LPKF Laser & Electronics AG 7/17... - Seite 8 7. Befestigen Sie das Beleuchtungskabel (2) an der linken Seite der Kamera. Nach der Montage der Kamera muss die Federkraft am Bearbeitungskopf passend eingestellt werden. Die Kamera ist am Bearbeitungskopf montiert. 8/17 LPKF Laser & Electronics AG | V. 3.0...
-
Seite 9: Federeinstellung Am Bearbeitungskopf
1. Lösen Sie die Federstellschraube mit einem Schraubendreher. 2. Setzen Sie die Federstellschraube entsprechend der vorhandenen Systemkonfiguration (2 bis 5) ein bis diese einrastet. 3. Ziehen Sie die Federstellschraube fest. Die Federeinstellung am Bearbeitungskopf ist angepasst. V. 3.0 | LPKF Laser & Electronics AG 9/17... -
Seite 10: Vision-System Konfigurieren
3. Aktivieren Sie die Option Kamera. 4. Folgen Sie den Aufforderungen des Konfigurationsassistenten bis zum Punkt Zusammenfassung. 5. Klicken Sie auf [Fertig], um den Konfigurationsassistenten zu beenden. Das Vision-System ist aktiviert. 10/17 LPKF Laser & Electronics AG | V. 3.0... - Seite 11 Falls der Regler Referenz für die automatische Beleuchtung nicht vorhanden ist, können Sie das Bild über die Regler Exposure und Kamerabeleuchtung anpassen. 3. Klicken Sie auf [Schließen]. Die Kamera ist konfiguriert. V. 3.0 | LPKF Laser & Electronics AG 11/17...
- Seite 12 7. Verschieben Sie die Kamera (1) nach oben bzw. unten bis das Kamerabild auf dem Monitor scharf angezeigt wird. 8. Drehen Sie ggf. die Kamera bis das Kamerabild korrekt ausgerichtet ist. 9. Schrauben Sie die Klemmschrauben (3) fest. Die Bildschärfe ist eingestellt. 12/17 LPKF Laser & Electronics AG | V. 3.0...
- Seite 13 Folgendes Dialogfenster erscheint: Abb. 9: Offset bestimmen 2. Legen Sie Basismaterial auf den Bearbeitungstisch. 3. Klicken Sie auf [X/Y-Offset bestimmen]. 4. Folgen Sie den Anweisungen des Dialogfensters Offset Kamera zu Fräskopf ermitteln. V. 3.0 | LPKF Laser & Electronics AG 13/17...
- Seite 14 Bohrung. Folgendes Dialogfenster erscheint: Abb. 11: Offset wurde gemessen 6. Klicken Sie auf [OK]. 7. Klicken Sie auf [Speichern]. Die Software synchronisiert die Ergebnisse mit dem System. Der Kamera-Offset ist eingestellt. 14/17 LPKF Laser & Electronics AG | V. 3.0...
-
Seite 15: Kundenservice
Für technische Auskünfte steht Ihnen unser LPKF Service zur Verfügung. Weitere Informationen finden Sie auf unserer Website: http://www.lpkf.de Unterstützung per Kontaktformular oder E-Mail Wenn Sie eine E-Mail an den LPKF Service senden möchten, füllen Sie das Kontaktformular auf unserer Website aus: http://www.lpkf.de/support/ansprechpartner.htm Oder kontaktieren Sie uns per E-Mail: support.rp@lpkf.com... -
Seite 16: Anhang
Tab. 3: Benötigte Werkzeuge ..................6 Tab. 4: Benötigte Hilfsmittel ..................6 Tab. 5: Revisionstabelle ..................16 Revisionstabelle Version Datum Änderung Geändert von 03.02.2020 Überarbeitung für CircuitPro PM 2.7 K. Schwab Tab. 5: Revisionstabelle 16/17 LPKF Laser & Electronics AG | V. 3.0... - Seite 18 Installing the vision system TechNote Order code: 120802 Version: 3.0...
- Seite 19 This document and the entire contents of the document as a whole or in parts are protected by copyright. Reproduction, translation or duplication of the contents as a photocopy or in any digital form is only permitted with written permission from LPKF Laser & Electronics Translation of the German original document...
- Seite 20 Spring setting on the processing head ..............9 Configuring the vision system ................. 10 Customer service ....................15 Appendix ......................16 7.1 List of tables ....................16 7.2 Revision table ..................... 16 V. 3.0 | LPKF Laser & Electronics AG 3/18...
-
Seite 21: Purpose Of This Technote
Target group This TechNote is intended exclusively for the target group staff and customers LPKF Laser & Electronics AG. 4/18 LPKF Laser & Electronics AG | V. 3.0... -
Seite 22: Scope
The following table lists the relevant documentations that are important for the content of TechNote: Documentation Order code User manual ProtoMat S42 123747 User manual ProtoMat S62 121882 User manual ProtoMat S100 117269 Compendium CircuitPro PM 10046163 Tab. 2: Relevant documentations V. 3.0 | LPKF Laser & Electronics AG 5/18... -
Seite 23: Tools And Auxiliaries
Figure Phillips screwdriver Tab. 3: Required tools Required auxiliaries Quantity Name Order code Figure CircuitPro PM – FR4 base material with an 115968 18 μm copper layer Tab. 4: Required auxiliaries 6/18 LPKF Laser & Electronics AG | V. 3.0... -
Seite 24: Installing The Vision System
1. Remove the heat sink from the processing head. Abb. 1: Installing the camera Processing head Heat sink Camera 2. Screw the camera left-aligned onto the processing head using the supplied screws. Abb. 2: Screws on the processing head V. 3.0 | LPKF Laser & Electronics AG 7/18... - Seite 25 7. Attach the lighting cable (2) to the left side of the camera. After mounting the camera, the spring force on the processing head must be adjusted appropriately. The camera is mounted on the processing head. 8/18 LPKF Laser & Electronics AG | V. 3.0...
-
Seite 26: Spring Setting On The Processing Head
2. Insert the spring setting screw according to the existing system configuration (2 to 5) until it snaps into place. 3. Tighten the spring setting screw. The spring setting on the processing head has been adjusted. V. 3.0 | LPKF Laser & Electronics AG 9/18... -
Seite 27: Configuring The Vision System
3. Activate the option Camera. 4. Follow the instructions of the equipment configuration wizard to the item Summary. 5. Click on [Done] to exit the configuration wizard. The vision system is activated. 10/18 LPKF Laser & Electronics AG | V. 3.0... - Seite 28 If the slider Automatic exposure reference is not available, you can adjust the image using the sliders Exposure and Camera light. 3. Click on [Close]. The camera has been configured. V. 3.0 | LPKF Laser & Electronics AG 11/18...
- Seite 29 7. Move the camera (1) up or down until the camera image is clearly displayed on the monitor. 8. If necessary, turn the camera until the camera image is correctly oriented. 9. Tighten the clamping screws (3). The image focus has been adjusted. 12/18 LPKF Laser & Electronics AG | V. 3.0...
- Seite 30 Determining the offset 2. Place the base material on the processing table. 3. Click on [Determine X/Y-Offset]. 4. Follow the instructions in the dialog Determine camera-to-milling-head offset. Abb. 10: Dialog Determine camera-to-milling-head offset V. 3.0 | LPKF Laser & Electronics AG 13/18...
- Seite 31 The following dialog is displayed: Abb. 11: Offset has been measured 6. Click on [OK]. 7. Click on [Save]. The software synchronizes the results with the system. The camera offset has been adjusted. 14/18 LPKF Laser & Electronics AG | V. 3.0...
-
Seite 32: Customer Service
For technical information, contact our LPKF Service. Visit our website for further information: http://www.lpkf.com Support via contact form or email If you would like to send an email to the LPKF Service, fill out the contact form on our website: http://www.lpkf.com/support/contact.htm Or contact us via email: support.rp@lpkf.com... -
Seite 33: List Of Tables
Required tools ....................6 Tab. 4: Required auxiliaries ..................6 Tab. 5: Revision table ..................... 16 Revision table Version Date Change Changed by 2020-02-03 Revision for CircuitPro PM 2.7 K. Schwab Tab. 5: Revision table 16/18 LPKF Laser & Electronics AG | V. 3.0... - Seite 34 Vision-System installieren Appendix V. 3.0 | LPKF Laser & Electronics AG 17/18...
- Seite 36 LPKF Laser & Electronics AG Osteriede 7 30827 Garbsen Germany Phone: +49 5131 7095-0 Fax: +49 5131 7095-90 www.lpkf.de...