Herunterladen Inhalt Inhalt Diese Seite drucken
Axis Communications P5522-E Installationsanleitung

Axis Communications P5522-E Installationsanleitung

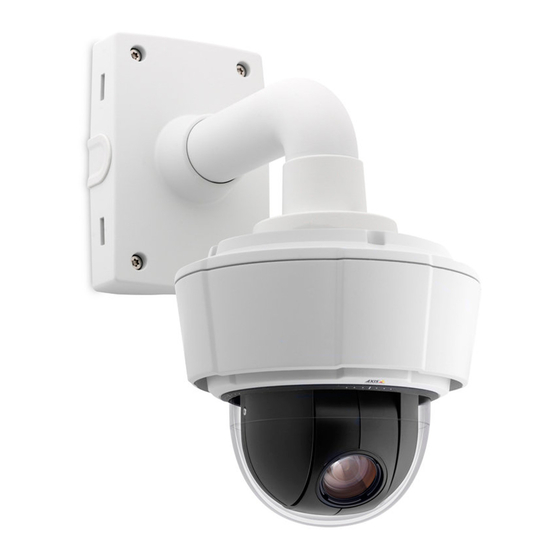
Ptz-dome-netzwerk-kamera
Vorschau ausblenden Andere Handbücher für P5522-E:
Inhaltsverzeichnis

Werbung

Verfügbare Sprachen
  • DE

Verfügbare Sprachen

  • DEUTSCH, seite 38
INSTALLATION GUIDE
AXIS P5522-E PTZ Dome Network Camera

Werbung

Inhaltsverzeichnis
loading

Inhaltszusammenfassung für Axis Communications P5522-E

  • Seite 1 INSTALLATION GUIDE AXIS P5522-E PTZ Dome Network Camera...
  • Seite 2: Electromagnetic Compatibility (Emc)

    Axis Communications AB makes no more of the following measures: Re-orient or relocate warranty of any kind with regard to the material the receiving antenna.
  • Seite 3: Battery Replacement

    Safeguards Please read through this Installation Guide carefully before installing the product. Keep the Installation Guide for further reference. CAUTION! • When transporting the Axis product, use the original packaging or equivalent to prevent damage to the product. • Store the Axis product in a dry and ventilated environment. •...
  • Seite 5: Installation Steps

    AXIS P5522-E Installation Guide This installation guide provides instructions for installing an AXIS P5522-E PTZ Dome Network Camera on your network. For all other aspects of using the product, please see the User’s Manual, available on the CD included in this package, or from www.axis.com Installation steps 1.
  • Seite 6: Hardware Overview

    Page 6 AXIS P5522-E Installation Guide Hardware overview Sunshield Screws (3) Part number (P/N) & Serial number (S/N). The serial number may be required during the installation. Restart button SDHC card slot Status indicator LED Control button Network connector (PoE)
  • Seite 7: Install The Hardware

    AXIS P5522-E Installation Guide Page 7 Install the hardware Prepare for installation Read all the instructions before preparing to install the network camera since several installation preparation steps require removing the top cover and would benefit from being completed together.
  • Seite 8 Page 8 AXIS P5522-E Installation Guide Replace the clear/smoked dome cover (optional) IMPORTANT! This camera has a dehumidifying membrane to maintain low humidity levels inside the dome. To avoid condensation, do not disassemble the camera in rain or in damp conditions.
  • Seite 9 AXIS P5522-E Installation Guide Page 9 Install the network camera IMPORTANT! The supplied RJ45 connector or a compatible, IP66 rated RJ45 connector must be used in order to comply with the IP66 rated design of the camera. 1. Install the selected bracket (not included) according to the instructions supplied with the bracket.
  • Seite 10 Page 10 AXIS P5522-E Installation Guide Install AXIS T8123 High PoE Midspan 1-port Axis T8123 High PoE Midspan enables Axis network video products with high power consumption to receive data and power over the same Ethernet cable. Follow these instructions to connect AXIS T8123.
  • Seite 11: Assign An Ip Address

    AXIS P5522-E Installation Guide Page 11 Assign an IP address Most networks today have a DHCP server that automatically assigns IP addresses to connected devices. If your network does not have a DHCP server the network camera will use 192.168.0.90 as the default IP address.
  • Seite 12 Page 12 AXIS P5522-E Installation Guide AXIS IP Utility - single camera/small installation AXIS IP Utility automatically discovers and displays Axis devices on your network. The application can also be used to manually assign a static IP address. Note that the computer running AXIS IP Utility must be on the same network segment (physical subnet) as the network camera.
  • Seite 13 AXIS P5522-E Installation Guide Page 13 AXIS Camera Management - multiple cameras/large installations AXIS Camera Management can automatically discover multiple Axis devices, show connection status, manage firmware upgrades and set IP addresses. Automatic discovery 1. Check that the camera is connected to the network and that power has been applied.
  • Seite 14 Page 14 AXIS P5522-E Installation Guide Set the password To gain access to the product, the password for the default administrator user root must be set. This is done in the ‘Configure Root Password’ dialog, which is displayed when the network is accessed for the first time.
  • Seite 15 AXIS P5522-E Installation Guide Page 15 Access the video stream The Live View page of the network camera is displayed, with links to the Setup tools, which allow you to customize the camera. If required, click Yes to install AMC (AXIS Media Control), which allows viewing of the video stream in Internet Explorer.
  • Seite 16 Page 16 AXIS P5522-E Installation Guide Other methods of setting the IP address The table below shows the other methods available for setting or discovering the IP address. All methods are enabled by default, and all can be disabled. Use in operating...
  • Seite 17 AXIS P5522-E Installation Guide Page 17 Set the IP address with ARP/Ping 1. Acquire an IP address on the same network segment your computer is connected to. 2. Locate the serial number (S/N) on the product label on the camera.
  • Seite 18: Status Indicators

    Steady for 10 sec. after successful restart Note: For more information on the AXIS P5522-E status indicators, please see the User’s Manual available from the AXIS Network Video Product CD supplied with this product or from the website at www.axis.com...
  • Seite 19: Resetting To The Factory Default Settings

    AXIS P5522-E Installation Guide Page 19 Resetting to the Factory Default Settings To reset the camera to the original factory default settings, use the control button and the restart button on the side of the camera, see Hardware overview, on page 6, as described below.
  • Seite 20: Mesures De Sécurité

    Mesures de sécurité Lisez attentivement le présent guide d’installation avant d’installer le produit. Conservez le guide d’installation si vous souhaitez le consulter ultérieurement. ATTENTION ! • Pour éviter d’endommager le produit Axis, utilisez l’emballage d’origine ou un équivalent pour le transporter.
  • Seite 21: Guide D'installation

    AXIS P5522-E Guide d’installation Ce guide d’installation explique comment installer une AXIS P5522-E Caméra réseau à dôme PTZ sur votre réseau. Pour toute autre question concernant l’utilisation du produit, reportez-vous au manuel d’utilisation du produit, que vous trouverez sur le CD joint ou sur le site www.axis.com Procédure d’installation...
  • Seite 22: Description Du Matériel

    Page 22 AXIS P5522-E Guide d'installation Description du matériel Pare-soleil Vis (3) Référence (P/N) et numéro de série (S/N). Le numéro de série peut être demandé pendant l’installation. Bouton Redémarrer Logement de carte SDHC Voyant d’état Bouton de commande Connecteur réseau (PoE) Supports de rack (3) Crochet pour fil de sécurité...
  • Seite 23: Installation Du Matériel

    AXIS P5522-E Guide d'installation Page 23 Installation du matériel Préparation de l’installation Lisez toutes les instructions avant de préparer l’installation de la caméra réseau. En effet, de nombreuses étapes de cette préparation requièrent le retrait du couvercle supérieur et il serait plus judicieux de les effectuer ensemble.
  • Seite 24 Page 24 AXIS P5522-E Guide d'installation Replacement de la bulle du dôme fumée/non fumée (facultatif) IMPORTANT ! Cette caméra dispose d’une membrane de déshumidification qui permet de maintenir de faibles niveaux d’humidité dans le dôme. Pour éviter toute condensation, ne démontez pas la caméra s’il pleut ou s’il fait humide.
  • Seite 25 AXIS P5522-E Guide d'installation Page 25 Installation de la caméra réseau IMPORTANT ! Le design norme IP66 de la caméra nécessite l’utilisation des connecteurs RJ45 ou RJ45 compatible norme IP66 fournis. 1. Installez le support choisi (non inclus) conformément aux instructions fournies avec le support.
  • Seite 26 Page 26 AXIS P5522-E Guide d'installation Installez l’injecteur High PoE AXIS à 1 port AXIS T8123 L’injecteur de puissance Axis T8123 High PoE permet aux produits vidéo Axis consommant une quantité importante d’énergie de recevoir des données et de l’alimentation via le même câble Ethernet.
  • Seite 27: Attribution D'une Adresse Ip

    AXIS P5522-E Guide d'installation Page 27 Attribution d’une adresse IP Aujourd’hui, la plupart des réseaux sont équipés d’un serveur DHCP qui attribue automatiquement des adresses IP aux périphériques connectés. Si votre réseau ne possède pas de serveur DHCP, la caméra réseau utilise l’adresse IP 192.168.0.90 comme adresse IP par défaut.
  • Seite 28 Page 28 AXIS P5522-E Guide d'installation AXIS IP Utility : une seule caméra et une petite installation AXIS IP Utility détecte et affiche automatiquement les périphériques Axis présents sur votre réseau. Cette application peut également être utilisée pour attribuer manuellement une adresse IP statique.
  • Seite 29 AXIS P5522-E Guide d'installation Page 29 AXIS Camera Management : plusieurs caméras et de grandes installations AXIS Camera Management est capable de détecter automatiquement plusieurs dispositifs Axis, d’afficher leur état de connexion, de gérer les mises à niveau des micrologiciels et de définir les adresses IP.
  • Seite 30 Page 30 AXIS P5522-E Guide d'installation Configuration du mot de passe Pour accéder au produit, le mot de passe par défaut de l’administrateur, root, doit être configuré. Pour ce faire, utilisez la boîte de dialogue Configure Root Password (Configurer le mot de passe root) qui s’affiche lors du premier accès au réseau.
  • Seite 31 AXIS P5522-E Guide d'installation Page 31 Accès au flux de données vidéo La page Live View (Vidéo en direct) de la caméra réseau s’affiche, avec des liens vers les outils de configuration, lesquels vous permettent d’adapter la caméra à vos besoins.
  • Seite 32 Page 32 AXIS P5522-E Guide d'installation Autres méthodes de définition de l’adresse IP Le tableau ci-dessous indique les autres méthodes permettant de configurer ou de détecter l’adresse IP. Toutes les méthodes sont activées par défaut et peuvent être désactivées. Utiliser sous le Remarques système...
  • Seite 33 AXIS P5522-E Guide d'installation Page 33 Définition de l’adresse IP à l’aide d’ARP/Ping 1. Trouvez une adresse IP sur le même segment de réseau que celui de votre ordinateur. 2. Repérez le numéro de série (S/N) sur l’étiquette de la caméra.
  • Seite 34 Continu pendant 10 s après avoir redémarré avec succès Remarque : Pour plus d’informations sur les voyants d’étatAXIS P5522-E, consultez le manuel de l’utilisateur disponible sur le CD du produit de vidéo sur IP AXIS, fourni avec le produit ou en téléchargement sur le site Web www.axis.com Unité...
  • Seite 35 AXIS P5522-E Guide d'installation Page 35 Rétablissement des paramètres d’usine par défaut Pour rétablir les paramètres d’usine par défaut de la caméra, utilisez les boutons de commande de redémarrage situés sur le côté de la caméra, reportez-vous à la section Description du matériel, à la page 22, comme décrit ci-après :...
  • Seite 36: Plus D'informations

    Page 36 AXIS P5522-E Guide d'installation Plus d’informations Le manuel d’utilisation est disponible sur le site web d’Axis (www.axis.com) et sur le CD de la caméra vidéo Axis fourni avec ce produit. Conseil ! Consultez le site www.axis.com/techsup pour vérifier si des micrologiciels à jour sont disponibles pour votre caméra réseau.
  • Seite 38: Sicherheitsvorkehrungen

    Sicherheitsvorkehrungen Bitte lesen Sie zunächst diese Installationsanleitung vollständig durch, bevor Sie mit der Installation Ihres Produkts beginnen. Halten Sie die Installationsanleitung bereit, falls Sie darauf zurückgreifen müssen. VORSICHT! • Transportieren Sie das Axis-Produkt nur in der Originalverpackung bzw. in einer vergleichbaren Verpackung, damit das Produkt nicht beschädigt wird.
  • Seite 39: Installationsschritte

    4. Weisen Sie eine IP-Adresse zu. Siehe Seite 45. 5. Legen Sie das Kennwort fest. Siehe Seite 48. Lieferumfang Komponente Modelle/Varianten/Anmerkungen Netzwerk-Kamera AXIS P5522-E 60 Hz/ 50 Hz Kuppelabdeckungen Transparente Klarglasabdeckung (vormontiert) Getönte transparente Abdeckung High PoE Midspan AXIS T8123 einschließlich Netzkabel (länderspezifisch)
  • Seite 40: Hardwareübersicht

    Seite 40 AXIS P5522-E Installationsanleitung Hardwareübersicht Sonnenschutz Schrauben (3) Bestellnummer (P/N) und Seriennummer (S/N). Die Seriennummer wird für die Installation benötigt. Neustarttaste SDHC-Speicherkarteneinschub Statusanzeige (LED) Steuertaste Netzwerkanschluss (mit PoE) Kamera- befestigungen (3) Haken für Sicherheitsdraht Obere Abdeckung Schrauben (4 Schrauben (6)
  • Seite 41: Installation Der Hardware

    AXIS P5522-E Installationsanleitung Seite 41 Installation der Hardware Vorbereitung der Installation Lesen Sie zunächst alle Anweisungen, bevor Sie mit der Installationsvorbereitung der Netzwerk- Kamera beginnen. Bei einigen Vorbereitungsschritten muss die obere Abdeckung abgenommen werden, sodass es sinnvoll ist, diese Schritte zusammen durchzuführen. Der Sonnenschutz muss entfernt werden, um eine SD-Karte zu installieren/entfernen.
  • Seite 42: Austauschen Der Klaren/Getönten Kuppelabdeckung (Optional)

    Seite 42 AXIS P5522-E Installationsanleitung Austauschen der klaren/getönten Kuppelabdeckung (optional) WICHTIG! Diese Kamera verfügt über eine Feuchtigkeit entziehende Membrane, die für eine niedrige Luftfeuchtigkeit in der Kuppel sorgt. Um Kondenswasserbildung zu vermeiden, demontieren Sie die Kamera nicht im Regen oder unter feuchten Bedingungen.
  • Seite 43: Installation Der Netzwerk-Kamera

    AXIS P5522-E Installationsanleitung Seite 43 Installation der Netzwerk-Kamera WICHTIG! Es muss der mitgelieferte RJ45-Stecker oder ein kompatibler, IP66-konformer RJ45-Stecker verwendet werden, um dem IP66-konformen Design der Kamera zu entsprechen. 1. Montieren Sie die gewünschte Halterung (nicht enthalten) gemäß den im Lieferumfang des Montagesatzes enthaltenen Anweisungen.
  • Seite 44 Seite 44 AXIS P5522-E Installationsanleitung Installation des AXIS T8123 High PoE Midspan 1-Port Mit dem Axis T8123 High PoE Midspan können Netzwerk-Videoprodukte von Axis mit einem großen Stromverbrauch über dasselbe Ethernet-Kabel sowohl mit Daten als auch mit Strom versorgt werden. Führen Sie folgende Installationsschritte durch, um den AXIS T8123 anzuschliessen.
  • Seite 45: Zuweisen Einer Ip-Adresse

    AXIS P5522-E Installationsanleitung Seite 45 Zuweisen einer IP-Adresse In den meisten Netzwerken ist heutzutage ein DHCP-Server eingebunden, der angeschlossenen Geräten automatisch IP-Adressen zuweist. Wenn Ihr Netzwerk über keinen DHCP-Server verfügt, wird für die Netzwerk-Kamera die Standard-IP-Adresse 192.168.0.90 verwendet. Zum Zuweisen einer statischen IP-Adresse stehen unter Windows die Programme AXIS IP Utility und AXIS Camera Management zur Verfügung.
  • Seite 46: Axis Ip Utility - Einzelne Kamera/Kleine Installation

    Seite 46 AXIS P5522-E Installationsanleitung AXIS IP Utility – einzelne Kamera/kleine Installation AXIS IP Utility erkennt automatisch die im Netzwerk vorhandenen Axis-Geräte und zeigt diese an. Die Anwendung kann außerdem zur manuellen Zuweisung einer statischen IP-Adresse verwendet werden. Beachten Sie, dass sich der Computer, auf dem AXIS IP Utility ausgeführt wird, und die Netzwerk- Kamera in demselben Netzwerksegment (physischen Subnetz) befinden müssen.
  • Seite 47: Axis Camera Management - Mehrere Kameras/Große Installationen

    AXIS P5522-E Installationsanleitung Seite 47 AXIS Camera Management – mehrere Kameras/große Installationen Mit AXIS Camera Management können automatisch mehrere Axis-Geräte erkannt, der Verbindungsstatus angezeigt, die Firmware-Aktualisierungen verwaltet und IP-Adressen festgelegt werden. Automatische Erkennung 1. Stellen Sie sicher, dass die Kamera an das Netzwerk und die Stromversorgung angeschlossen ist.
  • Seite 48: Festlegen Des Kennworts

    Seite 48 AXIS P5522-E Installationsanleitung Festlegen des Kennworts Für den Zugriff auf das Produkt muss das Kennwort für den standardmäßigen Administrator- Benutzer root festgelegt werden. Beim erstmaligen Zugriff auf die Netzwerk-Kamera wird das Dialogfeld „Configure Root Password“ (Root-Kennwort konfigurieren) angezeigt. Dort kann das Kennwort festgelegt werden.
  • Seite 49: Zugriff Auf Den Videostrom

    AXIS P5522-E Installationsanleitung Seite 49 5. Geben Sie das zuvor festgelegte Kennwort ein und klicken Sie auf „OK“. Hinweis: Wenn Sie das Kennwort vergessen haben, muss die Kamera auf die Werkseinstellungen zurückgesetzt werden. Siehe Seite 53. Zugriff auf den Videostrom Die Seite „Live View“...
  • Seite 50: Andere Methoden Zum Festlegen Der Ip-Adresse

    Seite 50 AXIS P5522-E Installationsanleitung Andere Methoden zum Festlegen der IP-Adresse Diese Tabelle bietet einen Überblick über weitere Methoden, die IP-Adresse festzulegen bzw. zu ermitteln. Alle Methoden sind standardmäßig aktiviert und können deaktiviert werden. Verwendung im Hinweise Betriebssystem Windows Wenn die Funktion auf dem Computer aktiviert ist, wird die UPnP™...
  • Seite 51: Zuweisen Der Ip-Adresse Per Arp/Ping

    AXIS P5522-E Installationsanleitung Seite 51 Zuweisen der IP-Adresse per ARP/Ping 1. Wählen Sie eine IP-Adresse aus dem Netzwerksegment, in dem sich auch Ihr Computer befindet. 2. Suchen Sie die Seriennummer (S/N) auf dem Produktaufkleber an der Kamera. 3. Öffnen Sie auf Ihrem Computer die Eingabeaufforderung und geben Sie die folgenden Befehle...
  • Seite 52 Firmware-Aktualisierung fehlgeschlagen Grün Konstant für 10 Sek. nach erfolgreichem Neustart Hinweis: Weitere Informationen zu den AXIS P5522-E Statusanzeigen finden Sie im Benutzerhandbuch-, das sich auf der mitgelieferten CD für Axis-Netzwerkvideoprodukte befindet und auf der Website unter „www.axis.com“ erhältlich ist. Gerät...
  • Seite 53: Wiederherstellen Der Werkseitigen Standardeinstellungen

    AXIS P5522-E Installationsanleitung Seite 53 Wiederherstellen der werkseitigen Standardeinstellungen Wenn Sie die Kamera auf die Werkseinstellungen zurücksetzen möchten, drücken Sie die Steuertaste und die Neustarttaste an der Seite der Kamera (siehe „ Hardwareübersicht, auf Seite 40) wie im Folgenden beschrieben: So setzen Sie mithilfe der Steuer- und der Neustarttaste sämtliche Parameter einschließlich der IP-...
  • Seite 54: Weitere Informationen

    Seite 54 AXIS P5522-E Installationsanleitung Weitere Informationen Das Benutzerhandbuch ist auf der Axis Website unter „http://www.axis.com“ erhältlich und befindet sich auch auf der mitgelieferten CD für Axis-Netzwerkvideoprodukte. Tipp! Unter „www.axis.com/techsup“ finden Sie Firmware-Aktualisierungen für Ihre Netzwerk- Kamera. Informationen zur aktuellen Firmware-Version finden Sie unter Setup > About...
  • Seite 56: Sostituzione Della Batteria

    Precauzioni Leggere per intero e con attenzione questa Guida all'installazione prima di installare il prodotto. Conservare la Guida all'installazione per ulteriori riferimenti. ATTENZIONE! • Quando si trasporta un prodotto Axis, utilizzare l'imballo originale o un imballo equivalente per evitare danni al prodotto. •...
  • Seite 57: Guida All'installazione

    Questo documento fornisce le istruzioni necessarie per installare la Telecamera di rete PTZ a cupola AXIS P5522-E nella rete in uso. Per ulteriori informazioni sull'utilizzo del prodotto, consultare la Guida per l'utente disponibile sul CD incluso nella confezione oppure visitare il sito web all'indirizzo www.axis.com...
  • Seite 58: Panoramica Dell'hardware

    Pagina 58 Guida all'installazione AXIS P5522-E Panoramica dell’hardware Parasole Viti (3) Codice prodotto (P/N) e numero di serie (N/S). Il numero di serie potrebbe essere necessario durante l’installazione. Pulsante di riavvio Alloggiamento scheda SDHC LED di stato Pulsante di comando...
  • Seite 59: Installazione Dell'hardware

    Guida all'installazione AXIS P5522-E Pagina 59 Installazione dell’hardware Preparazione dell'installazione Leggere tutte le istruzioni prima di prepararsi ad installare la telecamera di rete, poiché numerose fasi di preparazione dell'installazione richiedono la rimozione della copertura superiore ed è opportuno che vengano completate insieme. Per installare/rimuovere la scheda SD, è necessario rimuovere il parasole, vedere Installazione di una scheda SD (facoltativa), a pagina 60.
  • Seite 60 Pagina 60 Guida all'installazione AXIS P5522-E Sostituire la copertura a cupola trasparente/oscurata (facoltativo) IMPORTANTE! Questa telecamera è dotata di una membrana deumidificante per mantenere basso il livello di umidità nella cupola. Per evitare fenomeni di condensa, non smontare la telecamere in caso di pioggia o elevata umidità...
  • Seite 61 Guida all'installazione AXIS P5522-E Pagina 61 Installazione della telecamera di rete IMPORTANTE! Per mantenere inalterate le caratteristiche di tenuta di classe IP66 della telecamera, usare il connettore RJ45 fornito o un connettore RJ45 compatibile di classe. 1. Installare la staffa selezionata (non inclusa) secondo le istruzioni fornite con la staffa.
  • Seite 62 Pagina 62 Guida all'installazione AXIS P5522-E Installazione del Midspan con 1 porta AXIS PoE AXIS T8123 Il midspan Axis T8123 High PoE consente di alimentare e trasmettere dati ai prodotti con tecnologia video di rete di Axis che consumano molta potenza utilizzando un unico cavo di rete Ethernet.
  • Seite 63 Guida all'installazione AXIS P5522-E Pagina 63 Assegnazione di un indirizzo IP La maggior parte delle reti dispone di un server DHCP che assegna automaticamente gli indirizzi IP alle periferiche connesse. Se la rete non dispone di un server DHCP, per la telecamera di rete viene utilizzato l'indirizzo IP predefinito 192.168.0.90.
  • Seite 64 Pagina 64 Guida all'installazione AXIS P5522-E AXIS IP Utility: telecamera singola/piccole installazioni AXIS IP Utility rileva e visualizza automaticamente i dispositivi Axis collegati alla rete. L’applicazione inoltre può essere utilizzata per assegnare manualmente un indirizzo IP statico. Si tenga presente che la telecamera di rete deve essere installata sullo stesso segmento di rete (subnet fisica) del computer sul quale è...
  • Seite 65 Guida all'installazione AXIS P5522-E Pagina 65 AXIS Camera Management: più telecamere/grandi installazioni È possibile utilizzare AXIS Camera Management per individuare automaticamente la presenza di più periferiche Axis, mostrare lo stato di connessione, gestire gli aggiornamenti del firmware ed assegnare gli indirizzi IP.
  • Seite 66: Impostazione Della Password

    Pagina 66 Guida all'installazione AXIS P5522-E Impostazione della password Per ottenere l’accesso al prodotto, è necessario impostare la password dell’utente amministratore predefinito root. Questa operazione può essere effettuata nella finestra di dialogo ‘Configure Root Password’ (Configura password root), che viene visualizzata quando si accede alla rete per la prima volta.
  • Seite 67 Guida all'installazione AXIS P5522-E Pagina 67 5. Immettere la password impostata in precedenza e fare clic su OK. Nota:Se si dimentica la password, sarà necessario ripristinare le impostazioni predefinite della telecamera. Vedere a pagina 71. Accesso al flusso video Viene visualizzata la pagina Live View (Immagini dal vivo) con i collegamenti agli strumenti di configurazione che consentono di personalizzare la telecamera.
  • Seite 68 Pagina 68 Guida all'installazione AXIS P5522-E Altri metodi di assegnazione dell’indirizzo IP La seguente tabella descrive gli altri metodi disponibili per assegnare o individuare l’indirizzo IP. Per impostazione predefinita, tutti i metodi sono disponibili e possono essere disabilitati. Utilizzo nel sistema...
  • Seite 69 Guida all'installazione AXIS P5522-E Pagina 69 Assegnazione dell'indirizzo IP con ARP/Ping 1. Acquisire un indirizzo IP sullo stesso segmento di rete cui è connesso il computer in uso. 2. Individuare il numero di serie indicato sull’etichetta della telecamera. 3. Aprire una finestra MS-DOS sul computer e digitare i seguenti comandi:...
  • Seite 70: Indicatori Di Stato

    Fisso per 10 secondi dopo un riavvio senza errori Nota: Per ulteriori informazioni sugli indicatori di stato dell'unità AXIS P5522-E, -leggere la Guida per l'utente, disponibile sul CD del prodotto video di rete AXIS fornito insieme al prodotto, oppure sul sito web di Axis all'indirizzo www.axis.com.
  • Seite 71: Ripristino Delle Impostazioni Predefinite

    Guida all'installazione AXIS P5522-E Pagina 71 Ripristino delle impostazioni predefinite Per reimpostare la telecamera alle impostazioni originali predefinite in fabbrica, utilizzare il pulsante di comando ed il pulsante di riavvio sul lato della telecamera, vedere Panoramica dell’hardware, a pagina 58, come descritto di seguito:...
  • Seite 72: Ulteriori Informazioni

    Pagina 72 Guida all'installazione AXIS P5522-E Ulteriori informazioni La Guida per l’utente è disponibile sul sito web di Axis all’indirizzo www.axis.com oppure sul CD del prodotto con tecnologia video di rete Axis, fornito con il prodotto. Suggerimento Visitare il sito di Axis all'indirizzo www.axis.com/techsup per verificare se sono stati pubblicati aggiornamenti per la telecamera di rete.
  • Seite 74: Medidas Preventivas

    Medidas preventivas Lea atentamente la Guía de instalación antes de instalar el producto. Guarde la Guía de instalación para futuras consultas. ¡PRECAUCIÓN! • A la hora de transportar el producto Axis, utilice el embalaje original o uno equivalente para no dañar el producto.
  • Seite 75: Guía De Instalación

    En esta guía de instalación se proporcionan instrucciones para instalar una cámara de red domo PTZ AXIS P5522-E en su red. Para obtener información sobre cualquier cuestión relacionada con el uso del producto, consulte el Manual del usuario, disponible en el CD que se incluye en este paquete, o la página web www.axis.com...
  • Seite 76: Presentación Del Hardware

    Página 76 AXIS P5522-E Guía de instalación Presentación del hardware Parasol Tornillos (3) Referencia (P/N) y número de serie (S/N). Es posible que necesite el número de serie durante la instalación. Botón de reinicio Ranura para tarjeta SDHC LED indicador de estado Botón de control...
  • Seite 77: Instalación Del Hardware

    AXIS P5522-E Guía de instalación Página 77 Instalación del hardware Preparación para la instalación Lea las instrucciones al completo antes de prepararse para instalar la cámara de red, puesto que varios de los pasos de preparación para la instalación requieren que se retire la cubierta superior y es recomendable llevarlos a cabo todos juntos.
  • Seite 78 Página 78 AXIS P5522-E Guía de instalación Sustitución de la cubierta clara/ahumada del domo (opcional) ¡IMPORTANTE! Esta cámara posee una membrana de deshumidificación para mantener niveles de humedad bajos dentro del domo. Para evitar la condensación, no desmonte la cámara bajo la lluvia o en lugares húmedos.
  • Seite 79 AXIS P5522-E Guía de instalación Página 79 Instale la cámara de red ¡IMPORTANTE! Se debe usar el conector RJ45 o un conector compatible RJ45 con clasificación IP66 para la compatibilidad con el diseño con clasificación IP66 de la cámara. 1. Instale el soporte seleccionado (no incluido) según las instrucciones que se suministran...
  • Seite 80 Página 80 AXIS P5522-E Guía de instalación Instale el Midspan High PoE AXIS T8123 con 1 puerto incluido El Midspan High PoE AXIS T8123 permite que los productos de vídeo en red de Axis con un consumo eléctrico elevado reciban datos y alimentación por el mismo cable Ethernet. Siga estas instrucciones para conectar la AXIS T8123.
  • Seite 81: Asignación De Una Dirección Ip

    AXIS P5522-E Guía de instalación Página 81 Asignación de una dirección IP Actualmente, la mayoría de redes disponen de un servidor DHCP que asigna direcciones IP a los dispositivos conectados de forma automática. Si su red no dispone de un servidor DHCP, la cámara de red utilizará...
  • Seite 82 Página 82 AXIS P5522-E Guía de instalación AXIS IP Utility: Para cámaras individuales o instalaciones pequeñas AXIS IP Utility detecta y muestra automáticamente los dispositivos Axis que existen en la red. Además, puede utilizarse para asignar manualmente una dirección IP estática.
  • Seite 83 AXIS P5522-E Guía de instalación Página 83 AXIS Camera Management: para varias cámaras o instalaciones grandes AXIS Camera Management puede detectar automáticamente varios dispositivos Axis, mostrar el estado de la conexión, gestionar las actualizaciones del firmware y configurar direcciones IP.
  • Seite 84 Página 84 AXIS P5522-E Guía de instalación Configuración de la contraseña Para poder acceder al producto, hay que asignar una contraseña para el administrador root (es el usuario predeterminado). Aparecerá el cuadro de diálogo ‘Configure Root Password’ (Configurar contraseña de root) cuando se acceda a la red por primera vez.
  • Seite 85 AXIS P5522-E Guía de instalación Página 85 Acceso a la transmisión de vídeo La página Live View (vista en vivo) de la cámara de red aparece con enlaces a las herramientas de configuración que le permiten personalizar la cámara. En caso necesario, haga clic en Yes (Sí) para instalar el AMC (AXIS Media Control), y así permitir la visualización de la transmisión de vídeo en Internet Explorer.
  • Seite 86 Página 86 AXIS P5522-E Guía de instalación Otros métodos para configurar la dirección IP Esta tabla presenta otros métodos disponibles para configurar o detectar la dirección IP. Todos los métodos están habilitados de forma predeterminada y es posible deshabilitarlos. Uso en sistema...
  • Seite 87 AXIS P5522-E Guía de instalación Página 87 Configuración de la dirección IP con ARP/Ping 1. Adquiera una dirección IP en el mismo segmento de red en el que está conectado su equipo. 2. Localice el número de serie (S/N) en la etiqueta de producto de la cámara.
  • Seite 88 Fijo durante 10 segundos después de un reinicio correcto Nota: Para obtener más información sobre los indicadores de estado de la cámara AXIS P5522-E, consulte el Manual del usuario disponible en el CD de productos de vídeo en red de AXIS suministrado con este producto o en el sitio web www.axis.com.
  • Seite 89 AXIS P5522-E Guía de instalación Página 89 Restablecimiento de los valores iniciales Para restablecer la cámara a los valores iniciales, utilice el botón de control y el botón de reinicio que se encuentran en el lateral de la cámara, consulte la sección Presentación del hardware, en la página 76, como se describe a continuación:...
  • Seite 90: Más Información

    Página 90 AXIS P5522-E Guía de instalación Más información El Manual del usuario está disponible en el sitio Web de Axis, www.axis.com, o en el CD de productos de vídeo en red de Axis suministrado con este producto. Un consejo: Visite www.axis.com/techsup para comprobar si hay disponible firmware actualizado...
  • Seite 92 Ver.1.1 Installation Guide AXIS P5522-E Printed: March 2011 Part No. 42572 © Axis Communications AB, 2011...

Diese Anleitung auch für:

P5522

Inhaltsverzeichnis