protech ZOOM 400 Bauanleitung
T0500
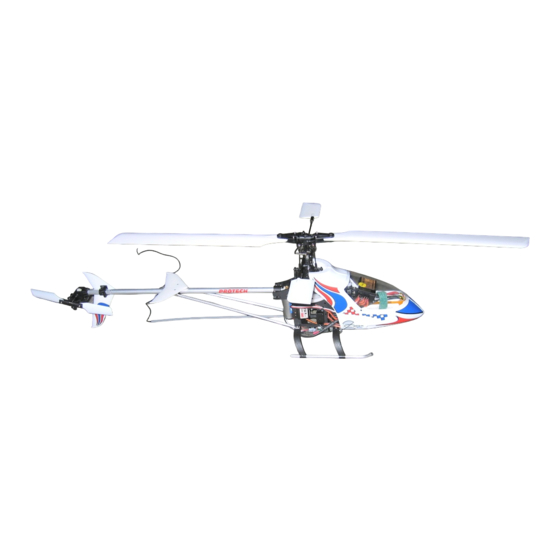
almost ready to fl y electric powered micro helicopter
Instruction manual • Bouwhandleiding • Bauanleitung • Instruction de montage
WARNING !
LET OP !
ACHTUNG !
ATTENTION !
This R/C kit and the model you
Deze bouwdoos van een
Dieser Bausatz eines
Ce modèle R/C à assembler
will build is not a toy.
radiobestuurd model is geen
ferngesteuerten Modells
n'est pas un jouet.
speelgoed.
ist kein Spielzeug.
version: 06/05/04
Downloaded from
www.Manualslib.com
manuals search engine
Inhaltsverzeichnis

Verwandte Anleitungen für protech ZOOM 400


Inhaltszusammenfassung für protech ZOOM 400
- Seite 1 T0500 almost ready to fl y electric powered micro helicopter Instruction manual • Bouwhandleiding • Bauanleitung • Instruction de montage WARNING ! LET OP ! ACHTUNG ! ATTENTION ! This R/C kit and the model you Deze bouwdoos van een Dieser Bausatz eines Ce modèle R/C à...
- Seite 2 Specifi cations / Specifi caties / Technische Daten / Spécifi cations Lengte: 580 mm Length: 580 mm Länge: 580 mm Longueur: 580 mm Rotor Ø: 630 mm Rotor Ø: 630 mm Rotor Ø: 630 mm Rotor Ø: 630 mm Motor: MEGAX 400 Motor: MEGAX 400...
- Seite 3 Tools & items / Gereedschap & benodigdheden / Werkzeuge und alle Notwendigkeiten/ Outils et équipements ELECTRONIC PACK FOR ZOOM 400 MICRO SERVOS Micro servo #B205 Weight: 9,8g Torque: 1kg/cm Speed: 0,21s / 60° Dimension: 22x20,5x12mm MICRO PIEZO GYRO NT-300 #PRO.300 Input voltage: 3.6V ~ 6.0V...
- Seite 4 Montieren Sie mit doppelseitigem Installez le gyro sur le côté droit side of the chassis using double rechterzijde op het chassis met Klebeband (Protech PL210) das du chassis à l’aide d’un morceau sided tape (Protech PL210). behulp van dubbelzijdig kleef- Kreiselsystem auf der rechte Seite d’adhésif double face (Protech...
- Seite 5 Connecting the speed controller / Monteren van de snelheidsregelaar / Montieren des Fahrtreglers / Raccordement du variateur de vitesse Fig. 8 Fig. 9 Fig. 10 Remove the motor from the chas- Demonteer de motor en soldeer Entfernen Sie den Motor und Démontez le moteur.
- Seite 6 #PL200). du chassis. cable ties on the chassis Maintenez les cables servos au (Protech #PL200). Fig. 15-16-17 Fig.15-16-17 chassis à l’aide de petits colliers de serrage (Protech #PL200). Fig. 15-16-17 Fig. 15-16-17 6 • Downloaded from www.Manualslib.com manuals search engine...
- Seite 7 Connecting the servo pushrods / Installeren van de stuurstangen / Montieren des Gestänges / Raccordement des commandes de servos HORIZONTAL !!! 90° Fig. 18 Fig. 19 Fig. 20 Center the elevator and roll con- Plaats de nick en rol sticks in de Stellen Sie die Nick und Roll Positionez les stick du tangage et trol sticks on the transmitter.
- Seite 8 Connecting the servo pushrods / Installeren van de stuurstangen / Montieren des Gestänges / Raccordement des commandes de servos 90° Fig. 21 Fig. 22 Fig. 23 Slightly bend the tail push rod so Plooi de staartstuurstang zodat Biegen Sie das Gestänge des Pliez légèrement la commande it can fi...
- Seite 9 Installing the rotorblades / Monteren van de rotorbladen / Montieren der Hauptrotorblätter / Installation des pales Fig. 25 Fig. 26 Fig. 26 Install the main rotorblades as Monteer de hoofdrotorbladen Montieren Sie die Installez les pales du rotor prin- shown. Check that the leading zoals afgebeeld.
-
Seite 10: Center Of Gravity
Install the battery and check the CG / Plaats de batterij en controleer het zwaartepunt / Einbau des Akkus und Schwerpunktüberprüfung / Installation de l’accu et contrôle du CG CENTER OF GRAVITY Fig. 29 Fig. 30 Install the battery in the front sec- Plaats de batterij in het voorste Bauen Sie den Akku in das Installez l’accu dans le compar-... - Seite 11 Gyro effect / Gyroscoop effect / Kreiselwirkung / Contrôle du gyro Fig. 32 Fig. 33 Fig. 34 Move the tailrotor stick to the right Beweeg de staartrotorstick naar Stellen Sie den Heckrotor- Poussez le stick gauche de position and observe the tailrotor rechts en controleer of de bewe- Steuerknuppel auf die rechte l’émetteur (fonction rotor de...
- Seite 12 Tracking adjust / Bladspoor / Zuordnung der Hauptrotorblätter / Alignement des pales GOOD Fig. 37 Fig. 38 Put some coloured tape on one of Kleef een stukje gekleurde kleef- Kleben Sie einen gefärbten Appliquez un morceau d’adhésif the blades. Gently open the throt- band op één van de rotorbladen.
- Seite 13 T0500.048 PIGNON GEAR T0500.023 TAIL BOOM T0500.049 O-RING SPINDLE SHAFT T0500.024 TAIL BOOM SUPPORT SET T0500.PS ZOOM 400 ELECTRONIC PACK T0500.025 LANDING GEAR SKID T500.200 CARBON PUSH ROD SET* * Optional part • 13 Downloaded from www.Manualslib.com manuals search engine...
- Seite 14 MA2068 MA2211 T0500.021 T0500.003 MA2068 T0500.049 MA2211 T0500.002 MA2050 T0500.032 MA2011 T0500.034 M2x4mm T0500.046 MA2011 MA2011 MA2062 T0500.004 T0500.028 MA2050 T0500.007 T0500.022 T0500.031 MA2050 MA2001 2.2x5mm T0500.019 MA2101 T0500.043 T0500.005 M1.5x4mm 2.2x5mm T0500.006 MA2062 T0500.008 T0500.042 T0500.010 2.2x5mm T0500.042 M2.2x5mm T0500.027 T0500.048 MA2050...
- Seite 15 Use PROTECH # A600 NUT LOCK T0500.037 T0500.036 T0500.018 T0500.017 T0500.033 T0500.023 T0500.016 MA2061 T0500.044 MA2061 T0500.024 T0500.012 T0500.026 T0500.013 T0500.017 T0500.041 T0500.014 M1.5x4mm MA2101 T0500.044 T0500.015 2.2x5mm T0500.038 T0500.045 Downloaded from www.Manualslib.com manuals search engine...
- Seite 16 TRANSMITTER OPERATION AND CONTROL • MODE 1 • TYPE H1 STICK INPUT SERVO ACTION HELI ACTION Elevator Nick Nick Tangage Elevator Nick Nick Tangage Tail Staart Heck Anticouple Tail Staart Heck Anticouple Pitch Pitch Pitch Pitch Pitch Pitch Pitch Pitch Roll Roll Roulis...
- Seite 17 TRIM ADJUSTMENT • MODE 1 If the helicopter does not fl y in neutral position, adjust the TRIM. The TRIM adjustment depends on the helicopter action. Als de helicopter niet in de neutrale positie vliegt, moet men de “TRIM“ aanpassen. Het aanpassen van de “TRIM“ hangt af van wat de helicopter aan het doen is op dat moment.
- Seite 18 TRANSMITTER OPERATION AND CONTROL • MODE 2 • TYPE H1 STICK INPUT SERVO ACTION HELI ACTION Pitch Pitch Pitch Pitch Pitch Pitch Pitch Pitch Tail Staart Heck Anticouple Tail Staart Heck Anticouple Elevator Nick Nick Tangage Elevator Nick Nick Tangage Roll Roll Roulis...
- Seite 19 TRIM ADJUSTMENT • MODE 2 If the helicopter does not fl y in neutral position, adjust the TRIM. The TRIM adjustment depends on the helicopter action. Als de helicopter niet in de neutrale positie vliegt, moet men de “TRIM“ aanpassen. Het aanpassen van de “TRIM“ hangt af van wat de helicopter aan het doen is op dat moment.
- Seite 20 Decals / Decoratie / Dekorbogen / Décoration Decalsheet 20 • Downloaded from www.Manualslib.com manuals search engine...
- Seite 21 Flying area / Vliegomgeving / Flugplatz / Terrain de vol CAUTION OPGEPAST ACHTUNG ATTENTION Do not fl y helicopter near : Nooit vliegen in de nabijheid van: Niemals in der nehe von: Ne jamais voler à proximité de: • People or animals •...
- Seite 22 Flight lesson / Vlieglessen / Die Flugstunden / 1er vol Wind Vent Place the model with the front in Plaats het model met de neus in Setzen Sie das Modell mit die Placez le modéle nez au vent the wind and stand behind the de wind en ga achter het model Näse im Wind und nehmen Sie et installez-vous derrière le...
- Seite 23 Landing / Landing / Die Landung / Atterrissage Wind GOOD Wind • 23 Downloaded from www.Manualslib.com manuals search engine...
- Seite 24 When using Lithium Polymer batteries: Because of the high energy density of these cells, they must be used with extreme precautions PROTECH denies any responsability claims or damages caused by use or misuse of these batteries. ALTIJD: • Sluit een geschikte verzekering af voor het besturen van RC modellen •...
- Seite 25 Utilisation d’éléments Lithium Polymer: Les accus Lithium Polymer contiennent énormément d’énergie et doivent donc être manipulés avec d’énormes précau- tions. C’est pour cela que PROTECH ne pourra pas être tenu responsable des dommages causés par l’utilisation de ce type d’accu.
- Seite 26 Optional parts / Opties / Zubehör / Options Carbon push rod set T0500.200 Training gear set T0500.047 26 • Downloaded from www.Manualslib.com manuals search engine...
-
Seite 27: Transport & Storage
• DO NOT drill, cut, bend or crush • Only use appropriate charger • Never leave battery unattended while charging • Only use the battery for the ZOOM 400 (see required battery) • Not to be used without adult supervision CHARGING OF LI-ION & LI-PO •... - Seite 28 • Als de spanning van de uitgaande stroom onvoldoende is om de helicopter van de grond te krijgen, moet je de batterij onmiddelijk inleveren bij een erkende afvalverwerkingsdienst PROTECH aanvaardt geen verantwoordelijkheid voor opgelopen schade of ongevallen bij het gebruik van deze batterijen 28 •...
-
Seite 29: Uber Li-Ion Und Li-Po Akkus
• Lassen Sie den Akku abkühlen nach dem Flug, laden Sie den Akku nachts kühlen (zum speichern oder fl iegen) • Wenn die Abgabeleistung der belasteten Batterie unzulänglich ist, den Hubschrauber anzuheben, entledigen Sie sich der Batterie sofort PROTECH verweigert alle mögliche Ansprüche oder Beschädigungen, die durch Gebrauch dieser Akkus verursacht werden. • 29 Downloaded from www.Manualslib.com... -
Seite 30: Transport Et Entreposage
• Quand la puissance de la batterie chargée est insuffi sante pour faire décoller l’hélicoptère, recycler la batterie immédiatement et utiliser une nouvelle PROTECH décline toute responsabilité pour les dommages causés par l’utilisation de ces types de batterie 30 •... - Seite 31 Pitch Gauge / Pitch instelling / Calibre de Pitch / Pitch-Einstelllehre Fig. 41 Fig. 42 Fig. 43 To use your pitch gauge, you Voor het instellen van de pitch Installieren Sie den Pitch- Installez le calibre de “Pitch“ have to set it on the rotor blade moet je de meter op het rotorblad Einstelllehre auf die (position 0°) sur la pale et assu-...
- Seite 32 ALL YOU NEED IS INSIDE ... THE PROTECH CATALOG 144 FULL COLOUR PAGES ASK YOUR LOCAL R/C MODEL SHOP PROTECH® is a registered trademark P.O.-Box 60 • B-2250 Olen Tel.: +32 (0)14 25 92 80 Fax: +32 (0)14 25 92 89 info@protech.be...