
Verwandte Anleitungen für Jack Wolfskin Exolight III


Inhaltszusammenfassung für Jack Wolfskin Exolight III
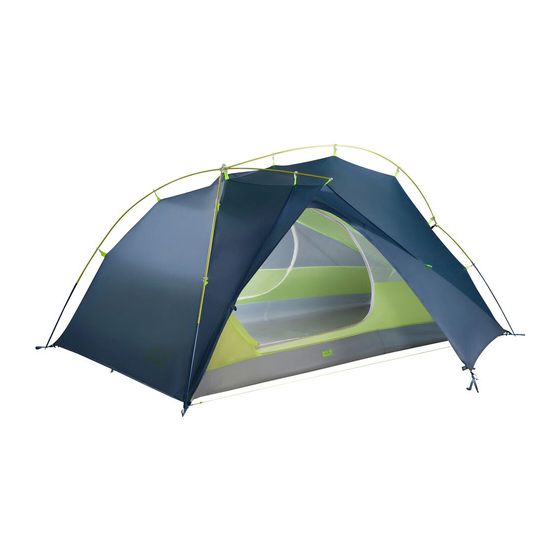
- Seite 1 Exolight ii / iii Tent Manual Gebrauchsanleitung Notice de Montage N60741_Exolight_134099_Instruction_Sheets_130813_rz.indd 1 13.08.13 12:58...
- Seite 2 5 haubans avec fixation 1 manchon de réparation At JACK WolFSKIN we are continually improving and upgrading our products. We therefore reserve the right to make changes to individual components. Diagrams used for the pitching instructions may differ slightly from the actual product.
- Seite 3 VENtilAtoN BElÜFtUNg Your tent is equipped with sufficient ventilation Ihr Zelt ist mit ausreichenden Belüftungsmöglich- options. try to ensure that there is always a good keiten ausgestattet. Sorgen Sie immer für eine gute flow of air through the tent to reduce the risk of luftzirkulation um die gefahr der Kondenswasser- condensation build-up.
- Seite 4 StEP 1 SChRitt 1 Pitching your tent for the first time: we recommend Beim ersten Aufbau: Sie sollten Ihr neues Zelt erst you do a dry run with your new tent, in order to einmal probeweise aufbauen und sich vor Antritt familiarise yourself with all the pitching instructions der ersten Reise mit allen Aufbauschritten vertraut before your first trip.
- Seite 5 ÉtAPE 1 45° Lors du premier montage : avant d’entamer votre voyage, il est conseillé tout d’abord de procéder au montage de votre nouvelle tente, afin de vous fami- liariser avec les différentes étapes de montage. Choisissez d’abord un emplacement adapté pour votre tente (1) et enlevez tous les objets pointus qui pourraient endommager le sol de la tente.
- Seite 6 StEP 2 SChRitt 2 Carefully connect all sections of the pole system, Fügen Sie die Segmente des Stangenverbunds ensuring they lock together firmly (1). sorgfältig zusammen, so dass diese fest ineinander sitzen (1). lay the pole system on top of the tent. the arms spread furthest apart from each other in the pole legen Sie den Stangenverbund über das ausgebrei- system should be positioned over the large triangle...
- Seite 7 ÉtAPE 2 Assemblez soigneusement tous les segments des arceaux de manière à ce qu’ils soient bien imbriqués les uns dans les autres (1). Posez l’assemblage de ces arceaux sur la tente à plat. les extrémités des arceaux les plus écartés sont placées sur la grande couture triangulaire de la tente extérieure ;...
- Seite 8 StEP 3 SChRitt 3 Attach all the clips on the flysheet to the poles. the Befestigen Sie alle Clips des Außenzeltes am Gestänge. clip on the point of the large triangle of seams on the Der Clip an der Spitze des großen Nahtdreiecks des flysheet attaches to the middle/ceiling pole (1).
- Seite 9 ÉtAPE 3 Fixez tous les clips de la tente extérieure aux arceaux. le clip situé sur la pointe de la grande couture trian- gulaire de la tente extérieure se fixe sur l’armature centrale du toit (1). Tendez bien les deux apsides en les écartant au sol et réglez la tension par les boucles de serrage (2).
- Seite 10 StEP 4 SChRitt 4 45° the five guylines and attachment points provided Die mitgelieferten fünf Abspannleinen und Fixierer may be attached to the neon loops on the flysheet (1) dienen zur optionalen Nutzung und werden an for optional extra stability. den neonfarbigen Bandschlaufen des Außenzeltes befestigt (1).
- Seite 11 ÉtAPE 4 les cinq haubans et fixations fournis peuvent être uti- lisés en option et se fixent sur les boucles de couleur fluorescente de la tente extérieure (1). Enfilez d’abord le hauban dans la fixation (2), ensuite dans la boucle de la tente (3) puis de nouveau dans la fixation (4) et terminez par un double nœud à...
- Seite 12 FolDiNg iNStRUCtioNS FAltANlEitUNg Disassembly takes place in the opposite order to Der Abbau erfolgt in umgekehrter Reihenfolge pitching. In order to simplify packing and your next des Aufbaus. Um das Einpacken und den nächsten pitching experience, roll the guylines up as short as Aufbau zu erleichtern, fassen Sie die Abspannleinen possible.
-
Seite 13: Instructions De Pliage
iNStRUCtioNS DE PliAgE Pour démonter la tente, il faut reprendre les étapes du montage dans le sens inverse. Afin de simplifier le rangement et un futur montage, enroulez les haubans au plus court. Pliez la tente en trois dans la longueur (1) et enrou- lez-la à... - Seite 14 Zeltmaterialien, kann aber auf Dauer der Natur nicht trotzen. Bitte vermeiden Sie deshalb please avoid subjecting the tent to intensive sunlight for extended periods of time. JACK WolFSKIN will not dauer hafte intensive Sonneneinwirkung. JACK WolFSKIN übernimmt keine garantie für Schäden durch assume any liability for damage caused by ultraviolet UV-Strahlung.
- Seite 15 NotES FURthER tiPS wEitERE tiPPS Firmly tensioning the poles, flysheet and guylines is Die stramme grundspannung der Stangen, des ober- the key to your tent remaining sturdy and wind-stable. zeltes und der Abspannleinen sind die Voraussetzung Check that the poles sit well and always tension the für besten Stand und Sturmstabilität Ihres Zeltes.
- Seite 16 2 apsides avec possibilités d’aération, ainsi que divers détails d‘équipement augmentent le confort. www.jack-wolfskin.com JACK WolFSKIN Ausrüstung für Draussen gmbH & Co. KgaA Jack Wolfskin Kreisel 1 65510 Idstein · germany 0813 N60741_Exolight_134099_Instruction_Sheets_130813_rz.indd 16 13.08.13 12:58...