Keter PREMIER JUMBO Gebrauchsanleitung
Quicklinks
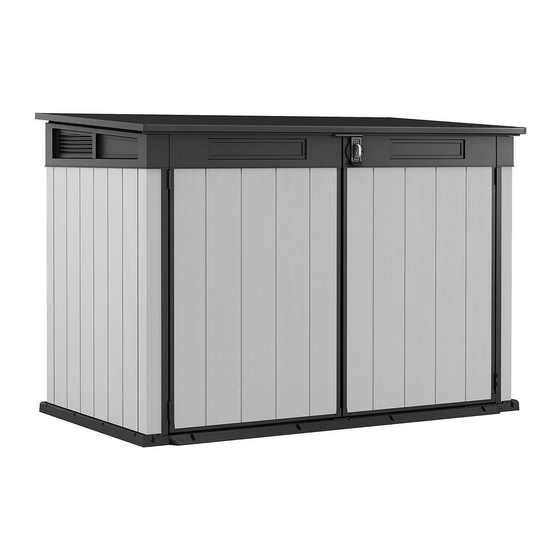
PREMIER JUMBO
USER MANUAL | MODE D'EMPLOI | MANUAL DEL USUARIO | GEBRAUCHSANLEITUNG | GEBRUIKSHANDLEIDING
| MANUALE PER L'UTENTE | MANUAL DO UTILIZADOR
WARRANTY ACTIVATION
shed. In order to activate your warranty, please log onto our website
and fill in the form under warranty activation.
US, Canada:
Tel: +1-877-638-7056
Fax: +1-704-263-9271
UK:
Tel: +44-121-506-0008
Fax: +44-121-422-0808
Thank you for your purchase of the Keter
Spain:
Tlf: +34-976-46-00-06
Fax: +34-976-460-281
Other European Countries:
Tel: +31-161-22-8300
Fax: +31-1612-27002
ACTIVATION DE LA GARANTIE
votre abri Keter. Pour activer votre garantie, veuillez, svp, vous connecter
sur notre site internet et remplir le formulaire de l'activation de la garantie.
SKU: 17206512
WWW.KETER.COM
Nous vous remercions pour l'achat de

Verwandte Anleitungen für Keter PREMIER JUMBO


Inhaltszusammenfassung für Keter PREMIER JUMBO
- Seite 1 Nous vous remercions pour l’achat de shed. In order to activate your warranty, please log onto our website votre abri Keter. Pour activer votre garantie, veuillez, svp, vous connecter and fill in the form under warranty activation. sur notre site internet et remplir le formulaire de l'activation de la garantie.
- Seite 2 SITE PREPARATION | PRÉPARATION DU SITE | PREPARACIÓN DEL LUGAR | VORBEREITUNG DES AUFSTELLUNGSORTES | VOORBEREIDING VAN HET TERREIN | PREPARAZIONE DEL LUOGO DI MONTAGGIO | PREPARAÇÃO DO LOCAL Level the ground surface | Égalisez la surface du sol | Nivele la superficie del suelo | Ebnen Sie die Bodenoberfläche | Maak de bodem vlak | Livella la superficie del terreno | Nivele a superfície do solo BEFORE STARTING ASSEMBLY | AVANT DE COMMENCER LE MONTAGE | ANTES DE EMPEZAR EL ARMADO | VOR MONTAGEBEGINN | VOORDAT U BEGINT TE MONTEREN | PRIMA DI INIZIARE IL MONTAGGIO | ANTES DE...
- Seite 3 SHED PARTS | PIÈCES DE L’ABRI | PARTES DEL COBERTIZO | TEILE DES SCHUPPENS | ONDERDELEN VAN HET SCHUURTJE | COMPONENTI DEL DEPOSITO ATTREZZI | PEÇAS DO ABRIGO Remove all parts from the package(s) and spread them out on a clean work surface | Code letters are imprinted on each part for easy identication | Retirez toutes les pièces du/des paquet(s) et étalez-les sur une surface de travail propre | Des lettres sont imprimées sur chaque pièce pour une identification facile | Saque todas las piezas del paquete o paquetes y póngalas sobre una superficie de trabajo limpia | El código de letras está...
- Seite 4 METAL PARTS | PIÈCES MÉTALLIQUES | PIEZAS METÁLICAS | METALLTEILE | METALEN DELEN | PARTI IN METALLO | PARTES METÁLICAS LM (x1) RM (x3) (x1) BM (x1) CR (x1) CL (x1) RP (x1) TMR (x1) FMF (x1) MB (x1)
- Seite 5 SMALL PARTS | PETITES PIÈCES | PARTES PEQUEÑAS | KLEINTEILE | KLEINE ONDERDELEN | MINUTERIA | PEÇAS PEQUENAS H (x1) ILR (x1) OLR (x1) TP (x1) PT (x2) DH (x4) MH (x1) (x7) LH (x1) CN (x3) CC (x3) TH (x3) SCREWS | VIS | TORNILLOS | SCHRAUBEN | SCHROEVEN | VITI | PARAFUSOS inch inch...
- Seite 6 FLOOR ASSEMBLY | MONTAGE DU SOL | ARMADO DEL PISO | MONTAGE DER BODENPLATTE | VLOERMONTAGE | MONTAGGIO DEL PAVIMENTO | MONTAGEM DO PISO (x2) sc15 (x10) sc15 sc15 (x1) s45b (x2) Front | Avant | Delante | Vorderseite | Voorkant | Anteriore | Frente...
- Seite 7 WALL ASSEMBLY | MONTAGE DU MUR | ARMADO DE PAREDES | MONTAGE DER WÄNDE | MONTAGE VAN DE MUREN | ASSEMBLAGGIO DELLE PARETI | MONTAGEM DA PAREDE (x1) WB (x1) Outside Extérieure Exterior Außenseite Buitenkant Esterno Exterior Front | Avant | Delante | Vorderseite | Voorkant | Anteriore | Frente...
- Seite 8 PC (x1) WS (x1) PC (x1)
- Seite 9 WB (x1) PC (x1) PC (x1) WS (x1)
- Seite 10 s13b (x8) CL (x1) CR (x1) sc15 (x4) sc15...
- Seite 11 s45b (x4) s45b PL (x1) PR (x1)
- Seite 12 sc15 (x2) BM (x1) sc15 sc15 (x4)
- Seite 13 sc15 (x6) sc15 (x6)
- Seite 14 DOOR ASSEMBLY | MONTAGE DE LA PORTE | ARMADO DE LA PUERTA | MONTAGE DER TÜR | DEURMONTAGE | MONTAGGIO DELLA PORTA | MONTAGEM DA PORTA Outside Extérieure Exterior Außenseite Buitenkant Esterno Exterior D (x2) LM (x1) RM (x3) Right Left Droit Gauche...
- Seite 15 UPR (x1) UPL (x1) Left Right Gauche Droit Izquierdo Derecho Verließ Richtig Links Rechts Sinistra Destra esquerdo Direito sc15 (x8) Left Right Droit Gauche Izquierdo Derecho Richtig Verließ Rechts Links Destra Sinistra Direito esquerdo...
- Seite 16 BPL (x1) BPR (x1) Right Left Droit Gauche Derecho Izquierdo Richtig Verließ Rechts Links Destra Sinistra Direito esquerdo sc15 (x8)
- Seite 17 sc15 (x8) DH (x4)
- Seite 18 sc15 (x4) Left Gauche Izquierdo Verließ Links Sinistra esquerdo sc15 (x4) Right Droit Derecho Richtig Rechts Destra Direito...
- Seite 19 ROOF ASSEMBLY | MONTAGE DU TOIT | ARMADO DEL TECHO | DACHMONTAGE | DAKMONTAGE | MONTAGGIO DEL TETTO | MONTAGEM DO TELHADO RE (x2) RP (x1) sc15 (x8) sc15 Front | Avant | Delante | Vorderseite | Voorkant | Anteriore | Frente...
- Seite 20 sc15 (x12) MMR (x1) MH (x1) sc15 (x2) sc15 x 2 sc15 x 2...
- Seite 21 sc15 (x6) PT (x2) sc15 Front | Avant | Delante | Vorderseite | Voorkant | Anteriore | Frente sc15 (x2)
- Seite 22 sc15 (x6) TMR (x1)
- Seite 23 sc15 (x4) sc15 x 4 sc15 (x4) LH (x1)
- Seite 24 ILR (x1) s26b (x4) OLR (x1) s26b sm18 (x2) IH (x1) TP (x1) sm18...
- Seite 25 MB (x1) sc15 (x1) sc15 s45b (x16)
- Seite 26 OPEN...
- Seite 27 OPTION | OPCIÓN | OPTIE | OPZION | OPÇÃOE 3 6 0 L TH (x2) CC (x2) CN (x2) 3 6 0 L 9 6 G a l 9 6 G a l TH (x3) CC (x3) CN (x3) 2 4 0 L 2 4 0 L 6 3 G a l 2 4 0 L...
- Seite 28 OPTION | OPCIÓN | OPTIE | OPZION | OPÇÃOE Shelves | Étagères | Regale | Estantes | Planken | Scaffali | Prateleria It is optional to purchase a wooden plank and use it as a shelf. L’achat facultatif d’une planche en bois vous permettra de créer une étagère. De manera opcional, puede adquirir una tabla de madera y utilizarla como estante.
- Seite 29 OPTION | OPTION | OPCIÓN | OPTION | OPTIE | OPZIONE | OPÇÃO SECURING THE SHED TO A FOUNDATION Affix the shed to the foundation by drilling holes in the shed floor at the pre-marked locations and screwing it into the foundation using appropriate screws (screws not included). FIXER L’ABRI SUR UNE FONDATION Fixez l’abri à...
- Seite 30 MAINTENANCE | MANTENIMIENTO | WARTUNGSARBEITEN | ONDERHOUD | MANUTENZIONE | MANUTENÇÃO This shed is maintenance free. Paint or varnish are not necessary. For smooth and long lasting performance occasionally apply lubricant on pistons. Cet abri ne nécessite aucun entretien. Peindre ou vernir n’est pas nécessaire. Pour un bon entretien et des performances durables, appliquez périodiquement un lubrifiant sur les pistons.
- Seite 31 CARE AND SAFETY GUIDELINES • The shed is intended for storage purposes only. It is not designed for habitation. • It is strongly recommended to secure the shed to an immovable object or anchor to the ground by drilling holes in the shed floor (at the pre-marked locations) and inserting proper screws into the ground (screws are not included).
- Seite 32 wenn der Schuppen nicht genutzt wird, um eine Beschädigung durch Windbelastungen zu vermeiden. • Betreten Sie auf keinen Fall das Dach des Schuppens. • Wenden Sie sich bitte an Ihre lokale Behörde und erkundigen Sie sich dort, ob zum Aufbau des Schuppens eine Genehmigung erforderlich ist. RICHTLIJNEN VOOR ZORG EN VEILIGHEID •...
- Seite 33 à des fins commerciales ou publiques, annuleront cette garantie. Keter ne saurait être tenu responsable de tout dégât encouru par une tierce partie ou de tout dégât ou perte d'objets à l'intérieur ou à proximité de l'abri.
- Seite 34 O seu abrigo Keter (“o Produto”) foi fabricado manualmente a partir de materiais recicláveis de qualidade superior sob controlo e supervisão rigorosos. Em caso de ocorrência de algum problema com o Produto, por favor, faça a sua reclamação para o serviço de apoio ao cliente Keter no nosso site (www.keter.com) ou por telefone.
- Seite 36 Made in Israel by | Fabriqué en Israël par | Fabricado en Israel por | Hergestellt in Israel von | Gemaakt in Israël door | Realizzato in Israele da | Fabricado em Israel por Keter Plastic Ltd., 2 Sapir St. Industrial Area, Herzliya 46852, Israel For assistance with assembly, or to request replacement parts, log onto our website or call Customer Service.