Herunterladen Inhalt Inhalt Diese Seite drucken
Reolink Argus 3 Bedienungsanleitung
Vorschau ausblenden Andere Handbücher für Argus 3:

Werbung

Verfügbare Sprachen
  • DE

Verfügbare Sprachen

  • DEUTSCH, seite 10
Technical Support
EN/DE/FR/IT/ES
If you need help, please contact Reolink before returning your product. Most questions can be
answered through our online support center at https://support.reolink.com.
Technische Unterstützung
Wenn Sie Hilfe brauchen, kontaktieren Sie bitte Reolink Support Team zuerst, bevor Sie Ihre
Bestellung zurücksenden.Meiste Fragen oder Probleme können von unserem Online Support
Center beantwortet und gelöst werden: https://support.reolink.com.
Support technique
Si vous avez besoin d'aide, veuillez contacter Reolink avant de retourner votre produit. La
plupart des questions peuvent être répondues via notre centre de support en ligne à l'adresse
https://support.reolink.com.
Supporto Tecnico
Se avete bisogno di aiuto, le chiediamo gentilmente di contattare Reolink prima di restituire il
Reolink Argus 3
prodotto.La maggior parte delle domande può essere risolta tramite il nostro centro di
assistenza online all'indirizzo https://support.reolink.com.
Operational Instruction
Soporte técnico
Si necesita ayuda, comuníquese con Reolink antes de devolver su producto. La mayoría de las
preguntas se pueden responder a través de nuestro centro de soporte en línea en
https://support.reolink.com.
SHENZHEN BAICHUAN SECURITY TECHNOLOGY CO., LTD.
2-4th Floor, Building 2, YuanLing Industrial Park, ShangWu, Shiyan Street, Bao'an District,
Shenzhen, China
https://reolink.com
https://support.reolink.com
REP
BellaCocool GmbH
tolomeoeu@gmail.com
Apri l, 20 20
Pettenkoferstraße 18,10247,Berlin,Germany
QS G 1_A

Werbung

Inhaltsverzeichnis
loading

Inhaltszusammenfassung für Reolink Argus 3

  • Seite 1 Technical Support EN/DE/FR/IT/ES If you need help, please contact Reolink before returning your product. Most questions can be answered through our online support center at https://support.reolink.com. Technische Unterstützung Wenn Sie Hilfe brauchen, kontaktieren Sie bitte Reolink Support Team zuerst, bevor Sie Ihre Bestellung zurücksenden.Meiste Fragen oder Probleme können von unserem Online Support...
  • Seite 2: Inhaltsverzeichnis

    General Introduction Contents Battery Status LED What’s in the Box General Introduction Micro USB power port Set up Camera via Reolink App on Smartphone Speaker Add the Camera to Reolink Client on PC Notes on Camera Installation Spotlight Charge the Battery...
  • Seite 3: Set Up Camera Via Reolink App On Smartphone

    Google Play (for Android). 2. Power on the camera. After setting up the camera, you can add it to Reolink Client and access the camera on your PC. Here is a detailed how-to guide: 3. Launch the Reolink App, click the “...
  • Seite 4: Notes On Camera Installation

    10°. NOTICE: Due to the limitation of PIR sensor Mounting Height: NOTICE: The path to adjust the Sensitivity on Reolink App: Device Settings-> PIR Settings-> detection, if a moving object approaches 2-3 Meters the PIR sensor vertically (the direction of the Sensitivity.
  • Seite 5: Charge The Battery

    NOTICE: The battery is a built-in one. Please do not remove it from the camera. our numerous tests, the recommended distance between the camera and Please note that the solar panel is NOT included in the package. You can buy one on Reolink's the vehicle is 16 meters (52ft).
  • Seite 6: Mount The Camera

    1. Please charge the rechargeable battery with a standard and high-quality DC 5V or 9V battery charger. 2. Please note that the battery is ONLY compatible with the Reolink solar panel. You cannot charge the battery with solar panels from any other brands.
  • Seite 7 field of view when you the part on the bracket watch live feed via Reolink App. identified in the chart clockwise. NOTICE: If you want to adjust the camera angle later, please loosen the bracket by turning the upper part anti-clockwise.
  • Seite 8: Troubleshooting

    Notification of Compliance Troubleshooting Specifications If it doesn’t work, please contact Reolink Support https://support.reolink.com/. FCC Compliance Statement • Camera is not turning on Video & Audio • Wi-Fi connection failed during Video Resolution: 1080p HD at 15 frames/sec This device complies with Part 15 of FCC Rules.
  • Seite 9: Überblick

    Kamera-Einführung and operated with minimum distance 20cm Limited warranty Einrichten der Kamera über die Reolink App auf dem Smartphone between the radiator & your body. Die Kamera zum Reolink Client auf dem PC hinzufügen This product comes with a 2-year limited...
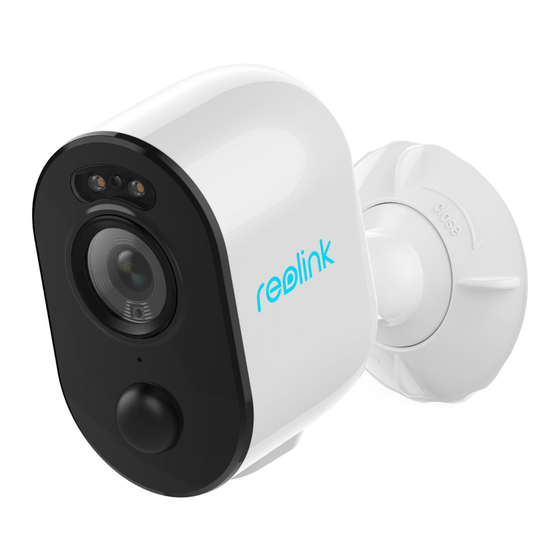
  • Seite 10: Kamera-Einführung

    USB-Stromanschluss Um die Reolink-Kamera einzurichten, führen Sie bitte die folgenden Schritte aus: Lautsprecher 1. Laden Sie die Reolink App herunter und installieren Sie sie im Available on the Get it on App Store (für iOS) oder Google Play (für Android).
  • Seite 11: Die Kamera Zum Reolink Client Auf Dem Pc Hinzufügen

    Hinweise zur Kamerainstallation HINWEIS: • Die Kamera Reolink Argus 2 unterstützt nur 2,4GHz WLAN, kann nicht 5GHz WLAN unterstützen. • Den besten Platz für die Kamera • Ihre Familie kann nach der Erstkonfiguration über "uf Kamera zugreifen" zur Live-Ansicht gelangen.
  • Seite 12: Erfassungsbereich Des Pir-Sensors

    Wichtige Hinweise zum Reduzieren Sie können den PIR-Erfassungsbereich auf Ihre spezifischen Bedürfnisse abstimmen. Sie können der von Fehlalarmen folgenden Tabelle entnehmen, wie sie in den Geräteeinstellungen der Reolink App einzurichten ist. Reichweite (für lebende und Um Fehlalarme zu verringern, beachten Sie bitte: Empfindlichkeit...
  • Seite 13: Laden Des Akkus

    Ladegerät auf. 2. Wenn Sie den Akku mit dem Solarpanel laden möchten, beachten Sie bitte, dass der Akku der Kamera NUR mit dem Reolink Solarpanel kompatibel ist. Der Akku lässt sich NICHT mit einem Solarpanel anderer Hersteller laden. 3. Bitte laden Sie den Akku bei Temperaturen zwischen 0 ° C und 45 ° C auf.
  • Seite 14: Montage Der Kamera

    Montage der Kamera • Mit Magnet Schritt 4 Installieren Sie die Kamera am Sockel und drehen Sie sie in die gewünschte Richtung. • Mit Sicherheitshalterung Schritt 1 Schritt 2 Drehen und öffnen Sie die Bohren Sie Löcher nach der mitgelieferten Halterung.
  • Seite 15: Mit Klettverschluss

    Installation auf einem Baum. Schritt 4 Passen Sie den Kamerawinkel für das beste Sichtfeld an, während Sie den Live-Feed in Ihrer Reolink App verfolgen. Schritt 5 Befestigen Sie die Kamera, indem Sie das Teil auf der im Diagramm angegebenen Halterung im Uhrzeigersinn drehen.
  • Seite 16: Technische Daten

    Videoauflösung: 1080p HD bei 15 Bildern/ Falls das Problem weiterhin besteht, wenden Sekunde FCC-Konformitätserklärung Wenn die Kamera keine Verbindung zum WLAN Sie sich bitte an den Reolink-Support Sichtfeld: 120° Diagonale herstellen kann, versuchen Sie bitte Folgendes: Dieses Gerät entspricht Abschnitt 15 der FCC- https://support.reolink.com.
  • Seite 17: Vereinfachte Eu-Konformitätserklärung

    Anforderungen und anderen Présentation de la Caméra Die Nutzung des Produkts unterliegt Ihrer relevanten Bestimmungen der Richtlinie Configurez la Caméra via l'Application Reolink sur Smartphone Zustimmung zu AGB und Datenschutzrichtlinien 2014/53/EU entspricht. Ajoutez la caméra au client Reolink sur PC auf https://reolink.com/de/.
  • Seite 18: Présentation De La Caméra

    Configurez la Caméra via l'Application Reolink sur Smartphone LED d'Etat de la Batterie Port d'alimentation USB Pour configurer la caméra Reolink, veuillez suivre les étapes ci-dessous : Haut-Parleur 1. Téléchargez et installez l'application Reolink sur l'App Store Available on the Get it on (pour iOS) ou Google Play (pour Android).
  • Seite 19 Remarques sur l'Installation de la Camera NOTICE: • Reolink Argus 3 la caméra ne prend en charge que 2.4 GHz WiFi. 5 GHz n'est pas supporté. • Trouver le meilleur endroit pour • Votre famille peut cliquer sur "Accès Caméra" pour l'affichage en direct après l'affichage de la la Caméra...
  • Seite 20 La portée de détection PIR peut être modifiée pour répondre à vos besoins spécifiques. Vous des émissions de Fausses alarmes pouvez vous référer au tableau suivant pour le configurer dans les Paramètres du Périphérique Reolink App. Pour réduire les fausses alarmes, veuillez noter que: Distance de détection (Pour les choses Sensibilité...
  • Seite 21 Reolink Argus 3 n'est pas conçu pour fonctionner 24 heures sur 24, 7 jours sur 7 et 24 heures sur 24 streaming en direct. Il est conçu pour enregistrer des événements de mouvement et visualiser à...
  • Seite 22: Montage De La Caméra

    Montage de la caméra • avec aimant Étape 4 Collez la caméra sur le mur monter et tordre la caméra dans le sens des aiguilles d'une montre dans n'importe quelle direction. • avec support de sécurité Étape 2 Étape 1 Percez les trous selon le gabarit de perçage fourni et Tournez et ouvrez le support.
  • Seite 23 Étape 4 Ajustez l'angle de la caméra et obtenez le meilleur champ de vision lorsque vous voyez des images en direct dans votre application Reolink. Étape 5 Fixez la caméra en tournant la pièce sur le support identifié dans le tableau dans le sens horaire.
  • Seite 24 SSID est dans les 31 • Retirer le film de protection de l'objectif de la Reolink déclare que cet appareil est conforme caractères et le mot de passe est dans les 64 caméra. aux exigences essentielles et autres dispositions Général...
  • Seite 25: Cosa Contiene La Confezione

    êtreéliminé avec d'autres déchets Introduzione alla telecamera vous et Reolink. Pour en savoir plus: ménagers dans l'UE. Afin d'éviter que Installare la camera tramite App Reolink su Smartphone https://reolink.com/eula/. l'élimination incontrôlée des déchets ne nuise Aggiungere la telecamera al Client Reolink su PC à...
  • Seite 26 Installare la camera tramite App Reolink su Smartphone LED stato della batteria Slot di Alimentazione USB Per configurare la telecamera Reolink, si prega di seguire i seguenti passaggi: Altoparlante 1. Scaricare e installare l'App Reolink su App Store (per iOS) o Get it on Available on the Google Play (per Android).
  • Seite 27 Cautele per l’installazione della telecamera AVVISO: • Reolink Argus 3 telecamera supporta solo il Wi-Fi a 2.4 GHz. I 5 GHz non sono supportati. • Trovare il posto migliore per la • La vostra famiglia può fare clic su "Accedi a Telecamera" per la visualizzazione dal vivo dopo il telecamera setup iniziale.
  • Seite 28 Note Importanti per Ridurre i Falsi Allarmi Il campo di rilevamento PIR può essere attivata per soddisfare le vostre specifiche esigenze. Si può fare riferimento alla seguente tabella per configurarlo nelle impostazioni del dispositivo Reolink App. Distanza di Rilevamento (Per Per ridurre i falsi allarmi, si prega di notare: Sensibilità...
  • Seite 29: Caricare La Batteria

    Reolink Argus 3 non è progettata per girare 24/7 a piena capacità o per lo streaming dal vivo tutta 10. NON usare la batteria se emette odori, genera calore, diventa scolorita o deformata, o sembra in qualche modo anormale.
  • Seite 30 Montare la telecamera • con Magnete Passaggio 4 Attaccare la telecamera sul supporto a parete e girare la telecamera in ogni direzione. • con Staffa di Sicurezza Passaggio 1 Passaggio 2 Ruotare e aprire la staffa. Praticare un foro secondo la sagoma del foro di montaggio e inserire i tasselli in plastica nel foro.
  • Seite 31 Infilare la fascetta a strappo nelle asole e allacciare la fascetta. È ideale per l'installazione sull'albero Passaggio 4 Regolare l'angolazione della telecamera per ottenere il miglior campo visivo quando si visualizza il feed dal vivo sulla propria App Reolink. Passaggio 5 Assicurare la telecamera ruotando in senso orario la parte sulla staffa identificata nel grafico.
  • Seite 32: Risoluzione Dei Problemi

    In caso la telecamera non riuscisse a eseguire sicura) sulla propria interfaccia del router. notifiche push Reolink dichiara che questo dispositivo è in la scansione del codice QR sul telefono, si • Modificare il SSID del Wi-Fi o la password e conformità...
  • Seite 33: Qué Hay En La Caja

    Introducción a la cámara non deve essere rottamato insieme ad altri (“EULA”) fra voi e Reolink. Scopri di più: Configure la cámara a través de la aplicación Reolink en el teléfono inteligente rifiuti domestici attraverso l’UE. Per prevenire https://reolink.com/eula/. possibili danni all’ambiente o alla salute umana Añade la cámara a Reolink Cliente en PC...
  • Seite 34 LED de estado Lente 3. Inicie la aplicación Reolink, haga clic en el botón “ ” en la esquina superior derecha y escanee el código QR para agregar la cámara, luego siga las instrucciones en pantalla y los tonos de aviso Sensor de luz diurna de la cámara para completar la configuración.
  • Seite 35 Atención para la instalación de la cámara NOTA: • La cámara Reolink Argus 3 solo admite wifi 2.4GHz, no admite wifi 5GHz. • Encuentre el mejor lugar para la • Su familia puede hacer clic en "Acceder a la Cámara" para ver la Vista en Vivo después de la configuración inicial.
  • Seite 36 El rango de detección PIR puede girarse para satisfacer sus necesidades específicas. Puede alarmas consultar la siguiente tabla para configurarlo en Reolink App Device Settings. Detectando Distancia (Para No instale la cámara hacia los objetos con luces brillantes, incluyendo el...
  • Seite 37 Si la batería está siendo utilizada o cargada, retire la batería del dispositivo o del cargador inmediatamente y deje de usarla. Reolink Argus 3 no está diseñado para capacidad total 24/7 durante todo el día o ejecución live streaming. Fue diseñado para grabar eventos de movimiento y distancia ver transmisión en vivo 11.
  • Seite 38: Montaje De La Cámara

    Montaje de la cámara • con Imán Paso 4 Pegue la cámara a la base y gire la cámara en cualquier dirección que desees. • con Monte de Seguridad Paso 2 Paso 1 Perfore orificios siguiendo la plantilla de orificios de Gire y abra el soporte.
  • Seite 39 Paso 4 Ajuste el ángulo de la cámara y obtenga el mejor campo de visión cuando vea la transmisión en vivo en su aplicación Reolink. Paso 5 Asegure la cámara girando la parte del soporte identificado en la tabla en sentido horario.
  • Seite 40: Solución De Problemas

    Général • Retire la película protectora de la lente de la • Cambie su SSID o contraseña de Wi-Fi y Reolink declara que este dispositivo cumple con cámara. asegúrese de que el SSID tenga 31 caracteres los requisitos esenciales y otras disposiciones Poder: 5V/2A y la contraseña tenga 64 caracteres.
  • Seite 41 Esta marca indica que este producto no debe acepta los términos de este Acuerdo de licencia desecharse con otros desechos domésticos de usuario final ("EULA") entre usted y Reolink. en toda la UE. Para evitar posibles daños al Obtenga más información: medio ambiente o la salud humana https://reolink.com/eula/.
  • Seite 42: Fcc Caution

    FCC Caution This device complies with part 15 of the FCC Rules. Operation is subject to the following two conditions: (1) This device may not cause harmful interference, and (2) this device must accept any interference received, including interference that may cause undesired operation.
  • Seite 43 IC Caution: This device complies with Industry Canada’s licence-exempt RSSs. Operation is subject to the following two conditions: (1) This device may not cause interference; and (2) This device must accept any interference, including interference that may cause undesired operation of the device. To maintain compliance with RF exposure guidelines, this equipment should be installed and operated with a minimum distance of 20cm between the radiator and your body.

Inhaltsverzeichnis