AKASO V50X Handbuch
Vorschau ausblenden
Andere Handbücher für V50X:
- Bedienungsanleitung ,
- Benutzerhandbuch (356 Seiten) ,
- Handbuch (58 Seiten)
Inhaltsverzeichnis
Verfügbare Sprachen
Verfügbare Sprachen
Kapitel
Inhaltsverzeichnis

Verwandte Anleitungen für AKASO V50X


Inhaltszusammenfassung für AKASO V50X
- Seite 1 USER MANUAL AKASO V50X Action Camera V1.3...
- Seite 2 01 - 27 28 - 54 55 - 81 82 - 108 109 - 134 日本語...
- Seite 30 INHALT Was ist in der Box Dein V50X Fertig Machen Übersicht der Modi Anpassen Ihres V50X Verbindung zur App herstellen Wiedergabe Ihrer Inhalte Löschen Sie Ihre Inhalte Laden Sie Ihre Inhalte Wartung Ihrer Kamera Maximierung der Akkulaufzeit Batterielagerung und -handhabung...
-
Seite 31: Was Ist In Der Box
Wasserdichtes Gehäuse Lenker/Masthalterung Montieren 1 Montieren 2 Montieren 3 Montieren 4 Montieren 5 Helmhalterungen Montieren 6 Montieren 7 Montieren 8 Schützende Hintertür USB Kabel Batterie Ladegerät Fernbedienung Bandagen Kabel Linsentuch Quick Start Guide AKASO V50X Action Camera Armband für Schnellstartanleitung Fernbedienung... -
Seite 32: Dein V50X
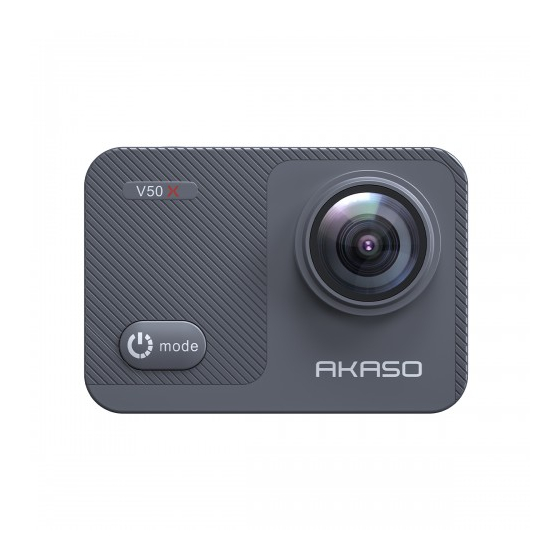
DEIN V50X... -
Seite 33: Fertig Machen
Hinweis: Die Kamera nimmt keinen Ton auf, wenn sie sich im wasserdichten Gehäuse befindet. FERTIG MACHEN Willkommen zu Ihrem AKASO V50X. Zum Aufnehmen von Videos und Fotos benötigen Sie eine microSD-Karte (separat erhältlich), um die Aufnahme zu starten. MicroSD-Karten Bitte verwenden Sie Markenspeicherkarten, die diese Anforderungen erfüllen: •... -
Seite 34: Modi Wechseln
Hinweis: 1. Bitte formatieren Sie die microSD-Karte zuerst in dieser Kamera, bevor Sie sie verwenden. Formatieren Sie Ihre microSD-Karte regelmäßig neu, um sie in gutem Zustand zu halten. Durch die Neuformatierung werden alle Ihre Inhalte gelöscht. Laden Sie daher Ihre Fotos und Videos, bevor Sie die Neuformatierung durchführen. -
Seite 35: Übersicht Über Die Modi
ÜBERSICHT ÜBER DIE MODI Es gibt 9 Modi: Foto, Selbstauslöser, Serienbild, Zeitrafferfoto, Video, Zeitlupe, Zeitraffervideo, Standbild und Fahrmodus. 0002/5467 Arbeitsmodus Foto Foto platzen Selbstauslöser Foto Zeitraffer Video Zeitlupe Klick hier Fotomodus Drücken Sie die Modustaste oder tippen Sie auf den Aufnahmemodusbereich auf dem Bildschirm, um nach dem Einschalten der Kamera in den Fotomodus zu wechseln. -
Seite 36: Selbstauslösermodus
Selbstauslösermodus Drücken Sie die Modustaste oder tippen Sie auf den Aufnahmemodusbereich auf dem Bildschirm, um nach dem Einschalten der Kamera in den Selbstauslösermodus zu wechseln. Drücken Sie im Selbstauslösermodus den Auslöser, um ein Selbstauslöserfoto aufzunehmen. Halten Sie die Auf-oder Ab-Taste gedrückt, um die Zoomstufe anzupassen. - Seite 37 Zeitraffer-Fotomodus Drücken Sie im Zeitraffer-Fotomodus den Auslöser, um eine Reihe von Fotos in bestimmten Intervallen aufzunehmen. Verwenden Sie diesen Modus, um Fotos von Aktivitäten aufzunehmen und später die besten auszuwählen. Halten Sie die Auf- oder Ab-Taste gedrückt, um die Zoomstufe anzupassen. 0002/5467 Zeitraffer Video Modus...
- Seite 38 Zeitlupen Modus Drücken Sie im Zeitlupenmodus den Auslöser. Die Kamera nimmt Zeitlupenvideos auf. Halten Sie die Auf- oder Ab-Taste gedrückt, um die Zoomstufe anzupassen. 00:00:00/00:40:37 Zeitlupen 1080P90fps Zeitraffervideomodus Drücken Sie im Zeitraffervideomodus den Auslöser. Die Kamera zeichnet Videos von Bildern auf, die in bestimmten Intervallen aufgenommen wurden. Halten Sie die Auf- oder Ab-Taste gedrückt, um die Zoomstufe anzupassen.
- Seite 39 Standbildmodus Drücken Sie im Standbildmodus den Auslöser, die Kamera beginnt mit der Videoaufnahme und nimmt während der Videoaufnahme automatisch Fotos auf. Halten Sie die Auf- oder Ab-Taste gedrückt, um die Zoomstufe anzupassen. 00:00:00/00:31:55 Standbild Foto 4K30fps Fahrmodus Im Fahrmodus verbinden Sie die Kamera mit einem Zigarettenanzünder im Auto. Die Kamera schaltet sich automatisch ein, wenn Sie Ihr Auto starten, und schaltet sich aus, wenn Sie Ihr Auto anhalten.
-
Seite 40: Anpassen Ihres V50X
ANPASSEN IHRES V50X Video-Einstellungen 1. Auflösung: 4K30fps/2.7K30fps/1080P90fps/1080P60fps/1080P30fps/ 720P120fps/720P60fps/720P30fps La configuración predeterminada es 4K30fps. Hinweis: Wenn Sie Videos mit hohen Auflösungen oder hohen Bildraten bei warmen Umgebungstemperaturen aufnehmen, wird die Kamera möglicherweise warm und verbraucht mehr Strom. 2. Bildstabilisierung: Aus/Ein Die Standardeinstellung ist Aus. - Seite 41 5. Langsame Bewegung: 1080P90fps/720P120fps Die Standardeinstellung ist 1080P90fps. Zeitlupe ist ein Effekt beim Filmemachen, bei dem die Zeit verlangsamt zu sein scheint. Hinweis: Wenn Sie Zeitlupenvideos aufnehmen möchten, schalten Sie zuerst die Bildstabilisierung aus. 6. StillFoto: 4K30fps Die Standardeinstellung ist 4K30fps. 7.
- Seite 42 10. Externes Mikrofon: Aus/Ein Die Standardeinstellung ist Aus. 11. Audioaufzeichnung: Aus/Ein Die Standardeinstellung ist Aus. Deaktivieren Sie die Audioaufnahme. Die Kamera nimmt beim Aufnehmen von Videos keinen Ton auf. 12. Belichtungswert: -2/-1.7/-1.5/-1.3/-1/-0.5/-0.3/0/+0.3/+0.5/+1/+1.3/+1.5/+1.7/+2 Standardeinstellung ist 0. Standardmäßig verwendet Ihre Kamera das gesamte Bild, um den geeigneten Belichtungsgrad zu bestimmen.
-
Seite 43: Fotoeinstellungen
Kamera die Belichtung bestimmt. Mit Kameras kann der Benutzer im Allgemeinen zwischen Mittel-, Durchschnitts- oder Punktmessmodus wählen. Die verschiedenen Messmodi ermöglichen es dem Benutzer, den am besten geeigneten Modus für eine Vielzahl von Lichtverhältnissen auszuwählen. 16. Farbe: Natürlich/Schwarzweiß/Sepia Die Standardeinstellung ist Natürlich. Fotoeinstellungen 1. - Seite 44 7. Belichtungswert: -2/-1.7/-1.5/-1.3/-1/-0.5/-0.3/0/+0.3/+0.5/+1/+1.3/+1.5/+1.7/+2 Die Standardeinstellung ist 0. Standardmäßig verwendet Ihre Kamera das gesamte Bild, um den geeigneten Belichtungsgrad zu bestimmen. Mit Belichtung können Sie jedoch einen Bereich auswählen, den Sie möchten Kamera zur Priorisierung bei der Bestimmung der Belichtung. Diese Einstellung ist besonders nützlich bei Aufnahmen, bei denen ein wichtiger Bereich ansonsten über- oder unterbelichtet sein könnte.
-
Seite 45: Systemeinstellungen
12. Schärfe: Stark/Normal/Weich Die Standardeinstellung ist Normal. Die Schärfe steuert die Qualität der in Ihrem Videomaterial oder Ihren Fotos aufgenommenen Details. 13. Farbe: Natürlich/Schwarz & Weiß/Sepia Die Standardeinstellung ist Natürlich. 14. Fotoqualität: Fein/Normal/Wirtschaft Die Standardeinstellung ist Fein. Systemeinstellungen 1. Sounds: Lautstärke/Key Tone/Touch Tone/Boot Tone Sie können die Lautstärke der Kamera einstellen und den Tastenton, den Tastenton oder den Startton ein-und ausschalten. - Seite 46 5. WDR: Aus/Ein Die Standardeinstellung ist Aus. Wide Dynamic Range (WDR) behält einen höheren Detaillierungsgrad in den dunklen und hellen Bereichen eines Bildes bei. Das Ergebnis ist ein Foto, das für beide Extreme richtig belichtet ist. Diese Einstellung ist besonders nützlich für Szenen mit Backlist oder großen hellen Bereichen und einem dunklen Vordergrund.
- Seite 47 16. Datum einstellen: MM/TT/JJJJ Sie können das Datum der Kamera einstellen. 17. Reset: Auf Werkseinstellung zurücksetzen? Abbrechen Bestätigen Diese Option setzt alle Einstellungen auf ihre Standardwerte zurück. 18. Über: Modelo/Versión Sie können das Modell und die Version Ihres V50X überprüfen.
-
Seite 48: Verbindung Mit Der App
VERBINDUNG MIT DER APP Laden Sie zuerst die AKASO GO-App im App Store oder bei Google Play herunter und installieren Sie sie. Mit der AKASO GO App können Sie Ihre Kamera mit einem Smartphone oder Tablet fernsteuern. Zu den Funktionen gehören Kamerasteuerung, Live-Vorschau, Wiedergabe, Download und Einstellungen. -
Seite 49: Spielen Sie Ihren Inhalt Zurück
Sie die Modustaste. Dateien in der AKASO App löschen 1. Öffnen Sie die AKASO GO App. Verbinden Sie die Kamera mit der App. 2. Tippen Sie auf das Wiedergabesymbol, um alle Videos und Fotos anzuzeigen. 3. Wählen Sie das Foto oder Video aus, das Sie löschen möchten, tippen Sie dann... -
Seite 50: Entladen Ihres Inhaltst
Dateien mithilfe des Datei-Explorers löschen. Laden Sie Ihre Inhalte auf das Smartphone 1. Öffnen Sie die AKASO GO App. Verbinden Sie die Kamera mit der App. 2. Tippen Sie auf das Wiedergabesymbol, um alle Videos und Fotos anzuzeigen. 3. Wählen Sie das Foto oder Video aus, das Sie herunterladen möchten, tippen Sie auf das Symbol Mehr in der rechten oberen Ecke und wählen Sie Herunterladen. -
Seite 51: Batterie-Leben Maximieren
BATTERIE-LEBEN MAXIMIEREN Wenn der Akku während der Aufnahme 0% erreicht, speichert die Kamera die Datei und schaltet sie aus. Befolgen Sie nach Möglichkeit die folgenden Richtlinien, um die Batterielebensdauer zu maximieren: • Deaktivieren Sie die drahtlosen Verbindungen • Nehmen Sie Videos mit niedrigeren Bildraten und Auflösungen auf •... -
Seite 52: Fernbedienung
FERNBEDIENUNG Fotoknopf Video-Taste Nur spritzwassergeschützt, nicht wasserdicht VIDEO Stellen Sie zum Aufnehmen eines Videos sicher, dass sich die Kamera im Videomodus befindet. So starten Sie die Aufnahme: Drücken Sie die graue Video-Taste. Die Kamera piept und das Kameralicht blinkt während der Aufnahme. So beenden Sie die Aufnahme: Drücken Sie die graue Video-Taste erneut. -
Seite 53: Cr2032 Batteriewechsel Für Fernbedienung
CR2032 BATTERIEWECHSEL FÜR FERNBEDIENUNG 1. Entfernen Sie die 4 Schrauben an der hinteren Abdeckung der Fernbedienung mit einem 1,8-mm-Kreuzschlitzschraubendreher. 2. Entfernen Sie weitere 4 Schrauben auf der Leiterplatte. 3. Heben Sie die Leiterplatte an und ziehen Sie den Akku heraus, wie in der Abbildung gezeigt. -
Seite 54: Montage Ihrer Kamera
4. Setzen Sie die neue Batterie ein und halten Sie den Pluspol nach oben. 5. Installieren Sie alle 4 Schrauben wieder auf der Leiterplatte. 6. Setzen Sie alle 4 Schrauben wieder in die Abdeckung ein. MONTAGE IHRER KAMERA Befestigen Sie Ihre Kamera an Helmen, Ausrüstung und Ausrüstung. -
Seite 56: Kontaktiere Uns
KONTAKTIERE UNS Bei Fragen zu AKASO-Produkten können Sie sich gerne an uns wenden. Wir werden Ihnen innerhalb von 24 Stunden antworten. E-mail: cs@akasotech.com Offizielle Website: www.akasotech.com Die Marken und Logos microSD, microSDHC, microSDXC und SD sind Marken von SD-3D, LLC.