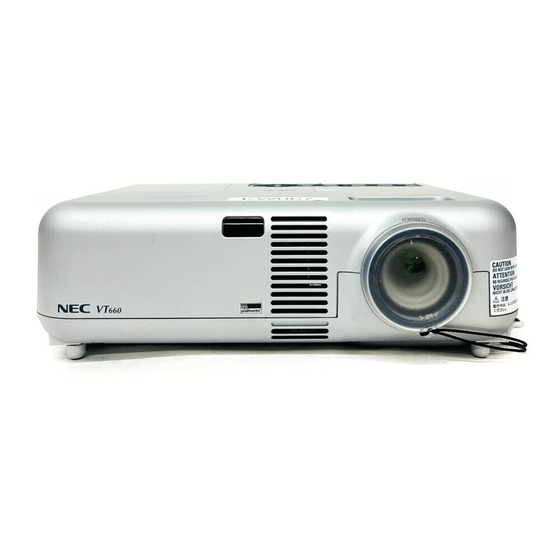
NEC VT660K Schnellstarter
Vorschau ausblenden
Andere Handbücher für VT660K:
- Handbuch (42 Seiten) ,
- Handbuch (42 Seiten) ,
- Schnellstartanleitung (2 Seiten)
Audio cable (not supplied) •
Câble audio (non fourni) •
Audiokabel (kein Lieferumfang) •
Cavo audio (venduto separatamente) •
Cable de audio (no suministrado) •
Audiokabel (medföljer ej) •
• Mini D-SUB 15 pin connector
• Connecteur Mini D-Sub à 15 broches
• 15poliger Mini D-Sub Anschluss
• Connettore mini D-SUB a 15 pin
• Conector Mini D-Sub de 15 contactos
• 15-polig Mini D-Sub-kontakt
Connect the supplied 15pin-15pin signal cable.
For older Macintosh computers, use a commercially available pin adapter to connect to your
Macintosh's video port.
NOTE : Power down all equipment before making connections.
Connecter le câble de signal 15 broches-15
broches fourni.
Pour les ordinateurs Macintosh anciens, utiliser un adaptateur à broche disponible dans le
commerce pour connecter au port vidéo du Macintosh.
REMARQUE : Eteindre tous les appareils avant d'effectuer les connexions.
Schließen Sie das mitgelieferte 15polige Signalkabel
an.
Verwenden Sie für ältere Macintosh-Computer einen handelsüblichen Stiftadapter für den
Anschluss an Ihren Macintosh-Videoport.
HINWEIS : Schalten Sie vor Durchführung der Anschlüsse alle Geräte aus.
Collegate il cavo dei segnali 15 pin – 15 pin in
dotazione.
Per i computer Macintosh di vecchia data, usate un adattatore venduto separatamente per
collegare la porta video del Macintosh.
NOTA : spegnete tutti i componenti prima di effettuare i collegamenti.
Conecte el cable de señal de 15-15 contactos
suministrado.
Para ordenadores Macintosh más antiguos, utilice un adaptador de contactos (disponible en el
comercio) para realizar la conexión al puerto de vídeo del ordenador Macintosh.
NOTA : Apague todos los equipos antes de hacer las conexiones.
Anslut den medlevererade 15P-15P-signalkabeln.
För äldre Macintosh-datorer krävs det en särskild stiftadapter (säljs separat) för anslutning till din
Macintoshs videoport.
OBSERVERA : Slå av strömmen till all utrustning innan anslutningarna görs.
Auto Keystone Correction
No special operation required. Just put the pro-
jector on a flat surface and the Auto Keystone
correction feature will correct the vertical distor-
tion of a projected image on the screen. Note
that the vertical keystone angle can be cor-
rected between 30 degrees upward and 30 de-
grees downward of projector tilt from level.
Correction automatique
de distorsion de trapèze
Aucune opération spéciale n'est nécessaire.
Placer tout simplement le projecteur sur une sur-
face plane et la fonction automatique de correction
de trapèze corrigera la distorsion verticale de
l'image projetée sur l'écran. L'angle vertical de
correction de trapèze peut être corrigé dans une
fourchette allant de 30 degrés vers le haut à 30
degrés vers le bas par rapport à l'inclinaison du
projecteur en partant de la position mise à niveau.
Automatische
Trapezkorrektur
Hierzu ist keine spezielle Vorgehensweise
erforderlich. Stellen Sie den Projektor einfach
auf einer ebenen Fläche auf, und die
automatische Trapezkorrektur gleicht die
vertikale Verzerrung des projizierten Bildes aus.
Beachten Sie, dass der vertikale Trapezwinkel
nur ausreichend korrigiert werden kann, wenn
der Projektor maximal um 30 Grad nach oben
oder unten geneigt ist.
Correzione automatica della
deformazione trapezoidale
Non sono richieste operazioni speciali.
E' sufficiente posizionare il proiettore su una
superficie piana e la funzione di correzione
automatica della deformazione trapezoidale
correggerà la distorsione verticale di
un'immagine proiettata sullo schermo. Nota:
l'angolo di deformazione trapezoidale verticale
può essere corretto di 30 gradi di inclinazione
del proiettore verso l'alto ed il basso.
Corrección trapezoidal
automática
No requiere una operación especial. Coloque el
proyector en una superficie plana y la función
de corrección trapezoidal automática corregirá
la distorsión vertical de una imagen proyectada
en la pantalla. Observe que el ángulo trapezoi-
dal vertical puede corregir entre 30 grados hacia
arriba y 30 grados hacia abajo la inclinación del
proyector.
Automatisk
keystonekorrigering
Det krävs inga särskilda åtgärder. Placera bara
projektorn på en plan yta, så funktionen för
automatisk keystonekorrigering korrigerar den
vertikala distorsionen hos en projicerad bild på
skärmen. Observera att den vertikala
keystonevinkeln kan korrigeras mellan 30
grader uppåt och 30 grader nedåt i förhållande
till projektorns plana vinkel.
Downloaded from
www.Manualslib.com
• RGB signal cable (supplied)
• Câble de signal RGB (fourni)
• RGB-Signalkabel (Lieferumfang)
• Cavo dei segnali RGB (in dotazione)
• Cable de señal RGB (suministrado)
• RGB-signalkabel (medföljer)
Power cable(supplied) •
Câble d'alimentation (fourni) •
Netzkabel (Lieferumfang) •
Cavo d´alimentazione (in dotazione) •
Cable de alimentación (suministrado) •
Nätkabel (medföljer) •
Connect the supplied power
cable.
Connecter le câble
d'alimentation fourni.
Schließen Sie das mitgelieferte
Netzkabel an.
Collegate il cavo
d´alimentazione in dotazione.
Conecte el cable de
alimentación suministrado.
Anslut den medlevererade
nätkabeln.
Adjust the Tilt Foot
(1) Lift the front edge of the projector.
Adjustable Tilt Foot lever
(2) Push up the Adjustable Tilt Foot Levers
Touche du pied à inclinaison réglable
on the right and left sides of the projector
Einstellbare Kippfußtaste
to extend the adjustable tilt feet (maxi-
Tasto del piede di inclinazione regolabile
mum height).
Botón de pata de inclinación ajustable
(3) Push down the Adjustable Tilt Foot Le-
Justerbar lutningsfottangent
vers.
(4) Lower the front of the projector to the de-
Adjustable Tilt Foot
sired height (max. 40mm/1.6") and re-
Pied à inclinaison réglable
lease the Adjustable Tilt Foot Lever to
Einstellbarer Kippfuß
lock the Adjustable tilt foot. There is ap-
Piede d'inclinazione regolabile
proximately 10 degrees of up and down
Pata de inclinación ajustable
adjustment for the front of the projector.
Justerbar lutningsfot
Manual Vertical Keystone
1
Turn off the Auto Keystone function.
Correction
You can also correct the vertical keystone dis-
tortion manually.
Use the SELECT button on the cabinet to select "Image" and then
"Auto Keystone" from the menu.
1
Correction manuelle de
Inactiver la fonction Auto Keystone.
distorsion trapèze
verticale
Il est également possible de corriger
manuellement la distorsion de trapèze
verticale.
Utiliser la touche SELECT du coffret pour sélectionner "Options de
l'image" puis "Auto Keystone" dans le menu.
1
Manuelle Trapezkorrektur
Schalten Sie die Funktion Auto Trapez aus.
Sie können die vertikale Trapezverzerrung
auch manuell korrigieren.
Drücken Sie die Taste SELECT auf dem Projektorgehäuse und wählen
Sie "Bild-Optionen" und anschließend "Auto Trapez" aus dem Menü aus.
Correzione manuale della
1
Disattivate la funzione Auto chiave.
deformazione
trapezoidale verticale
La deformazione trapezoidale verticale può
essere corretta anche manualmente.
Utilizzate il tasto SELECT sul proiettore per selezionare "Opzioni
Immagine", quindi "Auto chiave" dal menu.
1
Corrección trapezoidal
Apague la función Auto Keystone.
vertical manual
Puede corregir manualmente la distorsión trap-
ezoidal vertical.
Utilice el botón SELECT de la cubierta para seleccionar "Opciones de
imagen" y a continuación "Auto Keystone" del menú.
1
Manuell vertikal
Stäng av funktionen Auto Keystone.
keystonekorrigering
Du kan också korrigera den vertikala
keystonedistorsionen manuellt.
Använd SELECT-tangenten på höljet för att välja "Bildalternativ" och
sedan "Auto Keystone" på menyn.
manuals search engine
Turn on the main power switch.
To turn on the main power to the projector, press the Main
Power switch to the on position ( I ).
Enfoncer l'interrupteur
d'alimentation général.
Pour mettre le projecteur sous tension, enfoncer
l'interrupteur d'alimentation en position marche ( I ).
Schalten Sie den
Hauptnetzschalter ein.
Drücken Sie zum Einschalten der Hauptstromversorgung
zum Projektor den Hauptnetzschalter in Ein-Position ( I ).
Accendete l´interruttore
principale.
Per accendere la corrente principale del proiettore, premete
l´interruttore principale nella posizione di accensione ( I ).
Active el interruptor de
alimentación principal.
Para conectar la alimentación principal del proyector, pulse
el interruptor de alimentación principal de modo que quede
en la posición de activado ( I ).
Slå på huvudströmbrytaren.
För att slå på strömmen till projektorn, ställ
huvudströmbrytaren i På-läget ( I ).
Réglage du pied à
Einstellung des
inclinaison
Kippfußes
(1) Soulevez la partie avant du projecteur.
(1) Heben Sie die vordere Kante des Projektors an.
(2) Poussez vers le haut les touches du pied à
(2) Schieben Sie die Einstellbaren Kippfuß-Hebel
inclinaison réglable, sur les côtés droit et
auf der rechten und auf der linken Seite des
gauche du projecteur pour étendre les pieds à
Projektors, um die einstellbaren Kippfüße
inclinaison réglables (hauteur maximale).
(maximale Höhe) auszuziehen.
(3) Poussez vers le bas les touches du pied à
(3) Drücken Sie die Einstellbaren Kippfuß-Hebel
inclinaison réglable.
nach unten.
(4) Abaissez l'avant du projecteur jusqu'à la
(4) Senken Sie die Vorderseite des Projektors auf
hauteur désirée (maxi. 40mm/1,6") et dégagez
die gewünschte Höhe herab (max. 40mm/1,6")
la touche du pied à inclinaison réglable afin de
und lassen Sie den jeweiligen Einstellbaren
verrouiller le pied à inclinaison réglable. On
Kippfuß-Hebel los, um den Einstellbaren Kippfuß
peut régler l'avant du projecteur d'environ 10
zu sichern. Sie haben die Möglichkeit die
degrés de réglage vers le haut et le bas.
Vorderseite des Projektors um etwa 10 Grad zu
heben und zu senken.
2
Select the Keystone function.
Use the SELECT button to select "Image" and then "Keystone"
from the menu.
2
Sélectionner la fonction Keystone.
Utiliser la touche SELECT pour sélectionner "Options de l'image"
puis "Keystone" dans le menu.
2
Wählen Sie die Funktion Trapez.
Drücken Sie die Taste SELECT und wählen Sie "Bild-Optionen"
und anschließend "Trapez" aus dem Menü aus.
2
Selezionate la funzione Chiave.
Utilizzate il tasto SELECT per selezionare "Opzioni Immagine",
quindi "Chiave" dal menu.
2
Seleccione la función Keystone.
Utilice el botón SELECT para seleccionar "Opciones de imagen"
y a continuación "Keystone" del menú.
2
Välj Keystonefunktionen.
Använd SELECT-tangenten för att välja "Bildalternativ" och sedan
"Keystone" på menyn.
OFF
ON
POWER
VIDEO
AUTO ADJ.
S-VIDEO
RGB
SELECT
PJ
Turn on the projector.
Set up the Projector.
To turn on the power to the projector, press and hold the ON/STAND BY
To adjust the projector's focus or to zoom in and
button on the projector cabinet or the POWER ON button on the remote
out use the Focus ring or Zoom lever on the
control for a minimum of 2 seconds.
lens.
NOTE : To turn off the projector, press the ON/STAND BY button or the
To optimize image, press the AUTO ADJ. button
POWER OFF button twice.
on the cabinet or the remote control.
Allumer le projecteur.
Pour allumer le projecteur, appuyer sur la touche ON/STAND BY du
coffret du projecteur ou sur la touche POWER ON de la télécommande
et la maintenir enfoncée pendant au moins 2 secondes.
REMARQUE: Pour arrêter le projecteur, appuyer deux fois sur la touche
ON/STAND BY ou la touche POWER OFF.
Schalten Sie den Projektor ein.
Drücken und halten Sie zum Einschalten des Projektors die ON/STAND
BY-Taste am Projektorgehäuse oder die POWER ON-Taste auf der
Fernbedienung mindestens 2 Sekunden lang gedrückt.
HINWEIS: Drücken Sie zum Ausschalten des Projektors die Taste ON/
STAND BY oder die Taste POWER OFF zweimal.
Accensione del proiettore.
Per accendere la corrente del proiettore, premete e mantenete premuto
il tasto ON/STAND BY sull´involucro del proiettore o il tasto POWER ON
del telecomando, mantenendolo premuto per almeno 2 secondi.
NOTA: Per spegnere il proiettore, premete due volte il tasto ON/STAND
BY o il tasto POWER OFF.
Encienda el proyector.
Para conectar la alimentación del proyector, pulse el botón ON/STAND
BY en la cubierta del proyector o el botón POWER ON en el mando a
distancia durante al menos 2 segundos.
NOTA: Para apagar el proyector, pulse dos veces el botón ON/STAND
BY o el botón POWER OFF.
Slå på strömmen till projektorn.
Tryck på ON/STAND BY-tangenten på projektorhöljet eller POWER
ON-tangenten på fjärrkontrollen intryckt i minst 2 sekunder för att slå på
strömmen till projektorn.
OBSERVERA: Du stänger av projektorn genom ON/STAND BY-
tangenten eller POWER OFF-tagenten två gånger.
Regolate il piedino
Ajuste de la pata de
d'inclinazione
Inclinación
(1) Sollevate il bordo anteriore del proiettore.
(1) Levante el borde frontal del proyector.
(2) Premete verso l'alto le leve del piedino
(2) Empuje hacia arriba los botones de pata de
inclinabile sui lati destro e sinistro del
inclinación ajustable en el lado derecho e
proiettore per allungare il piedino regolabile
izquierdo del proyector con el fin de extender los
(altezza massima).
pies de inclinación ajustables (altura máxima).
(3) Premete verso il basso le leve del piedino
(3) Empuje hacia abajo los botones de pata de
regolabile.
inclinación ajustable.
(4) Abbassate il lato anteriore del proiettore
(4) Baje la parte frontal del proyector a la altura
all'altezza desiderata (max. 40mm/1,6") e
deseada (40mm/1,6" máx.) y libere los botones
rilasciate le leve del piedino regolabile per
de pie de inclinación ajustable para
bloccare il piedino. Il lato anteriore del
asegurar el pie de inclinación ajustable. Hay
proiettore può essere inclinato di 10° circa
aproximadamente 10 grados de ajuste hacia
verso l'alto ed il basso.
arriba y hacia abajo para la parte frontal del
proyector.
3
Correct the vertical distortion.
Use the SELECT
distortion.
Press the MENU button to close the menu.
3
Corriger la distorsion verticale.
Utiliser la touche SELECT
trapèze verticale.
Appuyez sur la touche MENU pour fermer le menu.
3
Korrigieren Sie die vertikale Bildverzerrung.
Drücken Sie die Taste SELECT
Trapezverzerrung zu korrigieren.
Drücken Sie die Taste MENU, um das Menü zu schließen.
3
Correggete la distorsione verticale.
Utilizzate i tasti SELECT
della deformazione trapezoidale verticale.
Premete il tasto MENU per chiudere il menu.
3
Corrija la distorsión vertical.
Utilice el botón SELECT
ezoidal vertical Distorsión trapezoidal.
Pulse el botón MENU para cerrar el menú.
3
Korrigera den vertikala distorsionen.
Använd tangenten SELECT
vertikala keystonedistorsionen.
Tryck på MENU-tangenten för att stänga menyn.
7N8P3141
Printed in Japan
Printed on recycled paper
Zoom lever
Focus ring
Installation du projecteur.
Pour régler la mise au point du projecteur ou
pour effectuer un zoom avant ou arrière, utiliser
la bague de mise au point ou le levier de zoom
sur l'objectif.
Pour optimiser l'image, appuyer sur la touche
AUTO ADJ. du coffret ou de la télécommande.
Stellen Sie den Projektor ein.
Betätigen Sie zum Scharfstellen bzw. zum Zoomen
des Projektorobjektivs den Fokussierungsring bzw.
den Zoomhebel an der Linse.
Drücken Sie zur Optimierung des Bildes die
Taste AUTO ADJ. am Projektorgehäuse bzw.
auf der Fernbedienung.
Impostate il proiettore.
Per regolare la messa a fuoco o lo zoom del
proiettore, utilizzate la ghiera di messa a fuoco o
la leva dello zoom sull'obiettivo.
Per ottimizzare l'immagine, premete il tasto
AUTO ADJ. sul proiettore o sul telecomando.
Configure el Proyector.
Para ajustar el enfoque del proyector o para
acercar o alejar la lente del zoom utilice el anillo
de enfoque o la palanca de zoom de la lente.
Para optimizar la imagen, pulse el botón AUTO
ADJ. de la cubierta o del mando a distancia.
Installera projektorn.
Använd fokusringen eller zoomspaken på linsen
för att justera projektorns fokus eller zooma in
och ut.
För att optimera bilden, tryck på tangenten
AUTO ADJ. på höljet eller fjärrkontrollen.
Justera lutningen
med foten
(1) Lyft projektorns framkant.
(2) Tryck på justerfotens spakar på
projektorns höger- och vänstersida
för att förlänga justerfoten
(maxhöjd).
(3) Tryck justerfotens spakar nedåt.
(4) Sänk projektorns framkant till önskad
höjd (max. 40mm/1,6") och släpp
spaken så att justerfoten låser i läge.
Projektorns framsida kan justeras
ungefär 10 grader uppåt eller nedåt.
Vertical Keystoning
or
button to correct the vertical keystone
Distorsion de trapèze verticale
ou
pour corriger la distorsion de
Vertikale Trapezkorrektur
bzw.
, um die vertikale
Deformazione trapezoidale verticale
o
per correggere la distorsione
Corrección trapezoidal vertical
o
para corregir la corrección trap-
Vertikal keystonekorrigering
eller
för att korrigera den

Verwandte Anleitungen für NEC VT660K


Inhaltszusammenfassung für NEC VT660K
- Seite 1 7N8P3141 Printed in Japan Printed on recycled paper Zoom lever Audio cable (not supplied) • Câble audio (non fourni) • Audiokabel (kein Lieferumfang) • Cavo audio (venduto separatamente) • Cable de audio (no suministrado) • POWER Audiokabel (medföljer ej) • VIDEO AUTO ADJ.
- Seite 2 This section helps you resolve problems you may encounter while setting up or using the Cette section facilite la résolution des problèmes pouvant être rencontrés pendant Dieses Kapitel hilft Ihnen bei der Beseitigung von Störungen, die bei der Einrichtung oder projector.