Werbung
Quicklinks
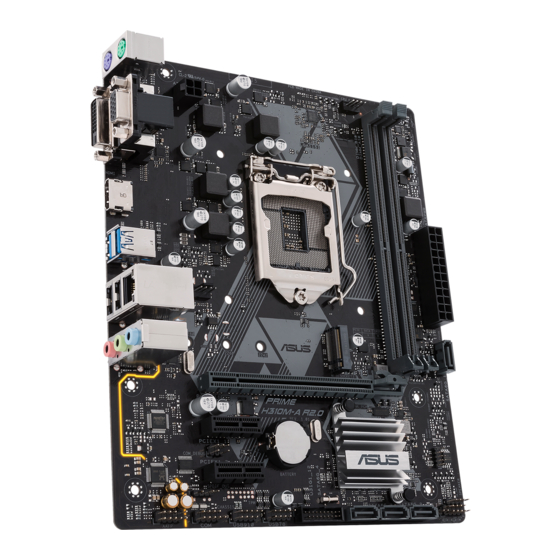
PRIME H310M-AT R2.0
quick start guide
Кратко упътване за бърз старт
Stručná příručka
Quick Start-vejledning
Snelstartgids
Lühijuhend
Guide de démarrage rapide
Pikakäynnistysopas
Schnellstarthilfe
Οδηγός γρήγορης έναρξης
Beüzemelési útmutató
Guida Rapida
Panduan Ringkas
クイックスタートガイド
Жылдам іске қосу нұсқаулығы
빠른 시작 설명서
Greitos darbo pradžios vadovas
Īsa pamācība
Hurtigstartsveiledning
Guia de consulta rápida
Instrukcja szybkiej instalacji
Краткое руководство
Ghid de pornire rapidă
Guía de inicio rápida
Vodič za brzo korišćenje
Stručný návod na spustenie
Snabbstartsguide
คู ่ ม ื อ เริ ่ ม ต้ น อย่ า งเร็ ว
Hızlı Başlatma Kılavuzu
Höôùng daãn khôûi ñoäng nhanh
vodič za brzi početak rada
Стисле керівництво для початку експлуатації
Motherboard Layout
Step 7
Step 2
18.5cm(7.3in)
KBMS
CPU_FAN
DIGI
+VRM
ATX12V
HDMI
LGA1151
Step 1
U31G1_34
CHA_FAN1
CHA_FAN2
LAN_USB56
M.2(SOCKET3)
PCIE SATA
IRST
X2
V
X
2280
2260
2242
AUDIO
Realtek
8111H
PCIEX16
ASM1480
Super
I/O
PCIEX1_1
Step 5
Intel
®
H310
ALC
PCIEX1_2
887
U31G1_12
COM
USB914
USB1011
SATA6G_4
SATA6G_3
SATA6G_2
AAFP
Step 4
Australia statement notice
From 1 January 2012 updated warranties apply to all ASUS products, consistent with
the Australian Consumer Law. For the latest product warranty details please visit
http://www.asus.com/support/. Our goods come with guarantees that cannot be
excluded under the Australian Consumer Law. You are entitled to a replacement or
refund for a major failure and compensation for any other reasonably foreseeable loss
or damage. You are also entitled to have the goods repaired or replaced if the goods
fail to be of acceptable quality and the failure does not amount to a major failure.
If you require assistance please call ASUS Customer Service 1300 2787 88 or visit us at
http://www.asus.com/support/
India E-waste (Management) Rules 2016
This product complies with the "India E-Waste (Management) Rules, 2016" and pro-
hibits use of lead, mercury, hexavalent chromium, polybrominated biphenyls (PBBs)
and polybrominated diphenyl ethers (PBDEs) in concentrations exceeding 0.1% by
weight in homogenous materials and 0.01 % by weight in homogenous materials for
cadmium, except for the exemptions listed in Schedule II of the Rule.
AEEE Yönetmeliğine Uygundur
Q14643
First Edition
August 2018
Copyright © ASUSTeK Computer Inc.
All Rights Reserved
Step 1
Install the CPU
Инсталирайте процесора
Instalace procesoru
Installer CPU'en
De CPU installeren
Paigaldage CPU
Installer le CPU
Asenna suoritin
Installieren der CPU
Εγκατάσταση της CPU
Helyezze be a CPU-t
Installare la CPU
Pasang CPU
CPUを設置する
CPU 설치
Sumontuokite centrinį procesorių
A
D
1
Step 3
Install memory modules
Инсталирайте модулите памет
Instalace paměťových modulů
Installer hukommelsesmodulerne
Geheugenmodules installeren
Paigaldage mälumoodulid
Installer les modules mémoire
Step 3
Asenna muistimoduulit
Installieren der Speichermodule
Εγκατάσταση των στοιχείων μνήμης
Step 7
Helyezze be a memória modulokat
Installare i moduli di memoria
Pasang modul memori
メモリーモジュールを設置する
Step 4
SATA6G_1
메모리 모듈 설치
Sumontuokite atminties modulius
128Mb
BIOS
SPEAKER
CLRTC F_PANEL
Step 6
DIMM_A1*
15060-0MGB0000
Uzstādiet centrālo procesoru
Installer sentralprosessoren (CPU)
Instale a CPU
Instalacja procesora
Установка процессора
Instalaţi CPU-ul
Instalar la CPU
Instalirajte CPU
Inštalácia centrálneho procesora
Installera CPU
ติ ด ตั ้ ง CPU
CPU'yu takın
Lắp CPU
Instalacija procesora
Інсталюйте процесор
1
2
C
3
E
2
2
Uzstādiet atmiņas moduļus
Installer minnemoduler
Instale módulos de memória
Instalacja modułów pamięci
Установка модулей памяти
Instalaţi modulele de memorie
Instalar los módulos de memoria
Instalirajte module memorije
Inštalácia pamäťových modulov
Installera minnesmoduler
ติ ด ตั ้ ง โมดู ล หน่ ว ยความจำ า
Bellek modüllerini takın
Lắp các thanh nhớ
Instalacija memorijskih modula
Інсталюйте модулі пам'яті
DIMM_B1*
DIMM_B1*
DIMM_A1*
Step 2
Install the CPU fan
Инсталирайте вентилатора на процесора
Instalace ventilátoru procesoru
Installer CPU-blæseren
De CPU-ventilator installeren
Paigaldage CPU ventilaator
Installer le ventilateur de CPU
Asenna suorittimen tuuletin
Installieren des CPU-Lüfters
Εγκατάσταση του ανεμιστήρα της CPU
Szerelje be a CPU ventillátort
Installare la ventola della CPU
Pasang kipas CPU
CPUファン を設置する
CPU 팬 설치
Sumontuokite centrinio procesoriaus ventiliatorių
Uzstādiet centrālā procesora ventilatoru
Installer CPU-viften
Instale a ventoinha de CPU
Instalacja wentylatora procesora
Установка вентилятора
B
Instalaţi ventilatorul CPU-ului
Instalar el ventilador de la CPU
Instalirajte CPU ventilator
Inštalácia ventilátora centrálneho procesora
Installera CPU-fläkten
ติ ด ตั ้ ง พั ด ลม CPU
CPU fanını takın
Lắp quạt CPU
Instalacija ventilatora procesora
Інсталюйте вентилятор процесора
A
1
3
2
1
1
Step 4
Install SATA devices
Инсталирайте SATA устройства
Instalace zařízení SATA
Installer SATA-udstyret
SATA-apparaten installeren
Paigaldage SATA seadmed
Installer des périphériques SATA
Asenna SATA-laitteet
Installieren der SATA-Geräte
Εγκατάσταση συσκευών SATA
Szerelje be a SATA eszközöket
Installare i dispositivi SATA
Pasang perangkat SATA
SATA デバイスを取り付ける
SATA 장치 설치
Sumontuokite SATA įrenginius
B
2
Uzstādiet SATA ierīces
Installer SATA-enheter
Instale dispositivos SATA
Instalacja urządzeń SATA
Установка SATA устройств
Instalaţi dispozitivele SATA
Instalar dispositivos SATA
Instalirajte SATA uređaje
Inštalácia zariadení SATA
Installera SATA-enheter
ติ ด ตั ้ ง อุ ป กรณ์ SATA
SATA aygıtlarını takın
Lắp các thiết bị SATA
Instalacija SATA uređaja
Інсталюйте пристрої SATA
Werbung

Inhaltszusammenfassung für Asus PRIME H310M-AT R2.0
- Seite 1 You are also entitled to have the goods repaired or replaced if the goods fail to be of acceptable quality and the failure does not amount to a major failure. If you require assistance please call ASUS Customer Service 1300 2787 88 or visit us at http://www.asus.com/support/ India E-waste (Management) Rules 2016 This product complies with the “India E-Waste (Management) Rules, 2016”...
- Seite 2 Step 5 Step 6 Step 7 Install expansion card(s) Install system panel connectors Install ATX power connectors Инсталирайте допълнителна карта (допълнителни карти) Инсталирайте конекторите на ситемния панел Инсталирайте ATX конекторите за захранване Instalace přídavné karty (karet) Instalace konektorů panelu systému Instalace konektorů...


