Herunterladen Inhalt Inhalt Diese Seite drucken

Werbung

Verfügbare Sprachen
  • DE

Verfügbare Sprachen

  • DEUTSCH, seite 1
Slim line
Dunstabzugshaube
Range Hood
Campana extractora
Hotte aspirante
Cappa aspirante
10033053 10033054

Werbung

Inhaltsverzeichnis
loading

Inhaltszusammenfassung für Klarstein Slim line

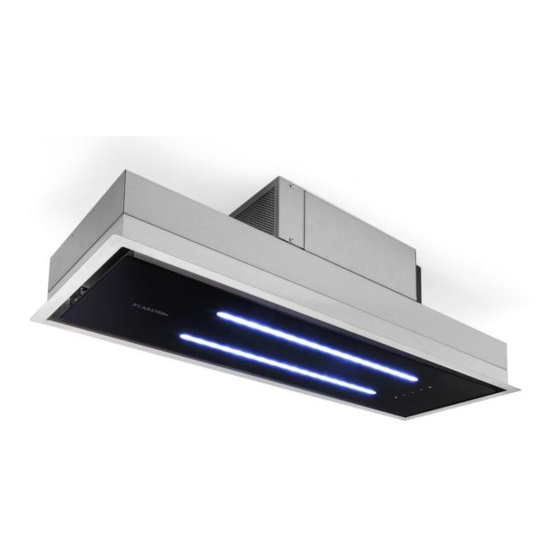
  • Seite 1 Slim line Dunstabzugshaube Range Hood Campana extractora Hotte aspirante Cappa aspirante 10033053 10033054...
  • Seite 3: Inhaltsverzeichnis

    Sehr geehrter Kunde, wir gratulieren Ihnen zum Erwerb Ihres Gerätes. Lesen Sie die folgenden Hinweise sorgfältig durch und befolgen Sie diese, um möglichen Schäden vorzubeugen. Für Schäden, die durch Missachtung der Hinweise und unsachgemäßen Gebrauch entstehen, übernehmen wir keine Haftung. Scannen Sie den folgenden QR-Code, um Zugriff auf die aktuellste Bedienungsanleitung und weitere Informationen rund um das Produkt zu erhalten:...
  • Seite 4: Sicherheitshinweise

    SICHERHEITSHINWEISE • Lesen Sie sich alle Hinweise vor der Benutzung sorgfältig durch und bewahren Sie die Bedienungsanleitung zum späteren Nachschlagen gut auf. • Die Montagearbeiten dürfen nur von einem Elektrofachmann oder einer Fachkraft durchgeführt werden. Bevor Sie die Dunstabzugshaube verwenden, stellen Sie sicher, dass die Spannung (V) und die auf der Dunstabzugshaube angegebene Frequenz (Hz) der Spannung (V) und Frequenz (Hz) ihrer Stromversorgung entsprechen.
  • Seite 5 Wichtige Hinweise zum Abluftbetrieb WARNUNG Vergiftungsgefahr durch zurückgesaugte Abgase! Betreiben Sie das Gerät nicht im Abluftbetrieb, wenn es zusammen mit einer raumluftabhängigen Feuerstätte betrieben wird und keine ausreichende Luftzirkulation garantiert wird. Raumluftabhängige Feuerstätten, wie Gas-, Öl-, Holz- oder Kohleheizungen, Boiler oder Durchlauferhitzer) beziehen die Luft aus dem Raum und führen Sie durch ein Abluftrohr oder eine Kamin ins Freie.
  • Seite 6: Installation

    INSTALLATION Vorbereitung Falls sie über einen Abzug nach außen verfügen, können Sie die Abzugshaube wie auf dem Bild rechts installieren. Der Abzugskanal sollte eine Durchmesser von mindestens 150 mm haben und aus Emaille, Aluminium oder einem flexiblen, hitzebeständigen Rohr bestehen. •...
  • Seite 7 Deckenmontage Sägen Sie ein Loch in die Decke Schieben Sie die Dunstabzugshaube in entsprechend der Abmessungen der die Öffnung. Dunstabzugshaube. Decke Befestigung Abzugshaube Schieben Sie die Dunstabzugshaube so weit nach oben geschoben werden, bis die Halterungen in die Zwischendecke einrasten. Sollten Sie nicht einrasten, durchstoßen Sie mit einem Schraubenzieher die vier Löcher an den unteren Ecken der Abzugshaube.
  • Seite 8 • Bei der Montage eines Rückschlagventils muss sichergestellt sein, dass sich das Ventil frei öffnen lässt. Wenn sich das Ventil nicht frei öffnen lässt, kann es die Saugleistung reduzieren und das Geräusch von der Dunstabzugshaube erhöhen. • Wenn die Dunstabzugshaube für die Umluftzirkulation verwendet wird und keine externe Entlüftung (Abluft) existiert, ist es wichtig, dass die Entlüftung nicht blockiert oder beeinträchtigt wird, da die Dunstabzugshaube sonst Schaden nehmen kann, die Kapazität reduziert und das Geräusch erhöht wird.
  • Seite 9: Bedienung

    BEDIENUNG Bedienfeld und Tastenfunktionen Motor ein- und ausschalten. Der Motor läuft mit niedriger Geschwindigkeit. Der Motor läuft mit mittlerer Geschwindigkeit. Der Motor läuft mit hoher Geschwindigkeit. Licht ein- und ausschalten. Beleuchtungsfarbe einstellen Drücken Sie im Standby-Modus lang auf die LICHT-Taste, um die Beleuchtungsfarbe einzustellen.
  • Seite 10: Fernbedienung

    Fernbedienung Drücken Sie die Taste (1), um den Motor ein- oder auszuschalten. Drücken Sie die Taste (2), um die Leistung oder die Geschwindigkeit zu verringern. Drücken Sie die Taste (3), um die Leistung oder die Geschwindigkeit zu erhöhen. Drücken Sie auf die Taste (4), um das Licht ein- oder auszuschalten.
  • Seite 11: Fehlersuche Und Fehlerbehebung

    FEHLERSUCHE UND FEHLERBEHEBUNG Fehler Mögliche Ursache Lösung Das Licht geht an aber der Das Lüfterblatt ist kaputt. Schalten Sie das Gerät Lüfter arbeitet nicht. aus und lassen Sie es Der Motor ist beschädigt. von einem Fachbetrieb untersuchen. Das Licht und der Lüfter Die Birne ist durchge- Ersetzen Sie die Birne funktionieren nicht.
  • Seite 12: Reinigung Und Pflege

    REINIGUNG UND PFLEGE Monatliche Reinigung der Fettfilter Reinigen Sie den Filter jeden Monat, um Brandgefahr zu vermeiden. Der Filter sammelt Fett, Rauch und Staub und beeinflusst somit die Effizienz der Dunstabzugshaube. Wenn der Filter nicht gereinigt wird, sammeln sich dort Fettreste. Reinigen Sie den Filter mit Wasser und etwas Spülmittel und lassen Sie ihn hinterher an der Luft trocknen.
  • Seite 13 Dear Customer, Congratulations on purchasing this equipment. Please read this manual carefully and take care of the following hints to avoid damages. Any failure caused by ignoring the items and cautions mentioned in the instruction manual is not covered by our warranty and any liability. Scan the QR code to get access to the latest user mannual and other information about the product CONTENT...
  • Seite 14: Safety Instructions

    SAFETY INSTRUCTIONS • Thank you for purchasing this cooker hood. Please read the instruction manual carefully before you use the cooker hood, and keep it in a safe place. • The installation work must be carried out by a qualified electrician or competent person.
  • Seite 15 Important notes about the extraction mode WARNING Risk of poisoning from exhaust gases sucked back. Never operate the device in extraction mode simultaneously with an open flue appliance when there is not adequate airflow guaranteed. Open fl ue combustion equipment (for example, gas, oil, wood or coal-fi red heaters, tankless water heaters, water heaters) pulls combustion air from the room and runs it through an exhaust pipe or chimney to the outside.
  • Seite 16 INSTALLATION Preparation If you have an outlet to the outside, your cooker hood can be connected as below picture by means of an extraction duct (enamel, aluminium, flexible pipe or inflammable material with an interior diameter of 150mm) • Before installation, turn the unit off and unplug it from the outlet. •...
  • Seite 17 Ceiling Installation Saw a hole in the ceiling according to Slide the extractor hood into the the dimensions of the extractor hood. opening. Ceiling Brackets Hood Push the extractor hood upwards until the brackets engage in the false ceiling. If you do not engage, use a screwdriver to pierce the four holes in the lower corners of the hood.
  • Seite 18 • When mounting a non-return valve, it must be ensured that the valve can be opened freely. If the valve cannot be opened freely, it can reduce the suction power and increase the noise from the extractor hood. • If the extractor hood is used for recirculation and there is no external ventilation (exhaust air), it is important that the ventilation is not blocked or impaired, as this can damage the extractor hood, reduce capacity and increase noise.
  • Seite 19 OPERATION Control Panel and Button Functions Switch the engine on and off. The motor runs at low speed. The motor runs at medium speed. The motor runs at high speed. Switch the light on and off. Setting the Lighting Colour In standby mode, press and hold the LIGHT button to adjust the illumination color.
  • Seite 20 Remote Control Press button (1) to switch the motor on or off. Press button (2) to decrease power or speed. Press button (3) to increase power or speed. Press the button (4) to turn the light on or off. If only the light is on and Press the key (5) while the power is on to activate the off timer.
  • Seite 21 TROUBLESHOOTING Fault Cause Solution Light on, but fan does not The fan blade is jammed. Switch of the unit and work repair by qualified service The motor is damaged. personnel only. Both light and fan do not light bulb burn. Replace the bulb with work correct rating.
  • Seite 22: Cleaning And Care

    CLEANING AND CARE Monthly Cleaning for Grease Filter Clean the filter every month can prevent any risk of fire. The filter collects grease, smoke and dust, so the filter is directly affecting the efficiency of the cooker hood. If not cleaned, the grease residue (potential flammable) will saturate on the filter.
  • Seite 23 Estimado cliente: Le felicitamos por la adquisición de este producto. Lea atentamente el siguiente manual y siga cuidadosamente las instrucciones de uso con el fin de evitar posibles daños. La empresa no se responsabiliza de los daños ocasionados por un uso indebido del producto o por haber desatendido las indicaciones de seguridad.
  • Seite 24: Indicaciones De Seguridad

    INDICACIONES DE SEGURIDAD • Lea atentamente todas las indicaciones y conserve este manual para consultas posteriores. • Los trabajos de montaje deben ser realizados solamente por un electricista u otro profesional. Antes de utilizar la campana extractora, asegúrese de que la tensión (V) y la frecuencia indicada en la campana extractora (Hz) coinciden con la tensión (V) y frecuencia (Hz) de su suministro eléctrico.
  • Seite 25 Notas importantes acerca del modo de extracción ADVERTENCIA Peligro de muerte, riesgo de intoxicación provocado por gases en combustión aspirados. Nunca ponga en funcionamiento la función de acción simultáneamente con un dispositivo que genere calor en una estancia estanca si no se ha garantizado una ventilación sufi ciente. Los dispositivos no estancos que generan calor (por ejemplo, radiadores que funcionan con gas, aceite, madera o carbón, calentadores, calentadores de agua) extraen el aire de combustión de la estancia correspondiente y canalizan el aire de salida por medio...
  • Seite 26 INSTALACIÓN Preparación Si cuenta con una salida de aire al exterior, puede instalar la campana tal y como indica la ilustración de la derecha. El tiro de aire debe contar con un diámetro mínimo de 150 mm y el conducto deberá estar fabricado en esmalte, aluminio o un material flexible y resistente al calor.
  • Seite 27 Montaje en el techo Perfore un orificio en el techo de Encaje la chimenea en el orificio. acuerdo con las dimensiones de la campana extractora. Techo Soporte Campana Empuje la campana hasta arriba hasta que los soportes queden encastrados en el falso techo.
  • Seite 28 • Al montar una válvula de retención, asegúrese de que esta se abre libremente. Si la válvula no se abre libremente, puede reducir la potencia de aspiración y aumentar el ruido que produce la campana extractora. • Si utiliza la campana en modalidad de circulación de aire y no hay ninguna ventilación externa (conducto), es importante no bloquear o disminuir la ventilación, ya que se podría dañar la campana, disminuir la capacidad y aumentar el ruido.
  • Seite 29 FUNCIONAMIENTO Panel y teclas de control motor. El motor funciona a velocidad baja. El motor funciona a velocidad media. El motor funciona a velocidad alta. Encender y apagar la luz Ajuste del color de la luz En el modo de espera, mantenga pulsado el botón LIGHT para ajustar el color de iluminación.
  • Seite 30 Mando a distancia Pulse el botón (1) para encender o apagar el motor. Pulse el botón (2) para reducir la potencia o la velocidad. Pulse el botón (3) para aumentar la potencia o la velocidad. Pulse el botón (4) para encender o apagar la luz.
  • Seite 31: Solución De Problemas

    SOLUCIÓN DE PROBLEMAS Problema Posible causa Solución La luz está encendida La ventilación está Retire aquello que pero el motor no funciona. bloqueada. obstruye la ventilación. El condensador está Sustituya el condensador. averiado. El motor está averiado. Sustituya el motor. El motor genera un olor Sustituya el motor.
  • Seite 32: Limpieza Y Mantenimiento

    LIMPIEZA Y MANTENIMIENTO Limpieza mensual de los filtros de grasa Limpie el filtro todos los meses para evitar el riesgo de incendio. El filtro acumula grasa, humo y polvo e influye así en la eficiencia de la campana extractora. Si el filtro no se limpia, se acumularán residuos de grasa.
  • Seite 33 Cher client, Toutes nos félicitations pour l’acquisition de ce nouvel appareil. Veuillez lire attentivement les instructions suivantes de branchement et d’utilisation afin d’éviter d’éventuels dommages. Le fabricant ne saurait être tenu pour responsable des dommages dus au non-respect des consignes de sécurité et à la mauvaise utilisation de l’appareil.
  • Seite 34: Consignes De Sécurité

    CONSIGNES DE SÉCURITÉ • Lisez attentivement toutes les consignes avant d’utiliser l’appareil et conservez ce mode d’emploi pour vous y référer ultérieurement. • Les travaux de montage doivent être effectués uniquement par électricien professionnel ou un spécialiste. Avant d‘utiliser la hotte aspirante, assurez-vous que la tension (V) et la fréquence indiquée sur la hotte aspirante (Hz) correspondent à...
  • Seite 35 Remarques importantes concernant le mode d‘extraction AVERTISSEMENT Danger de mort, risques d‘intoxication ! Par la ré-aspiration de gaz de combustion. Ne jamais utiliser la fonction d’aspiration de l’appareil en même temps qu’un foyer dépendant de l’air ambiant si l’air frais est insuffi sant.
  • Seite 36 INSTALLATION Préparation Si l’espace dispose d’une bouche d’aération dirigée vers l’extérieur, il est possible d’installer la hotte comme sur l’image de droite. Le conduit d’aspiration doit avoir un diamètre d’au moins 150 mm et doit être composé d’émail, d’aluminium ou d’un tuyau flexible et thermorésistant.
  • Seite 37 Montage au plafond Découpez un trou à la scie dans le Glissez la hotte dans l'ouverture. plafond correspondant aux dimensions de la hotte. Plafond Fixation Hotte aspirante Faites glisser la hotte vers le haut jusqu‘à ce que les supports s‘enclenchent dans le faux plafond.
  • Seite 38 • Lors de l‘installation d‘un clapet anti-retour, assurez-vous que la vanne peut s‘ouvrir librement. Si la vanne ne s‘ouvre pas librement, cela peut réduire la puissance d‘aspiration et augmenter le bruit de la hotte. • Si la hotte aspirante est utilisée en recirculation d‘air et qu‘il n‘y a pas d‘évacuation externe (extraction d‘air), il est important que l‘aération ne soit pas obstruée, sinon la hotte pourrait être endommagée, sa capacité...
  • Seite 39 UTILISATION Panneau de commande et fonctions des touches Allume et éteint le moteur. Le moteur fonctionne à basse vitesse. Le moteur fonctionne à vitesse moyenne. Le moteur fonctionne à haute vitesse. Allume et éteint l'éclairage. Réglage de la couleur d‘éclairage En mode veille, appuyez sur la touche LIGHT et maintenez-la enfoncée pour régler la couleur d‘éclairage.
  • Seite 40 Télécommande Appuyer sur le bouton (1) pour mettre le moteur en marche ou à l'arrêt. Appuyez sur le bouton (2) pour diminuer la puissance ou la vitesse. Appuyez sur le bouton (3) pour augmenter la puissance ou la vitesse. Appuyez sur la touche (4) pour allumer ou éteindre la lumière.
  • Seite 41: Résolution Des Problèmes

    RÉSOLUTION DES PROBLÈMES Problème Cause possible Solution La lumière est allumée La bouche d’aération est Éliminer la source du mais le moteur ne bloquée. blocage. fonctionne pas. Le condensateur est cassé. Faire remplacer le condensateur. Le moteur est cassé. Faire remplacer le moteur. Le moteur dégage une Faire remplacer le moteur.
  • Seite 42: Nettoyage Et Entretien

    NETTOYAGE ET ENTRETIEN Nettoyage mensuel du filtre à graisse Nettoyez le filtre tous les mois pour éviter un risque d‘incendie. Le filtre recueille la graisse, la fumée et la poussière et réduit ainsi l‘efficacité de la hotte. Si le filtre n‘est pas nettoyé, les restes de graisse s‘y accumulent.
  • Seite 43 Gentile cliente, La ringraziamo per aver acquistato il dispositivo. La preghiamo di leggere attentamente le seguenti istruzioni per l’uso e di seguirle per evitare possibili danni tecnici. Non ci assumiamo alcuna responsabilità per danni scaturiti da una mancata osservazione delle avvertenze di sicurezza e da un uso improprio del dispositivo.
  • Seite 44: Avvertenze Di Sicurezza

    AVVERTENZE DI SICUREZZA • Leggere attentamente tutte le istruzioni prima dell´uso e conservare il manuale per consultazioni future. • Il montaggio può essere eseguito solo da un tecnico qualificato. Prima di utilizzare la cappa aspirante, accertarsi che la tensione (V) e la frequenza (Hz) indicate corrispondano alla tensione (V) e alla frequenza (Hz) domestiche.
  • Seite 45 Note importanti circa la modalità di estrazione AVVERTIMENTO Pericolo di morte, pericolo di intossicazione da gas di scarico! Non azionare l´apparecchio con funzione di scarico mentre è attivo un impianto di riscaldamento che utilizza l´aria ambiente, se l´areazione non è suffi ciente. Gli impianti di riscaldamento che sfruttano l´aria ambiente (ad es.
  • Seite 46 INSTALLAZIONE Preparazione Se si possiede uno scarico verso l‘esterno, è possibile installare la cappa come mostrato nell‘immagine a destra. Il condotto di scarico deve avere un diametro minimo di 150 mm ed essere composto da smalto, alluminio, da un tubo flessibile, resistente al calore. •...
  • Seite 47 Montaggio a soffitto Fare un foro nel soffitto in base alle Far scorrere la cappa all‘interno dimensioni della cappa. dell‘apertura. Soffitto Fissaggio Cappa aspirante Far scorrere la cappa fino a quando le staffe si bloccano nel controsoffitto. Se non scatta in posizione, utilizzare un cacciavite per forare i quattro fori negli angoli inferiori della cappa aspirante.
  • Seite 48 • Quando si installa una valvola di ritegno, assicurarsi che la valvola possa essere aperta liberamente. Se la valvola non si apre liberamente, si può ridurre la potenza di aspirazione e aumentare il rumore dalla cappa. • Se la cappa aspirante viene utilizzata per la circolazione dell‘aria e non vi è sfiato esterno (aria di scarico), è...
  • Seite 49 FUNZIONAMENTO Pannello di controllo e funzioni dei tasti Accendere e spegnere il motore. Il motore funziona a bassa velocità. Il motore funziona a velocità media. Il motore funziona ad alta velocità. Accendere e spegnere la luce. Impostazione del colore dell‘illuminazione In modalità...
  • Seite 50 Telecomando Premere il pulsante (1) per accendere o spegnere il motore. Premere il pulsante (2) per diminuire la potenza o la velocità. Premere il pulsante (3) per aumentare la potenza o la velocità. Premere il pulsante (4) per accendere o spegnere la luce. Se solo la luce è accesa e Premere il tasto (5) mentre l'alimentazione è...
  • Seite 51: Risoluzione Dei Problemi

    RISOLUZIONE DEI PROBLEMI Problema Causa possibile Soluzione La luce è accesa ma il L´areazione è bloccata. Rimuovere l´ostruzione. motore non funziona. Il condensatore è guasto. Sostituire il condensatore. Il motore è guasto. Sostituire il motore. Il motore emette un odore Sostituire il motore.
  • Seite 52: Pulizia E Manutenzione

    PULIZIA E MANUTENZIONE Pulizia mensile dei filtri del grasso Pulire il filtro ogni mese per evitare il rischio di incendi. Il filtro raccoglie grasso, fumo e polvere, influenzando così l‘efficienza della cappa di aspirazione. Se il filtro non viene pulito, si raccolgono i residui di grasso. Pulire il filtro con acqua e un po‘ di detersivo e lasciare asciugare all‘aria.

Diese Anleitung auch für:

1003305310033054

Inhaltsverzeichnis