
Verwandte Anleitungen für capital sports Varient


Inhaltszusammenfassung für capital sports Varient
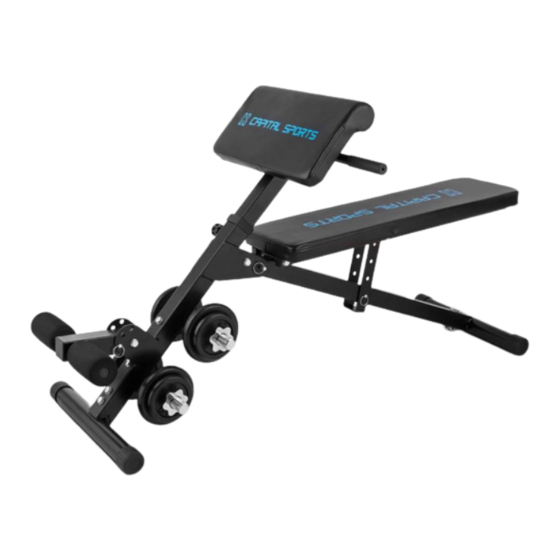
- Seite 1 Varient Trainingsbank Training Bench Banco de entrenamiento banc de musculation Banco di allenamento 10028518...
-
Seite 3: Hersteller
Sehr geehrter Kunde, wir gratulieren Ihnen zum Erwerb Ihres Gerätes. Lesen Sie die folgenden Hinweise sorgfältig durch und befolgen Sie diese, um möglichen Schäden vorzubeugen. Für Schäden, die durch Missachtung der Hinweise und unsachgemäßen Gebrauch entstehen, übernehmen wir keine Haftung. Scannen Sie den QR-Code, um Zugriff auf die aktuellste Bedienungsanleitung und weitere Informationen rund um das Produkt zu erhalten. -
Seite 4: Sicherheitshinweise
SICHERHEITSHINWEISE • Bewahren Sie die Bedienungsanleitung an einem sicheren Ort auf, so dass Sie jederzeit auf diese zugreifen können. • Bauen Sie das Gerät erst dann zusammen, wenn Sie die Bedienungsanleitung vollständig durchgelesen haben. Die Sicherheit und die Effizienz des Geräts können nur dann gewährleistet werden, wenn das Gerät richtig zusammengebaut wurde und fachgerecht gewartet und verwendet wird. - Seite 5 TEILE Bezeichnung Stk. Bezeichnung Stk. Hinteres Stützrohr Schaumstoffposlter Vorderes Stützrohr Arretier-Pin Fußrohre Ellbogen-Polster-Rohr / Vierkantrohr Sechskantschraube M10 x 155 Rohre für das hintere Polster Sechskantschraube M10 x 75 Einstellbares Rack hinten Sechskantschraube M10 x 70 Schwenkrohr Sechskantschraube M10 x 65 Hantelhalterung Sechskantschraube M10 x 15 Griffrohr...
-
Seite 6: Zusammenbau
ZUSAMMENBAU • Bringen Sie das einstellbare Rack (6) am hinteren Stützrohr (1) an und stecken Sie den Pin (16) hindurch. • Verschrauben Sie das Fußrohr (3) am hinteren Stützrohr (1) mit M10x65 (20), einer Unterlegscheibe Ø10 • (24) und einer Kunststoffmutter (26). •... - Seite 7 • Verbinden Sie die beiden Vierkantrohre (5) mit dem hinteren Stützrohr (1) und dem einstellbaren Rack (6). Verschrauben Sie sie mit M10x155 (17), passender Unterlegscheibe (24) und einer Mutter (26). • Verschrauben Sie das Polster (11) mit den Vierkantrohren (5) mit M6x40 Schrauben (22) und den kleinen Unterlegscheiben (25).
- Seite 8 • Bringen Sie das Ellbogenpolster (12) an dem Vierkantrohr (4) an. Verschrauben Sie mit M6x35 (23) und Unterlegscheiben Ø6 (25). • Stecken Sie dann die Griffstange (9) durch das Vierkantrohr (4) und verschrauben Sie mit M10x15 (21). • Bringen Sie die Griffe (13) an der Griffstange (9) an. •...
- Seite 9 • Verbinden Sie das Schwenkteil (7) mit dem vorderen Stützrohr (2) und arretieren Sie es mit dem Pin (16). Verschrauben Sie es mit Sechskantschrauben M10x75 (18), Unterlegscheiben Ø10 (24) und Muttern (26). • Schieben Sie das Rohr (10) durch das Schwenkteil (7). •...
- Seite 11 Dear Customer, Congratulations on purchasing this device. Please read the following instructions carefully and follow them to prevent possible damages. We assume no liability for damage caused by disregard of the instructions and improper use. Scan the QR code to get access to the latest user manual and more product information.
-
Seite 12: Safety Instructions
SAFETY INSTRUCTIONS • Please keep this manual in a safe place for your reference when necessary. • Please do not assembly or use this equipment until you read this manual thoroughly & carefully. The safety and efficiency only can be achieved when the equipment is assembled ,maintained and used properly. - Seite 13 PARTS Description Description Rear support tube Foam Front support tube Lock pin Foot tube Elbow cushion tube Hex bolt M10*155 Back cushion tube Hex bolt M10*75 Back adjustable rack Hex bolt M10*70 Rotate tube Hex bolt M10*65 Dubbell rack Hex bolt M10*15 Handle tube Hex bolt M6*40 Foam tube...
- Seite 14 ASSEMBLY • Attach back adjustable rack (6) to rear support tube • (1) using pin (16). • Attach foot tube (3) to rear support tube (1) using hex bolt M10*65 (20), washer Ø10 (24) and nylon lock nut M10 (26). •...
- Seite 15 • Attach back cushion tube (5) to rear support tube (1) and back adjustable rack (6) using hex bolt M10*155 (17), washer Ø10 (24) and nylon lock nut M10 (26). • Attach back cushion (11) to back cushion tube (5) using hex bolt M6*40 (22) and washer Ø6 (25).
- Seite 16 • Attach elbow cushion (12) to elbow cushion tube (4) using hex bolt M6*35 (23) and washer 6 (25). • Attach handle tube (9) to elbow cushion tube (4) using hex bolt M10*15 (21). • Attach handle bars (13) to handle tube (9). •...
- Seite 17 • Attach rotate tube (7) to front support tube (2) using pin (16), hex bolt M10*75 (18), washer 10 (24) and nylon lock nut M10 (26). • Attach foam tube (10) to rotate tube (7). • Attach foam (14) to foam tube (10).
- Seite 19 Estimado cliente: Le felicitamos por la adquisición de este producto. Lea atentamente el siguiente manual y siga cuidadosamente las instrucciones de uso con el fin de evitar posibles daños. La empresa no se responsabiliza de los daños ocasionados por un uso indebido del producto o por haber desatendido las indicaciones de seguridad.
-
Seite 20: Indicaciones De Seguridad
INDICACIONES DE SEGURIDAD • Conserve este manual en un lugar seguro para que pueda consultarlo en cualquier momento. • Monte el aparato una vez haya leído todo el manual de instrucciones. La seguridad y la eficacia del mismo solo podrá garantizarse si lo ha montado correctamente y si realiza un mantenimiento y uso idóneos. - Seite 21 COMPONENTES Núm. Denominación Uds. Núm. Denominación Uds. Poste trasero Acolchado de espuma Poste delantero Pin de bloqueo Soportes Tubo para acolchado de codo/tubo Tornillo allen M10 x 155 cuadrado Tubo para acolchado trasero Tornillo allen M10 x 75 Soporte trasero regulable Tornillo allen M10 x 70 Tubo giratorio Tornillo allen M10 x 65...
- Seite 22 MONTAJE • Monte el soporte ajustable (6) en el poste trasero (1) y encaje el pin (16). • Atornille el soporte (3) en el poste trasero (1) con un tornillo M10x65 (20), una arandela Ø10 (24) y una tuerca de plástico (26). •...
- Seite 23 • Una ambos tubos cuadrados (5) con el postre trasero (1) y el soporte regulable (6). Atornille un tornillo M10x155 (17) con la arandela correspondiente (24) y una tuerca (26). • Atornille el acolchado (11) al tubo cuadrado (5) con tornillos M6x40 (22) y las arandelas pequeñas (25).
- Seite 24 • Monte el acolchado para el codo (12) en el tubo cuadrado (4). Atorníllelo con un tornillo M6x35 (23) y una arandela Ø6 (25). • A continuación, encaje la barra de la empuñadura (9) por el tubo cuadrado (4) y atorníllelo con M10x15 (21). •...
- Seite 25 • Una la pieza giratoria (7) con el poste delantero (2) y sujétela con el pin (16). Atorníllela con tornillos allen M10x75 (18), arandelas Ø10 (24) y tuercas (26). • Coloque el tubo (10) en la pieza oscilante (7). • Deslice el acolchado de espuma (14) por los extremos salientes del tubo (10).
- Seite 27 Chère cliente, cher client, Toutes nos félicitations pour l’acquisition de ce nouvel appareil. Veuillez lire attentivement et respecter les instructions de ce mode d’emploi afin d’éviter d’éventuels dommages. Nous ne saurions être tenus pour responsables des dommages dus au non-respect des consignes et à...
-
Seite 28: Consignes De Sécurité
CONSIGNES DE SÉCURITÉ • Conservez le mode d‘emploi en lieu sûr afin de pouvoir vous y référer à tout moment. • Assemblez l‘appareil uniquement après avoir lu entièrement ce mode d‘emploi. La sécurité et l‘efficacité de l‘appareil ne peuvent être garanties que si l‘appareil a été... -
Seite 29: Pièces Détachées
PIÈCES DÉTACHÉES N° Description qté N° Description qté Tube de support arrière Rembourrage en mousse Tube de support avant Goupille d'arrêt Tubes de pied Goupille Tube coudé rembourré / tube carré Vis hexagonale M10 x 155 Tubes pour le rembourrage arrière Vis hexagonale M10 x 75 Crémaillère arrière réglable Vis hexagonale M10 x 70... - Seite 30 ASSEMBLAGE • Fixez la crémaillère réglable (6) au tube de support arrière (1) et poussez la goupille (16) à travers. • Vissez le tube de pied (3) au tube de support arrière (1) avec une vis M10x65 (20), une rondelle Ø10 (24) et un écrou en plastique (26). •...
- Seite 31 • Reliez les deux tubes carrés (5) au tube de support arrière (1) et à la crémaillère réglable (6). Vissez-les ensemble avec une vis M10x155 (17), la rondelle assortie (24) et un écrou (26). • Vissez le rembourrage (11) sur les tubes carrés (5) avec des vis M6x40 (22) et les petites rondelles (25).
- Seite 32 • Fixez les coudières rembourrées (12) au tube carré (4). Vis avec des vis M6x35 (23) et rondelles Ø6 (25). • Insérez ensuite le guidon (9) dans le tube carré (4) et vissez-le avec des M10x15 (21). • Fixez les poignées (13) au guidon (9). •...
- Seite 33 • Connectez la partie pivotante (7) au tube de support avant (2) et verrouillez-la avec la goupille (16). Vissez avec des vis à tête hexagonale M10x75 (18), des rondelles Ø10 (24) et des écrous (26). • Poussez le tube (10) à travers la partie pivotante (7). •...
- Seite 35 Gentile cliente, La ringraziamo per aver acquistato il dispositivo. La preghiamo di leggere attentamente le seguenti istruzioni per l’uso e di seguirle per evitare possibili danni. Non ci assumiamo alcuna responsabilità per danni scaturiti da una mancata osservazione delle avvertenze di sicurezza e da un uso improprio del dispositivo.
-
Seite 36: Avvertenze Di Sicurezza
AVVERTENZE DI SICUREZZA • Conservare il manuale d’uso in un luogo sicuro, in modo da poterlo consultare in ogni momento. • Procedere al montaggio del dispositivo solo dopo aver letto l’intero manuale d’uso. La sicurezza e l’efficacia del dispositivo sono garantite solo in caso di montaggio corretto e a regola d’arte e in un contesto di utilizzo appropriato. - Seite 37 PEZZI Descrizione Qtà. Descrizione Qtà. Tubo di supporto posteriore Imbottitura in espanso Tubo di supporto anteriore Perno d’arresto Tubi d’appoggio Perno Tubo a gomito / tubo quadrato Vite esagonale M10 x 155 Tubi per sedile posteriore Vite esagonale M10 x 75 Rack regolabile posteriore Vite esagonale M10 x 70 Tubo orientabile...
- Seite 38 MONTAGGIO • Applicare il rack regolabile (6) al tubo di supporto posteriore (1) e unirli con il perno (16). • Avvitare il tubo d’appoggio (3) nel tubo di supporto posteriore (1) con le viti esagonali M10x65 (20), le rondelle da ø10 (24) e i controdadi di plastica (26).
- Seite 39 • Unire entrambi i tubi quadrati (5) al tubo di supporto posteriore (1) e al rack regolabile (6). Avvitarli con le viti M10x155 (17), le rondelle (24) e i dadi (26). • Avvitare il sedile (11) ai tubi quadrati (5) con le viti M6x40 (22) e le piccole rondelle (25).
- Seite 40 • Avvitare l’imbottitura a gomito (12) al tubo quadrato (4) con le viti M6x35 (23) e le rondelle da ø6 (25). • Far passare poi il manico tubolare (9) attraverso il tubo quadrato (4). Quindi avvitarlo con la vite M10x15 (21). •...
- Seite 41 • Collegare il pezzo orientabile (7) con il tubo di supporto anteriore (2) bloccandolo con il perno (16) e avvitandolo con le viti M10x75 (18), le rondelle da ø10 (24) e i dadi (26). • Far passare il tubo (10) nel pezzo orientabile (7). •...