Donner DED-200 Handbuch Des Benutzers
Elektronische drum/multifunktionale elektronische trommel
Inhaltsverzeichnis
Verfügbare Sprachen
Verfügbare Sprachen
Quicklinks
Kapitel
Inhaltsverzeichnis

Verwandte Anleitungen für Donner DED-200


Inhaltszusammenfassung für Donner DED-200
- Seite 1 INSTRUCTION MANUAL www.idonner.com www.donnerdeal.com...
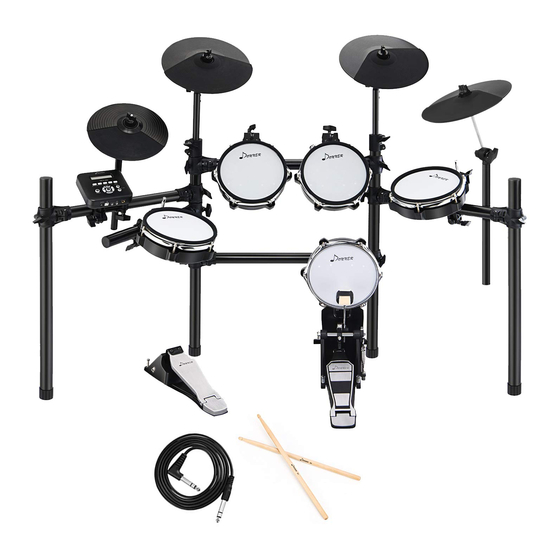
- Seite 21 Multifunktionale elektronische Trommel Elektronische DRUM Handbuch des Benutzers www.idonner.com www.donnerdeal.com...
-
Seite 22: Willkommen Bei Donner
Sehr geehrter Kunde Danke für die Bestellung von Donner! Hier spricht Donner Customer Service Team. Nach Erhalt des Pakets, Bitte testen Sie und sehen Sie, ob es ein Problem gibt. Bei Problemen wenden Sie sich bitte an amazon (die Bestellseite) oder Email Adresse unten. - Seite 23 Ka ta lo g EINLEITUNG DER FUNKTION --------------------------------------------------------------- KATALOG ------------------------------------------------------------------------------------- ANLEITUNG ZUR INSTALLATION----------------------------------------------------------- Überprüfen Sie die beigefügten Artikel----------------------------------------------------------------- Montage der Trommel----------------------------------------------------------------------------------- Installation des mechanischen Fußhammers----------------------------------------------------------- Installieren Sie die Modulhalterung--------------------------------------------------------------------- Installation module bracket ----------------------------------------------------------------------------- Gestell aus Eisen------------------------------------------------------------------------------------------ Montage des Ständers----------------------------------------------------------------------------------- Installation von Tragstange und modularer Kastenstruktur-------------------------------------------- Installation von Streikkomponenten-------------------------------------------------------------------- Verbindungslinie einfügen ----------------------------------------------------------------------------- DEMONSTRATION DER SCHNITTSTELLE VON MAINFRAME BOX-----------------------...
-
Seite 24: Anleitung Zur Installation
A nle itung z ur In st a ll a ti o n Anmerkung:! ● Um die Geräte korrekt zu nutzen, installieren Sie sie bitte nach den Installationsanleitungen und lesen Sie das "Benutzerhandbuch" vor der Benutzung sorgfältig durch. ● Wenn Sie angeschlossen sind, schalten Sie bitte die Stromversorgung gemäß den Anweisungen im Benutzerhandbuch ein und überprüfen Sie, ob Sie den Klang hören können. -
Seite 25: Montage Der Trommel
Anl e i tu n g z u r I n s ta l la t i o n Montage der Trommel ● Bei der Montage die Schrauben festziehen und achten Sie darauf, Ihren Finger nicht zu kneifen! Die beiden oberen sind spitzen Schrauben Je nach Figur, verwenden Sie einen Schraubenzieher, um die untere Trommel zu installieren, Befestigungsteile, und. -
Seite 26: Gestell Aus Eisen
Anle itung zur In s t al l at io n Gestell aus Eisen ● Nach dem Öffnen des Pakets überprüfen Sie bitte, ob die Artikel fehlen. 2pcs L=450mm L=550mm L=350mm L=450mm Montage des Ständers ● Bei der Montage die Schrauben festziehen und achten Sie darauf, Ihren Finger nicht zu kneifen! ●... -
Seite 27: Installation Von Tragstange Und Modularer Kastenstruktur
A nl e i tu n g z u r I n s ta l l a t i o n Installation von Tragstange und modularer Kastenstruktur ● Stützstangen und Modulboxen müssen an Ort und Stelle eingesetzt werden und die Kunststoffkopfschraube festziehen, um Sturz zu vermeiden. -
Seite 28: Installation Von Streikkomponenten
A nle itung zur Ins t a ll at i o n Installation von Streikkomponenten ● Nach dem Einlegen der Trommelscheibe die Schraube festziehen, um ein Lösen zu vermeiden. ● Schrauben Sie die Becken nicht fest, lassen Sie Platz, damit sie sich hin und her bewegen können. Machen Sie die Befestigungen nicht enger, damit sie sich bewegen können. -
Seite 29: Verbindungslinie Einfügen
Anl e i tu n g z u r I n s ta l l a t i o n Verbindungslinie einfügen ● Bitte legen Sie den Verbindungsdraht an Ort und Stelle ein, um einen schlechten Kontakt zu vermeiden, und fügen Sie ihn korrekt ein, wie in der Abbildung gezeigt. Stecken Sie den Stecker wie in der Abbildung abgebildet in den Hauptmodul-Kasten und fügen Sie ihn dann in das entsprechende Loch... -
Seite 30: Demonstration Der Schnittstelle Von Mainframe Box
Demonstration der Schnittstelle von Mainframe Box DC9V 1A DC9V 1A ADD CYMBALS AUDIO OUT AUDIO IN PHONE PHONE SONG MANU AN SC H LUSS A N NETZ K AB EL 1. Verbinden Sie das Netzkabel wie in der Abbildung dargestellt. Ein Ende wird in den Netzeinlass der Trommel-Hauptmodul-Box eingefügt, das andere Ende wird in eine 100-240V Haushaltssteckdose eingefügt (Abbildung 1) 2. -
Seite 31: Anleitung Zur Installation
Anl e i tu ng z u r In s t a ll a t i o n PO WER O N 1. Drücken Sie den "power" Schalter auf die "on"-Position, um in den Spielzustand einzutreten. (Abbildung 1) 2. Bitte schalten Sie den Strom aus, wenn er vorübergehend nicht genutzt wird. ●... -
Seite 32: Anle Itung Zur Ins T Al L At I On
Anle itung zur Ins t al l at i on TIM BRE A US W AHL DER TRO M M E LGR U PPE 1. Drücken Sie die "Voice"-Taste, der Bildschirm wird angezeigt (Voice), und geben Sie den Drum-Gruppe-Einstellung-Modus ein.(3 wird in der Abbildung dargestellt) 2. -
Seite 33: Metronome
Anl e i tu ng z u r In s t a ll a t i o n M ETR O NO M 1. Drücken Sie die Schaltfläche "METRONOME" und zeigen Sie (Metro) auf dem Bildschirm. (8 Abbildung) 2. Verwenden Sie die UP/DOWN, um die Optionen anzupassen. (4 Abbildung) Bildschirmanzeige anzeigen: ●(Time 002-016):Metronom-Geschwindigkeit - Ein Gesamt-4-Niveaus der Standardgeschwindigkeit kann eingestellt werden... -
Seite 34: Geschwindigkeit Der Wiedergabe
A nle itung zur Ins t a ll at i o n GE SCH WI NDIGK EIT DER WI EDE R GAB E Im Modus der Demonstrationsmusik oder des Metronomspiels kann die Einstellung der Geschwindigkeit die Geschwindigkeit steuern der Vorführmusik und des Metronomspiels. 1. -
Seite 35: Verzeichnis Der Beigefügten Inhalte
V e r z e i chn i s der bei ge f ü g t e n In ha l t e Klangfarbe des Drums KICK CRASH HI-HAT 138 Original Crash2 Rim 1 Acoustic Kick 46 Acoustic Tom1 91 Acoustic Crash1 139 Standard Crash2 Rim 181 Acoustic Hi-hat Open 2 Military Kick... -
Seite 36: Wartung Der Produkte
W ar tung d er P ro duk te Die Wartung und der Schutz des Produktes ist sehr wichtig, um die Lebensdauer des Produktes zu verlängern und den Ausfall zu reduzieren. Ver me ide n S ie Hit ze, F euchtig k e it ode r d ire k te s So nn e nl icht Das Produkt nicht dem direkten Sonnenlicht aussetzen oder in der Nähe der Klimaanlage oder an extrem heißen Stellen platzieren. -
Seite 37: Elektrische Energieversorgung
V or s ichtsm aß n a hm en f ü r d i e Si c he r he i t Elektrische Energieversorgung Dieses Produkt kann mit Standardinnenwandsteckdose betrieben werden. Bitte verwenden Sie nur das von diesem Produkt angegebene Netzkabel.Stellen Sie sicher, dass Sie den Strom ausschalten, wenn Sie nicht vorübergehend in Gebrauch sind, und ziehen Sie das Netzkabel aus, wenn Sie lange nicht in Gebrauch sind. -
Seite 38: Vorsichtsmassnahmen Für Die Sicherheit
Vor si cht sm aß n a hm e n fü r d i e Si c he r he i t WARNUNG SEI VORSICHTIG Rauch, Geruch, Überhitzung Ein falscher Einsatz von Kabeln kann Feuer und Wenn das Produkt raucht, eigenartigen Geruch Elektroschock verursachen.Es sind folgende : abgibt oder überhitzt, kann es Feuer und ●... - Seite 39 V or s i chts m aß n a hm en f ür d i e Si c her hei t Fallen oder Aufprall Auswahl der Produktstandorte Wenn das Produkt durch Sturz oder starken Vermeiden Sie, das Produkt an den folgenden Aufprall beschädigt wird, kann es Feuer und Stellen zu platzieren.Sonst kann es Feuer und Elektroschock verursachen, wenn es kontinuierlich...
-
Seite 40: Versicherungsk A R T E Für Repa R At U R En
Versicherungsk a r t e für Repa r at u r en Versicherungskartenverordnung für die Instandhaltung 1. Das Produkt kann kostenlos Garantie Service für ( ) Tage ab dem Kaufdatum genießen. 2. Bei Ausfall während der Garantiezeit müssen die Garantiekarte und der Kaufbeleg während der Wartung vorgelegt werden.