NORAUTO NS-218 DBT Handbuch
Inhaltsverzeichnis
Verfügbare Sprachen
Verfügbare Sprachen
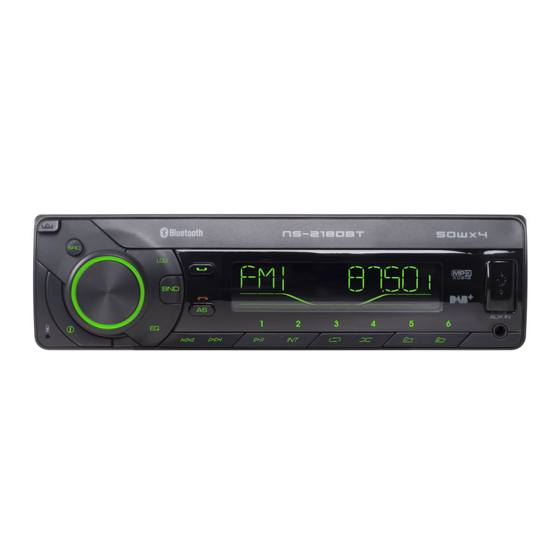
NS-218 DBT
ART: 2201424
RADIO MP3 WMA USB BT AUX-IN DAB
FR ................................1
NL ................................23
ES ................................44
IT .................................66
PT ................................88
PL ................................110
EN................................130
DE................................152
Kapitel
Inhaltsverzeichnis

Verwandte Anleitungen für NORAUTO NS-218 DBT


Inhaltszusammenfassung für NORAUTO NS-218 DBT
- Seite 153 Inhaltsverzeichnis 1 Sicherheitshinweise �����������������������������������������������������������������153 2 Vorbereitung ����������������������������������������������������������������������������156 3 Zubehör �����������������������������������������������������������������������������������157 4 Geräteinstallation und Demontage ������������������������������������������158 Geräteinstallation ���������������������������������������������������������������������158 Demontage des Geräts �����������������������������������������������������������158 5 Installation/Verbindung ������������������������������������������������������������159 Grundlegende Vorgehensweisen ������������������������������������������� 159 Achtung �����������������������������������������������������������������������������������159 Warnung ����������������������������������������������������������������������������������160 Verkabelung �����������������������������������������������������������������������������161 6 Grundbedienung ��������������������������������������������������������������������� 162 7 Funktionseinstellungen �����������������������������������������������������������165 Radio hören �����������������������������������������������������������������������������168 Musik über USB-Datenträger/SD-Karte abspielen ������������������169 Abspielen von anderen externen Geräten �������������������������������170...
-
Seite 154: Sicherheitshinweise
Sicherheitshinweise Ì Lesen Sie diese Sicherheitswarnungen vor der Verwendung dieses Gerätes sorgfältig durch und bewahren Sie sie als zukünftige Referenz auf� Wenn Sie dieses Gerät an Dritte weitergeben, dann geben Sie ihnen auch diese Sicherheitshinweise� Ì Verwenden Sie dieses Gerät ausschließlich wie in dieser Gebrauchsanweisung beschrieben�... - Seite 155 Ì Entfernen Sie während der Verwendung des Ladegeräts jegliche Zündquellen� Ì Halten Sie das Gerät trocken� Tauchen Sie es weder in Wasser, noch in andere Flüssigkeiten� Ì Setzen Sie dieses Gerät keinen Wassertropfen oder Spritzern aus� Ì Benutzen Sie das Gerät nicht in einer feuchten Umgebung� Ì...
- Seite 156 Geräts beim Fahren einschränken und Missbrauch ahnden; verwenden Sie daher dieses Gerät in Übereinstimmung mit den Gesetzen und Verkehrsregeln� Ì Seien Sie vorsichtig, wenn Sie dieses Gerät während der Fahrt verwenden� Lassen Sie sich nicht ablenken oder stören, wenn Sie dieses Gerät während der Fahrt benutzen� Konzentrationsschwäche kann zu einem Unfall führen�...
-
Seite 157: Vorbereitung
Vorbereitung Installation und Demontage Ì Vermeiden Sie es, die Bedienungsoberfläche direkter Sonneneinstrahlung, übermäßiger Hitze und Feuchtigkeit auszusetzen� Vermeiden Sie auch, das Gerät in einem sehr staubigen Bereich zu installieren oder es Wasserspritzern auszusetzen� Ì Bewahren Sie die Bedienungsoberfläche nach der Demontage im Etui auf�... -
Seite 158: Zubehör
Zubehör Prüfen Sie den Inhalt der Verpackung: Gerät (mit Bedienfeld Rahmen Einbaurahmen) Steckverbinder nach Demontagewerkzeug Bedienungsanleitung ISO-Norm (A/B) Externes Mikrofon Transportetui... -
Seite 159: Geräteinstallation Und Demontage
Geräteinstallation und Demontage Geräteinstallation Biegen Sie die entsprechenden Laschen, um die Hülse Halterung richtig zu sichern� Rahmen Bedienfeld Bevor Sie das Gerät in die Halterung einsetzen, achten Sie darauf, dass Sie die Richtung der Markierung beachten Armaturenbrett (große Häkchen am unteren Teil)�... -
Seite 160: Installation/Verbindung
Demontage Rahmen Halterung Demontage Bedienfeld Installation/Verbindung Grundlegende Vorgehensweise 1 Ziehen Sie den Zündschlüssel ab und trennen Sie dann den Minuspol von der Fahrzeugbatterie� 2 Schließen Sie die Eingangs- und Ausgangskabel ordnungsgemäß an� 3 Installieren Sie das Gerät im Armaturenbrett des Fahrzeugs� 4 Verbinden Sie wieder den Minuspol der Batterie 5 Gerät zurücksetzen Achtung... -
Seite 161: Warnung
Ì Um Kurzschlüsse zu vermeiden, dürfen die an den Enden angebrachten Kappen der nicht angeschlossenen Kabel oder Klemmen nicht entfernt werden� Ì Nach Abschluss der Installation ist sicherzustellen, dass das Fahrzeugchassis geerdet ist� Wenn die Stromversorgung nicht aktiviert ist, kann das Lautsprecherkabel kurzgeschlossen werden oder das Gehäuse berühren, was das Sicherheitssystem aktivieren kann�... -
Seite 162: Verkabelung
Die Montage und Verkabelung des Gerätes erfordern Know-how und Erfahrung� Aus Sicherheitsgründen bitten wir Sie, diese Arbeiten von Fachleuten ausführen zu lassen� Ì Wenn Sie bei der Installation auf Schwierigkeiten stoßen, wenden Sie sich bitte an Ihren Händler NORAUTO� Verkabelung Hinterer RCA-Ausgang (Links) (Rechts) ISO-Stecker... -
Seite 163: Grundbedienung
Anschluss an die Steuerklemme des Leistungsve- rstärkersystems Vorderer Grau+/ oder an die Laut- A5 Blau B3/B4 grau/ Steuerklemme sprecher weiss - des Fahrzeugan- rechts tennenrelais (150MA/12V DC max�) Vorderer Weiss+ Laut- A7 Rot Zündung (ACC) B5/B6 / weiss/ sprecher schwarz - links Hinterer Grün +/... - Seite 164 Funktionstabelle für jede Taste: Autoradio- Allgemeine Funktion Bedienung Wählen Sie eine der verfügbaren Quellen (RADIO, DAB, BT, USB, SD, AUX IN) Drehen, um die Lautstärke zu erhöhen oder „ zu verstärken Lautstärkeregler Gegenstände auswählen „ Stummschalten oder Wiederherstellen der „ Lautstärke Netzteil/ Schalten Sie das Gerät ein...
- Seite 165 Autoradio- Allgemeine Funktion Bedienung Drücken Sie diese Taste, um das Bassverstärkungssystem ein- oder auszuschalten� - Uhrzeit anzeigen „ - Wenn Sie diese Taste drücken, werden „ ID3-Informationen angezeigt, während die Wiedergabe läuft� Konfiguration des voreingestellten Equalizers (EQ) -Anruf annehmen „ -Während des Gesprächs gedrückt halten, „...
-
Seite 166: Funktionseinstellungen
Funktionseinstellungen 1 Drücken Sie , um den [AUDIO MENU] -Modus zu öffnen; drücken und halten, um in den [MENU]-Modus zu gelangen� 2 Drücken Sie wiederholt , um das einzustellende Element auszuwählen� 3 Drehen Sie den Lautstärkeregler der Codierung, um einen Wert oder eine Option auszuwählen�... - Seite 167 Element Verfügbare Einstellungen Stationsanzeige Aktivieren/Deaktivieren der aktivieren/ Stationsanzeigefunktion deaktivieren Drücken Sie im PTY-Modus die Taste "Power/Mute", um auf ein Element des Programmtyps zuzugreifen, und drehen Sie dann den Lautstärkeregler der Codierung, um eine Kategorie auszuwählen� Die Arten der verfügbaren Programme „...
- Seite 168 Element Verfügbare Einstellungen Ein: Wenn Sie Verkehrsinformationen „ empfangen, schaltet das Gerät unabhängig vom aktiven Modus in den Radiomodus und beginnt mit der TA (Straßenverke- Übertragung dieser Informationen� hrsinformationen) Am Ende der Sendung kehrt das Gerät in den vorherigen Modus zurück� Deaktiviert: Es werden keine „...
-
Seite 169: Radio Hören
Element Verfügbare Einstellungen Wenn "AUTOMATIC LED COLOR" angezeigt wird, bedeutet dies, dass die Standardfarbe "automatisch" ist� Automatische LED- Drehen Sie den Regler, um eine der Farbe folgenden Zyklusfarben auszuwählen: "AUTOMATISCH" - "GRÜN" - "BLAU" - "ROT" - "GELB" - "CYAN" - "LILA" - "WEISS"�... -
Seite 170: Musik Über Usb-Datenträger/Sd-Karte Abspielen
Musik über USB-Datenträger/SD-Karte abspielen Einmal drücken, um die Zufallswiedergabe von „ Für Pause drücken� „ Tracks zu starten, und ein zweites Mal, um einen Erneut drücken zur Wiederaufnahme� „ Ordner zufällig auszuwählen� Drücken Sie diese Taste, um zum nächsten/ „ Drücken Sie diese Taste, um einen Track „... -
Seite 171: Abspielen Von Anderen Externen Geräten
Abspielen von anderen externen Geräten 3,5mm Kabel (nicht mitgeliefert) 1 Drücken Sie SRC, um den AUDIO IN auszuwählen� 2 Schalten Sie das externe Gerät ein und starten Sie die Wiedergabe� Bluetooth-Einstellungen Appuyez pour sélectionner le „ Appuyez pour décrocher/accepter un appel� mode «... -
Seite 172: Bluetooth-Verbindung
1 Schalten Sie Ihr Handy ein und aktivieren Sie Bluetooth� 2 Suche nach anderen Bluetooth-Geräten in Reichweite 3 Wählen Sie "NS-218 DBT" aus der Liste der Geräte aus� 4 Wenn die Verbindung erfolgreich ist, erscheint die Meldung [PAIRED] auf dem Bildschirm� Die Verbindung zwischen den Geräten wird dann automatisch hergestellt�... -
Seite 173: Dab-Funktion
Anruf weiterleiten Während des Gesprächs können Sie die Stimme von den Lautsprechern auf das Mobiltelefon übertragen� Halten Sie während des Gesprächs gedrückt, um die Stimme von den Lautsprechern auf das Mobiltelefon zu übertragen� Bluetooth-Audio-Streaming (A2DP) Wenn das angeschlossene Bluetooth-Gerät das A2DP-Protokoll (Advanced Audio Distribution Profile) unterstützt, können Sie die darin gespeicherte Musik vom Gerät hören�... -
Seite 174: Technische Daten
2 Das Autoradio sucht nach DAB-Sendern� 3 Die gefundenen Sender werden auf dem Display aufgelistet und der erste Sender wird abgespielt� Halten Sie die Taste während ca� 2 Sekunden gedrückt, um den Sender unter der gewünschten Shortcut-Taste (M1 – M6) zu speichern. Drücken Sie die festgelegte Shortcut-Taste, um den Sender abzuspielen�... -
Seite 175: Entsorgung
AM-Bereich Frequenzbereich: 522 bis 1620kHz Nutzbare Empfindlichkeit: Mehr als 45dB für ein Signal-Rausch- Verhältnis = 26dB USB-Geräte USB-Flash-Speicher: USB1�1 und 2�0 kompatibel About Audio file Speicher- oder USB-Dateiformat: FAT16, FAT32 „ MP3/WMA-Bitrate: 32 bis 320kbit/s und variable Bitraten „ MP3 Abtastfrequenz: 8 bis 48kHz „... - Seite 176 EU-Richtlinie 2014/53/EU� Den vollständigen Text der EU Konformitätserklärung ist auf der Webseite: www�mgts�com verfügbar� Por la presente, Norauto, declara que el tipo de equipo radioeléctrico 29912-2201424-MW102 DCK DAB/DAB+ / A�RADIO NS 218 DBT es conforme con la Directiva 2014/53/UE� El texto completo de la declaración UE de conformidad está...
- Seite 178 Noroto España SAU Centre Comercial Alban Carretera de Ademuz km 2,9 46100 BURJASSOT Norauto Italia SPA Corso Savona 85/10024 MONCALIERI Norauto Portugal LDA Av� dos Cavaleiros, n°49 Alfragide 2794-057 CARNAXIDE Norauto Polska Sp z o�o�, ul� Jubilerska 10, 04-190 Warszawa www�norauto�com / www�atu�eu Made in P�R�C / Fabricado en/na R�P�C / Fabriqué...