
Verwandte Anleitungen für Kenwood KDC-BT50U


Inhaltszusammenfassung für Kenwood KDC-BT50U
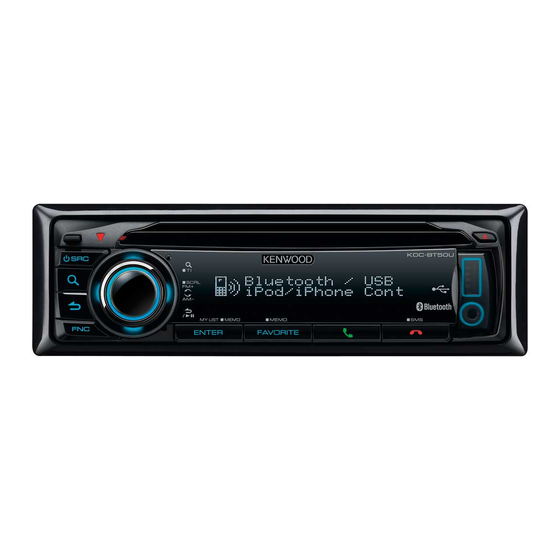
- Seite 1 KDC-BT50U KDC-5047U KMR-440U CD-RECEIVER Quick Start Guide AMPLI-TUNER LECTEUR DE CD Guide de démarrage rapide CD-RECEIVER Kurzanleitung CD RECEIVER Snelstartgids © B59-2006-00/00 (EW)
-
Seite 2: Inhaltsverzeichnis
Accessories ..........10 and so forth. You can download the latest version of the Instruction Manual from Installation Procedure ......10 www.kenwood.com/cs/ce/. Before Installation .........10 Connecting Wires to Terminals..12 Installation/Removing the Unit..14 2 | Quick Start Guide... -
Seite 3: Before Use
Kenwood dealer. settings when the • When you purchase optional accessories, Reset button is check with your Kenwood dealer to make pressed. sure that they work with your model and in your area. Cleaning the Unit •... -
Seite 4: First Step
First step Control Knob [ENTER] [FNC] Exit Demonstration Mode Adjusting the Date Turn off the demonstration mode Press the [FNC] button to enter the when you use it for the first time after Function setting mode. installation. The item can be selected and Press the [ENTER] button to quit determined as follows. -
Seite 5: Basic Operations
Press the [SRC] button and then turn the Control knob. To determine the selected source, press the [ENTER] button. Tuner (“TUNER”) ➜ Bluetooth Audio (“BT AUDIO”) (KDC-BT50U only) ➜ USB (“USB”) or iPod (“iPod”) ➜ CD (“CD”) ➜ Auxiliary Input (“AUX”) ➜ Standby (“STANDBY”) ➜ Tuner... -
Seite 6: Playing Music (Cd/Usb/Ipod)
Playing Music (CD/USB/iPod) Control Knob Disc slot USB Terminal [ENTER] Playing Disc Music Search Insert the disc in the Disc slot. Searching for the song you want to play. When inserted, the source is switched Press the [ ] button. automatically and a song starts playing. -
Seite 7: Listening To The Radio
Listening to the Radio [SRC] Control Knob [ENTER] Selecting a Tuner source Press the [SRC] button. Turn the Control knob to select “TUNER”, and then press the [ENTER] button. Selecting the Band Push the Control knob towards up to change the band in the order of FM1 ➜ FM2 ➜... -
Seite 8: Hands-Free Phoning
Function of KDC-BT50U/ KCA-BT200 (Optional Accessory) Hands-free phoning KDC-BT50U Control Knob Microphone [SRC] KDC-BT50U [FNC] [ENTER] KDC-BT50U Registering cell-phone Turn the Control knob to select “Initial Register your Bluetooth cellphone in this Search”, and then press the [ENTER] unit. button. - Seite 9 Answering a Phone Call Microphone Gain and Noise redaction setting KDC-BT50U Press the [ ] button. (KDC-BT50U only) If the microphone level is low or the KDC-5047U KMR-440U ambient noise is large during hands free Press the [ENTER] button. phoning, make adjustments.
-
Seite 10: Accessories
Accessories Before Installation ¤ • Mounting and wiring this product requires skills and experience. For safety’s ..1 sake, leave the mounting and wiring work to professionals. • Make sure to ground the unit to a negative 12V DC power supply. •... - Seite 11 • Reception may drop if there are metal connected to the constant power supply. objects near the Bluetooth antenna. Ignition cable A-7 Pin (Red) (Red) (KDC-BT50U only) Unit Vehicle Battery cable A-4 Pin (Yellow) (Yellow) 2 The A-7 pin (red) of the vehicle’s ISO...
-
Seite 12: Connecting Wires To Terminals
Connecting Wires to Terminals ⁄ KMR-440U only To KCA-RC107MR (optional accessory) • Speaker Impedance: 4 – 8 Ω • USB terminal Maximum Supply current ⁄ To connect the KCA-RC107MR, : 500 mA consult your KCA-RC107MR manual. Connector Function Guide Pin Numbers for Cable Colour Functions ISO Connectors... - Seite 13 Front output Sub Woofer output Fuse (10A) FM/AM antenna input (JASO) To optional accessory microphone KCA-MC10 (KDC-BT50U only) To Kenwood disc changer/ External optional accessory (KDC-5047U, KMR-440U only) Wiring harness ⁄ To connect these leads, refer to the (Accessory1) relevant instruction manuals.
-
Seite 14: Installation/Removing The Unit
Installation/Removing the Unit Installation Removing the hard rubber frame 1. Engage the catch pins on the removal tool and remove the two locks on the upper level. Lift up and pull the frame forward as shown in the figure. Catch Bend the tabs of the mounting sleeve Lock with a screwdriver or similar utensil... - Seite 15 • The Bluetooth word mark and logos are that this battery contains lead. owned by the Bluetooth SIG, Inc. and any use of such marks by Kenwood Corporation The marking of products using lasers is under license. Other trademarks and trade names are those of their respective owners.
-
Seite 16: À Propos Du Guide De Démarrage Rapide
Téléphonie mains libres ......22 dans le Mode d'emploi sont soumis à modification. Vous pouvez télécharger la Accessoires ..........24 dernière version du Mode d'emploi sur le site www.kenwood.com/cs/ce/. Procédure d’installation ......24 Avant installation ........24 Connexion des câbles aux bornes ..26 Installation/Retrait de l’appareil ..28... -
Seite 17: Avant Utilisation
Les • Lorsque vous achetez des accessoires paramètres d'usine en option, vérifiez auprès de votre sont restaurés lorsque revendeur Kenwood que ces accessoires vous appuyez sur le fonctionnent avec votre modèle dans bouton de réinitialisation. votre région. • Des caractères conformes à l'ISO 8859-1 Nettoyage de l’appareil... -
Seite 18: Réglage De La Date
Étape 1 Molette de commande [ENTER] [FNC] Quitter le mode démonstration Réglage de la date La première fois que vous utilisez Appuyez sur la touche [FNC] pour entrer l'appareil après l'avoir installé, vous devez en mode de réglage des fonctions. désactiver le mode de démonstration. -
Seite 19: Fonctionnement Basique
Pour confirmer la source sélectionnée, appuyez sur la touche [ENTER]. Tuner (“TUNER”) ➜ Bluetooth Audio (“BT AUDIO”) (KDC-BT50U uniquement) ➜ USB (“USB”) ou iPod (“iPod”) ➜ CD (“CD”) ➜ Entrée auxiliaire Input (“AUX”) ➜ Veille (“STANDBY”) ➜ Tuner... -
Seite 20: Reproduire De La Musique (Cd/Usb/Ipod)
Reproduire de la musique (CD/USB/iPod) Molette de Fente pour le commande disque Borne USB [ENTER] Lecture d'un disque Pause et lecture Insérez le disque dans la fente. Appuyez sur la touche [ ] pour Une fois inséré, la source change mettre une chanson (morceau ou fichier) automatiquement et une chanson est sur pause ou en reprendre la lecture. -
Seite 21: Écoute De La Radio
Écoute de la radio [SRC] Molette de commande [ENTER] Sélection d'une source Tuner Appuyez sur la touche [SRC]. Tournez la molette de commande pour sélectionner “TUNER” et appuyez sur la touche [ENTER]. Sélection de la bande Poussez la molette de commande vers le haut pour modifier la bande dans l'ordre FM1 ➜... -
Seite 22: Téléphonie Mains Libres
Fonction du KDC-BT50U/ KCA-BT200 (Accessoire en option) Téléphonie mains libres Molette de KDC-BT50U Microphone [SRC] commande [ENTER] KDC-BT50U KDC-BT50U [FNC] Enregistrement du téléphone Appeler un numéro du répertoire téléphonique portable Composez le numéro de téléphone dans Vous pouvez enregistrer votre téléphone le répertoire de votre téléphone. -
Seite 23: Répondre À Un Appel Téléphonique
KDC-BT50U de la réduction du bruit Appuyez sur la touche [ ] pour composer. (KDC-BT50U uniquement) Si le niveau du microphone est bas ou que KDC-5047U KMR-440U le bruit ambiant est important pendant Appuyez sur la touche [ENTER] pour les appels en mains libres, effectuez les composer. -
Seite 24: Accessoires
Accessoires Avant installation ¤ • Le montage et le câblage de ce produit nécessitent des compétences spécifiques..1 Pour des raisons de sécurité, laissez un professionnel effectuer le travail de montage et de câblage. • Assurez-vous de mettre l’appareil à la masse sur une alimentation négative de 12V CC. - Seite 25 30° ou moins. (jaune) est connectée à l’alimentation • La qualité de réception peut chuter si constante. des objets métalliques se trouvent près Câble d’allumage Broche A-7 de l'antenne Bluetooth. (KDC-BT50U (Rouge) (Rouge) uniquement) Appareil Véhicule Câble de batterie...
-
Seite 26: Connexion Des Câbles Aux Bornes
Connexion des câbles aux bornes KMR-440U uniquement ⁄ Vers le KCA-RC107MR (accessoire en option) • Impédance des enceintes : 4 – 8 Ω • Courant d'alimentation maximum ⁄ Pour connecter le KCA-RC107MR, pour la borne USB: 500 mA consultez le manuel du KCA- RC107MR. - Seite 27 Sortie avant Sortie subwoofer Fusible (10A) Entrée d'antenne FM/AM (JASO) Vers le microphone en option KCA-MC10 (KDC-BT50U uniquement) Vers le changeur de disques Kenwood / Accessoire externe en option (KDC-5047U, KMR-440U uniquement) Câblage électrique ⁄ Pour le raccordement de ces fils,...
-
Seite 28: Installation/Retrait De L'appareil
Installation/Retrait de l’appareil Installation Retrait de l’appareil 1. Reportez-vous à la section <Retrait du cadre en caoutchouc dur> et retirez le cadre. 2. Retirez la façade. 3. Insérez les deux outils de retrait profondément dans les fentes de chaque côté, comme indiqué. 4. - Seite 29 • The Bluetooth word mark and logos are l’environnement. owned by the Bluetooth SIG, Inc. and any Remarque: Le symbole “Pb” ci-dessous use of such marks by Kenwood Corporation sur des piles électrique is under license. Other trademarks and trade indique que cette pile names are those of their respective owners.
-
Seite 30: Informationen Zur Kurzanleitung
Die Bedienungsanleitung kann Hinweise zum Einbau ......38 möglicherweise Änderungen unterzogen werden, falls sich bestimmte Spezifikationen Vor dem Einbau ........38 der Geräte ändern. Die neueste Version der Bedienungsanleitung können Sie unter Anschlussdiagramm ......40 www.kenwood.com/cs/ce/ herunterladen. Einbau/Entfernen des Geräts ....42 30 | Kurzanleitung... -
Seite 31: Vor Der Verwendung
Sollte das Gerät nicht ist. Funktioniert der CD-Player nach einer Rückstelltaste richtig funktionieren, bestimmten Zeit noch immer nicht richtig, drücken Sie die wenden Sie sich bitte an Ihren Kenwood- Rückstelltaste. Fachhändler. Durch Drücken Hinweise der Rückstelltaste • Sollten Sie Probleme bei der Installation werden die des Geräts haben, lassen Sie sich bitte von... -
Seite 32: Erste Schritte
Erste Schritte Steuerknopf [ENTER] [FNC] Demonstrationsmodus verlassen Datum einstellen Schalten Sie den Demonstrationsmodus Drücken sie die [FNC]-Taste, um aus, wenn Sie das Gerät nach der den Funktionseinstellungsmodus zu Installation zum ersten Mal verwenden. aktivieren. Drücken Sie die [ENTER]-Taste, um den Das Einstellungselement kann wie folgt Demonstrationsmodus zu verlassen, ausgewählt werden. -
Seite 33: Grundbedienung
Sie anschließend den Steuerknopf. Um die ausgewählte Quelle festzulegen, drücken Sie die [ENTER]-Taste. Tuner (“TUNER”) ➜ Bluetooth Audio (“BT AUDIO”) (nur KDC-BT50U) ➜ USB (“USB”) oder iPod (“iPod”) ➜ CD (“CD”) ➜ Zusatzeingang (“AUX”) ➜ Standby (“STANDBY”) ➜ Tuner... Lautstärke Drehen Sie den Steuerknopf und stellen Sie die Lautstärke ein. -
Seite 34: Musikwiedergabe (Cd/Usb/Ipod)
Musikwiedergabe (CD/USB/iPod) Steuerknopf Disc-Fach USB-Anschluss [ENTER] Wiedergabe - Disc Pause und Wiedergabe Legen Sie die Disk in das Disc-Fach ein. Drücken Sie die [ ]-Taste, um die Nach dem Einlegen wird die Quelle Wiedergabe einer Musikdatei (Titel oder automatisch umgeschaltet, und die Datei) anzuhalten oder fortzufahren. -
Seite 35: Radiowiedergabe
Radiowiedergabe [SRC] Steuerknopf [ENTER] Tuner-Quelle auswählen Drücken Sie die [SRC]-Taste. Drehen Sie den Steuerknopf und wählen Sie “TUNER”. Drücken Sie anschließend die [ENTER]-Taste. Band auswählen Drücken Sie den Steuerknopf nach oben, um das Band in der Abfolge FM1 ➜ FM2 ➜ FM3 zu ändern. Drücken Sie den Steuerknopf nach unten, um als Band AM einzustellen. -
Seite 36: Freisprech-Telefon
Funktion von KDC-BT50U/KCA-BT200 (optionales Zubehör) Freisprech-Telefon KDC-BT50U Steuerknopf Mikrofon [SRC] KDC-BT50U [FNC] [ENTER] KDC-BT50U Mobiltelefon registrieren Anrufen einer Nummer aus dem Telefonbuch Melden Sie Ihr Mobiltelefon für die Verwendung mit diesem Gerät an. Wählen Sie eine Telefonnummer aus dem Telefonbuch Ihres Mobiltelefons. -
Seite 37: Annehmen Eines Anrufs
Funktionseinstellungsmodus zu verlassen. Mikrofonpegel und ist der Mikrofonpegel nach den Geräuschunterdrückung einstellen Einstellungen noch immer zu niedrig, (nur KDC-BT50U) verwenden Sie bei Bedarf das externe Ist während des Telefonierens mit Mikrofon KCA-MC10 (optionales der Freisprecheinrichtung der Zubehör). Mikrofonpegel zu niedrig, bzw. sind die Umgebungsgeräusche zu laut, nehmen... -
Seite 38: Zubehör
Zubehör Vor dem Einbau ¤ • Die Montage sowie die Verkabelung dieses Gerätes macht besondere Fähigkeiten und ..1 Erfahrung erforderlich. Überlassen Sie die Arbeiten zur Montage und Verkabelung ausgewiesenem Fachpersonal. • Betreiben Sie das Gerät ausschließlich mit 12-Volt-Gleichstrom und negativer Masseverbindung. -
Seite 39: Anschluss Des Iso-Steckverbinders
Stift A-4 metallische Gegenstände in der Nähe der (Gelb) (Gelb) Bluetooth-Antenne beeinträchtigt. (nur 2 Der Stift A-7 (rot) des ISO-Anschlusses KDC-BT50U) am Fahrzeug ist mit der ständigen Stromversorgung, der Stift A-4 (gelb) mit der Zündung verbunden. Stift A-7 Zündkabel (Rot) (Rot) Gerät... -
Seite 40: Anschlussdiagramm
Anschlussdiagramm KMR-440U nur ⁄ Zum KCA-RC107MR (optionales Zubehör) • Lautsprecherimpedanz: 4 – 8 Ω • Maximaler Versorgungsstrom des USB- ⁄ Näheres zum Anschluss des Anschlusses: 500 mA KCA-RC107MR finden Sie in der Bedienungsanleitung Ihres KCA- RC107MR. Zuordnung/Funktion der Anschlüsse Stiftnummern für Kabelfarbe Funktionen ISO-Anschlüsse... - Seite 41 Hinterer Ausgang Vorderer Ausgang Subwoofer-Ausgang Sicherung (10 A) UKW/MW-Antenneneingang (JASO) Zum optionalen Zusatzmikrofon KCA-MC10 (nur KDC-BT50U) Zum Kenwood Disc-Wechsler/zu einem externen optionalen Zubehör (nur KDC-5047U, KMR-440U) Kabelbaum ⁄ Beachten Sie beim Anschließen dieser (Zubehör1) Kabel die entsprechenden Handbücher. Falls kein Anschluss hergestellt wird, lassen Sie den Draht nicht aus der Lasche hervorstehen.
-
Seite 42: Einbau/Entfernen Des Geräts
Einbau/Entfernen des Geräts Einbau Entfernen des Geräts 1. Lösen Sie den Hartgummirahmen gemäß den Anweisungen aus dem Abschnitt <Entfernen des Hartgummirahmens>. 2. Nehmen Sie die Frontblende ab. 3. Stecken Sie die beiden Ausbauwerkzeuge wie abgebildet tief in die Schlitze auf beiden Seiten. 4. - Seite 43 • The Bluetooth word mark and logos are Weitere Informationen über das owned by the Bluetooth SIG, Inc. and any Recycling dieses Produktes erhalten use of such marks by Kenwood Corporation Sie von Ihrer Gemeinde oder den is under license. Other trademarks and trade kommunalen Entsorgungsbetrieben.
-
Seite 44: Over De Snelstartgids
Accessories ..........52 aanpassing van de specificaties, enz.. U kunt de meest recente versie van de Installatieprocedure ......52 gebruiksaanwijzing downloaden van www.kenwood.com/cs/ce/. Voor de installatie .........52 Verbinden van kabels met aansluitingen ........54 Installatie/Verwijderen van het toestel ............56... -
Seite 45: Voor De Ingebruikneming
(zoals munten in zo’n geval de cd en wacht totdat de en gereedschap) in het toestel. condens is verdampt. Raadpleeg uw Kenwood-dealer indien het toestel na een Terugstellen van Resettoets tijdje nog niet normaal functioneert. uw toestel... -
Seite 46: Eerste Stap
Eerste stap Regelknop [ENTER] [FNC] Sluit de demonstratiemodus Datum aanpassen Schakel de demonstratiemodus uit als Druk op de toets [FNC] om de modus u deze voor het eerst gebruikt na de Functies instellen te activeren. installatie. Het item kan als volgt worden Druk op de toets [ENTER] om de geselecteerd en bevestigd. -
Seite 47: Basisbewerkingen
U kunt bepalen welke bron is geselecteerd door op de toets [ENTER] te drukken. Tuner (“TUNER”) ➜ Bluetooth-audio (“BT AUDIO”) (uitsluitend KDC-BT50U ) ➜ USB (“USB”) of iPod (“iPod”) ➜ Cd (“CD”) ➜ Hulpingang (“AUX”) ➜ Stand-by (“STANDBY”) ➜ Tuner... -
Seite 48: Muziek Afspelen (Cd/Usb/Ipod)
Muziek afspelen (CD/USB/iPod) Regelknop CD-gleuf USB-aansluiting [ENTER] Cd afspelen Pauzeren en afspelen Plaats de cd in de cd-gleuf. Druk op de toets [ ] om het afspelen Nadat de disk is geplaatst, wordt de bron van een nummer (track of bestand) te automatisch overgeschakeld en wordt onderbreken of te hervatten. -
Seite 49: Naar De Radio Luisteren
Naar de radio luisteren [SRC] Regelknop [ENTER] Een tunerbron selecteren Druk op de toets [SRC]. Draai aan de regelknop om “TUNER” te selecteren en druk vervolgens op de toets [ENTER]. De band selecteren Druk de regelknop omhoog om van band te veranderen in de volgorde FM1 ➜... -
Seite 50: Handsfree Telefoneren
Functie van KDC-BT50U/KCA-BT200 (optioneel accessoire) Handsfree telefoneren KDC-BT50U Regelknop Microfoon [SRC] KDC-BT50U [FNC] [ENTER] KDC-BT50U Mobiele telefoon registreren Een nummer bellen in het telefoonboek Registreer uw Bluetooth-telefoon bij dit toestel. Kies het telefoonnummer in het telefoonboek van uw mobiele telefoon. -
Seite 51: Een Telefonisch Gesprek Beantwoorden
Instelling voor een optionele microfoon KCA-MC10 microfoonversterking en (accessoire). ruisreductie (uitsluitend KDC-BT50U) Als het microfoonniveau laag is of de omgevingsruis sterk tijdens handsfree telefoneren, kunt u aanpassingen doorvoeren. Druk op de toets [ ] om de Bluetooth- modus te activeren. -
Seite 52: Accessories
Accessories Voor de installatie ¤ • De bevestiging en bedrading van dit product vereist vakbekwaamheid en ervaring..1 Laat de bevestiging en bedrading om veiligheidsredenen door vaklui uitvoeren. • Zorg dat het toestel op een negatieve 12-volt-gelijkstroomvoeding is geaard. • Installeer het toestel niet op plaatsen die aan direct zonlicht, hitte of extreme vochtigheid blootstaan. - Seite 53 Auto wanneer zich metalen voorwerpen bevinden in de buurt van de Bluetooth-antenne. Accukabel A–4 Pen (uitsluitend KDC-BT50U) (geel) (geel) 2 De pin A-7 (rood) van de ISO-stekker is aangesloten op de constante spanningsbron en de pin A-4 (geel) is gekoppeld aan de ontsteking.
-
Seite 54: Verbinden Van Kabels Met Aansluitingen
Verbinden van kabels met aansluitingen uitsluitend KMR-440U ⁄ Naar KCA-RC107MR (Optioneel toebehoren) • Luidsprekerimpedantie: 4 – 8 Ω • Maximale toevoerstroom USB- ⁄ Voor aansluiting van de KCA-RC107M aansluiting: 500 mA raadpleegt u de handleiding bij uw KCA-RC107MR. Stekkerfunctietabel Pennummers voor Kleur van kabel Functies ISO-stekkers... - Seite 55 Achter-uitgang Vooruitgang Subwooferuitvoer Zekering (10A) FM/AM antenne-ingang (JASO) Naar optionele microfoon KCA-MC10 (accessoire) (uitsluitend KDC-BT50U) Naar diskwisselaar van Kenwood/extern optioneel accessoire (KDC-5047U, uitsluitend KMR-440U) Bedradingsbundel ⁄ Als u deze kabels wilt aansluiten, (toebehoren1) raadpleegt u de relevante gebruiksaanwijzingen. Zorg dat de kabel niet uit het lipje komt wanneer u geen verbindingen heeft gemaakt.
-
Seite 56: Installatie/Verwijderen Van Het Toestel
Installatie/Verwijderen van het toestel Installatie Verwijderen van het toestel 1 Zie <Verwijderen van het harde rubberframe> en verwijder het harde rubberframe. 2 Verwijder het voorpaneel. 3 Steek de twee verwijderstaafjes diep in de gleuven aan elke kant, zoals getoond in de afbeelding. 4 Duw de verwijderstaafjes omlaag terwijl u ze indrukt en trek het toestel half naar Buig de lipjes van de bevestigingshuls... -
Seite 57: Markering Op Producten Die Laserstralen Gebruiken
• The Bluetooth word mark and logos are Opgelet: Het teken “Pb” onder het owned by the Bluetooth SIG, Inc. and any teken van de batterijen geeft use of such marks by Kenwood Corporation aan dat deze batterij lood is under license. Other trademarks and trade bevat. -
Seite 58: Für Kdc-Bt50U
2967-3 Ishikawa-machi, Hachioji-shi, Tokyo, 192- 2967-3 Ishikawa-machi, Hachioji-shi, Tokyo, 192- 8525 Japan 8525 Japan EU-Vertreter: EU Representative's: Kenwood Electronics Europe BV Kenwood Electronics Europe BV Amsterdamseweg 37, 1422 AC UITHOORN, Amsterdamseweg 37, 1422 AC UITHOORN, The Niederlande Netherlands Conformiteitsverklaring met Déclaration de conformité... - Seite 59 Français Slovensko • Par la présente Kenwood déclare que l’appareil KDC-BT50U est • S tem Kenwood izjavlja, da je ta KDC-BT50U v skladu z osnovnimi conforme aux exigences essentielles et aux autres dispositions zahtevami in ostalimi ustreznimi predpisi Direktive 1999/5/EC.