Herunterladen Inhalt Inhalt Diese Seite drucken

Werbung

Verfügbare Sprachen
  • DE

Verfügbare Sprachen

  • DEUTSCH, seite 38
Model: 11-8323
LIT. #: 98-0535/02-05
Instruction Manual • Manuel D'instructions
Manual de Instrucciones • Bedienungsanleitung
Manuale di istruzioni • Manual de Instruções
CONTENTS
English ...................... 2
Français ................... 25
Español ................... 49
Deutsch................... 73
Italiano.................... 97
Português .............. 121

Werbung

Inhaltsverzeichnis
loading

Inhaltszusammenfassung für Bushnell Instant Replay 118323

  • Seite 1: Inhaltsverzeichnis

    CONTENTS English ...... 2 Français ....25 Español ....49 Deutsch....73 Italiano....97 Português ....121 Instruction Manual • Manuel D’instructions Model: 11-8323 Manual de Instrucciones • Bedienungsanleitung LIT. #: 98-0535/02-05 Manuale di istruzioni • Manual de Instruções...
  • Seite 2 QUICK GUIDE: BUSHNELL COMPACT INSTANT REPLAY 11-8323 Congratulations on your purchase of the Bushnell ® Compact Instant Replay ™ ! The Compact Install Batteries Insert 2 AAA batteries (see “Specifications”) into the battery compartment on the bottom of the camera Instant Replay is ideal for all sporting events and nature observation, as it combines a high pod (Note polarity indication inside).
  • Seite 3: Technical Specifications

    QUICK GUIDE: BUSHNELL COMPACT INSTANT REPLAY 11-8323 Technical Specifications Take A Photo Hold the camera steady with both hands and press the SNAP button to take a still photo. You will hear Magnification Still Photo File Size (Resolution) 2048x1536, 1600x1200, 640x480 a “beep”...
  • Seite 4: Parts Identification

    Parts Identification LCD Preview Display Icons LCD Display LCD Display LCD/Mode Button Normal Video Replay Video Replay Video 5-way Keypad w/ Movie (Video)Display 8 7 6 Menu/OK Button Still Photo Preview Display Center Icon Icon USB Port/ Focus Video Out Power Knob Battery Indicator (full)
  • Seite 5: Loading Batteries

    Loading Batteries Basic Binocular and Camera Setup Before taking photos or videos, take a few moments to set up the Compact Instant Replay for your individual eyesight and user prefer- Turn the Compact Instant Replay over, and slide open the battery cover in the ences.
  • Seite 6 Shooting Normal or “Instant Replay” Videos Taking Still Photos After following the initial setup as described in the previous pages, you are ready to take a photo: 1) Follow steps 1-4 on the previous page, “Taking Still Photos” 2) To change from still photo to either video mode, press the Menu/OK button. The first menu group is “Camera”-press the Right ar- 1) Raise the LCD and press the Power button briefly (red LED lights).
  • Seite 7: Using The Main Menu

    Using The Main Menu Using The Main Menu continued As mentioned earlier in this manual, the Compact Instant Replay is already set for its highest available resolution and Menu Group Icon Purpose quality right out of the box. Exposure, white balance, and other variables are set automaticallly. This means that you will get good results for most subjects and lighting without the need to go into the menus and change any settings.
  • Seite 8: Main Menu System (Default Settings In Bold)

    Main Menu System Main Menu System (Default Settings in Bold) continued *Scene and Sequence settings in “Mode” are not available when “Camera” is set for Normal or Replay Video Group Item Settings Description Group Settings Description MODE Scene * Program Standard auto exposure for most subjects or general purpose CAMERA Still Photo...
  • Seite 9: Review Menu

    Main Menu System Review Display Icons continued # Icon Group Item Settings Description 1 Date of photo or video file (Date feature must be setup and turned on) Date Setup, Allows setting the correct date/time for your area. If “On” is selected, the date On/Off will appear on the display and be imprinted on all photos.
  • Seite 10: Software Installation

    Review Menus System Requirements (Minimum) continued OS: Windows® 98/98SE/2000/ME/XP CPU: MMX Pentium® 200MHZ equivalent or faster ( entium® III 500 MHz for PhotoSuite5™) Group Item Setting Description Memory: 32MB minimum (64MB recommended for PhotoSuite) DELETE Delete Yes / No Deletes the currently displayed photo or video from memory. Use SVGA video card w/2MB VRAM, 800x600 screen display, 16 bit High color Up/Down arrows to find the file you want to delete.
  • Seite 11 Transferring The Photos & Videos to Your PC Transferring The Photos & Videos to Your PC continued continued 7. You’re now ready to open the photo files in any photo editing software. Just use File>Open and go to the 4. (This step is not required with Windows XP, simply use the on-screen options to view, copy or edit your photos). folder where you stored the photos earlier.
  • Seite 12 This warranty does not cover damages caused by misuse, improper handling, in- (FQ=low/EQ=high) interference in a residential installation. This equipment stallation, or maintenance provided by someone other than a Bushnell Authorized Service FQ: Fine Quality (1:4) generates, uses and can radiate radio frequency energy Department.
  • Seite 13: Français

    FRANÇAIS...
  • Seite 14 GUIDE RAPIDE : COMPACT INSTANT REPLAY 11-8323 BUSHNELL Félicitations et merci d’avoir acheté le Compact Instant Replay ™ Bushnell ® ! Le Compact Installation Introduisez 2 piles de type AAA (voyez « Spécifications ») dans le compartiment de piles, au bas du socle des piles et de de l’appareil (notez l’indication de polarité...
  • Seite 15: Caractéristiques Techniques

    QUICK GUIDE: BUSHNELL COMPACT INSTANT REPLAY 11-8323 Caractéristiques techniques Saisie d’une Maintenez l’appareil immobile des deux mains et appuyez sur le bouton SNAP (déclencheur) pour pren- photo ou d’un dre une photo fixe. Vous pouvez entendre un bip (qui peut être désactivé) suivi d’une pause brève (icône Grossissement Taille fichier photo fixe (résolu-...
  • Seite 16: Identification Des Pièces

    Identification des pièces Icônes affichées sur l’écran LCD Écran LCD Bouton LCD/Mode Vidéo Normal Vidéo Replay Vidéo Replay (relecture) Clavier 5 options 8 7 6 avec bouton Affichage film (vidéo) Menu/OK Visualisation de photo fixe Molette Icône Port USB/sortie vidéo Icône centrale de Avertisseur...
  • Seite 17: Mise En Place Des Piles

    Mise en place des piles Réglage de base des jumelles et de l’appareil photo Avant de prendre des photos ou des clips vidéo, veuillez prendre quelques instants pour régler le Compact Instant Replay à votre vision et Retournez le Compact Instant Replay et glissez le couvercle du compartiment de selon vos préférences.
  • Seite 18 Saisie de clips vidéo en mode normal ou « Instant Replay » Saisie de photos fixes Après avoir effectué le réglage initial comme décrit aux pages précédentes, vous êtes prêt à prendre une photo : 1) Effectuez les opérations 1 à 4 de la page précédente : « Saisie de photos fixes ». 2) Pour passer du mode de photo fixe à...
  • Seite 19: Utilisation Du Menu Principal

    Utilisation du menu principal Utilisation du menu principal (suite) Comme il a été mentionné plus haut dans ce manuel, le Compact Instant Replay est réglé par défaut à la résolution Groupe menu Icône et à la qualité les plus élevées. L’exposition, la balance des blancs et d’autres variables se règlent automatiquement. Cela signifie que vous pouvez obtenir de bons résultats pour la plupart des sujets et des conditions d’éclairage, sans Réglage Fournit les options de réglage de : Résolution (taille de fichier), Qualité...
  • Seite 20: Options Du Menu Principal

    Options du menu principal Options du menu principal (suite) (réglages par défaut en caractères gras) *Les réglages de Scène et de Séquence dans « Mode » ne sont pas disponibles lorsque « Camera » (appareil photo) est Groupe Article Réglages Description réglé...
  • Seite 21 Options du menu principal (suite) Icônes de visionnement # Icône Groupe Article Réglages Description 1 Date du fichier de la photo ou du clip vidéo (la fonction de date doit être Date Réglage, Permet le réglage de la date et de l’heure correctes pour votre région. Si « On » réglée et activée) activé/dés- (activé) est sélectionné, la date apparaîtra sur l’affichage et sera imprimée sur...
  • Seite 22: Installation Du Logiciel

    Menus de visionnement (suite) Système requis (minimum) Système d’exploitation : Windows® 98/98SE/2000/ME/XP Groupe Article Réglages Description UC : MMX Pentium® 200 MHz équivalent ou plus rapide (Pentium® III 500 MHz pour PhotoSu- ite5™) EFFACER Effacer Oui / Non Supprime de la mémoire la photo ou le clip vidéo actuellement Mémoire : 32 Mo minimum (64 Mo recommandés pour PhotoSuite) affiché(e).
  • Seite 23 Téléchargement de photos et clips vidéo à un ordinateur - étape par étape (suite) Téléchargement de photos et clips vidéo à un ordinateur - étape par étape (suite) 7. Vous pouvez dès maintenant ouvrir les fichiers de photos dans n’importe quel logiciel d’édition de photos. 4.
  • Seite 24 Remarque relative à la FCC (Commission fédérale des (capacité maxi +/- 2 photos) télécommunications) Votre produit Bushnell® est garanti exempt de défauts de matériaux et de fabrication Ce matériel a été testé et s’est révélé être conforme aux limites * Sélectionne le degré de compres- pendant deux ans après la date d'achat.
  • Seite 25: Español

    ESPAÑOL...
  • Seite 26 GUÍA RÁPIDA: COMPACT INSTANT REPLAY 11-8323 BUSHNELL ¡Lo felicitamos por su elección del Compact Instant Replay ™ Bushnell ® ! El Compact Instant Instalar las pilas Inserte 2 pilas AAA (vea las “Especificaciones”) en el compartimiento para pilas situado en la parte Replay es ideal para todos los eventos deportivos y la observación de la naturaleza, ya que...
  • Seite 27: Especificaciones Técnicas

    GUÍA RÁPIDA: COMPACT INSTANT REPLAY 11-8323 BUSHNELL Especificaciones técnicas Tome una foto Sujete la cámara bien fija con ambas manos y oprima el botón SNAP (Instantánea) para tomar una foto- Aumento Tamaño de archivo de fotos fijas 2048x1536, 1600x1200, 640x480 grafía fija.
  • Seite 28: Identificación De Las Piezas

    Identificación de las piezas Iconos de pantalla LCD de imagen preliminar Pantalla LCD Botón LCD/Mode Vídeo normal Vídeo Replay Vídeo Replay Teclado de 5 8 7 6 (Reproducción) vías con botón Menu/OK Pantalla de filmación (vídeo) Pantalla preliminar de fotos fijas Icono Icono Perilla de en-...
  • Seite 29: Instalación De Las Pilas

    Instalación de las pilas Configuración básica del binocular y la cámara Antes de tomas fotografías o videos, dedique unos minutos a configurar su Compact Instant Replay para propia vista y las preferencias Invierta el Compact Instant Replay, y abra la tapa de las pilas deslizándola en el del usuario.
  • Seite 30 Tomar videos Normal o “Instant Replay” Tomar fotografías fijas 1) Ejecute los pasos 1 al 4 de la página anterior, “Tomar fotografías fijas” Después de ejecutar la configuración inicial como se describe en las páginas anteriores, usted está preparado para tomar una fotografía: 2) Para cambiar de fotografías fijas a cualquiera de las dos modalidades de vídeo, oprima el botón Menu/OK.
  • Seite 31 Utilización del menú principal Utilización del menú principal continuación Tal como lo mencionamos anteriormente en este manual, el Compact Instant Replay viene preajustado para su reso- Grupo del Icono Propósito lución y calidad más altas posibles. La exposición, el equilibrio de blanco y otras variables se ajustan automáticamente. Esto significa que usted obtendrá...
  • Seite 32 Sistema del menú Principal continuación Sistema de menú Principal (ajustes predeterminados están en negrita) Grupo Item Descripción Configuración *Los ajustes de Escena y Secuencia en “Mode” no están disponibles cuando la “cámara” está configurada para vídeo Normal o Replay. MODE Scene * Program Exposición automática estándar para la mayoría de los temas o uso general...
  • Seite 33 Sistema del menú Principal Ver los iconos de visualización continuación # Icono Grupo Item Descripción Configuración 1 Fecha del archivo de fotografía o vídeo (La función de fecha debe estar Date (Fecha) Setup, Permite configurar la fecha/hora correcta para su zona. Si selecciona “ON” configurada y activada) On/Off (activado), la fecha aparecerá...
  • Seite 34 Menú Review Requisitos de sistema (mínimo) continuación OS: Windows® 98/98SE/2000/ME/XP Grupo Item Configuración Descripción CPU: MMX Pentium® 200MHZ equivalente o más rápido (Pentium® III 500 MHz para PhotoSu- ite5™) DELETE Delete Yes / No Borra de la memoria la fotografía o vídeo que se visualiza actual- Memoria: 32MB mínimo (64MB recomendado para PhotoSuite) (Borrar) mente.
  • Seite 35 Transferencia de fotos y vídeos a la computadora - Paso por paso Transferencia de fotos y vídeos a la computadora - Paso por paso continuación continuación 7. Ahora está preparado para abrir los archivos de fotografías en cualquier software para editar fotografías. 4.
  • Seite 36 (capacidad máx., +/- 2 fotografías) Este equipo ha sido sometido a pruebas y cumple con Su producto Bushnell® está garantizado contra defectos de material y fabricación los límites establecidos para un aparato digital de Clase * Selecciona la cantidad de com- Tamaño de...
  • Seite 37: Deutsch

    DEUTSCH...
  • Seite 38 KURZER LEITFADEN: BUSHNELL COMPACT INSTANT REPLAY 11-8323 Wir gratulieren zu Ihrem Kauf der Bushnell ® Compact Instant Replay ™ ! Die Compact Batterien und 2 AAA Alkali-Batterien (siehe „Spezifikationen“ in das Batteriefach am Boden des Kameragehäuses Instant Replay ist ideal für alle Sportveranstaltungen und Beobachtungen in der Natur, einlegen.
  • Seite 39: Technische Spezifikationen

    KURZER LEITFADEN: BUSHNELL COMPACT INSTANT REPLAY 11-8323 Technische Spezifikationen Ein Foto Die Kamera mit beiden Händen ruhig halten und für die Aufnahme eines Standfotos den SNAP Knopf Vergrößerung Dateigröße für Standfotos 2.048 x 1.536, 1.600 x 1.200, 640 x 480 drücken.
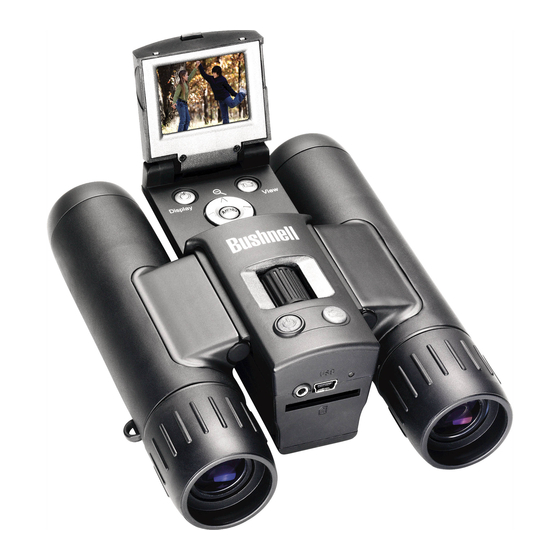
  • Seite 40: Identifizierung Der Teile

    Identifizierung der Teile LCD mit Vorschau der Icons LCD Display LCD Display LCD/Modus-Knopf Normal Video Abspiel-Video Abspiel-Video 5-Wege-Tastenfeld Film (Video) Display 8 7 6 mit Menu/OK Display für Standfotos-Vorschau Knopf Mittlerer Icon Icon USB Port/ Fokussierknopf Video Out Power Batteriekontrolle (2/3 Ladestand angezeigt) (Fernglas) Batteriekontrolle (voll) Piepton...
  • Seite 41: Batterien Einlegen

    Batterien einlegen Grundlagen der Vorbereitung von Fernglas und Kamera Vor dem Aufnehmen von Fotos oder Videos einen Moment darauf verwenden, die Compact Instant Replay auf die individuelle Die Compact Instant Replay umdrehen und den Batteriefachdeckel wie rechts Sehschärfe und Benutzervorzüge einzustellen. Wenn keine Brille getragen wird, die Augenmuscheln aus Gummi in ihrer Position abgebildet öffnen.
  • Seite 42: "Normal" Oder "Instant Replay" Videos Aufnehmen

    „Normal“ oder “Instant Replay” Videos aufnehmen Standfotos aufnehmen 1) Die Schritte 1 bis 4 auf der vorherigen Seite „Standfotos aufnehmen“ befolgen. Nach dem ersten Setup wie weiter oben beschrieben kann ein Foto aufgenommen werden: 2) Für die Umschaltung von Standfotos auf einen Video-Modus den Menu/OK Knopf drücken. Die erste Menügruppe ist “Camera” (Kamera) –...
  • Seite 43: Benutzung Des Hauptmenüs

    Benutzung des Hauptmenüs Using The Main Menu continued Wie weiter oben in diesem Handbuch angegeben, ist die Compact Instant Replay werksmäßig für ihre größte ver- Menügruppe Icon Zweck fügbare Bildauflösung und Qualität voreingestellt. Belichtung, Weißabgleich und andere Variablen sind automatisch eingestellt.
  • Seite 44: Hauptmenü System (Standardeinstellungen In Fettdruck)

    Hauptmenü System Hauptmenü System Fortsetzung (Standardeinstellungen in Fettdruck) *Einstellungen Szene und Sequenz unter “Mode” sind nicht verfügbar, wenn “Camera”für „Normal“ oder „Replay Group Item Settings Description Video“ eingestellt ist. MODUS Szene * Programm Standardmäßige Selbstbelichtung für die meisten Subjekte oder allgemeine Zwecke Gruppe Einstellungen Beschreibung...
  • Seite 45: Icons Im Überprüfungs-Display

    Hauptmenü System Fortsetzung Icons im Überprüfungs-Display # Icon Gruppe Artikel Einstel- Beschreibung lungen 1 Datum der Foto- oder Videodatei (Das Datumsmerkmal muß eingestellt und eingeschaltet werden) 2 Ort der laufenden Überprüfungsdatei (INterner Speicher oder SD Karte) Datum Setup, Dient bei der richtigen Einstellung von Datum / Uhrzeit gemäß Zeitzone. Wenn “On” On/Off gewählt ist, erscheint das Datum im Display und wird auf alle Fotos aufgedruckt.
  • Seite 46: Installation Der Software

    Überprüfungsmenüs Fortsetzung Erforderliches System (Minimum) OS: Windows® 98/98SE/2000/ME/XP Gruppe Artikel Beschreibung Beschreibung Zentraleinheit: MMX Pentium® 200 MHZ gleichwertig oder schneller Pentium® III 500 MHz für PhotoSuite5™) LÖSCHEN Eins Yes / No Löscht das im Moment angezeigte Foto oder die Video aus dem Speicher: 32 MB Minimum (64 MB für PhotoSuite empfohlen) löschen Speicher.
  • Seite 47 Die Fotos und Videos auf den PC herunterladen – Schritt für Schritt Die Fotos und Videos auf den PC herunterladen – Schritt für Schritt 7. Jetzt können die Fotodateien unter jeder beliebigen Bearbeitungs-Software geöffnet werden. Nur „File>Open” 4. (Dieser Schritt ist bei Windows XP nicht erforderlich, nur einfach die Optionen des Bildschirms zum Sichten, (Datei>öffnen) benutzen und zum Ordner gehen, in dem die Fotos vorher gespeichert worden waren.
  • Seite 48 Anmerkung bezüglich FCC Richtlinien: (max. Kapazität, +/- 2 Fotos) Sie erhalten für Ihr Bushnell®-Produkt eine Garantie für einen Zeitraum von zwei Jahren ab dem Dieses Gerät wurde getestet und es wurde als mit Kaufdatum. Die Garantie erstreckt sich auf Material- und Herstellungsfehler. Für den Fall, dass ein den Vorschriften für ein digitales Gerät der Klasse B...
  • Seite 49: Italiano

    ITALIANO...
  • Seite 50 GUIDA DI CONSULTAZIONE RAPIDA: BUSHNELL INSTANT REPLAY 11-8323 Grazie per aver scelto il binocolo Bushnell ® Compact Instant Replay ™ ! Compact Instant Installazione Inserite 2 pile alcaline AAA (vedere le “Specifiche”) nel vano portapile in basso sulla cassa della foto- Replay è...
  • Seite 51: Specifiche Tecniche

    GUIDA DI CONSULTAZIONE RAPIDA: BUSHNELL INSTANT REPLAY 11-8323 Specifiche tecniche Scatto di una Per scattare una foto, tenete ferma la fotocamera con entrambe le mani e premete il pulsante SNAP. Ingrandimento Dimensione delle foto (Risoluzione) 2048x1536, 1600x1200, 640x480 Sentirete un “segnale acustico” (che può essere disattivato), seguito da una breve pausa (appare l’icona foto o ripresa dei file) mentre la fotocamera salva la foto in memoria.
  • Seite 52: Identificazione Delle Parti

    Identificazione delle parti Icone della visualizzazione di anteprima sullo schermo LCD Display LCD Display LCD Pulsante LCD/Mode Tastierino a 5 Video normale Video Replay Video Replay 8 7 6 direzioni con pul- Visualizzazione Film (Video) sante Menu/OK Visualizzazione di anteprima delle foto Icona Icona Manopola cen-...
  • Seite 53: Inserimento Delle Pile

    Inserimento delle pile Preparazione di base del binocolo e della fotocamera Prima di scattare le foto o fare riprese video, regolate il binocolo Compact Instant Replay secondo la vista dei vostri occhi e le vostre Capovolgete il binocolo Compact Instant Replay e aprite la copertura delle pile preferenze.
  • Seite 54: Come Scattare Una Foto

    Come fare una ripresa in modalità video Normal (normale) o ‘Instant Replay’ Come scattare una foto Dopo la preparazione iniziale, descritta nelle pagine precedenti, siete pronti a scattare le foto: 1) Seguite i passi da 1 a 4 della procedura “Come scattare una foto”, spiegata in precedenza. 2) Per passare dalla modalità...
  • Seite 55: Uso Del Menu Principale

    Uso del menu principale Uso del menu principale continuazione È già stato menzionato in questo manuale che Compact Instant Replay viene consegnato impostato sulla più alta Gruppo del menu Icona Funzione risoluzione e qualità delle immagini disponibile. L’esposizione, l’equilibrio bianco ed altre variabili sono impostate automaticamente.
  • Seite 56 Sistema del menu principale Sistema del menu principale (le impostazioni predefinite sono in grassetto) continuazione Le impostazioni Scena e Sequenza non sono disponibili in “Modalità” quando la “Camera” è impostata su video Normale o Replay. Gruppo Voce Impostazioni Descrizione Gruppo Voce Impostazioni Descrizione...
  • Seite 57 Sistema menu Principale Le icone del display (segue) # Icona Gruppo Voce Impostazioni Descrizione Data della foto o del file video (la funzionalità della data deve essere impostata e attivata) Data Setup, Permette di impostare la data e l’ora esatta in base al proprio fuso orario. Se selezionate “On”, On / Off la data viene visualizzata sul display e viene stampata su ogni foto.
  • Seite 58 I menu di revisione - Requisiti del sistema (Minimo) segue Sistema operativo: Windows® 98/98SE/2000/ME/XP CPU: MMX Pentium® 200MHZ, equivalente o più veloce, (Pentium® III 500 MHz per PhotoSuite5™) Gruppo Voce Impostazioni Descrizione Memoria: almeno 32MB (si raccomandano 64MB per PhotoSuite) scheda video SVGA con 2MB di VRAM, display schermo da 800x600, colori 16 bit DELETE Delete...
  • Seite 59 Istruzioni dettagliate per il trasferimento di foto e video sul PC Istruzioni dettagliate per il trasferimento di foto e video sul PC segue segue 7. A questo punto potete aprire i file delle foto con un qualsiasi software di elaborazione delle immagini 4.
  • Seite 60 Per prodotti acquistati fuori degli Stati Uniti o del Canada, rivolgersi al rivenditore per le · Rivolgersi al rivenditore o a un tecnico radio/TV quando prevedete di fare ingran- clausole pertinenti della garanzia. In Europa si può anche contattare la Bushnell a questo qualificato. dimenti o ritagli. All’occorrenza è...
  • Seite 61: Português

    PORTUGUÊS...
  • Seite 62 GUIA DE CONSULTA RÁPIDA: BUSHNELL COMPACT INSTANT REPLAY 11-8323 Parabéns pela aquisição de seu Bushnell ® Compact Instant Replay ™ ! O Compact Instant Instale as pilhas Insira 2 pilhas de tamanho AAA (consulte as “Especificações”) no compartimento de pilhas, encontra- Replay é...
  • Seite 63: Especificações Técnicas

    Especificações técnicas GUIA DE CONSULTA RÁPIDA: BUSHNELL COMPACT INSTANT REPLAY 11-8323 Ampliação Tamanho do arquivo da fotogra- 2048x1536, 1600x1200, 640x480 fia still (Resolução) Tire uma Segure a câmara firmemente com ambas as mãos e pressione o botão SNAP para tirar uma fotografia fotografia ou...
  • Seite 64: Identificação Das Peças

    Identificação das peças Ícones de display de visualização do LCD Display LCD Display LCD Botão LCD/Mode Vídeo normal Vídeo replay Vídeo replay Teclado de 5 8 7 6 posições c/ botão Display de filme (vídeo) Menu/OK Display de visualização de fotografia still Botão de Ícone Ícone...
  • Seite 65 Como carregar as pilhas Configuração básica do binóculo e câmara Vire o Compact Instant Replay e abra a tampa do compartimento de pilhas no Antes de tirar fotografias ou filmar vídeos, dedique alguns momentos para configurar o Compact Instant Replay de acordo com sua visão e preferências individuais.
  • Seite 66 Como filmar vídeos normais ou “Instant Replay” Como tirar fotografias still Após seguir a configuração inicial descrita nas páginas anteriores, você já estará pronto para tirar uma fotografia: 1) Siga as etapas 1-4 na seção “Como tirar fotografias still”, na página anterior 2) Pressione o botão Menu/OK para sair de fotografia still e passar para um dos modos de vídeo.
  • Seite 67 Como usar o Menu Principal Como usar o Menu Principal Como mencionado anteriormente neste manual, o Compact Instant Replay já vem configurado com as mais elevadas Grupo do menu Ícone Finalidade resolução e qualidade disponíveis ao sair da caixa. A exposição, equilíbrio de branco e outras variáveis são configuradas automaticamente.
  • Seite 68 Sistema do Menu Principal Sistema do Menu Principal continuação (As configurações padrão aparecem em Negrito) *As configurações de cenas e seqüências no “Modo” não se encontram disponíveis quando a “câmara” estiver configurada no vídeo Replay ou Normal. Grupo Item Configurações Descrição MODO Cena *...
  • Seite 69 Sistema do Menu Principal Review Display Icons continuação # Ícone Grupo Item Configurações Descrição Data do arquivo de fotografia ou vídeo (O recurso de data deve estar configurado e ligado) Data Setup (Configu- Permite configurar a data/hora correta de sua área. Se “On” (Ligado) estiver selecionado, a data ração), aparecerá...
  • Seite 70: Instalação Do Software

    Menu de visualização Requisitos do sistema (mínimos) continuação Sistema operacional: Windows® 98/98SE/2000/ME/XP Unidade Central de Processamento: Equivalente ao MMX Pentium® 200MHZ ou mais rápido (Pen- Grupo Item Descrição Configurações tium® III 500 MHz para o PhotoSuite5™) Memória: mínima de 32MB (recomenda-se 64MB para o PhotoSuite) DELETE Remover Yes (Sim) / No...
  • Seite 71 Como transferir fotografias e vídeos ao PC – Etapa por etapa Como transferir fotografias e vídeos ao PC – Etapa por etapa continuação continuação 7. Agora você já pode abrir os arquivos de fotografias em qualquer software de edição apropriado. Basta usar 4.
  • Seite 72 (capacidade máxima, +/- 2 fotografias) Este equipamento foi testado e verificou-se que cumpre Garantimos que seu produto Bushnell® estará isento de defeitos materiais e de com os limites para um dispositivo digital Classe B, de * Seleciona a quantidade de com- fabricação.
  • Seite 73 ©2005 Bushnell Performance Optics www.bushnell.com...

Inhaltsverzeichnis