Herunterladen Inhalt Inhalt Diese Seite drucken
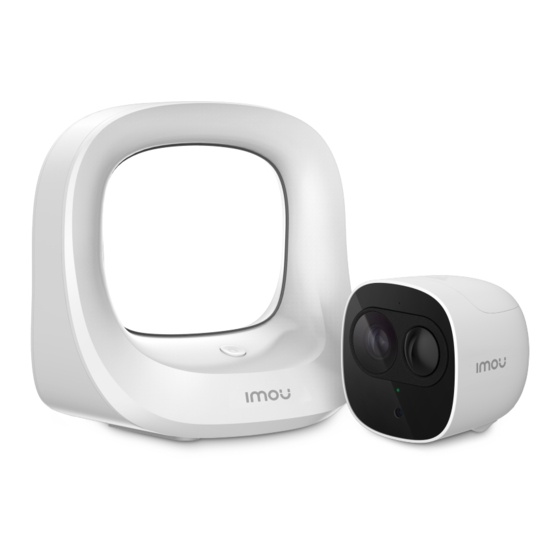
IMOU Cell Pro Kurzanleitung
Vorschau ausblenden Andere Handbücher für Cell Pro:
Inhaltsverzeichnis

Werbung

Verfügbare Sprachen
  • DE

Verfügbare Sprachen

  • DEUTSCH, seite 13
Quick Start Guide
Version 1.0.2
1

Werbung

Inhaltsverzeichnis
loading

Inhaltszusammenfassung für IMOU Cell Pro

  • Seite 1 Quick Start Guide Version 1.0.2...
  • Seite 2: Inhaltsverzeichnis

    Contents Quick Start Guide...................... 1 Packing List ......................1 Camera Introduction ................... 2 Installing Battery ....................3 Base station Introduction ..................4 Adding Base station .................... 5 Pairing Camera ....................6 Installing Camera ....................7 Kurzanleitung ......................9 Lieferumfang ...................... 9 Bedienelemente und Funktionen Kamera ............
  • Seite 3 Instalar la batería ....................20 Presentación de la estación base: ..............21 Agregar la estación base .................. 23 Emparejamiento de la cámara ................24 Instalación de la cámara ................... 24 Guide de démarrage rapide ..................27 Contenu de l’emballage ..................27 Présentation de la caméra ................
  • Seite 4 Het installeren van de camera ................42 Guida introduttiva ....................45 Contenuto della confezione ................45 Introduzione alla telecamera................46 Installazione della batteria ................47 Introduzione alla stazione di base ..............48 Aggiunta della stazione di base ................ 49 Associazione della telecamera ................. 50 Installazione della telecamera ................
  • Seite 5: Quick Start Guide

    Quick Start Guide Packing List Camera *1 Battery*1 Power Cable *1 Bracket *1 Base Station*1 Network Cable *1 Power Adapter *1 QSG*1 Positioning Map *1 Screw Package *1 Note: The quantity of the camera and other accessories might vary with different models, and the actual product shall prevail.
  • Seite 6: Camera Introduction

    Camera Introduction Figure 2-1 Note: - Press the SYNC button to pair with the base station. - Press and hold the SYNC button for 8 s to reset the camera. The pattern of the LED indicator is included in the following table. LED Indicator Status Device status ...
  • Seite 7: Installing Battery

    Installing Battery Figure 3-1 Figure 3-2...
  • Seite 8: Base Station Introduction

    Base station Introduction The pattern of the power indicator is included in the following table. Power Indicator Status Device status Not powered up Blue light stay on Powered up properly...
  • Seite 9: Adding Base Station

    Step 2 The system indicator stays on with white light for 10 s, and then off, which means the base station is connected to the network. Step 3 Scan the following QR code or serach “Imou” in Google Play or App Store to download and install the Imou App.
  • Seite 10: Pairing Camera

    Step 4 Run Imou App, and then register an account for first use. Step 5 Do the following operations to finish adding base station. Figure 5-1 Pairing Camera Step 1 On the base station: Press the SYNC button, and then the indicator on the base station flashes with white light.
  • Seite 11: Installing Camera

    Note: - You can pair six cameras at most with one base station, and pair one camera at a time. - Keep the distance of the base station and the camera within 30 cm (12 inches) during pairing. Installing Camera Note: Make sure the mounting surface is strong enough to hold at least three times of the device weight.
  • Seite 12: Safety Instructions

    Safety Instructions - Do not short circuit the battery with other metal. - Do not heat the battery or throw it into fire. - Do not take apart the battery or press it to make it deformed. Keep the battery away from children. - It is recommended to use the original battery.
  • Seite 13: Kurzanleitung

    Kurzanleitung Lieferumfang 1 x Kamera 1 x Akku 1 x Stromkabel 1 x Halterung 1 x Basisstation 1 x Netzwerkkabel 1 x Netzteil 1 x Kurzanleitung 1 x Montageschablone 1 x Schraubenbeutel Hinweis: Die Anzahl der Kameras und des sonstigen Zubehörs kann je nach Modell variieren, das tatsächliche Produkt ist maßgebend.
  • Seite 14: Bedienelemente Und Funktionen Kamera

    Bedienelemente und Funktionen Kamera Stromanschluss Integriertes Mikrofon Objektiv Synchronisationstaste PIR- Bewegungsmelder LED Anzeige Fotosensor Integrierter Lautsprecher Abbildung 2-1 Hinweis: - Drücken Sie die Synchronisationstaste SYNC, um eine Verbindung mit der Basisstation aufzubauen. - Halten Sie die SYNC-Taste für 8 Sekunden gedrückt, um die Kamera zurückzusetzen.
  • Seite 15: Akku Einsetzen

    Akku einsetzen Abbildung 3-1 Abbildung 3-2...
  • Seite 16: Bedienelemente Und Funktionen Basisstation

    Bedienelemente und Funktionen Basisstation Systemanzeige Synchronisationstaste Betriebsanzeige Der Status der Betriebsanzeige ist in der nachfolgenden Tabelle dargestellt. Netzanzeige Status Gerätestatus Nicht eingeschaltet Blaue Anzeige leuchtet Korrekt eingeschaltet Rücksetztaste Integrierter Lautsprecher Stromanschluss Ethernet-Port USB-Port...
  • Seite 17 Hinweis: - Drücken Sie die Synchronisationstaste SYNC, um eine Verbindung mit der Basisstation aufzubauen. - Halten Sie die Reset-Taste für 5 Sekunden gedrückt, um die Basisstation zurückzusetzen. - Sie können einen USB-Speicher am USB-Port anschließen, um Videos aufzunehmen. Vorsicht: Die Basisstation kann den USB-Speicher formatieren. Sichern Sie auf jeden Fall Ihre Daten.
  • Seite 18: Basisstation Hinzufügen

    Schritt 3: Scannen Sie den nachfolgenden QR-Code oder suchen Sie „Imou“ in Google Play oder im App Store, um die Imou-App herunterzuladen und zu installieren. Schritt 4: Starten Sie die Imou-App und erstellen Sie ein Konto für die erstmalige Nutzung. Schritt 5: Folgen Sie den nachfolgenden Schritten, um das Hinzufügen der Basisstation abzuschließen.
  • Seite 19: Kamera Koppeln

    Kamera koppeln Schritt 1: Auf der Basisstation: Drücken Sie die SYNC-Taste, die Anzeige auf der Basisstation blinkt weiß. Schritt 2: Auf der Kamera: Drücken Sie die SYNC-Taste, die Anzeige auf der Kamera blinkt grün. Schritt 3: Die Kopplung beginnt und die LEDs blinken wie nachfolgend beschrieben: ...
  • Seite 20 Montagefläche Selbstschneidende Schraube Halterung Halterung Dübel Abbildung 7-1 Schritt 1: Bohren Sie Löcher in die Montagefläche, wie auf der Montageschablone dargestellt, und setzen Sie die Dübel ein. Schritt 2: Öffnen Sie die Halterung und schrauben Sie den Boden der Halterung an der Montagefläche an.
  • Seite 21: Sicherheitshinweise

    Sicherheitshinweise - Schließen Sie den Akku nicht kurz. - Erhitzen Sie den Akku nicht und verbrennen Sie ihn nicht. - Verformen und demontieren Sie den Akku nicht. - Halten Sie den Akku von Kindern fern. - Wir empfehlen, den Original-Akku zu verwenden. - Verwenden Sie den Akku nicht bei Temperaturen über 60 °C.
  • Seite 22: Guía De Inicio Rápido

    Guía de inicio rápido Contenido 1 Cámara 1 batería 1 cable de 1 soporte alimentación 1 estación base 1 cable de red 1 adaptador eléctrico 1 guía de inicio 1 plantilla de 1 bolsa con rápido posicionamiento tornillos Nota: El número de cámaras y de accesorios puede variar en función de los distintos modelos, debiendo prevalecer el producto actual.
  • Seite 23: Presentación De La Cámara

    Presentación de la cámara Puerto de alimentación Micrófono incorporado Lente Botón SYNC (sincronizar) Detector IR pasivo Indicador LED Fotosensor Altavoz integrado Figura 2-1 Nota: - Pulse el botón SYNC (sincronizar) para emparejar con la estación base. - Mantenga pulsado el botón SYNC durante 8 s para restablecer la cámara. El comportamiento del indicador led se incluye en la tabla siguiente.
  • Seite 24: Instalar La Batería

    Instalar la baterí a Figura 3-1 Figura 3-2...
  • Seite 25: Presentación De La Estación Base

    Presentación de la estación base: Indicador del sistema Botón SYNC (sincronizar) Indicador de batería El comportamiento del indicador de alimentación se incluye en la tabla siguiente. Estado del indicador de alimentación Estado del dispositivo Desactivar Sin alimentación La luz azul permanece encendida Dispositivo alimentado adecuadamente Botón Reset (Reinicio) Altavoz integrado...
  • Seite 26 Nota: - Pulse el botón SYNC (sincronizar) para emparejar con la estación base. - Mantenga pulsado el botón Reset durante 5 s para restablecer la estación base. - Es posible conectar una unidad USB al puerto USB para grabar vídeo. Advertencia: la estación base puede formatear la unidad USB, así...
  • Seite 27: Agregar La Estación Base

    Google Play o en la App Store para descargar e instalar la aplicación Imou. Paso 4: Ejecute la aplicación Imou y registre una cuenta si es su primer uso. Paso 5: Realice los siguientes pasos para terminar de agregar la estación base.
  • Seite 28: Emparejamiento De La Cámara

    Emparejamiento de la cámara Paso 1: En la estación base: Pulse el botón SYNC y la luz blanca del indicador de la estación base parpadeará. Paso 2: En la cámara Pulse el botón SYNC y la luz verde del indicador de la cámara base parpadeará.
  • Seite 29 Superficie de montaje Tornillo autorroscante Soporte Soporte Perno de expansión Figura 7-1 Paso 1: Taladre los agujeros para los tornillos en la superficie de montaje según lo indicado en la plantilla de posicionamiento. Una vez perforados, introduzca los pernos de expansión. Paso 2: Abra el soporte y fije su parte inferior en la superficie de montaje mediante los tornillos autorroscantes.
  • Seite 30: Instrucciones De Seguridad

    Instrucciones de seguridad - No cortocircuite la batería con ningún metal. - No caliente la batería ni la arroje al fuego. - No desmonte las pilas ni las apriete para deformarlas. Mantenga la batería fuera del alcance de los niños. - Se recomienda usar baterías originales.
  • Seite 31: Guide De Démarrage Rapide

    Guide de démarrage rapide Contenu de l’emballage Caméra × 1 Batterie × 1 Câble Support de d’alimentation × 1 montage × 1 Station de base × 1 Câble réseau × 1 Adaptateur d’alimentation × 1 Guide de démarrage Patron Jeu de vis × 1 rapide ×...
  • Seite 32: Présentation De La Caméra

    Présentation de la caméra Port d’alimentation Microphone intégré Bouton Objectif SYNCHRONISATIO Détecteur PIR Indicateur lumineux Capteur Haut-parleur intégré photosensible Figure 2-1 Remarque : - Appuyez sur le bouton SYNCHRONISATION pour coupler l’appareil à sa station de base. - Maintenez enfoncé le bouton SYNCHRONISATION pendant 8 s pour réinitialiser l’appareil.
  • Seite 33: Installation De La Batterie

    Statut de l’indicateur lumineux Statut de l’appareil Indicateur lumineux rouge s’allume Temporisation du couplage pendant 10 s, puis s’éteint Indicateur lumineux rouge s’allume Réinitialisation réussie pendant 1 s, puis s’éteint Tableau 2-1 Installation de la batterie Figure 3-1 Figure 3-2...
  • Seite 34: Présentation De La Station De Base

    Présentation de la station de base Indicateur lumineux d’état du système Bouton synchronisation Indicateur d’alimentation Les variantes des indicateurs lumineux d’alimentation sont présentées dans le tableau ci-dessous. Statut de l’indicateur lumineux d’alimentation Statut de l’appareil Arrêt Hors tension Indicateur lumineux bleu allumé Sous tension Bouton de réinitialisation...
  • Seite 35: Ajout De La Station De Base

    Remarque : - Appuyez sur le bouton SYNCHRONISATION pour coupler l’appareil à sa station de base. - Maintenez enfoncé le bouton Reset pendant 5 s pour réinitialiser la station de base. - Vous pouvez brancher un périphérique USB au port USB pour enregistrer des vidéos.
  • Seite 36: Couplage De La Caméra

    Étape 2 : l’indicateur lumineux système reste allumé en blanc pendant 10 s, puis s’éteint. Ce qui signifie que la station de base est connectée au réseau. Étape 3 : scannez le code QR figurant sur l’unité ou recherchez « Imou » dans Google Play ou App Store, téléchargez et installez l’application.
  • Seite 37: Installation De La Caméra

    Étape 3 : le couplage démarre et les indicateurs lumineux clignotent comme indiqué ci-dessous.  L’indicateur lumineux système de la station de base s’allume en continu en blanc pendant 10 s, puis s’éteint.  L’indicateur lumineux de la caméra s’allume en continu en vert pendant 10 s, puis s’éteint.
  • Seite 38 Surface de montage Vis autotaraudeuse Support Support Cheville à expansion Figure 7-1 Étape 1 : perforez les trous de vissage sur la surface de montage suivant le patron d’installation et fixez les chevilles à expansion. Étape 2 : ouvrez le support, puis fixez-en la partie inférieure sur la surface de montage à...
  • Seite 39: Précautions D'emploi

    Précautions d’emploi - Évitez de court-circuiter la batterie à l’aide d’un objet métallique. - Ne chauffez pas la batterie et ne la jetez pas au feu. - Ne séparez jamais les piles ; ne les pressez jamais, sinon elles vont se déformer.
  • Seite 40: Snelstarthandleiding

    Snelstarthandleiding Paklijst Camera *1 Batterij *1 Netsnoer *1 Beugel *1 Basisstation *1 Netwerkkabel *1 Voedingsadapter *1 Snelstarthandleiding Positiebepaling Schroevenpakket *1 kaart *1 Opmerking: Het aantal camera's en overige accessoires kunnen bij verschillende modellen variëren en het feitelijke product prevaleert.
  • Seite 41: Inleiding Camera

    Inleiding camera Stroomaansluiting Geïntegreerde microfoon Lens Toets SYNC PIR-detector LED-Indicator Fotosensor Ingebouwde luidspreker Afbeelding 2-1 Opmerking: - Druk op de toets SYNC om met het basisstation te koppelen. - Houd de toets SYNC gedurende 8 seconden ingedrukt om de camera te herstellen.
  • Seite 42: Batterij Installeren

    LED-Indicator Status Status apparaat Het rode lampje blijft 10 sec. branden Onderbreking koppelen en gaat dan uit Het rode lampje blijft 1 sec. branden Herstellen voltooid en gaat dan uit Tabel 2-1 Batterij installeren Afbeelding 3-1 Afbeelding 3-2...
  • Seite 43: Inleiding Basisstation

    Inleiding basisstation Systeemindicator Toets SYNC Stroomindicator Het patroon van de stroomindicator is in de volgende tabel opgenomen. Status stroomindicator Status apparaat Niet ingeschakeld Blauw lampje blijft aan Juist ingeschakeld Reset-Knop Ingebouwde luidspreker Stroomaansluiting Ethernetpoort USB-poort...
  • Seite 44: Basisstation Toevoegen

    Opmerking: - Druk op de toets SYNC om met het basisstation te koppelen. - Houd de toets Reset gedurende 5 seconden ingedrukt om het basisstation te herstellen. - U kunt een USB-station op de USB-poort aansluiten om video op te nemen. Voorzichtig: Het basisstation kan het USB-station formatteren;...
  • Seite 45: Camera Koppelen

    Stap 2: De systeemindicator blijft gedurende 10 sec wit branden en gaat dan uit, wat betekent dat het basisstation met het netwerk is verbonden. Stap 3: Scan de volgende QR code of zoek naar "Imou" in Google Play of de App Store om de Imou-app te downloaden en installeren.
  • Seite 46: Het Installeren Van De Camera

    Stap 3: Het koppelen begint en de indicatielampjes knipperen zoals hieronder is beschreven:  De systeemindicator op het basisstation blijft gedurende 10 sec. wit branden en gaat dan uit.  Het indicatielampje op de camera blijft gedurende 10 sec. groen branden en gaat dan uit.
  • Seite 47 Montage-oppervlak Zelftappende Schroef Beugel Beugel Expansiebou Afbeelding 7-1 Stap 1: Boor schroefgaten op het montage-oppervlak zoals op de boormal wordt aangegeven en plaats dan de pluggen. Stap 2: Open de beugel en bevestig dan de onderkant van de beugel met de zelftappende schroeven aan het montage-oppervlak.
  • Seite 48: Veiligheidsinstructies

    Veiligheidsinstructies - Kortsluit de batterij niet met ander metaal. - Verhit de batterijen niet en gooi ze niet in een vuur. - Haal de batterij niet uit elkaar en vervorm de batterij niet door druk uit te oefenen. Houd de batterij uit de buurt van kinderen. - Het wordt aanbevolen om de originele batterij te gebruiken.
  • Seite 49: Guida Introduttiva

    Guida introduttiva Contenuto della confezione Telecamera *1 Batteria *1 Cavo di Supporto *1 alimentazione *1 Stazione di base *1 Cavo di rete *1 Adattatore di alimentazione *1 GI *1 Dima di 1 Kit di viti posizionamento *1 Nota: le quantità di telecamera e degli altri accessori possono variare in base al modello, ma prevarranno quelle del prodotto attuale.
  • Seite 50: Introduzione Alla Telecamera

    Introduzione alla telecamera Porta di alimentazione Microfono integrato Obiettivo Pulsante SYNC Rilevatore PIR Indicatore LED Fotosensore Altoparlante integrato Figura 2-1 Nota: - Premere il pulsante SYNC per associarla alla stazione di base. - Premere e tenere premuto il pulsante SYNC per 8 secondi per reimpostare la telecamera.
  • Seite 51: Installazione Della Batteria

    Stato dell’indicatore a LED Stato del dispositivo Spia rossa accesa per 10 secondi, Timeout associazione quindi spenta Spia rossa accesa per 1 secondi, Reimpostazione completata quindi spenta Tabella 2-1 Installazione della batteria Figura 3-1 Figura 3-2...
  • Seite 52: Introduzione Alla Stazione Di Base

    Introduzione alla stazione di base Indicatore di sistema Pulsante SYNC Indicatore di alimentazione Indicazione del LED di Alimentazione: Stato indicatore di alimentazione Stato del dispositivo Disattivo Non acceso Spia blu accesa Acceso correttamente Tasto di ripristino Altoparlante integrato Porta di alimentazione Porta Ethernet Porta USB...
  • Seite 53: Aggiunta Della Stazione Di Base

    Nota: - Premere il pulsante SYNC per associarla alla stazione di base. - Premere e tenere premuto il pulsante Reset per 5 secondi per reimpostare la stazione di base. - È possibile collegare un'unità USB alla porta USB per registrare video. Attenzione: la stazione di base potrebbe formattare l'unità...
  • Seite 54: Associazione Della Telecamera

    Fase 2: L'indicatore di sistema resta acceso con spia bianca per 10 secondi, quindi si spegne, ad indicare che la stazione di base è connessa alla rete. Fase 3: Effettuare la scansione del seguente codice QR oppure ricercare "Imou" in Google Play o App Store per scaricare e installare l'app Imou.
  • Seite 55: Installazione Della Telecamera

    Fase 3: Viene avviata l'associazione, e gli indicatori lampeggiano come descritto di seguito:  L'indicatore sulla stazione di base resta acceso con spia bianca per 10 secondi, quindi si spegne.  L'indicatore sulla telecamera resta acceso con spia verde per 10 secondi, quindi si spegne.
  • Seite 56 Superficie di montaggio Vite autofilettante Supporto Supporto Tassello ad espansione Figura 7-1 Fase 1: Praticare dei fori per viti sulla superficie di montaggio come mostrato dalla dima di posizionamento, quindi inserirvi i tasselli ad espansione. Fase 2: Aprire il supporto, quindi fissare la parte inferiore del supporto alla superficie di montaggio con viti autofilettanti.
  • Seite 57: Istruzioni Di Sicurezza

    Istruzioni di sicurezza - Non cortocircuitare la batteria con altri metalli. - Non riscaldare la batteria o gettarla nel fuoco. - Non smontare la batteria o deformarla. - Tenere la batteria fuori dalla portata dei bambini. - È consigliabile utilizzare la batteria originale. - Non utilizzare la batteria a una temperatura superiore ai 60 °C/140 °F.
  • Seite 58: Guia De Início Rápido

    Guia de Início Rápido Lista da embalagem Câmara × 1 Bateria × 1 Cabo de Suporte × 1 alimentação × 1 Estação interior × 1 Cabo de rede × 1 Adaptador de corrente × 1 GIR × 1 Mapa de Embalagem de posicionamento ×...
  • Seite 59: Introdução À Câmara

    Introdução à câmara Porta de alimentação Microfone incorporado Objetiva Botão SYNC (de Sincronização) Detetor PIR Indicador LED Fotossensor Caixa de som embutida Figura 2-1 Nota: - Prima o botão SYNC para emparelhar com a estação interior. - Prima sem soltar o botão SYNC durante 8 segundos para repor as definições da câmara.
  • Seite 60: Instalar A Bateria

    Estado do indicador LED Estado do dispositivo A luz vermelha acende durante Tempo de emparelhamento esgotado 10 segundos e depois apaga-se A luz vermelha acende durante Reposição concluída 1 segundos e depois apaga-se Tabela 2-1 Instalar a Bateria Figura 3-1 Figura 3-2...
  • Seite 61: Introdução À Estação Interior

    Introdução à estação interior Indicador do sistema Botão SYNC (de Sincronização) Indicador de alimentação O padrão do indicador de alimentação está incluído na tabela a seguir. Estado do indicador de alimentação Estado do dispositivo Desligado Sem alimentação Luz azul acesa Ligado corretamente Botão Reset (de Reposição)
  • Seite 62: Adicionar A Estação Interior

    Nota: - Prima o botão SYNC para emparelhar com a estação interior. - Prima sem soltar o botão Reset durante 5 segundos para repor as definições da estação interior. - Pode ligar uma unidade USB à porta USB para gravar vídeo. Atenção: a estação interior pode formatar a unidade USB;...
  • Seite 63: Emparelhar A Câmara

    Passo 2: O indicador do sistema acende a branco durante 10 segundos e depois apaga-se; o que significa que a estação interior está ligada à rede. Passo 3: Leia o seguinte código QR ou procure por “Imou” no Google Play ou na App Store para transferir e instalar a aplicação Imou.
  • Seite 64: Instalar A Câmara

    Passo 3: O emparelhamento começa e os indicadores piscam conforme descrito de seguida:  O indicador do sistema na estação interior acende a branco durante 10 segundos e depois apaga-se.  O indicador na câmara acende a verde durante 10 segundos e depois apaga-se. O emparelhamento foi bem-sucedido.
  • Seite 65 Superfície de montagem Parafuso perfurante Suporte Suporte Parafuso de expansão Figura 7-1 Passo 1: Faça furos para os parafusos na superfície de montagem, tal como mostra o mapa de posicionamento; em seguida, coloque os parafusos de expansão. Passo 2: Abra o suporte; em seguida, fixe a base do suporte à superfície de montagem com os parafusos perfurantes.
  • Seite 66: Instruções De Segurança

    Instruções de segurança - Não provoque o curto-circuito da bateria com outro metal. - Não aqueça a bateria nem a atire para o lume. - Não desmonte a bateria nem a comprima para deformar a mesma. Mantenha a bateria longe do alcance das crianças. - Recomenda-se utilizar a bateria original.

Inhaltsverzeichnis