Herunterladen Inhalt Inhalt Diese Seite drucken
Promate volTag-10 Bedienungsanleitung

Promate volTag-10 Bedienungsanleitung

10000mah ultra-fast lithium polymer power bank

Werbung

Verfügbare Sprachen
  • DE

Verfügbare Sprachen

  • DEUTSCH, seite 25
volTag-10
10000mAh Ultra-Fast Lithium Polymer Power Bank
Dual USB Port • Lightweight • Auto-Voltage Regulation
Compatible
with
CHARGE
All
67%
2
89%
Charged
Devices
Charged
Same Time
at the
Tablet
& Smartphones

Werbung

Inhaltsverzeichnis
loading

Inhaltszusammenfassung für Promate volTag-10

  • Seite 1 10000mAh Ultra-Fast Lithium Polymer Power Bank Dual USB Port • Lightweight • Auto-Voltage Regulation Compatible with CHARGE Charged Devices Charged Same Time at the Tablet & Smartphones...
  • Seite 2: Packaging Contents

    Introduction Charge your devices on-the-go with this powerful 10000mAh lithium polymer power bank with dual USB ports: VolTag-10. It features two ultra-fast USB charging ports to charge any USB-chargeable device. VolTag-10 also includes Automatic Voltage Regulation i.e. it provides an optimum output based on the device connected.
  • Seite 3 Precautions Please read all safety instructions and warnings thoroughly before using this product. Improper use of this product may result in damage to this or attached products. 1. Do not disassemble the back-up battery or attempt to fix it. 2. Kindly use an original charging cable provided to charge the product. 3.
  • Seite 4 <=100% 2. Charging VolTag-10 back-up battery • Connect one end of the Micro-USB Cable VolTag-10 and the other end to a desktop/laptop or a USB Power Adapter. The Battery Level LED Indicator’s will light up indicating that the back-up battery is charging normally.
  • Seite 5 3. Charging USB chargeable devices using VolTag-10 • Plug the USB cable into the USB output port on VolTag-10 back-up battery and the other end into the device. Press power button once to begin charging your device. Correct disposal of this Product (Waste Electrical & Electronic Equipment (WEEE) Your product is designed and manufactured with high quality materials and components which can be recycled and reused.
  • Seite 6 Apariencia & Descripción de la Interfaz 1. Entrada Puerto Micro-USB 2. Indicador LED Nivel de Batería 3. Botón Encendido 4. Puertos Salida...
  • Seite 7: Instrucciones De Uso

    2. Carga de la batería de reserva VolTage-10 • Conecte un extremo del cable Micro-USB VolTag-10 y el otro extremo a un ordenador de sobremesa / portátil o un adaptador de alimentación USB. El indicador de nivel de batería se encenderá indicando que la batería de respaldo...
  • Seite 8 3. Carga de dispositivos USB cargables mediante VolTag-10 • Conecte el cable USB en el puerto de salida USB de la batería de reserva VolTag-10 y el otro extremo en el dispositivo. Presione el botón de encendido una vez para comenzar a cargar su dispositivo.
  • Seite 9 Aspect & Description de l’Interface 1. Port Entrée Micro-USB 2. Indicateur LED Niveau de Batterie 3. Bouton d’Alimentation 4. Port de Sortie...
  • Seite 10 Mode d’Emploi : 1. Vérification de la charge restante dans la batterie de secours VolTag-10 • Afin d’afficher la charge qui reste, appuyez une fois sur le bouton d’alimentation et regardez l’indicateur du niveau de batterie LED Nombre de LED actifs % d’énergie restante...
  • Seite 11 3. Chargement des périphériques USB à l’aide du VolTag-10 • Branchez le câble USB dans le port USB de sortie USB à la batterie de secours VolTag-10 et l’autre extrémité à l’appareil. Appuyez une fois sur le bouton d’alimentation pour commencer à charger votre appareil.
  • Seite 12 Aparência e Descrição do Interface 1. Porta de Entrada Micro-USB 2. Indicador LED do Nível de Bateria 3. Botão de Ligar 4. Portas de Saída...
  • Seite 13: Instruções De Funcionamento

    <=100% 2. Carregamento da bateria de reserva VolTag-10 • Ligue uma extremidade do Cabo Micro-USB à VolTag-10 e a outra extremidade a um computador de secretária/portátil ou a um Adaptador de Corrente USB. A luz do Indicador LED do Nível de Bateria irá iluminar-se,...
  • Seite 14 3. Carregamento de dispositivos recarregáveis por USB utilizando a VolTag-10 • Ligue o cabo USB à porta de saída USB da bateria de reserva VolTag-10 e a outra extremidade do cabo USB ao dispositivo. Pressione o botão de ligar uma...
  • Seite 15 Descrierea aspectului și a interfeței: 1. Port de intrare Micro-USB 2. Indicator LED pentru nivelul bateriei 3. Butonul de pornire 4. Porturi de ieșire...
  • Seite 16 <=100% 2. Încărcarea bateriei de rezervă VolTag-10 • Conectați un capăt al cablului Micro-USB VolTag-10, iar celălalt capăt la un calculator de birou/ laptop sau la un adaptor de alimentare prin USB . Indicatorul LED al nivelulului bateriei se va aprinde, indicând faptul că bateria de...
  • Seite 17 3. Încărcarea dispozitivelor cu conectare USB utilizând VolTag-10 • Conectați cablul USB în portul de ieșire USB al bateriei de rezervă VolTag-10, iar celălalt capăt în dispozitiv. Apăsați butonul de alimentare o dată pentru a începe încărcarea dispozitivului.
  • Seite 18 Russian Описание внешнего вида и интерфейса 1. Входной порт микро-USB 2. Светодиодный индикатор уровня заряда батареи 3. Кнопка питания 4. Выходные порты...
  • Seite 19: Инструкция По Эксплуатации

    <=25% <=50% <=75% <=100% 2. Зарядка резервной батареи VolTag-10 • Подсоедините один конец кабеля микро-USB к VolTag-10, а другой конец – к настольному компьютеру/ноутбуку или адаптеру питания USB. Загорится светодиодный индикатор уровня заряда батареи, указывая, что резервная батарея заряжается нормально.
  • Seite 20 Russian 3. Зарядка заряжаемых устройств при помощи VolTag-10 • Подключите USB-кабель к выходному порту USB на резервной батарее VolTag-10, а другой его конец подсоедините к устройству. Чтобы начать заряжать Ваше устройство, один раз нажмите на кнопку питания.
  • Seite 21 Turkish Görünüm ve Arayüz Açıklaması 1. Micro-USB Girişi 2. LED Pil Seviyesi Göstergesi 3. Güç Düğmesi 4. Çıkışlar...
  • Seite 22: İşletim Talimatları

    <=50% <=75% <=100% 2. VolTag-10 yedek pilin şarj edilmesi • Micro-USB Kablosunun bir ucunu VolTag-10’a, diğer ucunu bir masaüstü/dizüstü bilgisayara veya bir USB Güç Adaptörüne bağlayın. Pil Seviyesi LED Göstergesinin ışığı yanacak, yedek pilin normal bir şekilde şarj olduğunu gösterecektir.
  • Seite 23 Turkish 3. USB şarj edilebilir cihazların VolTag-10 kullanılarak şarj edilmesi • USB kablosunu VolTag-10 yedek pilin üzerinde bulunan USB çıkışına, diğer ucunu da cihaza takın. Cihazınızı şarj etmeye başlamak için güç düğmesine bir kez basın.
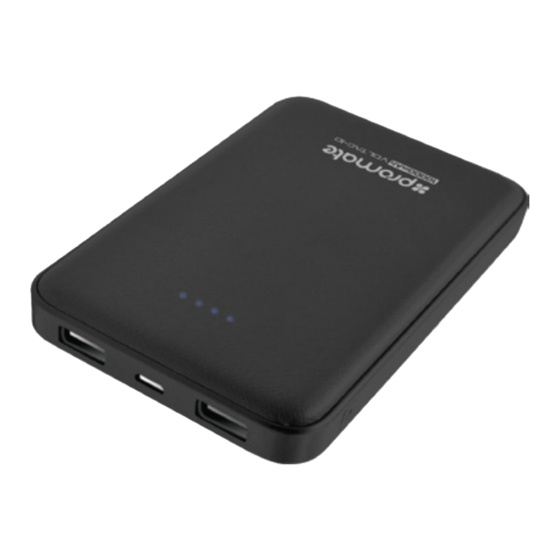
  • Seite 24: Aussehen & Schnittstellenbeschreibung

    Aussehen & Schnittstellenbeschreibung 1. Micro-USB-Eingangsport 2. LED-Batterieladezustandsanzeige 3. Einschalttaste 4. Ausgangsports...
  • Seite 25 <=75% <=100% Leistung 2. Laden der VolTag-10-Stützbatterie • Verbinden sie das eine Ende des Micro-USB-Kabels mit dem VolTag-10 und das andere mit einem Desktop/Laptop oder einem USB-Stromadapter. Die LED-Batterieladezustandsanzeige leuchtet auf und gibt an, dass die Stützbatterie normal geladen wird.
  • Seite 26 3. Laden von USB-ladefähigen Geräten mittels VolTag-10 • Stecken Sie das USB-Kabel in den USB-Ausgangsport der Stützbatterie des VolTag-10 und das andere in das Gerät. Drücken Sie die Einschalttaste einmal, um Ihr Gerät zu laden.
  • Seite 27 外观和接口描述 1. Micro-USB 输入端口 2. LED 电池电量指示灯 3. 电源按钮 4. 输出端口...
  • Seite 28 操作说明: 1 .检查VolTag-10备用电池的剩余电量 1. 要查看剩余电量,请按一次电源按钮,然后查看LED电池电量指示灯 点亮 LED 灯数 <=25% <=50% <=75% <=100% 剩余电量百分比 2. 给VolTag-10备用电池充电 ・将Micro-USB线的一端连接到VolTag-10,另一端连接到台式机/笔记本电脑 或USB电源适配器。 电池电量LED指示灯将亮起,表明备用电池正在充电。...
  • Seite 29 3. 用VolTag-10给USB可充电设备充电 ・ 将USB线插入VolTag-10备用电池的USB输出端口,另一端插入设备。 按一下电源按钮开始为设备充电...
  • Seite 30 VolTag-10 ‫ ﺑﺎ اﺳﺘﻔﺎده از‬USB ‫3. ﺷﺎرژ ﮐﺮدن دﺳﺘﮕﺎه ھﺎی ﻗﺎﺑﻞ ﺷﺎرژ ﺑﺎ‬ ‫ و ﺳﺮ دﯾﮕﺮ را‬VolTag-10 ‫ ﻣﺮﺑﻮطﻪ روی ﺑﺎﺗﺮی ﭘﺸﺘﯿﺒﺎن‬USB ‫ را ﺑﻪ درﮔﺎه ﺧﺮوﺟﯽ‬USB ‫• ﮐﺎﺑﻞ‬ ‫ﺑﻪ دﺳﺘﮕﺎه وﺻﻞ ﮐﻨﯿﺪ. ﯾﮏ ﺑﺎر دﮐﻤﻪ روﺷﻦ/ﺧﺎﻣﻮش را ﻓﺸﺎر دھﯿﺪ ﺗﺎ ﺷﺎرژ ﺷﺪن دﺳﺘﮕﺎه‬...
  • Seite 31 <=100% VolTag-10 ‫2. ﺷﺎرژ ﮐﺮدن ﺑﺎﺗﺮی ﭘﺸﺘﯿﺒﺎن‬ ‫ و ﺳﺮ دﯾﮕﺮ را ﺑﻪ راﯾﺎﻧﻪ روﻣﯿﺰی/ﻟﭙﺘﺎپ ﯾﺎ ﯾﮏ‬VolTag-10 ‫ را ﺑﻪ‬Micro-USB ‫• ﯾﮏ ﺳﺮ ﮐﺎﺑﻞ‬ ‫ ﻣﯿﺰان ﺑﺎﺗﺮی روﺷﻦ ﻣﯽ ﺷﻮد ﮐﻪ ﻧﺸﺎن ﻣﯽ دھﺪ‬LED ‫ وﺻﻞ ﮐﻨﯿﺪ. ﻧﺸﺎﻧﮕﺮ‬USB ‫آداﭘﺘﻮر ﺑﺮق‬...
  • Seite 32 ‫ظﺎھﺮ و ﺷﺮح راﺑﻂ‬ Micro-USB ‫1. درﮔﺎه ورودی‬ ‫2. ﻧﺸﺎﻧﮕﺮ ال ای دی ﻣﯿﺰان ﺑﺎﺗﺮی‬ ‫3. دﮐﻤﻪ ﺧﺎﻣﻮش و روﺷﻦ‬ ‫4. درﮔﺎه ھﺎی ﺧﺮوﺟﯽ‬...
  • Seite 33 VolTag-10 ‫ ﺑﺎﺳﺘﺨﺪام‬USB ‫3. ﺷﺤﻦ اﻷﺟﮭﺰة اﻟﻘﺎﺑﻠﺔ ﻟﻠﺸﺤﻦ ﺑﻮاﺳﻄﺔ‬ ‫ اﻻﺣﺘﯿﺎطﯿﺔ‬VolTag-10 ‫ ﻋﻠﻰ ﺑﻄﺎرﻳﺔ‬USB ‫ ﻓﻲ ﻣﻨﻔﺬ ﻣﺨﺮج‬USB ‫• ﺿﻊ ﻗﺎﺑﺲ ﻛﺎﺑﻞ‬ ‫وﺿﻊ اﻟﻄﺮف اﻵﺧﺮ ﻓﻲ اﻟﺠﮭﺎز. اﺿﻐﻂ زر اﻟﻄﺎﻗﺔ ﻣﺮة واﺣﺪة ﻟﻠﺒﺪء ﻓﻲ ﻋﻤﻠﯿﺔ ﺷﺤﻦ‬ .‫ﺟﮭﺎزك‬...
  • Seite 34 <=25% ‫ اﻻﺣﺘﯿﺎطﯿﺔ‬VolTag-10 ‫ﺷﺤﻦ ﺑﻄﺎرﻳﺔ‬ ‫ وﺗﻮﺻﯿﻞ اﻟﻄﺮف اﻵﺧﺮ‬VolTag-10 ‫ ﻣﻊ‬Micro-USB ‫• ﻗﻢ ﺑﺘﻮﺻﯿﻞ أﺣﺪ طﺮﻓﻲ ﻛﺎﺑﻞ‬ ‫. ﺳﻮف ﻳﻀﯿﺊ ﻣﺆﺷﺮ ﻣﺴﺘﻮى‬USB ‫ﺑﺎﻟﻜﻤﺒﯿﻮﺗﺮ اﻟﻤﻜﺘﺒﻲ أو اﻟﻼﺑﺘﻮب أو ﻣﺤﻮل طﺎﻗﺔ‬ ‫ﺷﺤﻦ اﻟﺒﻄﺎرﻳﺔ ﻟﻠﺪﻻﻟﺔ ﻋﻠﻰ أن ﻋﻤﻠﯿﺔ ﺷﺤﻦ اﻟﺒﻄﺎرﻳﺔ اﻻﺣﺘﯿﺎطﯿﺔ ﺗﺘﻢ ﺑﺼﻮرة‬...
  • Seite 35 ‫ﺷﻜﻞ ووﺻﻒ اﻟﻮاﺟﮭﺔ‬ Micro-USB ‫1. ﻣﻨﻔﺬ ﻣﺪﺧﻞ‬ LED ‫2. ﻣﺆﺷﺮ ﻣﺴﺘﻮى ﺷﺤﻦ اﻟﺒﻄﺎرﻳﺔ‬ ‫3. زر اﻟﻄﺎﻗﺔ‬ ‫4. ﻣﻨﺎﻓﺬ ﻣﺨﺎرج‬...

Inhaltsverzeichnis