Revox Outdoor 180 Bedienungsanleitung
Außenlautsprecher
Inhaltsverzeichnis
Verfügbare Sprachen
Verfügbare Sprachen
Quicklinks
Kapitel
Inhaltsverzeichnis

Verwandte Anleitungen für Revox Outdoor 180


Inhaltszusammenfassung für Revox Outdoor 180
- Seite 1 Re:sound I...
-
Seite 3: Inhaltsverzeichnis
Swiss Sound Solutions Inhaltsverzeichnis EINLEITUNG Auspacken Standort Lautsprecher ausrichten Montagevorbereitung (Kabel) MONTAGE Benötigtes Montagewerkzeug Allgemein MONTAGE (Fortsetzung) Schritte 1-4 / Schritte 5-6 / Lautsprecher farblich anpassen Technische Hinweise Belastbarkeit Schutzschaltung Technische Daten Garantie Entsorgung Ihres Altgerätes... -
Seite 4: Einleitung
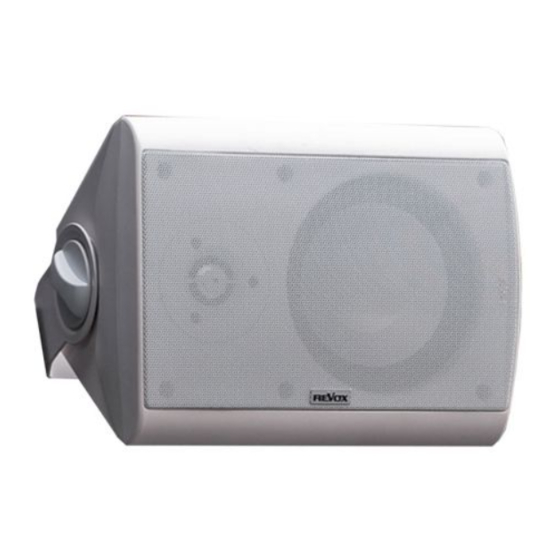
Lieber Musikfreund! Die Membranen des I80 sind Wir gratulieren Ihnen zum Erwerb witterungsbeständigem Aluminium Ihrer neuen Revox Lautsprecher und gefertigt. Zudem ist das Gehäuse danken Ihnen für das Vertrauen, das spritzwasserdicht aufgebaut und hält Sie uns mit dem Kauf dieses... -
Seite 5: Lautsprecher Ausrichten
Swiss Sound Solutions Lautsprecher ausrichten Bevor Sie mit der Montage be- Optimal ist, wenn sich die Hochtöner ginnen, hier noch ein paar Hinweise etwa auf Ohrhöhe befinden bzw. der Ausrichtung Außen- Hochtöner auf Kopfhöhe ausgerichtet lautsprechers. Der Lautsprecher ist ist. so konzipiert, dass die optimale Bei hohen Einbaupositionen empfiehlt Wiedergabe erreicht wird, wenn der... -
Seite 6: Montagevorbereitung (Kabel)
Lautsprecherleitung vom Kontakt mit Luft oxidiert. Dies gilt Verstärker zum Lautsprecher ver- besonders, wenn die Lautsprecher legt. salzhaltiger Luft ausgesetzt sind. Alle Revox-Lautsprecher weisen Sie können die abisolierten Enden einen ausgeglichenen elektrischen durch Silikon-Abdichtungs- Impedanz- und Phasenverlauf auf material schützen,... -
Seite 7: Montage
Swiss Sound Solutions MONTAGE Benötigtes Allgemein Montagewerkzeug besteht einem • Torx-Schraubendreher TX20 Montagebügel und dem eigentlichen Lautsprecher. • Bleistift • Wasserwaage • Abisolierzange • 6 mm Steinbohrer f. Dübel (nur bei Montage auf Betonwand) Seitenansicht Lautsprecher mit Bügel Der erste Teil (Schritt 1-3) der Montageanleitung beschreibt Anbringung des Bügels an der Wand,... -
Seite 8: Montage (Fortsetzung)
Swiss Sound Solutions MONTAGE (Fortsetzung) Schritt 1 / Führen Sie Lautsprecherkabel durch die mittlere Durchgangsöffnung und richten Sie die Montagebügel mit Hilfe einer Wasserwaage senkrecht bzw. Abbildung 4 waagrecht aus. Markieren Sie nun mit einem Bleistift die Schraubenposition in den Langlöchern - siehe Abb. 4 + 5 Schritt 2 / Holzwand a) Installation auf... - Seite 9 Swiss Sound Solutions Schritt 5 / Drehen Sie den Lautsprecher soweit zur Seite, dass die Anschlussklemmen für das Lautsprecherkabel gut zu- gänglich sind. Nun werden die Kabelenden ca. 15 mm abisoliert und mit den Polklemmen verbunden: Pluspol mit der roten Laut- sprecherklemme verbinden...
-
Seite 10: Lautsprecher Farblich Anpassen
Servicetechniker zwei- felsfrei feststellbar. Eine Garantie- leistung durch Revox ist dann nicht Decken Sie die Lautsprecherfront mit gegeben. Hilfe von Malerklebeband und Karton ab und stellen Sie sicher, dass kein Sprühnebel beim Lackieren seitlich in... -
Seite 11: Technische Daten
Swiss Sound Solutions Technische Daten Audiodaten Übertragungsbereich: 52 Hz - 32 kHz (IEC-Norm) Belastbarkeit: 80 / 110 Watt Impedanz: 6 Ohm Kennschalldruck: 87 dB/ 2.83 V/ 1m Trennfrequenz: 3.5 kHz Empf. Verstärkerleistung: 20 – 100W (unverzerrtes Signal) Temperaturbereich: -10° bis +70° C Überlastungsschutz: Reversibel, getrennt für Hoch- und Tieftöner Bestückung:... -
Seite 12: Entsorgung Ihres Altgerätes
Swiss Sound Solutions Entsorgung Ihres Altgerätes Ihr Produkt ist aus hochqualitativen Materialien und Bestandteilen hergestellt, die dem Recycling zugeführt werden und wiederverwertet werden können. Falls dieses Symbol eines durchgestrichenen Müllcontainers auf Rollen auf diesem Produkt angebracht ist, bedeutet dies, dass es von der Europäischen Richtlinie 2002/96/EG erfasst wird.