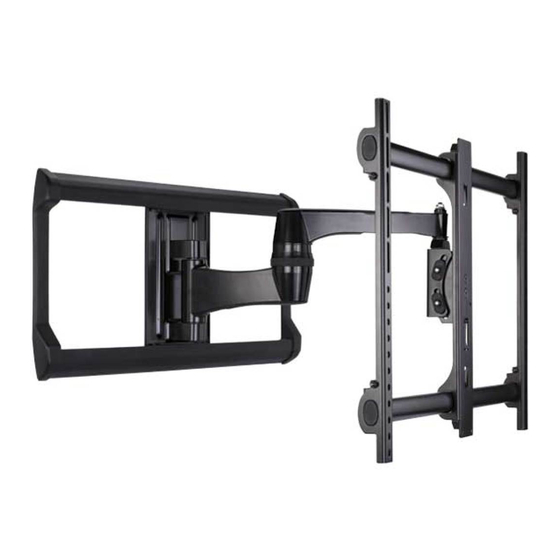
Sanus VisionMount VLF220 Bedienungsanleitung
Quicklinks
EN
IMPORTANT SAFETY INSTRUCTIONS - SAVE THESE INSTRUCTIONS
Thank you for choosing the Sanus VLF220 wall mount. The Sanus VLF220 wall
mount is designed to support a monitor weighing up to 59 kg (130 lbs). The
mount is adjustable up to ±75° of swivel, +5° to –15° of tilt, and ±5° of roll.
FR
INFORMATIONS IMPORTANTES CONCERNANT LA SÉCURITÉ –
CONSERVEZ CES INSTRUCTIONS
Merci d'avoir choisi le support de moniteur Sanus Systems VLF220. Le support
VLF220 et a une capacité de poids maximale de 59 kg. Le support mural
VLF220 est ajustable à ±75° de pivotement, +5° à –15° d'inclinaison, et ±5° de
roulement.
DE
WICHTIGE SICHERHEITSHINWEISE – BEWAHREN SIE DIESE HINWEISE
SORGFÄLTIG AUF
Vielen Dank, dass Sie sich für die Bildschirmhalterung VLF220 von Sanus Sys-
tems Vielen Dank, dass Sie sich für eine Sanus Systems-Wandhalterung entsch-
ieden haben. Die VLF220 trägt Monitore mit einem Gewicht von maximal 59 kg
(130 lb). Die Wandhalterung VLF220 ist bis zu ±75° schwenkbar, um +5° bis
–15° neigbar und um ±5° drehbar.
ES
INSTRUCCIONES IMPORTANTES DE SEGURIDAD – CONSERVE ESTAS
INSTRUCCIONES
Gracias por elegir el soporte de monitor VLF220 de Sanus Systems. El VLF220
sostiene monitores un peso máximo de 59 kg. El soporte para pared VLF220
se puede ajustar en un ángulo de giro de hasta ±75°, una inclinación de +5° a
–15°, y una rotación de ±5°.
PT
INSTRUÇÕES DE SEGURANÇA IMPORTANTES – GUARDE ESTAS
INSTRUÇÕES
Obrigado por escolher o suporte Sanus Systems para parede. O VLF220 agüen-
ta monitores com peso até 59 kg. A armação de parede VLF220 é ajustável com
uma rotação até ±75°, inclinação entre +5° a –15° e uma translação de ±5°.
NL
BELANGRIJKE VEILIGHEIDSINSTRUCTIES – BEWAAR DEZE GOED
Hartelijk dank voor uw aankoop van de VLF220 beeldschermsteun van Sanus
Systems. De VLF220 draagt monitors tot 59 kg. De VLF220 muursteun is
draaibaar tot maximaal ±75°, kantelbaar van +5° tot –15° en rolbaar ±5°.
IT
ISTRUZIONI DI SICUREZZA IMPORTANTI - CONSERVARE CON CURA
QUESTE ISTRUZIONI
Grazie per aver scelto il supporto per schermi Sanus Systems VLF220. Il sup-
porto VLF220 può sostenere monitor con peso fi no a 59 kg (130 libbre.). Il
supporto a parete VLF220 è regolabile: rotazione massima di ±75°, inclinazione
da +5° a –15° e rullio di ±5°.
EL
ΣΗΜΑΝΤΙΚΕΣ ΟΔΗΓΙΕΣ ΑΣΦΑΛΕΙΑΣ - ΦΥΛΑΞΤΕ ΑΥΤΕΣ ΤΙΣ ΟΔΗΓΙΕΣ
Ευχαριστούμε που επιλέξατε τη βάση οθόνης Sanus Systems VLF220. Η VLF220
υποστηρίζει οθόνες με βάρος έως 59kg . Η βάση τοίχου VLF220 ρυθμίζεται σε
περιστροφή ±75°, κλίση +5° έως –15°, και ανάκλιση ±5°.
NO
VIKTIGE SIKKERHETSINSTRUKSJONER – TA VARE PÅ DISSE
INSTRUKSJONENE
Takk for at du har valgt Sanus Systemss VLF220 skjermfeste. VLF220 kan
brukes til skjermer på opptil 59 kg. VLF220-veggfestet kan justeres med en
svingradius på ±75 grader, helling på +5 til -15 grader og ±5 grader rulling.
Sanus Systems 2221 Hwy 36 West, Saint Paul, MN 55113 USA • sanus.com
Europe, Middle East, and Africa: 31 (0) 40 26 68 619 • sanus.europe@sanus.com
Asia Pacifi c: 86 755 8996 9226 • 800 999 6688 (mainland China only) • sanus.ap@milestone.com
©2009 Milestone AV Technologies, a Duchossois Group Company. All rights reserved. Sanus is a division of Milestone.
All other brand names or marks are used for identifi cation purposes and are trademarks of their respective owners.
VLF220
(6901-002025 <03>)
Americas: 800-359-5520 • 651-484-7988 • info@sanus.com
DA
VIGTIGE SIKKERHEDSOPLYSNINGER - GEM DISSE OPLYSNINGER
Tak, fordi du valgte skærmholderen Sanus Systems VLF220. VLF220 kan bære
skærme på op til 59 kg. Vægholderen VLF220 kan drejes op til ±75°, vippes +5°
til –15° og roteres ±5°.
SV
VIKTIGA SÄKERHETSANVISNINGAR – SPARA DESSA ANVISNINGAR
Tack för att du väljer ett skärmfäste från VLF220-serien. VLF220 klarar bildskär-
mar som väger upp till 59 kg. VLF220-väggfästet är reglerbart och möjliggör
upp till ±75° svängning, +5° till –15° lutning och ±5° vridning.
RU
ВАЖНЫЕ ИНСТРУКЦИИ ПО ТЕХНИКЕ БЕЗОПАСНОСТИ –
СОХРАНИТЕ ЭТИ ИНСТРУКЦИИ
Благодарим вас за выбор крепления для мониторов Sanus Systems VLF220.
Кронштейн VLF220 позволяет устанавливать мониторы весом до 59
килограмм (130 фунтов). Настенное крепление VLF220 поворачивается на
угол до ±75°, угол наклона регулируется в диапазоне от +5° до –15°, угол
вращения регулируется в диапазоне ±5°.
PL
WAŻNE INSTRUKCJE DOTYCZĄCE BEZPIECZEŃSTWA — NIE
WYRZUCAĆ
Dziękujemy za wybranie uchwytu Sanus Systems VLF220 do montażu moni-
tora. W uchwycie VLF220 można mocować monitory o ciężarze maksymalnym
59kg (130 funtów). Uchwyt do montażu na ścianie VLF220 można regulować
w następującym zakresie: obrót ±75°, pochylenie +5° do –15°, poziomowanie
±5°.
CS
DŮLEŽITÉ BEZPEČNOSTNÍ POKYNY – BEZPEČNĚ JE ULOŽTE
Děkujeme vám za zakoupení držáku na monitor Sanus Systems VLF220. Držák
VLF220 zajišťuje podpěru monitorů o hmotnosti do 59kg. Nástěnný držák
VLF220 je nastavitelný – otáčení až ±75°, náklon +5° až -15° a sklopení ±5°.
TR
ÖNEMLİ GÜVENLİK TALİMATLARI - BU TALİMATLARI SAKLAYIN
Sanus Systems VLF220 monitör taşıma düzeneğini seçtiğiniz için teşekkür
ederiz. VLF220 59 kg (130 lbs) . VLF220 duvar taşıma düzeneğinde ±75° dönme,
+5° ila –15° eğilme ve ±5° yatırma ayarları yapılabilir.
重要- 上記の安全指示書を保管しておいてください
JP
Sanus Systems VLF220モニターマウントをご購入いただき、ありがとう
ございました。Sanus Systemsウォールマウントをご購入いただき、あり
がとうございました。VLF220は、最大重量59kg(130 lbs)のモニターを
支え。VLF220ウォールマウントの場合、±75°旋回したり、+5°~-15°
まで傾けることができ、±5°の回転制御も付いています。
MD
重要安全说明 – 保存这些说明
感谢您选择 Sanus Systems VLF220 显示器支架。Sanus Systems 墙壁支
架。VLF220 可支持重量不超过 59 kg(130 磅)的显示器。VLF220 壁挂
支架具有达 ±75° 的可调旋转度、+5° 至 –15° 的可调倾斜度和 ±5° 的
可调摇摆度。
®

Verwandte Anleitungen für Sanus VisionMount VLF220


Inhaltszusammenfassung für Sanus VisionMount VLF220
- Seite 1 Thank you for choosing the Sanus VLF220 wall mount. The Sanus VLF220 wall mount is designed to support a monitor weighing up to 59 kg (130 lbs). The skærme på op til 59 kg. Vægholderen VLF220 kan drejes op til ±75°, vippes +5° til –15° og roteres ±5°.
- Seite 2 CAUTION/WARNING: CAUTION: VORSICHT: Avoid potential personal injuries and property damage! VERMEIDEN SIE POTENZIELLE PERSONEN- UND SACHSCHÄDEN! Do not use this product for any purpose not explicitly specifi ed by Sanus Verwenden Sie dieses Produkt nur für den von Sanus Systems Systems.
- Seite 3 ATENÇÃO: PRECAUZIONE: Evite possíveis ferimentos pessoais e danos à propriedade! Evitare di causare danni a persone e/o a cose! Não use este produto para uma fi nalidade diferente daquela Non utilizzare il prodotto per qualsiasi scopo non esplicitamente explicitamente especifi cada pela Sanus Systems.
- Seite 4 ПРЕДУПРЕЖДЕНИЕ: FORSIKTIG: СОБЛЮДАЙТЕ ПРАВИЛА БЕЗОПАСНОСТИ, ЧТОБЫ ПРЕДОТВРАТИТЬ UNNGÅ POTENSIELL PERSONSKADE OG MATERIELL SKADE! ВОЗМОЖНЫЕ ТРАВМЫ И ПОВРЕЖДЕНИЕ ИМУЩЕСТВА! Bruk ikke dette produktet til noe annet formål enn det som Sanus Systems uttrykkelig har angitt. Не используйте изделие для какой-либо цели, явно не оговоренной компанией...
- Seite 5 注意 POZOR: ケガや壁面の破損が起こらないように注意してください。 Vyvarujte se úrazu nebo poškození majetku! Nepoužívejte tento výrobek jinak, než bylo specifi kováno společností Sanus Systemsが明確に指定している以外の目的で本製品を使用しな いでください。 Sanus Systems. 取り付け先の壁は、モニターとマウントの総重量の5倍を支えられ Stěna musí být schopná unést zatížení ve výši pětinásobku součtu なければなりません。 hmotností monitoru a držáku. ...
- Seite 6 3/16 in. Supplied Parts and Hardware Medleverede dele og armatur Before starting assembly, verify all parts are included and undamaged. If any Før samling, kontroller at alle dele er inkluderet og ubeskadiget. Hvis der parts are missing or damaged, do not return the item to your dealer; contact mangler dele eller dele er beskadiget, returner ikke enheden til din forhandler;...
- Seite 7 [01] x 1 [02] x 1 [03] x 1 M4 x 20mm M4 x 30mm M4 x 40mm [05] x 4 [06] x 4 [04] x 4 M5 x 20mm M5 x 30mm M5 x 40mm [07] x 4 [08] x 4 [09] x 4 M6 x 25mm M6 x 40mm...
- Seite 8 3/16 in. CAUTION: Wood Stud Mounting Installazione su muro con intelaiatura in legno CAUTION: Avoid potential injuries or property damage! Do not over-tighten PRECAUZIONE: Evitare la possibilità di lesioni alle persone o danni alle cose! the lag bolts [26]. Tighten the lag bolts [26] only until the washers [25] are Non serrare eccessivamente le viti [26].
- Seite 9 Montaż na ścianie o szkielecie drewnianym UWAGA: Uwaga na możliwość obrażeń i uszkodzenia sprzętu! Wkrętów montażowych [26] nie należy dokręcać za mocno. Śruby [26] należy dokręcać tylko do momentu dociśnięcia podkładek [25] do płyty ściennej [02]. Grubość materiału stanowiącego pokrycie ściany nie może przekraczać 16 mm (5/8 cala).
- Seite 10 3.25” 6901-002025<03>...
- Seite 11 41 - 61 cm (16 - 24 in.) [02] < 16 mm (5/8 in.) 88.5 mm (3.5 in.) [02] [25] [26] 6901-002025<03>...
- Seite 12 [32] Install the arm assembly [03] into the wall plate [02]. Installez l’assemblage du bras [03] dans la plaque murale [02]. Bringen Sie die Armvorrichtung [03] an der Wandplatte [02] an. Instale el montaje del brazo [03] a la placa mural [02]. Instale o conjunto do braço [03] na placa da parede [02].
- Seite 13 [02] [03] [28] [27] [29] 6901-002025<03>...
- Seite 14 Adjust the monitor plate to fi t the hole pattern of your monitor. Be Juster skjermplaten slik at den passer til skjermens hullmønster. sure that the center column is aligned with the center of the monitor. Pass på at midtlinjen er på linje med midten på skjermen. Réglez la plaque du moniteur afi n de l’adapter au patron de trous Juster skærmpladen, så...
- Seite 15 13.61 - 80.55 cm (5.36 - 31.71 in.) 6901-002025<03>...
- Seite 16 CAUTION: Install Brackets Instale los soportes Note: For TVs with a 400 x 400 hole pattern, see page 16. Nota: Para televisores con patrón de orifi cios de 400 x 400, consulte la página Determine the bolt diameter for your monitor and your TV type. Antes de instalar los soportes, determine el diámetro de los pernos ...
- Seite 17 Installare i bracci Montering af beslag Nota: per i televisori con una sequenza di fori di montaggio di 400 x 400, si Bemærk: Se side 16 for tver med et hulmønster på 400 x 400 veda pagina 16. Find diameteren på skruebolten på dit TV, og undersøg TV-typen: Prima di installare i bracci, determinare il diametro corretto per il televi- ...
- Seite 18 ブラケットの取り付け Montaż wsporników 注意: 穴パターンが400 x 400のテレビに関しては、16ページを参照し Uwaga: W przypadku telewizorów z otworami 400 x 400, patrz strona 16. てください。 Przed rozpoczęciem montażu wsporników, określić średnicę śruby ブラケットを取り付ける前に、テレビの種類に応じたボルト径を判 telewizora i typ telewizora: 断します。 Dla telewizorów z płaskim tyłem/bez przeszkód, patrz punkt 4-1. ...
- Seite 19 6901-002025<03>...
- Seite 20 400 x 400mm For TVs with 400 x 400mm spacing, remove the support tubes and Fjern støtterørene og løsne låseanordningene (c) på TV-er med release the locking carriages (c) before completing the bracket attachment 400 x 400mm-avstand, før du fullfører trinnet med å feste braketten. Etter step.
- Seite 21 400 x 400mm [01] [01] [21] [21] [23] [23] [16] [16] [07] [04] [01] [01] [21] [21] [24] [24] [16] [17] [10] [13] 6901-002025<03>...
- Seite 22 400 x 400mm [01] [01] [21] [21] [23] [23] [18] [18] [05] [08] [01] [01] [21] [21] [24] [24] [19] [19] [11] [14] 6901-002025<03>...
- Seite 23 400 x 400mm [01] [01] [21] [23] [21] [23] [19] [19] [06] [09] [01] [01] [21] [24] [21] [24] [20] [20] [12] [15] 6901-002025<03>...
- Seite 24 Sørg for at placere den midterste kolonne ud for midten af Be sure that the center column is aligned with the center of the skærmen. Stram den øverste [A] og nederste [B] fastgøringslås. TV. Tighten the upper [A] and lower [B] fasteners. Do not overtighten the Bemærk: Hulmellemrum på...
- Seite 25 [32] [31] 6901-002025<03>...
- Seite 26 Position arms so one elbow is pressed against the wall. Tighten the Plasser armene, slik at albuen trykkes mot veggen. Stram til [T] tension adjustment [T] to prevent the arms from moving while installing the for å unngå at armen beveger seg mens du installerer skjermbraketten. Fest monitor bracket.
- Seite 27 [01] [03] [22] 6901-002025<03>...
- Seite 28 Remove the arm covers by pressing the front of the cover; the rear Fjern armdækslerne ved at trykke på forsiden af dækslerne, of the cover will pop upward. Pull each arm to its full extension then route the hvorefter bagsiderne springer op. Træk hver arm ud i fuld længde, og før cables through the arm.
- Seite 29 6901-002025<03>...
- Seite 30 Install the upper cover and lower cover. Installer les couvercles supérieur et inférieur. Bringen Sie die obere und untere Abdeckung an. Instale las cubiertas superior e inferior. Instale as tampas superior e inferior. Installeer de bovenste en onderste afdekplaat. Installare i coperchi superiore e inferiore. Εγκαταστήστε...
- Seite 31 [30] [30] 6901-002025<03>...
- Seite 32 CAUTION: A: Adjust left / right swivel tension. A: Juster stramheden på drejning til venstre/højre. B: Adjust up / down tilt tension. B: Juster stramheden på vipning op/ned. C: Adjust arm extend / retract tension. C: Juster stramheden på armens udstrækning/sammentrækning. CAUTION: Never remove the tension nut [A].
- Seite 33 [32] 6901-002025<03>...
- Seite 34 [32] To level the monitor, loosen the two screws on the back of the head. Rettstill skjermen ved å løsne de to skruene på baksiden av hodet. Adjust the monitor position so that it is level. Tighten the screws. Juster skjermstillingen, slik at skjermen blir vannrett. Fest skruene. Pour mettre le moniteur à...
- Seite 35 6901-002025<03>...
- Seite 36 To remove the monitor, pull the arms to their full extension, release Om du ska ta bort bildskärmen ska armarna först dras ut helt och the locking tab [T], and then slide the monitor bracket off of the arm. hållet. Lossa sedan låsklacken [T] och skjut av hela bildskärmsfästet från HEAVY! You will need assistance with this step.
- Seite 37 [22] [01] [03] 6901-002025<03>...
- Seite 38 Milestone AV Technologies and its affi liated corporations and subsidiaries (collectively, Milestone AV Technologies og dets associerede selskaber og datterselskaber (samlet, “Milestone”), intend to make this manual accurate and complete. However, Milestone makes no claim “Milestone”), har til hensigt at gøre denne manual nøjagtig og fuldstændig. Dog hævder Milestone ikke that the information contained herein covers all details, conditions, or variations.