
Verwandte Anleitungen für IDEAL AP35


Inhaltszusammenfassung für IDEAL AP35
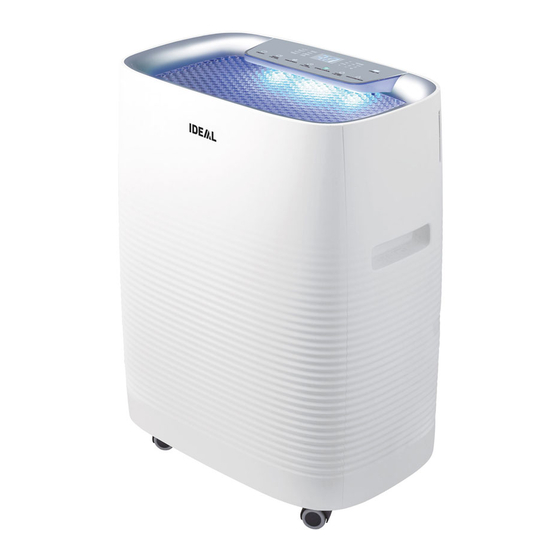
- Seite 1 Luftreiniger Betriebsanleitung Air Purifi er Operating Instructions Purifi cateur Mode d´emploi Oczyszczacz powietrza Instrukcja obsługi IDEAL AP35 www.ideal.de...
-
Seite 2: Inhaltsverzeichnis
Inhaltsverzeichnis Betriebsanleitung (2 – 22) Operating Instructions (23 – 43) Mode d´emploi (44 – 64) Instrukcja obsługi (65 – 85) Bestimmungsgemäßer Gebrauch Sicherheitshinweise Lieferumfang / Teilebezeichnungen Filterfunktionen Aufstellen / Inbetriebnahme Bezeichnungen und Funktion Bedienfeld / Display Luftqualitätsanzeige Grundbetrieb Betriebsarten Anzeige Sonstige Einstellungen Reinigung und Pflege Technische Daten... -
Seite 3: Betriebsanleitung
Sicherheitshinweise Vorwort Vielen Dank, dass Sie sich für ein Gerät aus dem Hause IDEAL entschieden haben. Bestimmungsgemäßer Gebrauch • Das Gerät dient ausschließlich zur Reinigung der Raumluft in Innenräumen. • Bitte lesen Sie vor Inbetriebnahme der Maschine unbedingt diese Betriebsanleitung und beachten Sie die Sicherheitshinweise. - Seite 4 Sicherheitshinweise Sicherheitshinweise • Blockieren Sie den Luftein- und Luftauslass nicht. • Setzen Sie den Luftreiniger nicht direktem Sonnenlicht, offenem Feuer oder Wärme aus. • Den Luftreiniger nur in Wohnräumen und innerhalb der spezifi zierten technischen Daten verwenden. Ein nicht bestimmungsgemäßer Gebrauch kann Gesundheit und Leben gefährden.
-
Seite 5: Lieferumfang, Teilebezeichnungen
Lieferumfang, Teilebezeichnungen Luftqualitätsanzeige (in Farben, siehe Seite 9) Bedienfeld / Display Luftauslass Tragegriff Luftreiniger Betriebsanleitung Luftreinigungsfi lter Operating Instructions Mode d´emploi Oczyszczalnik IDEAL AP35 www.ideal.de Filterabdeckung/ Gedruckte Lufteinlass Betriebsanleitung... -
Seite 6: Filterfunktionen
Filterfunktionen HEPA Feinstaub-Filter Vorfi lter Deodorfi lter Stufe 1 Vorfi lter Filtert größere Staubpartikel und Haare aus der Raumluft und verlängert die Lebensdauer der Filter. Stufe 2 Deodorfi lter Der Deodorfilter filtert unangenehme Gerüche und gesundheitsschädliche Gase wirksam aus der Raumluft. Stufe 3 HEPA Feinstaub-Filter Hervorragend geeignet um Pollen, Feinstaub und Allergene aus der Raumluft zu filtern. -
Seite 7: Aufstellen / Inbetriebnahme
Aufstellen / Inbetriebnahme ACHTUNG! Netzstecker aus der Steckdose ziehen. 1. Öffnen Sie die Filterabdeckung. Fassen Sie die Filterabdeckung zum Öffnen links und rechts oben an den Seiten. 2. Nehmen Sie die Filter heraus. Entfernen Sie die Folienverpackung von allen Filtern und befolgen Sie dann die Anweisungen zur Filtermontage. -
Seite 8: Bezeichnungen Und Funktion Bedienfeld / Display
Bezeichnungen und Funktion Bedienfeld / Display Bedienfeld / Display • ON/OFF: Ein ( leuchtet) - und Ausschalten (OFF-Betrieb = Standby) des Geräts. • MODE: Auswahl der gewünschten Betriebsart. > Bei jedem Tastendruck wechselt die Betriebsart in der Reihenfolge AUTO, TURBO, ECO und NIGHT. •... -
Seite 9: Luftqualitätsanzeige
Luftqualitätsanzeige Luftqualitätsanzeige: Zeigt den Reinheitsgrad der Raumluft in verschiedenen Farben an. Verschmutzungsgrad Stufe 1 Stufe 2 Stufe 3 Stufe 4 Stufe 5 Stufe 6 (sauber) (stark verschmutzt) Luftqualitätsanzeige Blau Blaugrün Grün Gelb Violett Drücken Sie die ON/OFF-Taste, um das Gerät in Betrieb zu nehmen. >... -
Seite 10: Grundbetrieb
Grundbetrieb Grundbetrieb 1. Stecken Sie den Netzstecker in eine Steckdose. > Das Gerät wechselt mit einem Piep-Ton in den OFF-Betrieb = Standby (Wenn der Netzstecker im laufenden Betrieb herausgezogen wurde, arbeitet das Gerät in der zuvor eingestellten Betriebsart). 2. Drücken Sie die ON/OFF-Taste. >... -
Seite 11: Betriebsarten
Betriebsarten AUTO Luftqualitätsabhängiger Automatikbetrieb • Drücken Sie die ON/OFF-Taste im OFF-Betrieb einmal. > Zunächst läuft das Gerät im AUTO-Modus. Wenn zuvor eine andere Betriebsart eingestellt war, läuft das Gerät in dieser Betriebsart. • Das Gerät überprüft die Reinheit der Raumluft und passt die Lüfterstufe entsprechend an. •... - Seite 12 Betriebsarten Betriebsart zur energiesparenden Luftreinhaltung. • Drücken Sie die MODE-Taste im AUTO-Modus zweimal, ECO leuchtet. • Das Gerät stellt sich auf die Reinheit der Raumlauft bei minimalen Energieverbrauch ein (Wird die Luft über einen bestimmtem Zeitraum als „sauber“ angezeigt, läuft der Lüfter auf der niedrigsten Stufe.
-
Seite 13: Fan Speed
Betriebsarten FAN SPEED Betriebsart mit manueller Auswahl der bevorzugten Lüfterstufe • Drücken Sie die FAN SPEED-Taste, um in die Betriebsart zu wechseln. • Drücken Sie die FAN SPEED-Taste, um die gewünschte Lüfterstufe einzustellen (Stufe 1, 2, 3 oder 4). > Zunächst beginnt der Lüfter auf Stufe 1. Wenn zuvor eine Lüfterstufe eingestellt wurde, läuft der Lüfter mit der vorherigen Stufe. -
Seite 14: Anzeige
Anzeige FILTER CHANGE Filteraustausch-LED • Wenn es Zeit für einen Filteraustausch ist, leuchtet die LED auf. Quittieren Sie den Alarm, wenn Sie die Filter ausgetauscht bzw. gereinigt haben (siehe Seite 19). > Sie haben 3 verschiedene Möglichkeiten, den Alarm zu quittieren und die LED auszuschalten: Öffnen und schließen Sie die Filterabdeckung, während das Gerät an die Spannungsversorgung angeschlossen ist. -
Seite 15: Sonstige Einstellungen
Sonstige Einstellungen TASTENSPERRE • Das Gerät ist im FAN SPEED-Modus. Halten Sie die FAN SPEED-Taste mindestens 3 Sekunden lang gedrückt. > Alle LED´s blinken zweimal, die Tastensperre ist aktiviert (beim Antippen der Tasten, ertönen zwei Signal-Töne und alle LED´s blinken zweimal). Halten Sie die FAN SPEED-Taste mindestens 3 Sekunden lang gedrückt, um die Tastensperre wieder zu deaktivieren. -
Seite 16: Reinigung Und Pflege
Reinigung und Pflege Reinigung des Feinstaubsensors (alle zwei Monate) 1. Öffnen Sie die Sensorklappe. 2. Reinigen Sie den Sensor sehr vorsichtig mit einem weichem Pinsel oder einem Staubsauger. 3. Wischen Sie die Sensorlinse (LENS) vorsichtig mit einem Wattestäbchen ab. 4. Schießen Sie die Sensorklappe wieder. Hinweis: Reinigen Sie den Sensor nicht mit Reinigungsmitteln, die flüchtige Bestandteile wie Alkohol oder Aceton enthalten. - Seite 17 Reinigung und Pflege Reinigung und Pflege ACHTUNG: Vor Reinigungs- und Pflegearbeiten den Netzstecker ziehen! Reinigung des Gerätegehäuses (alle zwei bis vier Wochen) • Reinigen Sie das Gehäuse des Luftreinigers mit einem, mit Seifenlösung angefeuchteten, fusselfreien Tuch. • Verwenden Sie keine Lösungsmittel. Diese könnten die Gehäuseoberfläche angreifen.
- Seite 18 Reinigung und Pflege ACHTUNG: Vor Reinigungs- und Pflegearbeiten den Netzstecker ziehen! Reinigung des Gerätegehäuses (alle zwei Wochen) 1. Öffnen Sie die Filterabdeckung. > Fassen Sie die Filterabdeckung zum Öffnen links und rechts oben an den Seiten. 2. Reinigen Sie die Filteroberfläche mit einem, auf der kleinsten Sufe eingestelltem, Staubsauger.
-
Seite 19: Technische Daten
Technische Daten / Intervalle für Pflege und Filterwechsel / Filterwechsel / Zubehör Technische Daten Netzspannung 220-240 V / 50 Hz Lüfterstufen 6 (incl. TURBO & NIGHT) Leistung 33 W Geeignet für Raumgrößen 25 - 45 m² * Reinigungsleistung bis zu 330 m³/h Geräuschpegel 26 - 55 dB (A) Gewicht... -
Seite 20: Mögliche Störungen
Mögliche Störungen Problem Checkliste Empfehlung Das Gerät funktioniert nicht, obwohl ich die • Ist das Netzkabel an die Steckdose • Stecken Sie den Netzstecker in eine angeschlossen? Steckdose mit 220-240 V, 50 Hz. ON/OFF-Taste drücke. • Ist das Gerät richtig zusammengebaut? •... - Seite 21 Die Garantiebestimmungen sind von unserer Landesvertretung festgelegt. • Falls innerhalb des Garantiezeitraums ein Material oder Konstruktionsfehler auftritt, wird IDEAL nach eigenem Ermessen das Gerät reparieren, ersetzen oder den Einkaufspreis des Gerätes erstatten. • Die Garantieleistung kann nur erfolgen, wenn ausreichende Nachweise, wie z.B. eine Kaufquittung vorgelegt werden und der Garantieanspruch innerhalb des Garantiezeitraums geltend gemacht wird.
- Seite 22 Das Gerät ist CE-konform und entspricht den folgenden Richtlinien: • 2014/35/EU Niederspannungsrichtlinie • 2014/30/EU EMV Richtlinie • 2011/65/EU, 2015/863/EU RoHS Richtlinie Angewendete harmonisierte Normen insbesondere: EN 55014-1:2017 EN 55014-2:2015 EN 61000-3-2:2014 EN 61000-3-3:2013 EN 60335-1:2012+A11:2014+A13:2017 EN 60335-2-65:2003+A1:2008+A11:2012 EN 60335-2-98:2003+A1:2005+A2:2008 EN 62233:2008 Die spezifi...
-
Seite 23: Operating Instructions
Table of Contents Operating Instructions (23 – 43) Intended Use Safety Instructions Scope of Delivery / Parts Designation Filter Functions Setting Up / Commissioning Designations and Function Control Panel / Display 29 Air Quality Indicator Basic Operation Operating Modes Display Other Settings Cleaning and Maintenance Technical Data... -
Seite 24: Intended Use
Safety Instructions Introduction Thank you for choosing a device from IDEAL. Intended use • The device is used exclusively for cleaning the ambient air indoors. • Please read these operating instructions before using the machine and please follow the safety instructions. - Seite 25 Safety Instructions Safety instructions • Do not block the air intake or outlet. • Do not expose the air purifi er to direct sunlight, a naked fl ame or heat. • Only use the air purifi er in living quarters and within the specifi ed technical parameters.
-
Seite 26: Scope Of Delivery / Parts Designation
Scope of Delivery / Parts Designation Air quality indicator (in colours, see Page 30) Control panel / display Air outlet Handle Luftreiniger Betriebsanleitung Air purifi cation fi lter Operating Instructions Mode d´emploi Oczyszczalnik IDEAL AP35 www.ideal.de Filter cover/ Printed operating Air intake instructions... -
Seite 27: Filter Functions
Filter functions Ultra PM 2.5 fi lter Pre-fi lter Deodorization fi lter Stage 1 Pre-fi lter Filters large dust particles and hair out of the ambient air and extends the filter service life. Stage 2 Deodorization fi lter The deodorization filter effectively filters unpleasant smells and health-injurious gases out to the ambient air. -
Seite 28: Setting Up / Commissioning
Setting Up / Commissioning CAUTION! Unplug the mains plug from the socket. 1. Open the filter cover. To open the filter cover, get hold of it at the top on the right and left-hand sides. 2. Take out the fi lters. Remove the plastic sheet packing from all fi... -
Seite 29: Designations And Function Control Panel / Display
Designations and Function Control Panel / Display Control panel / display • ON/OFF: On ( lights up) - and off switching (OFF-operation = Standby) of the device. • MODE: Selection of the required operating mode. > Each time the button is pressed, the operating mode changes in the following order AUTO, TURBO, ECO and NIGHT. -
Seite 30: Air Quality Indicator
Air Quality Indicator Air quality indicator: Indicates the cleanliness of the ambient air in various colours. Degree of Level 1 Level 2 Level 3 Level 4 Level 5 Level 6 contamination (clean) (markedly contaminated) Air quality indicator Blue Blue- Green Yellow Violet green... -
Seite 31: Basic Operation
Basic Operation Basic Operation 1. Insert the mains plug into a socket. > With a bleep the device changes to the OFF operation = Standby (Unplugging the mains plug during the ongoing operation results in the device operating in the operating mode as set beforehand). 2. -
Seite 32: Operating Modes
Operating Modes AUTO Air quality-conditioned automatic mode • Press the ON/OFF button once in the OFF mode. > The device firstly runs in the AUTO mode. Should a different operating mode have been set beforehand, then the device runs in this mode. •... - Seite 33 Operating Modes Operating mode for keeping air pure in an energy-saving way. • Press the MODE button twice in the AUTO mode, ECO lights up. • The device adjusts to ambient air purity under minimum energy consumption (If the air is displayed as “clean”...
- Seite 34 Operating Modes FAN SPEED Operating mode in which the preferred fan speed is manually selected • Press the FAN SPEED button to change into the operating mode. • Press the FAN SPEED button to set the required fan speed (Speed 1, 2, 3 or 4). >...
-
Seite 35: Display
Display FILTER CHANGE Filter change LED • The LED lights up when a fi lter needs to be changed. Acknowledge the alarm when you have changed the filter (see Page 40). > There are 3 different ways of acknowledging the alarm and switching off the LED: Open and close the filter cover whilst the device is connected to the power supply. -
Seite 36: Other Settings
Other Settings BUTTON LOCK • The device is in the FAN SPEED mode. Keep the FAN SPEED button pressed for at least 3 seconds. > All LEDs fl ash twice, the button lock is activated (on tapping the buttons, two audible signals are heard and all the LEDs flash twice). -
Seite 37: Cleaning And Maintenance
Cleaning and Maintenance Cleaning the fi ne dust sensor (every two months) 1. Open the sensor flap. 2. Carefully clean the sensor with a soft paintbrush or a dust extractor. 3. Carefully wipe the sensor lens (LENS) with a cotton bud. 4. - Seite 38 Cleaning and Maintenance Cleaning and Maintenance CAUTION: Unplug the mains plug prior to cleaning and maintenance work! Cleaning the device housing (every two to four weeks) • Clean the air purifi er housing with a lint-free cloth moistened with soapy water. •...
- Seite 39 Cleaning and Maintenance CAUTION: Unplug the mains plug prior to cleaning and maintenance work! Cleaning the device housing (every two weeks) 1. Open the fi lter cover. > To open the filter cover, take hold of it at the top on the right and left-hand sides. 2.
-
Seite 40: Technical Data
Technical data / Intervals for Maintenance and Filter Change / Filter Change / Accessories Technical data Power supply 220-240 V / 50 Hz Fan speeds 6 (incl. TURBO & NIGHT) Power 33 W Suitable for rooms 25 - 45 m² * Cleaning capacity up to 330 m³/h Noise level... -
Seite 41: Troubleshooting
Troubleshooting Problem Check list Recommendation The device does not function even though I • Is the power cable connected to the socket? • Insert the mains plug into a 220-240 V, 50 Hz socket. pressed the ON/OFF button. • Is the device not correctly assembled? •... - Seite 42 IDEAL provides a guarantee for this device from the date of purchase. The guarantee terms are defi ned by our local representative. • If a material or design defect occurs during the guarantee period, IDEAL shall, at its discretion, repair or replace the device, or refund the purchase price.
- Seite 43 Legal information The device is CE-conform and complies with the following directives: • 2014/35/EU Low Voltage Directive • 2014/30/EU Electromagnetic compatibility directive • 2011/65/EU, 2015/863/EU RoHS directive Applied harmonised standards in particular EN 55014-1:2017 EN 55014-2:2015 EN 61000-3-2:2014 EN 61000-3-3:2013 EN 60335-1:2012+A11:2014+A13:2017 EN 60335-2-65:2003+A1:2008+A11:2012 EN 60335-2-98:2003+A1:2005+A2:2008...
-
Seite 44: Fr Mode D´emploi
Sommaire FR Mode d’emploi (44 – 64) Utilisation conforme Consignes de sécurité Contenu de la livraison / Désignation des pièces Fonctions de fi ltrage Installation / Mise en service Désignations et fonctions du panneau de commande / de l’écran Voyant de la qualité de l’air Fonctionnement de base Modes de fonctionnement Affi... -
Seite 45: Utilisation Conforme
Consignes de sécurité Préface Nous vous remercions d’avoir opté pour un appareil de la maison IDEAL. Utilisation conforme • L’appareil est exclusivement destiné à la purifi cation de l’air ambiant en intérieur. • Veuillez lire impérativement ce mode d’emploi et observer les consignes de sécurité... - Seite 46 Consignes de sécurité Consignes de sécurité • N’obstruez jamais les orifices d’entrée et d’évacuation de l’air. • N’exposez pas le purificateur d’air à la lumière directe du soleil, aux flammes nues ou à la chaleur. • N’utilisez le purificateur d’air que dans des pièces d’habitation et dans les limites spécifiées dans les caractéristiques techniques.
-
Seite 47: Contenu De La Livraison / Désignation Des Pièces
Voyant de la qualité de l’air (en couleurs, voir page 51) Panneau de Sortie d’air commande / Écran Poignée Luftreiniger Betriebsanleitung Filtre de Operating Instructions Mode d´emploi Oczyszczalnik powietrza purifi cation d’air IDEAL AP35 www.ideal.de Copie du mode Couvercle du fi ltre / d’emploi Entrée d’air... -
Seite 48: Fonctions De Fi Ltrage
Fonctions de fi ltrage Filtre à poussières Pré-fi ltre fi nes HEPA Filtre désodorisant Niveau 1 Pré-fi ltre Filtre les plus grosses particules de poussière et les poils de l’air ambiant et prolonge la durée de vie des filtres. Niveau 2 Filtre désodorisant Le filtre désodorisant filtre efficacement les odeurs désagréables et les gaz nocifs de l’air ambiant. -
Seite 49: Installation / Mise En Service
Installation / Mise en service ATTENTION ! Débrancher la fi che secteur de la prise. 1. Ouvrez le couvercle du filtre. Saisissez les côtés supérieur gauche et supérieur droit du couvercle du filtre pour l’ouvrir. 2. Retirez le fi ltre. Retirez l’emballage en fi... -
Seite 50: Désignations Et Fonctions Du Panneau De Commande / De L'écran
Désignations et fonctions du panneau de commande / de l’écran Panneau de commande / Écran • ON/OFF : Mise en marche ( allumé) et mise hors marche (OFF = veille) de l’appareil. • MODE : Sélection du mode de fonctionnement souhaité. >... -
Seite 51: Voyant De La Qualité De L'air
Voyant de la qualité de l’air Voyant de la qualité de l’air : Indique le degré de pureté de l’air ambiant dans différentes couleurs. Degré de pollution Niveau 1 Niveau 2 Niveau 3 Niveau 4 Niveau 5 Niveau 6 (propre) (fortement encrassé) Voyant de la qualité... -
Seite 52: Fonctionnement De Base
Fonctionnement de base Fonctionnement de base 1. Branchez la fiche secteur dans une prise de courant. > L’appareil émet un bip sonore et passe en mode OFF = veille (Si la fiche a été débranchée pendant le fonctionnement, l’appareil fonctionne dans le mode de fonctionnement réglé... -
Seite 53: Modes De Fonctionnement
Modes de fonctionnement AUTO Mode automatique en fonction de la qualité de l’air • Appuyez une fois sur la touche ON/OFF en mode OFF. > Tout d’abord, l’appareil fonctionne en mode AUTO. Si un autre mode de fonctionnement a été réglé au préalable, l’appareil fonctionne dans ce mode de fonctionnement. •... - Seite 54 Modes de fonctionnement Mode de fonctionnement pour la dépollution de l’air à faible consommation d’énergie. • Appuyez deux fois sur la touche MODE en mode AUTO, ECO s’allume. • L’appareil s’adapte à la pureté de l’air ambiant en mode de consommation d’énergie minimale (Si l’air est affi...
- Seite 55 Modes de fonctionnement FAN SPEED Mode de fonctionnement avec sélection manuelle de la vitesse de ventilation souhaitée • Appuyez sur la touche FAN SPEED pour passer dans ce mode de fonctionnement. • Appuyez sur la touche FAN SPEED pour régler la vitesse de ventilation souhaitée (niveau 1, 2, 3 ou 4).
-
Seite 56: Affi Chage
Affi chage FILTER CHANGE LED de remplacement du filtre • Lorsqu’il est temps de remplacer et/ou de nettoyer le fi ltre, la LED s’allume. Acquittez l’alarme lorsque vous avez remplacé ou nettoyé les filtres (voir page 61). > Il y a 3 façons différentes d’acquitter l’alarme et d’éteindre la LED : Ouvrez et fermez le couvercle du filtre alors que l’appareil est connecté... -
Seite 57: Autres Réglages
Autres réglages VERROUILLAGE DES TOUCHES • L’appareil est en mode FAN SPEED. Appuyez sur la touche FAN SPEED et maintenez-la enfoncée pendant au moins 3 secondes. > Toutes les LED clignotent deux fois, le verrouillage des touches est activé (lorsque vous appuyez les touches, deux bips sonores retentissent et toutes les LED clignotent deux fois). -
Seite 58: Nettoyage Et Entretien
Nettoyage et entretien Nettoyage du capteur de poussière fi ne (tous les deux mois) 1. Ouvrez le clapet du capteur. 2. Nettoyez avec précaution le capteur à l’aide d’une brosse douce ou d’un aspirateur. 3. Essuyez soigneusement la lentille du capteur (LENS) avec un coton-tige. 4. - Seite 59 Nettoyage et entretien Nettoyage et entretien ATTENTION : Avant tous travaux de nettoyage et d’entretien, débrancher la fi che secteur ! Nettoyage du boîtier de l’appareil (toutes les deux à quatre semaines) Nettoyez le boîtier du purifi cateur d’air avec un chiffon non pelucheux imbibé...
- Seite 60 Nettoyage et entretien ATTENTION : Avant tous travaux de nettoyage et d’entretien, débrancher la fi che secteur ! Nettoyage du boîtier de l’appareil (toutes les deux semaines) 1. Ouvrez le couvercle du fi ltre. > Saisissez les côtés supérieur gauche et supérieur droit du couvercle du filtre pour l’ouvrir.
-
Seite 61: Caractéristiques Techniques
Caractéristiques techniques / Intervalles d’entretien et de remplacement des fi ltres / Remplacement des fi ltres / Accessoires Caractéristiques techniques Tension d’alimentation 220-240 V / 50 Hz Vitesses de ventilation 6 (incl. TURBO & NIGHT) Puissance 33 W Adapté aux pièces spacieuses 25 - 45 m²... -
Seite 62: Pannes Éventuelles
Pannes éventuelles Problème Liste de contrôle Recommandation L’appareil ne fonctionne pas bien que • Le cordon d’alimentation est-il branché • Branchez la fi che secteur dans une prise dans la prise de courant ? 220-240 V, 50 Hz. j’appuie sur la touche ON/OFF. •... - Seite 63 Les clauses de garantie sont fi xées par notre fi liale du pays concerné. • Si un vice de matière ou de construction apparaît pendant la période de garantie, IDEAL procédera à la réparation, au remplacement ou au remboursement du prix d’achat de l’appareil selon sa propre évaluation.
- Seite 64 Informations légales L’appareil est conforme à la norme CE et aux directives suivantes : • 2014/35/UE Directive Basse Tension • 2014/30/UE EMV directives compatibilité électromagnétique • 2011/65/UE, 2015/863/UE Directive RoHS Normes harmonisées utilisées, notamment EN 55014-1:2017 EN 55014-2:2015 EN 61000-3-2:2014 EN 61000-3-3:2013 EN 60335-1:2012+A11:2014+A13:2017 EN 60335-2-65:2003+A1:2008+A11:2012...
-
Seite 65: Pl Instrukcja Obsługi
Spis treści Instrukcja obsługi (65 – 85) Użytkowanie zgodne z przeznaczeniem Wskazówki bezpieczeństwa Zakres dostawy / nazwy części Funkcje fi ltra Instalacja / rozruch Nazwy i działanie panelu obsługi / wyświetlacza Wskaźnik jakości powietrza Tryb podstawowy Tryby pracy Wskaźnik wymiany fi ltra Pozostałe ustawienia Czyszczenie i konserwacja Dane techniczne... -
Seite 66: Użytkowanie Zgodne Z Przeznaczeniem
Wskazówki bezpieczeństwa Wstęp Dziękujemy za wybór urządzenia fi rmy IDEAL. Użytkowanie zgodne z przeznaczeniem • Urządzenie służy wyłącznie do czyszczenia powietrza w pomieszczeniu wewnątrz budynku. • Przed uruchomieniem urządzenia należy koniecznie przeczytać niniejszą instrukcję eksploatacji i przestrzegać podanych w niej wskazówek bezpieczeństwa. - Seite 67 Wskazówki bezpieczeństwa Wskazówki bezpieczeństwa • Nie blokować wlotu i wylotu powietrza. • Nie narażać oczyszczacza powietrza na bezpośrednie światło słoneczne, otwarty ogień lub ciepło. • Oczyszczacz powietrza stosować wyłącznie w pomieszczeniach mieszkalnych i w ramach określonych danych technicznych. Zastosowanie niezgodne z przeznaczeniem może być groźne dla życia i zdrowia.
-
Seite 68: Zakres Dostawy, Nazwy Części
Zakres dostawy, nazwy części Wskaźnik jakości powietrza (kolory, patrz strona 72) Panel obsługi / Wylot powietrza wyświetlacz Uchwyt do przenoszenia Filtr do czyszczenia powietrza Luftreiniger Betriebsanleitung Operating Instructions Mode d´emploi Oczyszczalnik powietrza IDEAL AP35 www.ideal.de Pokrywa fi ltra/ Drukowana wlot powietrza instrukcja eksploatacji... -
Seite 69: Funkcje Fi Ltra
Funkcje fi ltra Filtr drobnopyłkowy HEPA Filtr wstępny Filtr usuwający zapachy Stopień 1 fi ltr wstępny Odfiltrowuje większe cząsteczki pyłu i włosy z powietrza i przedłuża żywotność filtra. Stopień 2 fi ltr usuwający zapachy Filtr usuwający zapachy odfiltrowuje skutecznie nieprzyjemne zapachy i szkodliwe dla zdrowia gazy z powietrza pomieszczenia. -
Seite 70: Instalacja / Rozruch
Instalacja / rozruch UWAGA! Wyciągnąć wtyk sieciowy z gniazda. 1. Otwórz pokrywę filtrów. Aby otworzyć pokrywę chwyć ją za specjalne wgłębienia znajdujące się z lewej i prawej strony w górnej części pokrywy. 2. Wyciągnij fi ltry. Usuń foliowe opakowanie z wszystkich fi... -
Seite 71: Nazwy I Działanie Panelu Obsługi / Wyświetlacza
Nazwy i działanie panelu obsługi / wyświetlacza Panel obsługi / wyświetlacz • ON/OFF: zał. ( świeci się) - wyłączanie (tryb OFF = standby) urządzenia. • MODE: wybór żądanego trybu pracy. > każde naciśnięcie przycisku powoduje zmianę trybu pracy w kolejności AUTO, TURBO, ECO i NIGHT. -
Seite 72: Wskaźnik Jakości Powietrza
Wskaźnik jakości powietrza Wskaźnik jakości powietrza: Pokazuje stopień czystości powietrza w pomieszczeniu przy pomocy różnych kolorów. Stopień stopień 1 stopień 2 stopień 3 stopień 4 stopień 5 stopień 6 zanieczyszczenia (czyste) (mocno zanie- czyszczone) Wskaźnik jakości niebieski niebiesko- zielony żółty fi... -
Seite 73: Tryb Podstawowy
Tryb podstawowy Tryb podstawowy 1. Wetknąć wtyk sieciowy do gniazdka. > Urządzenie przechodzi z odgłosem piszczenia do trybu OFF = standby (jeżeli wtyk został wyciągnięty w trakcie pracy, urządzenie pracuje w uprzednio ustawionym trybie). 2. Nacisnąć przycisk ON/OFF. > Na wyświetlaczu palą się ikony ON/OFF i AUTO i wentylator zaczyna pracować. Wentylator pracuje w poprzednim trybie pracy. -
Seite 74: Tryby Pracy
Tryby pracy AUTO Zależny odjakości powietrza tryb automatyczny • Nacisnąć jeden raz przycisk ON/OFF w trybie OFF. > Najpierw urządzenie pracuje w trybie AUTO. Jeżeli uprzednio ustawiony był inny tryb pracy, urządzenie pracuje w tym trybie. • Urządzenie sprawdza czystość powietrza w pomieszczeniu i odpowiednio dopasowuje stopień prędkości wentylatora. - Seite 75 Tryby pracy Tryb pracy energooszczędnej wentylatora. • Nacisnąć dwukrotnie przycisk MODE w trybie AUTO, pali się ECO. • Urządzenie przestawia się na tryb minimalnego zużycia energii (Jeżeli stan powietrza będzie przez określony czas sygnalizowany jako „czysty“, wentylator działa na najniższym poziomie. Wyświetla się...
- Seite 76 Tryby pracy FAN SPEED Tryb pracy z ręcznym doborem preferowanej prędkości wentylatora. • Nacisnąć przycisk FAN SPEED, aby zmienić tryb pracy. • Nacisnąć przycisk FAN SPEED, aby ustawić żądany stopień wentylatora (stopień 1, 2, 3 lub 4). > Najpierw wentylator rozpoczyna pracę na stopniu 1. Jeżeli wcześniej ustawiono inny stopień...
-
Seite 77: Wskaźnik Wymiany Fi Ltra
Wskaźnik wymiany fi ltra FILTER CHANGE Dioda LED wymiany filtra • Dioda LED świeci się, gdy nadchodzi czas wymiany fi ltra. Potwierdzić alarm, jeżeli filtr został wymieniony (patrz strona 82). > Dostępne są 3 różne możliwości potwierdzenia alarmu i wyłączenie diody LED: Otworzyć... -
Seite 78: Pozostałe Ustawienia
Pozostałe ustawienia BLOKADA PRZYCISKÓW • Urządzenie znajduje się w trybie FAN SPEED. Przytrzymać wciśnięty przycisk FAN SPEED przez przynajmniej 3 sekundy. > Wszystkie diody LED zamigają dwukrotnie, blokada przycisków została aktywowana (podczas dotknięcia rozlegną się dwa tony sygnalizacyjne i wszystkie diody LED zamigają... -
Seite 79: Czyszczenie I Konserwacja
Czyszczenie i konserwacja Czyszczenie czujnika drobnopyłkowego (co dwa miesiące) 1. Otworzyć klapkę czujnika. 2. Bardzo ostrożnie oczyścić czujnik przy pomocy miękkiego pędzla lub odkurzacza. 3. Ostrożnie wytrzeć soczewkę czujnika (LENS) przy pomocy patyczka z wacikiem. 4. Ponownie zamknąć klapkę czujnika. Wskazówka: Nie czyścić... - Seite 80 Czyszczenie i konserwacja Czyszczenie i konserwacja UWAGA: Przed czyszczeniem i pracami konserwacyjnymi wyciągnij wtyczkę z gniazdka! Czyszczenie obudowy urządzenia (co dwa do czterech tygodni) • Obudowę oczyszczacza czyścić szmatką niepozostawiającą włókien nasączoną roztworem mydła. • Nie stosować środków zawierających rozpuszczalniki. Mogłyby uszkodzić...
- Seite 81 Czyszczenie i konserwacja UWAGA: Przed czyszczeniem i pracami konserwacyjnymi wyciągnij wtyczkę z gniazdka! Czyszczenie obudowy urządzenia (co dwa tygodnie) 1. Otwórz pokrywę fi ltrów. > Chwycić pokrywę filtrów w celu otwarcia po lewej i prawej stronie u góry. 2. Oczyścić powierzchnię filtra odkurzaczem pracującym na najniższych obrotach.
-
Seite 82: Dane Techniczne
Dane techniczne / Okres czyszczenia i wymiany fi ltra, akcesoria Dane techniczne Napięcie sieciowe 220-240 V / 50 Hz Tryby pracy wentylatora 6 (w tym TURBO & NIGHT) 33 W Nadaje się do pomieszczeń o kubaturze 25 - 45 m² * Wydajność... -
Seite 83: Możliwe Usterki
Możliwe usterki Problem Lista kontrolna Zalecenie Urządzenie nie działa mimo naciskania • Czy kabel sieciowy jest podłączony do • Wtyczkę sieciową należy podłączyć tylko gniazda? do prawidłowo zamontowanego gniazda przycisku ON/OFF. sieciowego 220-240 V, 50 Hz. • Czy urządzenie jest poprawnie •... - Seite 84 Oczyszczacz należy przechowywać w oryginalnym opakowaniu w suchym, nie za gorącym miejscu. Części zamienne i akcesoria Części zamienne można pozyskać w specjalistycznych sklepach lub pod adresem www.ideal-health.pl. Należy używać wyłącznie oryginalnych części zamiennych producenta. Naprawa Naprawy mogą wykonywać wyłącznie specjaliści lub Obsługa Klienta. Dotyczy to także uszkodzonego kabla sieciowego.
- Seite 85 Wskazówki prawne Urządzenie jest zgodne z normą CE i odpowiada następującym dyrektywom: • 2014/35/UE dyrektywa niskonapięciowa • 2014/30/UE dyrektywa w sprawie kompatybilności elektromagnetycznej • 2011/65/WE, 2015/863/WE dyrektywa RoHS EN 55014-1:2017 EN 55014-2:2015 EN 61000-3-2:2014 EN 61000-3-3:2013 EN 60335-1:2012+A11:2014+A13:2017 EN 60335-2-65:2003+A1:2008+A11:2012 EN 60335-2-98:2003+A1:2005+A2:2008 EN 62233:2008 Specyfi...
- Seite 86 Notizen: Remarks: Notes : Uwagi:...
- Seite 87 Notizen: Remarks: Notes : Uwagi:...
- Seite 88 Immer frische Luft. Für Gesundheit, Vitalität und mehr Lebensqualität. Spürbar. Bei jedem Atemzug. For fresh air. For more health, vitality and quality of life. Perceptible. With every breath you take. De l'air toujours frais. Pour une meilleure santé, vitalité et qualité de vie. Perceptible.