
Verwandte Anleitungen für Lab.gruppen D SERIE


Inhaltszusammenfassung für Lab.gruppen D SERIE
- Seite 1 D SERIES Rev. 2.0.0 Item no. QSG-DSERIES-TESIRA High-Power installation platform Tesira Variants: D 200:4T/Ta D 120:4T/Ta D 80:4T/Ta Incorporating technologies from Quick Start Guide...
-
Seite 2: Important Safety Instructions
1. Important safety instructions 1. Important safety instructions Before using the device, be sure to carefully read the Safety Instructions. Keep this document with the device at all times. 2. Approvals Read these instructions. Keep these instructions Heed all warnings. Follow all instructions. -
Seite 3: User Responsibility
3. Warnings To completely disconnect this equipment from the AC 3.4.3. Radio interference mains, disconnect the power supply cord plug from the AC A sample of this product has been tested and complies with receptacle. The mains plug of the power supply cord shall the limits for the European Electro Magnetic Compatibility remain readily operable. - Seite 4 D SERIES Tesira Quick Start Guide rev 2.0.0...
- Seite 5 D SERIES Tesira Quick Start Guide rev 2.0.0...
- Seite 6 安全に関する注意事項 安全に関する注意事項 本装置を使用する前に、必ず安全のための注意事項をご一読ください。この書類は、常に装置と一緒に保管してください。 注意事項をお読みください。 ネットワーク・ケーブルを使用する場合、US National Differences 注意事項の書類は手の届くところに保管しておいてください。 16.3 項は、VW-1 の難燃対応品を使用することを義務づけています。 全ての警告をお守りください。 規格 全ての指示に従ってください。 本機器は水の近くで使用しないでください。 掃除には、乾いた布のみを使用してください。 換気口は塞がないようにしてください。製造者の指示に従って設置し 本機器は、EMC(European Electro-Magnetic Com- てください。 patibility: EU 電磁両立性)指令 2004/108/EC および ラジエーター、 暖房送風口、 ストーブをはじめ、 熱を発生する機器(ア 低電圧指令 2006/95/EC の必須要求事項に準拠して います。 ンプを含む)の近くに設置しないでください。 有極プラグや接地極付きプラグは安全性を確保するための構造です。 適用規格 : EMC エミッションに関する規制 EN55103- 無効にしないでください。有極プラグは、二本の差し込み刃のうち、...
- Seite 7 警告 電波障害 3.4.3 機器を電源から完全に遮断するには、電源プラグをコンセントから抜いてくだ さい。電源ケーブルの電源プラグは常に容易に抜き差しできるようにしてくだ 本装置のサンプルは European Electro Magnetic Compatibility(EMC)directive さい。 の制限事項に適合するための試験に合格しています。また、本装置は FCC 基準 Part 15 に準ずる Class B デジタル機器の制限事項に適合するための試験に合 Français: Pour démonter complètement l’équipement de l’alimentation 格しています。これらの制限事項は、装置の設置に伴って生じうる有害な電波 générale, démonter le câble d’alimentation de son réceptacle. La prise d’alimentation restera aisément fonctionnelle. 障害からの適切な保護を目的に制定されたものです。本装置は無線周波エネル...
-
Seite 8: Instructions De Sécurité Importantes
1. Instructions de sécurité importantes 1. Instructions de sécurité importantes Avant d'utiliser l'appareil, veillez à lire attentivement les instructions de sécurité. Conservez constamment ce document avec l'appareil. 2. Certifications Lisez ces instructions. Conservez ces instructions. Tenez compte de tous les avertissements. Suivez toutes les instructions. -
Seite 9: Responsabilité De L'utilisateur
3. Avertissements Pour totalement isoler l’équipement de l’alimentation secteur, débranchez le cordon d’alimentation de son embase. La fiche This Class A digital apparatus complies with Canadian ICES-003. Cet appareil numérique de la classe A est conforme à la norme NMB-003 secteur du cordon d’alimentation doit rester accessible. -
Seite 10: Wichtige Sicherheitshinweise
1. Wichtige Sicherheitshinweise 1. Wichtige Sicherheitshinweise Lesen Sie bitte diese Sicherheitsanweisungen sorgfältig, bevor Sie das Gerät verwenden. Bewahren Sie dieses Dokument bitte jederzeit zusammen mit dem Gerät auf. 2. Kennzeichnungen Bitte lesen Sie diese Anweisungen. Bitte bewahren Sie diese Anweisungen auf. Beachten Sie alle Warnhinweise. -
Seite 11: Verantwortung Des Anwenders
3. Warnungen Um das Gerät vollständig vom Stromnetz zu trennen, müssen Sie den B nach Abschnitt 15. Diese Einschränkungen sollen angemessenen Netzstecker des Gerätes aus der Steckdose ziehen. Der Netzstecker Schutz vor schädlichen Störungen durch elektrische Geräte des Gerätes sollte jederzeit zugänglich sein. gewährleisten. -
Seite 12: Instrucciones Importantes De Seguridad
1. Instrucciones importantes de seguridad 1. Instrucciones importantes de seguridad Antes de usar este aparato, asegúrese de leer completamente estas Instrucciones de seguridad. Conserve este documento junto con el dispositivo. 2. Certificaciones Lea estas instrucciones. Conserve estas instrucciones Cumpla con lo indicado en los avisos. Siga todas las instrucciones. -
Seite 13: Responsabilidad Del Usuario
3. Precaución Para desconectar este aparato completamente de la corriente 3.4.3. Interferencias de radio eléctrica, extraiga el enchufe del cable de alimentación de la Se ha verificado que este aparato cumple con los límites salida de corriente. Por este motivo, coloque el cable de forma establecidos por la directiva europea de compatibilidad que siempre pueda acceder a él. - Seite 14 4. Table of Contents 4. Table of Contents 1. Important safety instructions 2. Approvals 3. Warnings 3.1. Explanation of warning symbols 3.2. Warnings 3.3. Caution 3.4. User responsibility 3.4.1. Mains connection grounding 3.4.2. Speaker output hazard on amplifiers 3.4.3. Radio interference 3.4.4.
-
Seite 15: Inhaltsverzeichnis
4. Table of Contents 8. Cooling and fan operation 9. Operating voltage 9.1. Low voltage country considerations 10. Grounding 11. Product overview 11.1. Front panel 11.2. Rear panel 12. Signal flow and processing 13. Quick Start Tutorial 13.1. Software installation and firmware update 13.1.1. - Seite 16 5. Introduction 5.1. Welcome Thank you for choosing the Lab.gruppen D Series for your sound reinforcement needs. We are confident that you will be pleased with the performance, unique features, configuration flexibility, reliability, and long-term durability offered by this product.
-
Seite 17: Feature Summary
6. Feature summary 6. Feature summary • Four channels with three levels of total available frame power output: 20000 W, 12000 W and 8000 W • Rational Power Management (RPM) • True flexibility in allocating power output across each channel to match requirement, for more efficient use of amplifier inventory •... -
Seite 18: Unpacking
Carefully open the shipping carton and check for any damage to the device or the supplied accessories. Every Lab.gruppen product is tested and inspected before leaving the factory and should arrive in perfect condition. If any damage is discovered, please notify the shipping company immediately. Only the consignee may initiate a claim with the carrier or their insurers for damage incurred during shipping. - Seite 19 7. Installation Rear support bracket with mounting hardware Rear support bracket mounted for fixed Rear support bracket mounted for removable installation and bracket pointing forward installation and bracket pointing towards back 7.2.2. Mounting front grille The front grille is shipped on top of the amplifier inside the box to protect it during shipping. The front grille adheres to the amplifier with magnets.
-
Seite 20: Cooling And Fan Operation
8. Cooling and fan operation 8. Cooling and fan operation D Series devices use a forced-air cooling system with airflow from front to rear, allowing high continuous power levels without thermal problems. To facilitate maximum air flow, ensure that no objects such as rack doors or lids are placed at the front or rear of the rack. -
Seite 21: Grounding
10. Grounding Connecting the amplifier in three phase delta configuration In three-phase configuration where the phases are 120 degrees apart, one can connect three balanced loads in a delta configuration. The connection is made between the phases instead of between the neutral and a phase. Three phase delta configuration 3 phase delta 208V 3 phase Y 120V... -
Seite 22: Product Overview
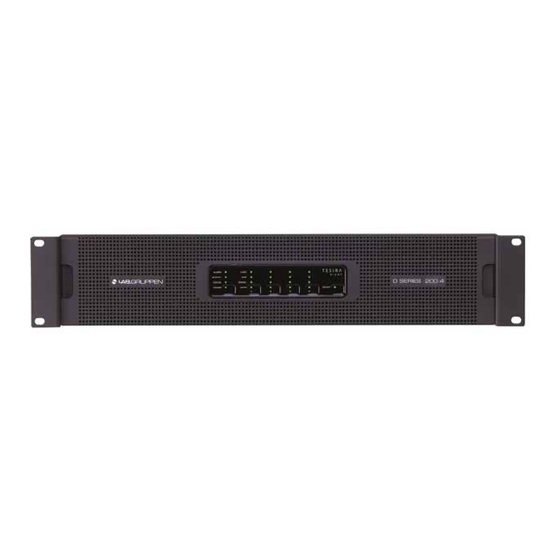
11. Product overview 11. Product overview 11.1. Front panel The front panel is consists of an outer front with air intake and a centered user interface. The user interface has LEDs for monitoring and six recessed touch buttons for control. 1 Rack ears for 19 inch rack mount 2 Exterior front grille (also air intake and dust filter holder) USER INTERFACE... - Seite 23 11. Product overview Table 1 LED/category chart NOTE: See Faults and warnings (pages 21-22) for a detailed description of status, faults and warnings associated with each LED. Green Amber Frame warning/Minor Frame fault/Major Device OK Alarm Tesira fault active Tesira fault active Device active in an active Device is part of an inactive Activity...
-
Seite 24: Rear Panel
11. Product overview 11.2. Rear panel ANALOG OPTION 1 Amplifier Outputs - The amplifier output connectors are sturdy terminal block connectors. See Technical Specifications (pages 23-24) for connector rating. Channels are located from left to right. Each channel has a clearly marked hot (+) and cold (-) terminal. -
Seite 25: Signal Flow And Processing
12. Signal flow and processing 12. Signal flow and processing The table below depicts the audio signal flow for a D Series Tesira device. D Series Tesira Amplifier Load Mute Level Invert AmpGain RPM/ISVPL Monitoring Load Tesira Mute Level Invert AmpGain RPM/ISVPL Monitoring... -
Seite 26: Quick Start Tutorial
13. Quick Start Tutorial 13. Quick Start Tutorial This section will describe how to get started with associated software and set up a basic system for operation. 13.1. Software installation and firmware update 13.1.1. Tesira Software 1. Download Tesira Software from biamp.com: www.biamp.com/products/tesira/downloads.aspx. Locate the Software and Firmware section and download the latest version of Tesira software. -
Seite 27: Network Setup
13. Quick Start Tutorial CAFÉ software 1. Download the latest CAFÉ software from www.labgruppen.com 2. Execute the installer and follow the on-screen instructions. This is a typical software installation where the default settings are acceptable for the vast majority of users. 13.2. -
Seite 28: System Setup
13. Quick Start Tutorial 13.3. System setup The setup guide describes how to get a simple system up and running, connect audio through to the amplifier, and make basic configurations of the amplifier. This guide assumes you have a Tesira Server IO with an analog input card, a D Series amplifier and an AVB switch. - Seite 29 13. Quick Start Tutorial Compile the system 1. Compile your system by hitting the compile button in the standard Bar or select System > Compilation > Compile active partition Assign physical units to the imaginary units in the system design 1.
-
Seite 30: Basic Configuration
13. Quick Start Tutorial 13.4. Basic Configuration In the Tesira software, double click the amplifier block. The D Series configuration window opens. Here you can check the amplifier for any potential faults and warnings and monitor signal status. You can also control STANDBY/ ON state and other amplifier channel functions such as mute, level and invert. -
Seite 31: Faults And Warnings
14. Faults and warnings 14. Faults and warnings Category/Type Name On screen text Description Action ALARM Minor Tesira fault active in the Warning device The Under Voltage limiter is active as the mains supply is approaching the lower Increase mains distribution Under Voltage Limit UVL ACTIVE end of the device´s operational voltage. - Seite 32 14. Faults and warnings Category/Type Name On screen text Description Action Power supply detects mains voltage Mains voltage above Check mains distribution/ MAINS > 270 V above operation voltage. Protective shut Fault 270 V connection down, auto restart attempt Power supply detects mains voltage Mains voltage below Check mains distribution/ MAINS <...
-
Seite 33: Technical Specifications
15. Technical Specifications 15. Technical Specifications D 200:4T/Ta D 120:4T/Ta D 80:4T/Ta General Processing / Network Tesira by Biamp / AVB ® Numbers of amplifier channels Total burst power all channels (share among channels with RPM) 20000 W 12000 W 8000 W Max. - Seite 34 Approvals CE, ETL (ANSI/UL, CSA), PSE, RCM Note 1): Lab.gruppen burst power (1 kHz, 25 ms burst power @ 150 BPM, 12 dB Crest factor) All specifications are subject to change without notice. D SERIES Tesira Quick Start Guide rev 2.0.0...
-
Seite 35: Warranty And Support
Lab.gruppen dealer. If the product fails to perform as specified during the warranty period, Lab.gruppen will undertake to repair, or at its option, replace this product at no charge to its owner, provided the unit is returned undamaged, shipping prepaid, to an authorized service facility or to the factory. -
Seite 36: Factory Service
16. Warranty and support 16.2.2. Factory service In the event a Lab.gruppen product requires factory service, you may contact Lab.gruppen’s service department for return instructions and a Return Authorization number. Please note for product return: 1. Use the original packing. - Seite 37 Notes Notes D SERIES Tesira Quick Start Guide rev 2.0.0...
- Seite 38 Notes Notes D SERIES Tesira Quick Start Guide rev 2.0.0...
- Seite 39 Notes Notes D SERIES Tesira Quick Start Guide rev 2.0.0...
- Seite 40 Lab.gruppen adopts a policy of continuous improvement and product specification is subject to change. RPM, R.SMPS, PFC, CDM, BEL, UVL, CAFÉ, ESP, ISVPL, Iso-Float, Raised Cosine, MESA EQ, LimiterMax and LoadLibrary are trademarks of Lab.gruppen AB. Tesira is a trademark of Biamp Systems. All other trademarks remain the property of their respective owners.