Sony Multiscan GDM-W900 Bedienungsanleitung

Verwandte Anleitungen für Sony Multiscan GDM-W900


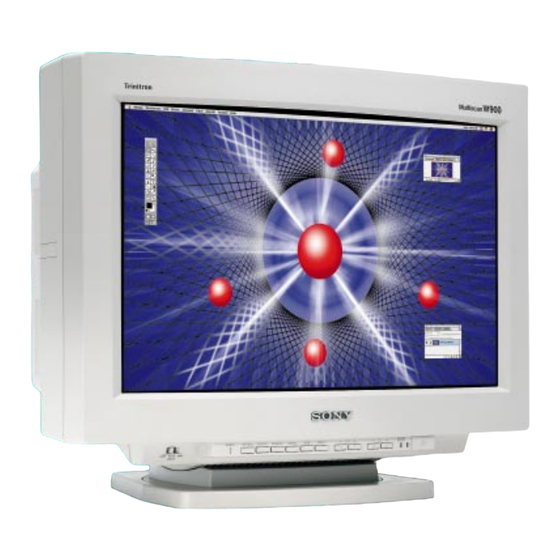
Inhaltszusammenfassung für Sony Multiscan GDM-W900
- Seite 1 3-858-582-13 (1) ® Trinitron Color Graphic Display GDM-W900 Operating Instructions Mode d’emploi Bedienungsanleitung Manual de instrucciones Istruzioni per l’uso ® Multiscan © 1996 by Sony Corporation...
- Seite 2 Dieses Gerät erfüllt bezüglich tieffrequenter (very low frequency) und tiefstfrequenter (extremely low frequency) Strahlung die Vorschriften des „Swedish National Council for Metrology (MPR)“ As an NERGY TAR Partner, Sony vom Dezember 1990 (MPR ll). Corporation has determined that this product meets the NERGY INFORMACIÓN...
-
Seite 3: Inhaltsverzeichnis
Congratulations on your purchase of a Sony Multiscan adjustable color modes give you unprecedented flexibility series monitor. in matching on-screen colors to hard copy printouts. This monitor incorporates over 25 years of Sony experience ® Furthermore, this monitor features digital control with OSD with Trinitron display technology, ensuring excellent (On Screen Display). -
Seite 4: Connections
Connections Connecting to the 5 BNC’s connector Before using this monitor, check that the following items are included in your package: • Monitor (1) • Video signal cable (1) • Power cord (1) • Macintosh adapter (1) • HD15 (Female) –HD15 (Male without the No. 9 pin) adapter (1) to VIDEO IN R/G/B to SYNC IN HD/VD... -
Seite 5: Preset Modes
For the customers using the Windows95 INPUT Even if you select SONY for the maker on the device select screen, To input the signal from the computer connected to the model name (GDM-W900) may not appear. In this case, select the 5 BNC’s connector... -
Seite 6: Functions Of Controls
Functions of Controls See the given pages for further description. Front 0 > (contrast) −/+ (?//) buttons (pages 8 – 1 INPUT switch (page 5) Selects the input signal. Adjust the contrast. 2 RESET button (page 12) Act as the −/+ (?//) buttons when adjusting other Resets the adjustment to the factory preset levels. - Seite 7 Rear OPTION OSD OPT I ON (HD15) (BNC) L ANGUAGE I TA OSD POS I T I ON : R I GHT BOTTOM OSD MENU NORMAL EXPERT LOCK UNLOCK LOCK I NPUT : BNC 84.4kHz / 72Hz SELECT 1 AC IN connector 1 LANGUAGE (page 8) Plug in an AC power cord.
-
Seite 8: Selecting The Osd Language
Selecting the OSD Language Press the >?// button to move the OSD to the desired position. Japanese, English, French, German, Spanish, or Italian versions of OSD are available. Press the OPTION button. The “OPTION” OSD appears. OPTION The “OPTION” OSD automatically disappears after about 30 seconds. -
Seite 9: Adjustments (Normal Mode)
Adjustments (Normal mode) You can adjust the picture to your preference. Adjusting the picture This monitor has two levels of adjustment mode, normal brightness and expert. Before adjusting The adjustment data becomes the common setting for all • Connect the monitor and the computer, turn them on and input signals received. -
Seite 10: Adjusting The Picture Rotation
Adjustments (Normal mode) For vertical adjustment Adjusting the picture Press the ¨ ./> buttons. centering The adjustment data becomes the individual setting for each input signal received. Press the CENT button..to decrease The “CENTER” OSD appears. >... -
Seite 11: Adjusting The Screen
Convergence Adjusting the pincushion The adjustment data becomes the common setting for all input signals received. The adjustment data becomes the individual setting for each input signal received. Press the >?// button so that the red or blue shadow disappears. “H CONVERGENCE”... -
Seite 12: Adjusting The Color Temperature
Adjustments (Normal mode) Resetting the picture size, position, Adjusting the color moire, and geometry* at the same time temperature When there is no OSD displayed, press and hold the RESET button for one second. The adjustment data becomes the common setting for all The above items of the current input signal are reset to input signals received. -
Seite 13: Adjustments (Expert Mode)
Adjustments (Expert mode) You can adjust more in detail in the expert mode than in the Adjusting the picture normal mode. brightness and contrast Before adjusting • Connect the monitor and the computer, turn them on and The adjustment data becomes the common setting for all feed the signal to the monitor. - Seite 14 Adjustments (Expert mode) Press the ¨ ./> button to select and the > ?// Adjusting the picture button to adjust the parameter. centering and size H PINCUSHION/ H PIN BAL: Corrects the picture distortion of the picture edges. H KEYSTONE: The adjustment data becomes the individual setting for each Corrects the difference of picture size at the top and input signal received.
-
Seite 15: Adjusting The Color
CANCEL MOIRE: The OSD automatically disappears after about 30 seconds. Cancels the moire when ”ON” is selected. To turn off the OSD, press the COLOR button again. The adjustment data becomes the individual setting for To reset all parameters of a particular color each input signal received. -
Seite 16: Control Lock Function
Control Lock Degaussing the Function Screen The control lock function disables all the buttons on the The screen of the monitor is automatically degaussed when front panel except the u (power) and OPTION buttons and the power is turned on (page 3). the INPUT switch. -
Seite 17: Plug & Play
Plug & Play Power Saving Function This monitor complies with the DDC™1, DDC2B and DDC2AB which are the Display Data Channel (DDC) standards of VESA. This monitor is capable of three states of reduced power When a DDC1 host system is connected, the monitor consumption. -
Seite 18: Input Signal Warning Function
Input Signal Use of the Tilt- Warning Function Swivel If there is something wrong with the input signal, one of the With the tilt-swivel, this unit can be adjusted to be viewed following messages appears when you turn the monitor off at the desired angle within 310°... -
Seite 19: Troubleshooting
If using a Windows95 • When you cannot find “GDM-W900” among the Sony monitors on the Windows95 device select screen, select the DDC standard monitor. Picture is scrambled • Check your graphic board manual for proper monitor setting. - Seite 20 Troubleshooting Symptom Check these items • Adjust the centering or size (pages 10, 14). Screen image is not centered • Some video modes do not fill the screen to the edge of the monitor. There is no single or sized properly answer to solve the problem.
- Seite 21 Congratulations on your purchase of a Sony Multiscan adjustable color modes give you unprecedented flexibility series monitor. in matching on-screen colors to hard copy printouts. This monitor incorporates over 25 years of Sony experience ® Furthermore, this monitor features digital control with OSD with Trinitron display technology, ensuring excellent (On Screen Display).
-
Seite 22: Connections
Connections Connecting to the 5 BNC’s connector Before using this monitor, check that the following items are included in your package: • Monitor (1) • Video signal cable (1) • Power cord (1) • Macintosh adapter (1) • HD15 (Female) –HD15 (Male without the No. 9 pin) adapter (1) to VIDEO IN R/G/B to SYNC IN HD/VD... -
Seite 23: Preset Modes
For the customers using the Windows95 INPUT Even if you select SONY for the maker on the device select screen, To input the signal from the computer connected to the model name (GDM-W900) may not appear. In this case, select the 5 BNC’s connector... -
Seite 24: Functions Of Controls
Functions of Controls See the given pages for further description. Front 0 > (contrast) −/+ (?//) buttons (pages 8 – 1 INPUT switch (page 5) Selects the input signal. Adjust the contrast. 2 RESET button (page 12) Act as the −/+ (?//) buttons when adjusting other Resets the adjustment to the factory preset levels. - Seite 25 Rear OPTION OSD OPT I ON (HD15) (BNC) L ANGUAGE I TA OSD POS I T I ON : R I GHT BOTTOM OSD MENU NORMAL EXPERT LOCK UNLOCK LOCK I NPUT : BNC 84.4kHz / 72Hz SELECT 1 AC IN connector 1 LANGUAGE (page 8) Plug in an AC power cord.
-
Seite 26: Selecting The Osd Language
Selecting the OSD Language Press the >?// button to move the OSD to the desired position. Japanese, English, French, German, Spanish, or Italian versions of OSD are available. Press the OPTION button. The “OPTION” OSD appears. OPTION The “OPTION” OSD automatically disappears after about 30 seconds. -
Seite 27: Adjustments (Normal Mode)
Adjustments (Normal mode) You can adjust the picture to your preference. Adjusting the picture This monitor has two levels of adjustment mode, normal brightness and expert. Before adjusting The adjustment data becomes the common setting for all • Connect the monitor and the computer, turn them on and input signals received. - Seite 28 Adjustments (Normal mode) For vertical adjustment Adjusting the picture Press the ¨ ./> buttons. centering The adjustment data becomes the individual setting for each input signal received. Press the CENT button..to decrease The “CENTER” OSD appears. >...
-
Seite 29: Adjusting The Screen
Convergence Adjusting the pincushion The adjustment data becomes the common setting for all input signals received. The adjustment data becomes the individual setting for each input signal received. Press the >?// button so that the red or blue shadow disappears. “H CONVERGENCE”... - Seite 30 Adjustments (Normal mode) Resetting the picture size, position, Adjusting the color moire, and geometry* at the same time temperature When there is no OSD displayed, press and hold the RESET button for one second. The adjustment data becomes the common setting for all The above items of the current input signal are reset to input signals received.
-
Seite 31: Adjustments (Expert Mode)
Adjustments (Expert mode) You can adjust more in detail in the expert mode than in the Adjusting the picture normal mode. brightness and contrast Before adjusting • Connect the monitor and the computer, turn them on and The adjustment data becomes the common setting for all feed the signal to the monitor. - Seite 32 Adjustments (Expert mode) Press the ¨ ./> button to select and the > ?// Adjusting the picture button to adjust the parameter. centering and size H PINCUSHION/ H PIN BAL: Corrects the picture distortion of the picture edges. H KEYSTONE: The adjustment data becomes the individual setting for each Corrects the difference of picture size at the top and input signal received.
- Seite 33 CANCEL MOIRE: The OSD automatically disappears after about 30 seconds. Cancels the moire when ”ON” is selected. To turn off the OSD, press the COLOR button again. The adjustment data becomes the individual setting for To reset all parameters of a particular color each input signal received.
-
Seite 34: Control Lock Function
Control Lock Degaussing the Function Screen The control lock function disables all the buttons on the The screen of the monitor is automatically degaussed when front panel except the u (power) and OPTION buttons and the power is turned on (page 3). the INPUT switch. -
Seite 35: Plug & Play
Plug & Play Power Saving Function This monitor complies with the DDC™1, DDC2B and DDC2AB which are the Display Data Channel (DDC) standards of VESA. This monitor is capable of three states of reduced power When a DDC1 host system is connected, the monitor consumption. -
Seite 36: Input Signal Warning Function
Input Signal Use of the Tilt- Warning Function Swivel If there is something wrong with the input signal, one of the With the tilt-swivel, this unit can be adjusted to be viewed following messages appears when you turn the monitor off at the desired angle within 310°... -
Seite 37: Troubleshooting
If using a Windows95 • When you cannot find “GDM-W900” among the Sony monitors on the Windows95 device select screen, select the DDC standard monitor. Picture is scrambled • Check your graphic board manual for proper monitor setting. - Seite 38 Troubleshooting Symptom Check these items • Adjust the centering or size (pages 10, 14). Screen image is not centered • Some video modes do not fill the screen to the edge of the monitor. There is no single or sized properly answer to solve the problem.
- Seite 39 Multiscan Sony ! flexibilité inégalée en matière de correspondance des Ce moniteur intègre plus de 25 années d’expérience de Sony couleurs d’affichage et d’impression. ® en matière de technologie d’affichage Trinitron , qui vous Ce moniteur est par ailleurs doté...
-
Seite 40: Raccordement
Raccordement Avant d’utiliser ce moniteur, vérifiez si les éléments Raccordement du connecteur 5 BNC suivants sont contenus dans l’emballage : • Moniteur (1) • Câble de signal vidéo (1) • Cordon d’alimentation (1) • Adaptateur Macintosh • Adaptateur HD15 (femelle) – HD15 (mâle sans la broche n°9) (1) vers SYNC IN HD/VD vers VIDEO IN R/G/B... -
Seite 41: Modes Par Défaut
Réglez le commutateur INPUT sur BNC. Pour les utilisateurs de Windows95 Pour entrer le signal de l’ordinateur raccordé au Même si vous sélectionnez SONY pour le fabricant sur l’écran de connecteur HD15 . sélection de l’appareil, il est possible que le nom du modèle (GDM- Réglez le commutateur INPUT sur HD15. -
Seite 42: Fonction Des Commandes
Fonction des commandes Reportez-vous aux pages indiquées pour une description plus précise. Avant 0 Touches > (contraste) −/+ (?//) 1 Commutateur INPUT (page 5) (pages 8 – 16) Pour sélectionner le signal d’entrée. Pour régler le contraste de l’image. 2 Touche RESET (page 12) Pour ramener les réglages aux valeurs par défaut. - Seite 43 Arrière OSD OPTION OPT I ON L ANGUAGE (HD15) (BNC) I TA POS I T I ON OSD : BAS DRO I T MENU OSD NORMAL EXPERT VERROU DEVERR VERROU ENTREE : BNC 84.4kHz / 72Hz SELECT 1 Connecteur AC IN 1 LANGUAGE (page 8) Branchement du cordon d’alimentation.
-
Seite 44: Sélection De La Langue D'affichage Des Menus
Sélection de la langue d’affichage des menus Appuyez sur la touche ¨ ./> pour sélectionner “POSITION OSD”. Vous avez le choix entre l’allemand, l’anglais, l’espagnol, le OPT I ON français, l’italien ou le japonais pour l’affichage des menus. L ANGUAGE I TA POS I T I ON OSD : BAS DRO I T... -
Seite 45: Réglages (Mode Normal)
Réglages (mode Normal) Vous pouvez régler l’image suivant vos préférences. Réglage de la luminosité de Ce moniteur comporte deux niveaux de réglage, normal et l’image expert. Avant le réglage Les données de réglage deviennent le réglage commun à • Raccordez le moniteur et l’ordinateur, mettez-les sous tous les signaux d’entrée reçus. -
Seite 46: Réglage De La Rotation De L'image
Réglages (mode Normal) Pour le réglage vertical Réglage du centrage de l’image Appuyez sur les touches ¨ ./> . Les données de réglage deviennent le réglage individuel pour chaque signal d’entrée reçu. Appuyez sur la touche CENT. Le menu “CENTRAGE” apparaît. CENT CENTRAGE . -
Seite 47: Réglage De L'écran
Appuyez sur la touche ¨ ./> pour sélectionner le Le menu disparaît automatiquement au bout d’environ 10 secondes. Pour désactiver le menu, appuyez à nouveau sur paramètre à régler. la touche GEOM. Le paramètre sélectionné devient jaune. Pour réinitialiser les réglages, appuyez sur la touche RESET Le menu disparaît automatiquement au bout d’environ 30 lorsque le menu est affiché. -
Seite 48: Réglage De La Température De Couleur
Réglages (mode Normal) Appuyez sur les touches > ?// pour sélectionner Alignement la température de couleur. Procédez à ce réglage lorsque les couleurs ne sont pas Les réglages par défaut sont : uniformes sous l’effet du magnétisme terrestre. 5000K, 6500K, 9300K Les données de réglage deviennent le réglage commun à... -
Seite 49: Réglages (Mode Expert)
Réglages (mode Expert) Le mode expert vous permet d’effectuer des réglages plus Réglage de la luminosité et précis qu’en mode normal. du contraste de l’image Avant le réglage • Raccordez le moniteur et l’ordinateur, mettez-les sous Les données de réglage deviennent le réglage commun à tension et envoyez le signal vers le moniteur. - Seite 50 Réglages (mode Expert) Appuyez sur la touche ¨ ./> pour sélectionner le Réglage du centrage et de la paramètre et sur la touche > ?// pour le régler. taille de l’image COUSSIN H/ CORR CYL H: Corrige la distorsion des bords de l’image. TRAPEZE H : Les données de réglage deviennent le réglage individuel Corrige la différence de taille entre le haut et le bas de...
-
Seite 51: Réglage Des Couleurs
Appuyez sur la touche ¨ ./> pour sélectionner le FOCALISATION H : paramètre et sur la touche > ?// pour le régler. Réglage de la mise au point horizontale. Les données de réglage deviennent le réglage commun à VARIABLE : tous les signaux d’entrée reçus. -
Seite 52: Fonction De Verrouillage Des Commandes
Fonction de verrouillage Démagnétisation des commandes L’écran du moniteur est automatiquement démagnétisé à la mise sous tension (page 3). Vous pouvez aussi le démagnétiser manuellement. La fonction de verrouillage des commandes désactive toutes les touches du panneau frontal à l’exception des touches u Appuyez sur la touche SCREEN. -
Seite 53: Plug & Play
Plug & Play Fonction d’économie d’énergie Ce moniteur satisfait aux normes DDC™1, DDC2B et DDC2AB qui sont les normes Display Data Channel (DDC) de VESA. Ce moniteur est doté de trois modes de réduction de la Si un serveur DDC1 est connecté, le moniteur se consommation d’énergie. -
Seite 54: Fonction D'avertissement Du Signal D'entrée
Fonction d’avertissement Utilisation du de signal d’entrée support pivotant S’il y a une anomalie avec le signal d’entrée, le message Le support pivotant permet de régler cet appareil suivant suivant apparaît lorsque vous mettez le moniteur hors et l’angle de vision de votre préférence dans une plage de 310° sous tension ou lorsque vous actionnez le commutateur horizontalement et 20°... -
Seite 55: Dépannage
Si vous utilisez un système et si les microcommutateurs de l’adaptateur sont correctement réglés. Macintosh. • Si vous ne trouvez pas “GDM-W900” parmi les moniteurs Sony dans l’écran de sélection Si vous utilisez Windows95 des appareils de Windows95, sélectionnez le moniteur standard DCC. - Seite 56 Dépannage Symptôme Vérifiez Le blanc n’est pas blanc. • Réglez les couleurs (pages 12, 15). • Vérifiez si les 5 BNC sont dans le bon ordre (depuis le côté du cordon d’alimentation : rouge–vert–bleu–HD–VD). L’image n’est pas centrée • Réglez le centrage ou la taille de l’image (pages 10, 14). correctement ou n’est pas •...
-
Seite 57: Einführung
Multiscan-Technologie kann sich das Gerät auf eine Die Leistungsstärke des Monitors, seine Qualität und die Vielzahl von Videomodi innerhalb eines sehr weiten Unterstützung, die Sie von Sony erwarten können, werden Abtastbereichs einstellen. gewiß auch Sie überzeugen. Darüber hinaus verfügt das Gerät über vier werkseitig Trinitron ®... -
Seite 58: Anschließen Des Monitors
Anschließen des Monitors Bevor Sie mit dem Monitor arbeiten, überprüfen Sie bitte, Verbinden des 5-BNC-Anschlusses ob folgende Teile im Lieferumfang enthalten sind: • Monitor (1) • Videosignalkabel (1) • Netzkabel (1) • Macintosh -Adapter (1) • Adapter HD15 (weiblich) – HD15 (männlich, ohne Stift Nr. -
Seite 59: Voreingestellte Modi
So wählen Sie das Signal des an den HD15-Anschluß Auch wenn Sie auf dem Geräteauswahlbildschirm als Hersteller angeschlossenen Computers aus SONY auswählen, wird der Modellname (GDM-W900) Stellen Sie den Schalter INPUT auf HD15. möglicherweise nicht angezeigt. Wählen Sie in diesem Fall den... -
Seite 60: Lage Und Funktion Der Bedienelemente
Lage und Funktion der Bedienelemente Näheres finden Sie auf den angegebenen Seiten. Vorderseite 0 Tasten > (Kontrast) −/+ (?//) 1 Schalter INPUT (Seite 5) (Seiten 8 – 16) Zum Auswählen des Eingangssignals. Zum Einstellen des Kontrasts. 2 Taste RESET (Seite 12) Zum Zurücksetzen der Werte auf die werkseitigen Darüber hinaus werden auch andere Optionen mit den Tasten −/+ (?//) eingestellt. - Seite 61 Rückseite Bildschirmanzeige OPTION OPT I ON (HD15) (BNC) L ANGUAGE I TA POS I T I ON UNTEN RECHTS OSD MENÜS NORMAL EXPERT SPERREN FRE I GB SPERREN E I NGANG : BNC 84.4kHz / 72Hz WAHLEN E I NST 1 Netzeingang AC IN 1 LANGUAGE (Seite 8) Zum Anschließen des Netzkabels.
-
Seite 62: Auswählen Der Sprache Für Die Bildschirmanzeige
Auswählen der Sprache für die Bildschirmanzeige Wählen Sie mit der Taste ¨ ./> die Option “POSITION” aus. Für die Bildschirmanzeigen stehen die Sprachen Japanisch, OPT I ON L ANGUAGE ENG FRA Englisch, Französisch, Deutsch, Spanisch oder Italienisch I TA zur Verfügung. POS I T I ON UNTEN RECHTS OSD MENÜS... -
Seite 63: Einstellungen (Normalmodus)
Einstellungen (Normalmodus) Sie können das Bild auf dem Monitor ganz nach Ihren Einstellen der Bildhelligkeit Wünschen einstellen. Dieser Monitor bietet zwei Einstellmodi, den normalen Modus und den Expertenmodus. Der eingestellte Wert gilt für alle Eingangssignale. Drücken Sie die Taste ¨ (Helligkeit) ./>. Vorbereitungen Die Bildschirmanzeige “HELLIGKEIT/KONTRAST”... -
Seite 64: Einstellen Der Bildzentrierung
Einstellungen (Normalmodus) Zum Einstellen der Bildhöhe Einstellen der Bildzentrierung Drücken Sie die Tasten ¨ ./>. Der eingestellte Wert gilt nur für das gerade eingespeiste Eingangssignal. Drücken Sie die Taste CENT. Die Bildschirmanzeige “BILDLAGE” erscheint. CENT B I LDLAGE Mit . stellen Sie das Bild niedriger ein. Mit >... -
Seite 65: Korrigieren Der Kissenverzeichnung
Die Bildschirmanzeige wird nach etwa 10 Sekunden Einstellen der Bildqualität automatisch ausgeblendet. Sie können die Bildschirmanzeige jedoch auch ausblenden, indem Sie die Taste GEOM erneut drücken. Drücken Sie die Taste SCREEN. Die Bildschirmanzeige “BILD” erscheint. Drücken Sie zum Zurücksetzen des Wertes die Taste RESET, solange die Bildschirmanzeige zu sehen ist. -
Seite 66: Zurücksetzen Der Werte Auf Die Werkseitigen Einstellungen
Einstellungen (Normalmodus) Wählen Sie mit der Taste > ?// die Farbreinheit Farbtemperatur aus. Wenn die Farben aufgrund des Erdmagnetismus nicht Die werkseitigen Einstellungen sind: gleichmäßig sind, muß die Farbreinheit korrigiert werden. 5000K, 6500K, 9300K Der eingestellte Wert gilt für alle Eingangssignale. Entmagnetisieren Sie den Bildschirm. -
Seite 67: Einstellungen (Expertenmodus)
Einstellungen (Expertenmodus) Im Expertenmodus können Sie detailliertere Einstellungen Einstellen von Bildhelligkeit als im normalen Modus vornehmen. und Kontrast Vorbereitungen • Verbinden Sie den Monitor und den Computer, schalten Der eingestellte Wert gilt für alle Eingangssignale. Sie sie ein, und speisen Sie ein Signal in den Monitor ein. •... -
Seite 68: Einstellen Der Bildzentrierung Und Bildgröße
Einstellungen (Expertenmodus) Wählen Sie mit der Taste ¨ ./> den Parameter aus, Einstellen der Bildzentrierung und stellen Sie ihn mit der Taste > ?// ein. und Bildgröße H KISSEN/ H KISSEN BAL: Korrigiert die Bildverzerrung an den Bildrändern. H TRAPEZ: Der eingestellte Wert gilt nur für das gerade eingespeiste Korrigiert die unterschiedliche Bildgröße am oberen und Eingangssignal. -
Seite 69: Einstellen Der Farbe
H FOKUS: Wählen Sie mit der Taste ¨ ./> den Parameter aus, Zum Einstellen des horizontalen Brennpunkts. und stellen Sie ihn mit der Taste > ?// ein. Der eingestellte Wert gilt für alle Eingangssignale. VARIABEL: Zum Einstellen der in Schritt 2 gewählten Farbe auf die MOIREKORREKTUR: gewünschte Farbtemperatur. -
Seite 70: Tastensperrfunktion
Tastensperrfunktion Entmagnetisierung Der Monitorbildschirm wird automatisch entmagnetisiert, Mit der Tastensperrfunktion können Sie alle wenn das Gerät eingeschaltet wird (Seite 3). Bedienelemente an der Vorderseite mit Ausnahme des Sie können ihn aber auch manuell entmagnetisieren. Netzschalters u, der Taste OPTION und des Schalters INPUT sperren. -
Seite 71: Plug And Play
Energiesparfunktion Plug and Play Dieser Monitor ist mit einer Energiesparfunktion Dieser Monitor entspricht den DDC™-Standards (DDC = ausgestattet, die den Stromverbrauch des Geräts in drei Display Data Channel) DDC1, DDC2B und DDC2AB der Stufen senkt. Wenn das Gerät erkennt, daß die Videosignale VESA. -
Seite 72: Warnfunktion Für Eingangssignal
Warnfunktion für Der dreh- und Eingangssignal neigbare Ständer Wenn mit dem Eingangssignal etwas nicht in Ordnung ist, Mit der dreh- und neigbaren Ständer können Sie den erscheint folgende Meldung, wenn Sie den Monitor aus- Monitor so einstellen, wie es Ihnen angenehm ist. Dabei und einschalten oder wenn Sie den Schalter INPUT können Sie ihn horizontal um bis zu 310°... -
Seite 73: Störungsbehebung
Dip-Schalter des Adapters korrekt eingestellt sein. System: Bei einem Windows95- • Wenn Sie “GDM-W900” unter den Sony-Monitoren im Windows95-Gerätemenü nicht finden können, wählen Sie den DDC-Standardmonitor. System: • Schlagen Sie in der Anleitung zur Grafikkarte die korrekte Monitoreinstellung nach. - Seite 74 Störungsbehebung Symptom Überprüfen Sie bitte folgendes: Bildschirmanzeige nicht • Stellen Sie die Zentrierung bzw. die Bildgröße ein (Seiten 10, 14). zentriert oder Bildgröße • Bei bestimmten Videomodi füllt die Anzeige nicht den gesamten Bildschirm. Für dieses nicht korrekt Problem gibt es keine einfache Lösung. Das Problem tritt in der Regel eher bei hohen Bildauffrischungsraten auf.
- Seite 75 En conjunto, de multiexploración digital permite a la unidad proporciona unas prestaciones increíbles junto con la sincronizarse con cualquier modo de vídeo dentro de su calidad y asistencia técnica que puede esperar de Sony. amplio rango de exploración. ® Trinitron es una marca registrada de Sony Corporation.
-
Seite 76: Conexiones
Conexiones Antes de utilizar este monitor, asegúrese de que en el Conexión al conector 5 BNC paquete se incluyen los siguientes artículos: • Monitor (1) • Cable de señal de vídeo (1) • Cable de alimentación (1) • Adaptador Macintosh •... -
Seite 77: Modos Predefinidos
5 BNC Ponga el interruptor INPUT en BNC. Para utilizar Windows95 Incluso si selecciona SONY como nombre del fabricante en la Para emplear la señal de entrada del ordenador pantalla de selección de dispositivos, el nombre del modelo (GDM- enchufado al conector HD15 W900) puede no aparecer. -
Seite 78: Funciones De Los Controles
Funciones de los controles Consulte las páginas correspondientes para obtener descripciones más detalladas. Parte frontal 0 Botones > (contraste) −/+ (?//)(páginas 1 Interruptor INPUT (página 5) 8 –16) Selecciona la señal de entrada. Ajusta el contraste. 2 Botón RESET (página 12) Recupera los niveles predefinidos de fábrica. - Seite 79 Parte posterior OSD OPCION OPC I ON L ANGUAGE (HD15) (BNC) I TA POS I C MENU : I NF I ZQ MENU OSD NORMAL AVZDO BLOQUEO DESBLO BLOQUEO ENTRADA : BNC 84.4kHz / 72Hz SELEC CONF 1 Conector AC IN 1 LANGUAGE (página 8) Permite enchufar un cable de alimentación CA.
-
Seite 80: Selección Del Idioma De Osd
Selección del idioma de OSD Pulse el botón > ?// para mover la indicación en pantalla a la posición apropiada. Existen versiones de la indicación en pantalla en japonés, inglés, francés, alemán, español e italiano. Pulse el botón OPTION. Aparece la indicación en pantalla “OPCION”. OPTION La indicación “OPCION”... -
Seite 81: Ajustes (Modo Normal)
Ajustes (modo Normal) Puede ajustar la imagen según sus preferencias. Ajuste del brillo de la imagen Este monitor tiene dos niveles de modo de ajuste: normal y experto. Los datos de ajuste se convierten en el ajuste común de Antes de realizar ajustes todas las señales de entrada recibidas. - Seite 82 Ajustes (modo Normal) Para el ajuste vertical Ajuste del centrado de la Pulse los botones ¨ ./>. imagen Los datos de ajuste se convierten en el ajuste individual de cada señal de entrada recibida. Pulse el botón CENT. Aparece la indicación “CENTRADO”. .
-
Seite 83: Ajuste De La Pantalla
La indicación desaparece automáticamente después de unos Ajuste de la pantalla 10 segundos. Para borrar la indicación, vuelva a pulsar el botón GEOM. Pulse el botón SCREEN. Para reajustar, pulse el botón RESET mientras la función Aparece la indicación “PANTALLA”. OSD aún esté... -
Seite 84: Ajuste De La Temperatura De Color
Ajustes (modo Normal) Pulse los botones > ?// para seleccionar una Pureza de imagen temperatura de color. Corrija este ajuste si el color no aparece uniforme debido a Los ajustes de fábrica son: la influencia del magnetismo terrestre. 5000K, 6500K, 9300K Los datos de ajuste se convierten en el ajuste común de todas las señales de entrada recibidas. -
Seite 85: Ajustes (Modo Experto)
Ajustes (modo Experto) Puede realizar ajustes en el modo experto, más detallados Ajuste del brillo y contraste que en el modo normal. de la imagen Antes de realizar ajustes • Conecte el monitor y el ordenador, enciéndalos y alimente Los datos de ajuste se convierten en el ajuste común de la señal al monitor. - Seite 86 Ajustes (modo Experto) Pulse el botón ¨ ./> para seleccionar y el botón Ajuste centrado y del tamaño > ?// para ajustar el parámetro. de la imagen DIST COJIN H/ BAL COJIN H: Corrige la distorsión de los bordes de la imagen en el centro.
-
Seite 87: Ajuste Del Color
Pulse el botón ¨ ./> para seleccionar y el botón ENFOQUE H: > ?// para ajustar el parámetro. Ajusta el enfoque horizontal. Los datos de ajuste se convierten en el ajuste común de VARIABLE: todas las señales de entrada recibidas. Ajusta el color seleccionado en el paso 2 a una temperatura de color elegido. -
Seite 88: Función De Bloqueo De Los Controles
Función de bloqueo Desmagnetización de los controles La pantalla del monitor se desmagnetiza de forma automática cuando se enciende la unidad (página 3). También puede hacerlo manualmente. La función de bloqueo de los controles desactiva todos los botones del panel frontal excepto los botones u (encendido) Pulse el botón SCREEN. -
Seite 89: Función Plug & Play
Función Plug & Función de ahorro Play de energía Este monitor cumple DDC™1, DDC2B y DDC2AB, las Este monitor dispone de tres estados de ahorro de energía. normas de Canal de Datos de Visualización (DDC) de Al detectar la ausencia de señales de vídeo y de una o VESA. -
Seite 90: Función De Aviso De La Señal De Entrada
Función de aviso de Uso del soporte la señal de entrada basculante giratorio Si existe algún problema con la señal de entrada, aparece el El soporte basculante giratorio permite ajustar el ángulo de siguiente mensaje al apagar y encender el monitor, o al visualización de la unidad dentro de un rango de 310°... -
Seite 91: Solución De Problemas
Si utiliza un sistema encajados, y que los conmutadores de configuración del adaptador se encuentran bien Macintosh ajustados. • Al no encontrar “GDM-W900” entre los monitores Sony en el menú de dispositivos de Si emplea un Windows95, seleccione el monitor estándar DDC. sistemaWindows95 •... - Seite 92 Solución de problemas Síntoma Compruebe lo siguiente No puede ajustar el monitor • Si la función de bloqueo de los controles está activada, desactívela mediante la indicación con los botones del panel en pantalla OPCION (página 16). frontal De esta forma, podrá ajustar el monitor. El color blanco no parece •...
- Seite 93 Il design avanzato del monitor e la tecnologia digitale comandi. Le prestazioni incredibili di questo monitor Multiscan consentono la sincronizzazione con tutte le addizionate alla qualità e all’assistenza tipici della Sony lo modalità video incluse nella sua ampia gamma di scansione. rendono un prodotto eccezionale.
-
Seite 94: Collegamenti
Collegamenti Prima di utilizzare il monitor, verificare che la confezione Collegamento al connettore dei 5 BNC contenga i seguenti elementi: • Monitor (1) • Cavo del segnale video (1) • Cavo di alimentazione (1) • Adattatore per Macintosh • Adattatore HD15 (femmina) – HD15 (maschio privo del piedino n.9) (1) A SYNC IN HD/VD A VIDEO IN R/G/B... -
Seite 95: Modi Predefiniti
Impostare l’interruttore INPUT su BNC. Per i clienti che utilizzano Windows95 Per introdurre il segnale dal computer collegato al Pur selezionando SONY come marca per lo schermo di selezione connettore HD15 del dispositivo, il nome del modello (GDM-W900) potrebbe non Impostare l’interruttore INPUT su HD15. -
Seite 96: Funzioni Dei Comandi
Funzioni dei comandi Per ulteriori informazioni vedere le pagine indicate fra parentesi. Lato anteriore 0 Tasti > (contrasto ) −/+ (?//) 1 Interruttore INPUT (pag. 5) (pag. 8 – 16) Seleziona il segnale d’ingresso. Per regolare il contrasto. 2 Tasto RESET (pag. 12) Ripristina la regolazione ai valori predefiniti. - Seite 97 Lato posteriore Indicazione a schermo OPZIONI OPZ I ONI (HD15) L ANGUAGE (BNC) I TA POS I Z MENU : BASSO DX MENU NORM AVANZATO BLOCC MENU SBLOCCO BLOCC I NGRESSO : BNC 84.4kHz / 72Hz SELEZ 1 Connettore AC IN 1 LANGUAGE (pag.
-
Seite 98: Selezione Della Lingua Dell'indicazione A Schermo
Selezione della lingua dell’indicazione a schermo Premere il tasto ¨ ./> per selezionare “POSIZ MENU”. Le lingue disponibili per l’indicazione a schermo sono le OPZ I ONI L ANGUAGE seguenti: giapponese, inglese, francese, tedesco, spagnolo o I TA italiano. POS I Z MENU : BASSO DX NORM AVANZATO... -
Seite 99: Regolazioni (Modo Normale)
Regolazioni (Modo normale) L’immagine può essere regolata in funzione delle Regolazione della luminosità preferenze personali. dell’immagine Questo monitor dispone di due modi di regolazione, normale e avanzato. I dati della regolazione diventano l’impostazione comune Prima di eseguire la regolazione per tutti i segnali d’ingresso ricevuti. •... -
Seite 100: Regolazione Della Rotazione Dell'immagine
Regolazioni (Modo normale) Per la regolazione verticale Regolazione della centratura Premere i tasti ¨ ./>. dell’immagine I dati della regolazione diventano l’impostazione individuale per ogni segnale d’ingresso ricevuto. Premere il tasto CENT. Appare l’indicazione a schermo “CENTRATURA”..per ridurre l’immagine >... -
Seite 101: Regolazione Dello Schermo
L’indicazione a schermo scompare automaticamente dopo Regolazione dello schermo circa 10 secondi. Per spegnere l’indicazione a schermo, premere nuovamente il tasto GEOM. Premere il tasto SCREEN. Per azzerare l’impostazione, premere il tasto RESET mentre Appare l’indicazione a schermo “SCHERMO”. l’indicazione a schermo è attivo. La rotazione e la distorsione a cuscino dell’immagine vengono entrambe SCHERMO azzerate. - Seite 102 Regolazioni (Modo normale) Premere i tasti > ?// per selezionare una Atterraggio temperatura di colore. Correggere questo parametro quando il colore I valori predefiniti sono i seguenti: dell’immagine non è uniforme, a causa del magnetismo 5000K, 6500K, 9300K terrestre. I dati della regolazione diventano l’impostazione comune Regolazione della temperatura di colore per tutti i segnali d’ingresso ricevuti.
-
Seite 103: Regolazioni (Modo Avanzato)
Regolazioni (Modo avanzato) Il modo di regolazione avanzato permette di effettuare delle Regolazione della luminosità e regolazioni più dettagliate rispetto al modo normale. del contrasto dell’immagine Prima di eseguire la regolazione • Collegare il monitor e il computer, accendere entrambi gli I dati della regolazione diventano l’impostazione comune apparecchi e alimentare il segnale video nel monitor. - Seite 104 Regolazioni (Modo avanzato) Premere il tasto ¨ ./> per selezionare e il tasto Regolazione della centratura e della > ?// per regolare il parametro. dimensione dell’immagine DIST CUSC OR/ DIST SFER OR: Corregge la distorsione dell’immagine ai bordi. DIST TRAP OR: I dati della regolazione diventano l’impostazione Corregge la differenza della dimensione dell’immagine individuale per ogni segnale d’ingresso ricevuto.
- Seite 105 Premere il tasto ¨ ./> per selezionare e il tasto FUOCO ORIZZ: > ?// per regolare il parametro. Regola la messa a fuoco orizzontale. I dati della regolazione diventano l’impostazione VARIAZIONI: comune per tutti i segnali d’ingresso ricevuti. Regola il colore selezionato al passo 2 sulla temperatura di colore desiderata.
-
Seite 106: Funzione Di Bloccaggio Dei Comandi
Funzione di bloccaggio Smagnetizzazione dei comandi Lo schermo del monitor si smagnetizza automaticamente non appena viene accesa l’alimentazione (pag. 3). È possibile eseguire la smagnetizzazione anche in modo La funzione di bloccaggio dei comandi disattiva tutti i tasti manuale. del pannello frontale, tranne i tasti u (accensione), OPTION e l’interruttore INPUT. -
Seite 107: Plug & Play
Plug & Play Funzione di risparmio energetico Questo monitor è conforme agli standard DDC™ , DDC2B e DDC2AB (Display Data Channel) del marchio VESA. Quando un sistema ospite DDC1 viene collegato, il monitor Questo monitor può essere impostato su tre diversi modi di si sincronizza con il V. -
Seite 108: Funzione Di Avvertimento Del Segnale D'ingresso
Funzione di Uso del sistema di avvertimento del orientamento segnale d’ingresso Grazie al sistema di orientamento, questo apparecchio può essere regolato per consentire la visione all’inclinazione desiderata, compresa fra 310° in orizzontale e 20° in In caso di problemi per il segnale d’ingresso, appare il verticale. -
Seite 109: Guida Alla Soluzione Dei Problemi
• Qualora non si trovasse nello schermo di selezione di Windows95 il tipo di monitor l’applicazione Windows95 “GDM-W900” fra i monitor Sony, selezionare il modello standard DDC. L’immagine non è chiara • Controllare il manuale della scheda grafica per la corretta impostazione del monitor. - Seite 110 Questo è normale. l’apparecchio A causa delle vibrazioni e delle • Tamburellare leggermente sui lati del scosse subite durante il trasporto, monitor. la griglia di apertura potrebbe occasionalmente andare fuori posto e delle strisce nere potrebbero comparire Sony Corporation Printed in Japan...