Herunterladen Inhalt Inhalt Diese Seite drucken
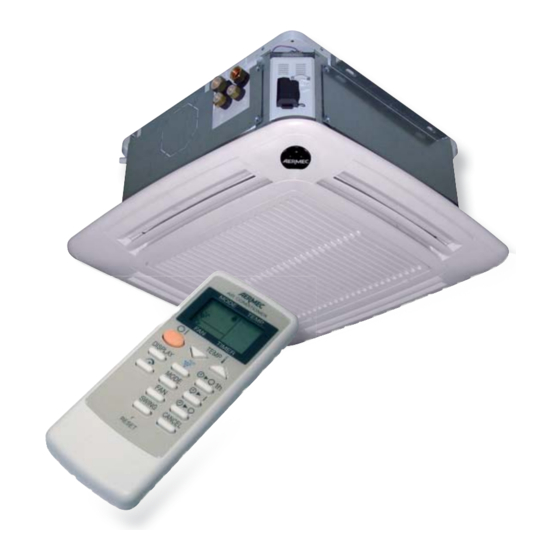
AERMEC GLL10M Installationsanleitung
Vorschau ausblenden Andere Handbücher für GLL10M:

Werbung

Verfügbare Sprachen
  • DE

Verfügbare Sprachen

CORNICE DI MANDATA E D'ASPIRAZIONE CON ALETTE MOTORIZZATE
FLOW AND INTAKE FRAME WITH MOTORISED LOUVERS
CADRE DE SOUFFLAGE ET D'ASPIRATION AVEC AILETTES MOTORISEES
LUFTAUSTRITTS- UND ANSAUGRAHMEN MIT ELEKTRISCHEN KLAPPEN
MARCO DE IMPULSIÓN Y ASPIRACIÓN CON ALETAS MOTORIZADAS
GLL10M
Sostituisce il • Replace • Remplace le n° • Ersetzt • Sustituye a: 4528565_00 / 0903
MANUALE D'INSTALLAZIONE
I N S T A L L A T I O N B O O K L E T
M A N U E L D ' I N S TA L L AT I O N
INSTALLATIONSANLEITUNG
M A N UA L D E I N S TA L AC I Ó N
AGLLMIJ 1007 - 4528565_02

Werbung

Inhaltsverzeichnis
loading

Inhaltszusammenfassung für AERMEC GLL10M

  • Seite 1 CADRE DE SOUFFLAGE ET D'ASPIRATION AVEC AILETTES MOTORISEES LUFTAUSTRITTS- UND ANSAUGRAHMEN MIT ELEKTRISCHEN KLAPPEN MARCO DE IMPULSIÓN Y ASPIRACIÓN CON ALETAS MOTORIZADAS GLL10M AGLLMIJ 1007 - 4528565_02 Sostituisce il • Replace • Remplace le n° • Ersetzt • Sustituye a: 4528565_00 / 0903...
  • Seite 2: Dichiarazione Di Conformità

    - info@aermec.com I presenti prodotti devono essere installati, esclusivamente, in abbina- The above equipments must be used with AERMEC units FCL series only. mento con le unità FCL. Solo rispettando tali abbinamenti è valida la Following declaration applIes to the combinations as above stated only:...
  • Seite 3 TRASPORTO • CARRIAGE • TRANSPORT • TRANSPORT • TRANSPORTE NON bagnare. Tenere al riparo NON calpestare dalla pioggia Do NOT step Do NOT wet NE PAS marcher sur cet emballage CRAINT l’humidité Nicht betreten Vor Nässe schützen NO pisar NO mojar Sovrapponibilità: controllare sull’imballo per conoscere il numero di macchine impilabili Stacking: control the packing to know the number of machines that can be stacked Empilement: vérifier sur l’emballage pour connaître le nombre d’appareils pouvant être empilés...
  • Seite 4: Inhaltsverzeichnis

    INDICE • CONTENTS • INDEX • INHALTSVERZEICHN • INDICE Osservazioni Installazione Manutenzione • Uso e funzionamento Dip Switch Dati dimensionali Installazione e sostituzione del filtro aria Remarks Unit installation Maintenance information • Operation Dip Switch Dimensions Installation and replacement of the air filter Observation Installation de l’unité...
  • Seite 5: Osservazioni

    Area After-Sales Service as soon as possible. coils and their accessories must only be performed by persons AERMEC S.p.A. declines all responsibility for any damage due to with technical-professional requisites regarding installation, tran- improper use of the machine, partial or hasty reading of the infor- sformation, extension and maintenance of plants and who can mation contained in this manual.
  • Seite 6: Installazione

    - Appendere la cornice ai due ganci di sostegno, fare la guarnizione fornita a corredo. attenzione alla posizione di montaggio, l'angolo della cornice il vetrino con il logo AERMEC deve coincidere con l'angolo della scatola elettrica dell'unità FCL.
  • Seite 7: Manutenzione • Uso E Funzionamento

    MANUTENZIONE - La manutenzione ordinaria è ridotta alla pulizia periodica del filtro dell’aria, sarà quindi necessario estrarlo dall’unità per poi rimontarlo dopo la pulitura per aspirazione. Pericolo: nel caso fosse necessario accedere all’unità, prima interrompere l’alimentazione elettrica. Si consiglia una apertura di 20° nel funzionamento in riscaldamento e di 10° nel funzionamento in raffrescamento, queste posizioni sono indicate con due linee in rilievo sulle alette (vedi figure).
  • Seite 8: Dip Switch

    IMPOSTAZIONI DIP-SWITCH Togliere tensione all’unità. Da eseguire in fase di installazione solo da personale specializzato. SW2 contiene impostazioni che non devono essere modificate (nella tabella sono riportate le impostazioni di default). Agendo sui Dip-Switch dei SW1 otterremo le seguenti funzionalità: SW 2 SW 1 Dip 1 (Default OFF)
  • Seite 9: Air Filter

    - Hang the frame on the two support hooks, pay attention to the assembly position, the corner of the frame with the AERMEC logo holder must coincide with the corner of the FCL unit electric box. - WARNING: fix the safety cable to the frame.
  • Seite 10: Maintenance Information • Operation

    MAINTENANCE - Routine maintenance is reduced to the periodical cleaning of the air filter. It must be extracted from the unit and then re- mounted after it has been cleaned using a suction device. Danger: interrupt the electric power supply if the unit must be accessed. An opening of 20°...
  • Seite 11: Dip Switch

    DIP SWITCH CONFIGURATION Turn off the power to the unit. To be performed in the installation phase, only by expert staff. SW2 contains settings that must not be modified (the table states default settings). By acting on the Dip-Switches of SW1 the following functionalities are obtained: SW 2 SW 1 Dip 1 (Default OFF)
  • Seite 12: Filtre A Air

    En cas d'installation à proximité d'un mur, il est possible de attention à la position de montage, l'angle du cadre, le fermer la bouche de soufflage correspondante à l'aide du verre avec le logo AERMEC doivent correspondre avec joint fourni.
  • Seite 13: Maintenance • Fonctionnement

    MAINTENANCE - La maintenance ordinaire se réduit au nettoyage périodique du filtre à air, il faudra par conséquent le retirer de l'unité pour ensuite le remonter après le nettoyage par aspiration. Danger: s'il fallait accéder à l'unité, couper d'abord l'alimentation électrique. UTILISATION Nous conseillons une ouverture de 20º...
  • Seite 14: Dip Switch

    CONFIGURATIONS COMMUTATEURS DIP Couper le courant à l'unité. A effectuer au cours de l'installation uniquement par du personnel spécialisé. SW2 contient des configurations qui ne doivent pas être modifiées (le tableau reprend les configurations par défaut). Agir sur les Commutateurs Dip des SW1 pour obtenir les fonctions suivantes: SW 2 SW 1 Dip 1 (Par défaut OFF)
  • Seite 15: Luftfilter

    - Rahmen an den beiden Haltehaken anhängen, auf die Montageposition achten, die Ecke des Rahmens mit dem • INSTALLATION IN WANDNÄHE AERMEC-Logo muss mit der Ecke des Schaltkastens der Bei Installation in der Nähe einer Wand kann die entspre- FCL-Einheit übereinstimmen.
  • Seite 16: Wartung • Betrieb

    WARTUNG - Die ordentliche Wartung beschränkt sich auf die regelmäßige Reinigung des Luftfilters, daher muss dieser aus der Einheit entnommen und nach der Reinigung durch Absaugung wieder eingesetzt werden. Gefahr: Vor dem Öffnen des Gerätegehäuses Stromversorgung unterbrechen. GEBRAUCH Es wird eine Öffnung von 20° bei Heizbetrieb und 10° bei Kühlbetrieb empfohlen, diese Positionen sind durch zwei Relieflinien an den Lüfterklappen angegeben (siehe Abbildungen).
  • Seite 17: Dip-Schalter-Einstellungen

    DIP-SCHALTER-EINSTELLUNGEN Die Einheit von der Stromversorgung trennen. Nur durch Fachpersonal während der Installation auszuführen. SW2 enthält Einstellungen, die nicht verändert werden dürfen (in der Tabelle sind die Standardeinstellungen aufgeführt). Durch Einstellung der Dip-Schalter von SW1 erhalten wir folgende Funktionen: SW 2 SW 1 Dip 1 (Standard OFF) Dip 1 (Standard OFF)
  • Seite 18: Filtro Del Aire

    ángulo del marco rar la respectiva boca de impulsión con la empaquetadura del vidrio con el logotipo de AERMEC debe coincidir con suministrada. el ángulo de la caja eléctrica de la unidad FCL.
  • Seite 19: Mantenimiento • Funcionamiento

    MANTENIMIENTO - El mantenimiento ordinario se reduce a la limpieza periódica del filtro del aire; por tanto es necesario extraerlo de la uni- dad y montarlo sucesivamente tras la limpieza por aspiración. Peligro: si es necesario acceder a la unidad, interrumpir antes la alimentación eléctrica. Se recomienda una apertura de 20°...
  • Seite 20: Dip Switch

    PROGRAMACIONES DIP SWITCH Desconectar la tensión de la unidad. Deben ser llevadas a cabo en la fase de instalación exclusivamente por personal especializado. SW2 contiene programaciones que no deben modificarse (en la tabla se indican las programaciones por defecto). Los Dip-Switch de los SW1 permiten obtener las siguientes funcionalidades: SW 2 SW 1 Dip 1 (Default OFF)
  • Seite 21: Dati Dimensionali

    DATI DIMENSIONALI • DIMENSIONS • DONNÉES DES LES DIMENSIONS • ABMESSUNGEN DATOS DIMENSIONALES [mm] GLL10M...
  • Seite 22 GLL10M 230VAC 230VAC...
  • Seite 26: Installazione E Sostituzione Del Filtro Aria

    PERICOLO: Togliere tensione prima d’iniziare le operazioni di pulizia del filtro e/o dell’unità. DANGER: Switch off power supply before cleaning filter and/or unit. DANGER: Couper la tension avant de commencer les opérations de nettoyage du filtre et/ou de l'unité. GEFAHR: Vor der Reinigung des Filters und/oder des Gerätes die Strom versorgung abschalten. PELIGRO: Quitar la tensión antes de iniciar las operaciones de limpieza del filtro o de la unidad.
  • Seite 28 AERMEC S.p.A. si riserva la facoltà di apportare in qualsiasi momento tutte le modifiche ritenute necessarie per il miglioramento del prodotto. Les données mentionnées dans ce manuel ne constituent aucun engagement de notre part. Aermec S.p.A. se réserve le droit de modifier à tous moments les données considérées nécessaires à...
Inhaltsverzeichnis