
Verwandte Anleitungen für Midland STREET GUARDIAN GPS


Inhaltszusammenfassung für Midland STREET GUARDIAN GPS
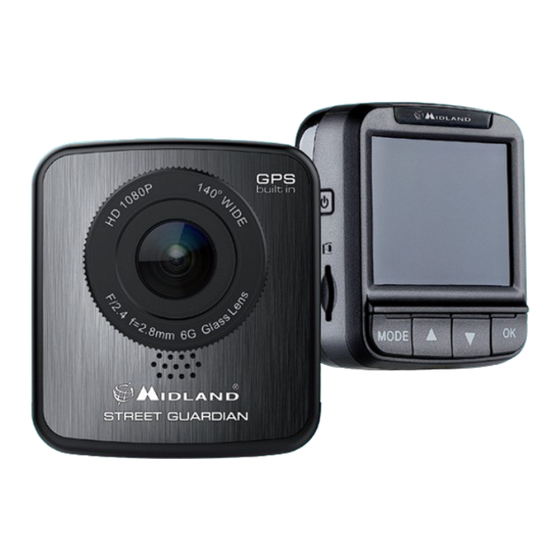
- Seite 1 VIDEOCAMERE DA AUTO CAR CAMCORDERS AUTO-VIDEOKAMERA ISTRUZIONI D’USO USER’S INSTRUCTION BEDIENUNGSANLEITUNG Put Yourself in the Action...
-
Seite 3: Inhaltsverzeichnis
Sommario Informazioni su questa guida Avviso regolamentare CE Note sull’installazione Precauzioni 1. Introduzione 1.1 Caratteristiche 1.2 Contenuto confezione 1.3 Descrizione delle parti 2. Per iniziare 2.1 Inserimento scheda di memoria 2.2 Installazione nei veicoli 2.3 Collegamento all’alimentazione 2.4 Accensione/Spegnimento della telecamera 2.5 Impostazioni iniziali 3. -
Seite 5: Informazioni Su Questa Guida
Informazioni su questa guida Il contenuto del presente documento viene divulgato solo a scopo informativo ed è soggetto a modifiche senza preavviso. Abbiamo fatto il possibile per garantire che il presente manuale sia preciso e completo. Tuttavia, non ci assumiamo alcuna responsabilità per eventuali errori e omissioni che potrebbero essere stati commessi e fatti. -
Seite 6: Precauzioni
› L’esposizione della telecamere a fiamme libere può causare esplosioni. › In base alle leggi locali e alle osservazioni sulla sicurezza dei veicoli, non operare manualmente il dispositivo durante la guida. SOLO PER STREET GUARDIAN GPS: › I risultati del posizionamento del GPS sono indicati solo a titolo di riferimento e non riguardano la condizione di guida effettiva. -
Seite 7: Introduzione
› Videocamera da auto › Cavo di alimentazione 4 m › Supporto a ventosa › Cavo USB › Manuale d’uso › Caricabatteria per auto › Software MGVP - Midland GPS Video Player - (funzione GPS attiva solo su STREET GUARDIAN GPS) -
Seite 8: Descrizione Delle Parti
1.3 Descrizione delle parti 13 14... - Seite 9 N° Descrizione Collegamento supporto ventosa USB – Alimentazione HDMI Reset* Altoparlante Obiettivo grandangolare Microfono N° di serie Pulsante di alimentazione Fessura per schede Spia LED Schermo 2” (MODE) Modalità ▲: Avanti ▼: Indietro Per utilizzare il dispositivo, premere i tasti corrispondenti in base alle icone guida indicate sullo schermo.
-
Seite 10: Per Iniziare
2. Per iniziare 2.1 Inserimento scheda di memoria Inserire la scheda di memoria con i contatti dorati rivolti verso il retro della telecamera. Spingere la scheda di memoria fino a farla scattare in posizione. rimuovere scheda di memoria: Spingere per espellere la scheda di memoria dalla fessura. -
Seite 11: Collegamento All'alimentazione
› Quindi, serrare la manopola per essere certi che il dispositivo sia ben fissato in posizione. 2.3 Collegamento all’alimentazione Per alimentare il dispositivo e caricare la batteria incorporata, utilizzare esclusivamente l’adattatore per auto fornito in dotazione. Collegare un’estremità dell’adattatore per auto al connettore USB della telecamera. -
Seite 12: Accensione/Spegnimento Della Telecamera
2.4 Accensione/Spegnimento della telecamera 2.4.1 Accensione/Spegnimento in automatico Una volta avviato il motore del veicolo, il dispositivo si accende automaticamente avvia registrazione. Quando il motore del veicolo si spegne, la telecamera salva automaticamente registrazione eseguita e si spegne entro 10 secondi. 2.4.2 Accensione/Spegnimento in manuale Per accendere manualmente l’alimentazione, premere il pulsante POWER. -
Seite 13: Utilizzo Del Registratore Per Auto
3. Utilizzo del registratore per auto 3.1 Registrazione di video 3.1.1 Registrazione di video durante la guida Quando il motore del veicolo viene acceso, la telecamera si accende automaticamente ed avvia la registrazione. La registrazione si arresta automaticamente quando il motore viene spento. Oppure, in alternativa, premere il tasto OK per bloccare manualmente la registrazione. -
Seite 14: Schermata Di Registrazione In Stand-By
Nota: Se la funzione ‘Scatola nera’ è attiva e viene rilevato un urto, il dispositivo attiva automaticamente la registrazione di emergenza. Il file di registrazione di emergenza viene creato come nuovo file. Il file è protetto per evitare che venga sovrascritto con la normale registrazione ciclica. Se lo spazio dei file di emergenza supera il 70% della capacità... -
Seite 15: Scatto Di Fotografie
N° Elemento Descrizione Numero registrazione autovettura/identificativo. B1U138 Modalità di commutazione tra Record (Registra) – Photo (Foto) – Setup (Impostazione) Attiva/Disattiva il microfono. ˘ Riproduzione video. Registra dallo schermo in standby. ● Registrazione in corso. 00:04:30 Timer registrazione. Istantanea (foto). Registrazione di emergenza. Arresto registrazione. -
Seite 16: Riproduzione Video E Foto
3.1.6 La schermata Photograph (Fotografia) N° Elemento Descrizione La definizione della foto Numero di foto residue Modalità di commutazione tra Record (Registra) – Photo (Foto) – Setup (Impostazione) Batteria residua Icona scheda ˘ Riproduzione fotografie. Scatto foto 3.2 Riproduzione video e foto In corso di registrazione, premere il tasto OK per interrompere la registrazione. - Seite 17 2. Premere ▼ per entrare nell’elenco di riproduzione video. 3. Premere ▲▼ per cercare il file video desiderato e premere il tasto OK per riprodurre il video. 4. Premere il tasto OK per mettere in pausa la riproduzione. Premerlo ancora una volta per riprendere la riproduzione.
- Seite 18 3.2.3 Cancellazione o protezione dei file Per cancellare o proteggere il(i) file, procedere nel modo che segue: Dalla schermata standby video o standby foto: 1. Premere il tasto ▼ per entrare nell’elenco di fotografie o video. 2. Premere i tasti ▲▼ per selezionare il file. Tenere premuto il tasto Mode per 1 secondo.
-
Seite 19: Regolazione Impostazioni
4. Regolazione impostazioni 4.1 Utilizzo del Menu È possibile configurare il menu delle impostazioni. 1. Impostazione registrazione 2. Configurazione sistema 3. Se la registrazione è in corso, premere il tasto OK per interrompere la registrazione. 4. Premere il tasto MODE per passare al menu. 5. -
Seite 20: Struttura Del Menu
4.2 Struttura del menu Per i dettagli sugli elementi del menu e sulle opzioni disponibili del menu, fare riferimento alla tabella che segue. Opzione menu Descrizione Opzione disponibile Movie Mode Imposta la risoluzione FHD 30fps (modalità film) dei video (1920 x 1080 30fps) HD 30fps (1280 x 720 30fps) HD 60fps... - Seite 21 Opzione menu Descrizione Opzione disponibile Premere i tasti ▲▼ Stamp Speed OFF Quando la velocità (Tempo Stempel) - reale è superiore a per selezionare la solo STREET quella impostata, il velocità GUARDIAN GPS dispositivo nasconderà la velocità e le coordinate Car ID Inserimento del Inserire ID autovettura.
- Seite 22 Opzione menu Descrizione Opzione disponibile USB Function Imposta le funzioni MSDC / PCCAM (Funzione USB) USB tra trasferimento di file e PCCAM. Format SD-Card Formatta scheda SD Sì/No (Formatta scheda SD) Reset Setup Riavvio dal dispositivo Sì/No (Ripristina da effettuare in caso di impostazioni) malfunzionamento Language...
-
Seite 23: Caratteristiche Tecniche
5. Caratteristiche tecniche Elemento Descrizione Sensore immagini Sensore CMOS 1/3” Pixel effettivi 2304 (H) x 1536 (V) Supporto di archiviazione Supporta Micro SDHC, fino a 32GB, classe 6 o superiore Schermo LCD Schermo a colori 2” TFT (230K pixel) Obiettivo 140°... - Seite 24 Index About this Guide CE Regulatory Notice Notes on Installation Caution 1. lntroduction 1.1 Features 1.2 Package Contents 1.3 Product overview 2. Getting Started 2.1 Inserting the Memory Card 2.2 Installing in Vehicles 2.3 Connecting to Power 2.4 Powering the Camcorder On/Off 2.5 Initial Settings 3.
-
Seite 25: About This Guide
About this Guide The content in this document is for information purpose and is subject to change without prior notice. We made every effort to ensure that this User Guide is accurate and complete. However, no liability is assumed for any errors and omissions that may have occurred. -
Seite 26: Caution
Exposing the camcorder to open flames can cause explosion. Due to local laws and vehicles safety considerations, do not manually operate the device while driving. FOR STREET GUARDIAN GPS ONLY: › The results of GPS positioning are only for reference, and should not affect the actual driving situation. -
Seite 27: Lntroduction
› Car Camcorder › 4m power cable › Suction cup › USB cable › User manual › Car Charger › MGVP Software -Midland GPS Video Player – (GPS function activated only in STREET GUARDIAN GPS) -
Seite 28: Product Overview
1.3 Product overview 13 14... - Seite 29 Description Suction cup connection USB – Power HDMI Reset* Speaker Wide angle lens Microphone Serial number Power button Card slot LED indicator 2” screen MODE ▲ Forwards ▼ Backwards To operate the device, press the corresponding buttons according to the icons shown the screen.
-
Seite 30: Getting Started
2. Getting Started 2.1 Inserting the Memory Card Insert the memory card with the gold contacts facing the back of the camcorder. Push the memory card until it clicks into place. To remove the memory card: push to eject the memory card out of the slot. -
Seite 31: Connecting To Power
2.2.2 Adjust the device position › Loose the knob to swivel the device vertically. › Loose the knob to swivel the device horizontally up to 360°. › Then tighten the knob to make sure the device is securely locked in place. 2.3 Connecting to Power Use only the supplied car adapter to power up the device and charge the built-in battery. -
Seite 32: Powering The Camcorder On/Off
2.4 Powering the Camcorder On/Off 2.4.1 Auto Power 0n/0ff Once the vehicle engine is started, the device automatically turns on and starts recording. Once the vehicle engine shuts down, the camcorder automatically saves the recording and turns off the power within 10 seconds. -
Seite 33: Using The Car Recorder
3. Using the Car Recorder 3.1 Recording Videos 3.1.1 Record videos while driving When the vehicle engine starts up, the camcorder automatically turns on and starts recording. Recording will automatically stop when the engine is switched off. Or, press the [OK] button to stop recording manually. Note: On some cars, the recording will continue when the engine is switched off. -
Seite 34: The Recording Screen In Stand-By Mode
Note: If the Black Box function (G-Sensor) is enabled and a collision is detected, the device will automatically trigger the emergency recording. The emergency recording file is created as a new file, which will be protected to avoid being overwritten by normal cyclic recording. If the space of emergency files exceed 70% of the card capacity, the system will erase the oldest emergency file. -
Seite 35: Taking Photographs
Description N° Item Car registration number/identifier. B1U138 Mode to switch between Record – Photo – Setup Microphone activated/deactivated. ˘ Video playback. Records from the stand-by screen. ● Recording now. Recording timer. 00:04:30 Snapshot. Emergency recording. Stop recording. GPS after correct positioning 3.1.5 Taking Photographs You can also use this camcorder to take photos of the current scene. -
Seite 36: Playback Videos And Photos
3.1.6 Photograph Screen N° Item Description Photo definition Remaining photo numbers Mode to switch between Record – Photo – Setup Remaining battery Card icon ˘ Photo playback Take a photo 3.2 Playback Videos and Photos If recording is in progress, press the [OK] button to stop recording. The standby screen is displayed. -
Seite 37: Viewing Photos
3. Press the▲▼ buttons to browse for the desired video file and press the [OK] button to play the video. 4. Press the [OK] button to pause the playback. Press it again to resume. 5. Press ▲▼ to adjust the video volume. 6. - Seite 38 1. Press ▼ button to enter the video or photo list. 2. Press ▲▼ buttons to select the file. Hold the [Mode] button down for 1 second. 3. Press ▲▼ buttons to the desired action and press OK. Item Select Description Delete one Yes/No...
-
Seite 39: Adjusting The Settings
4. Adjusting the Settings 4.1 Using the Menu You can adjust the settings menu. 1. Recording Setting 2. System Setup 3. If the recording is in progress, press the [OK] button to stop recording. 4. Press [MODE] button to switch to menu. 5. -
Seite 40: Menu Tree
4.2 Menu Tree Refer to the below table for details of the menu items and available menu options. Menu option Description Available option Movie Mode Set the video FHD 30fps resolution (1920 x 1080 30fps) HD 30fps (1280 x 720 30fps) HD 60fps (1280 x 720 30fps) Still Image Size... - Seite 41 Menu option Description Available option Press ▲▼ to select Stamp Speed OFF When the real speed - only STREET is higher than the one the speed GUARDIAN GPS set, the device will hide the speed and coordinates Car ID Input your car plate Input car ID number Driver Fatigue...
- Seite 42 Menu option Description Available option Reset Setup Reset of the device Yes/No Language Select Language English, , Pусский, Deutsch, Français, Italiano, Español, Português, Türkçe FW Version Firmware version...
-
Seite 43: Specifications
5. Specifications Item Description Image sensor 1/3” CMOS Sensor Pixels 2304 (H) x 1536 (V) Storage media Supports Micro SDHC, up to 32GB, class 6 or higher LCD screen 2” LCD color TFT (230K pixels) Lens 140° wide angle fixed focus lens F2.4, f= 2.8 mm Focus range 1,5m ~ infinity... - Seite 44 Signature DECLARATION OF CONFORMITY N ° 2014080101 Manufacturer: C.T.E. INTERNATIONAL, Srl Address: VIA SEVARDI, 7 - ZONA INDUSTRIALE MANCASALE - 42124 REGGIO EMILIA STREET GUARDIAN GPS Products Name: Product Type: Car camcorder MIDLAND Brand: The product described above is in conformity with the following Specification...
- Seite 45 Via Sevardi, 7 - 42124 Zona Industriale MANCASALE (Reggio Emilia) STREET GUARDIAN Product name/model: Brand: MIDLAND Product Type: Car camcorder This is to certify that above mentioned product complies with the provision of the Directive of the Council of the European Communities on the approximation of the laws of the Member States relating to electromagnetic compatibility directive 2004/108/EC, with following implementations and modifications.
- Seite 46 Verzeichnis Über diese Anleitung Hinweise zu den gesetzlichen Vorschriften zur CE-Kennzeichnung 1 Hinweise zur Montage Vorsicht 1. Einführung 1.1 Merkmale 1.2 Packungsinhalt 1.3 Produktübersicht 2. Erste Schritte 2.1 Einsetzen der Speicherkarte 2.2 Montage in Fahrzeugen 2.3 Anschluss an die Stromversorgung 2.4 Videokamera ein-/ausschalten 2.5 Grundeinstellungen 3.
-
Seite 47: Über Diese Anleitung
Über diese Anleitung Der Inhalt dieses Dokuments ist zu Informationszwecken vorgesehen und kann ohne Vorankündigung geändert werden. Wir haben alle Anstrengungen unternommen, um sicher zu stellen, dass diese Bedienungsanleitung genau und vollständig ist. Es wird jedoch keine Haftung für Fehler oder Auslassungen übernommen, die möglicherweise aufgetreten sind. -
Seite 48: Vorsicht
Aufgrund der lokalen Gesetzgebung und der Fahrzeugsicherheit darf das Gerät während der Fahrt vom Fahrer nicht manuell bedient werden. NUR FÜR STREET GUARDIAN GPS: › Die Ergebnisse der GPS-Positionierung sind nur zu Informationszwecken vorgesehen und sollten nicht auf die tatsächliche Fahrsituation angewendet werden. -
Seite 49: Einführung
Sie sich bitte umgehend an Ihren Händler. › Auto Videokamera › 4 m langes Netzkabel › Saugnapfhalterung › USB-Kabel › Benutzerhandbuch › Kfz-Ladegerät › MGVP Software -Midland GPS-Video Player - (GPS-Funktion ist nur in STREET GUARDIAN GPS aktiviert) -
Seite 50: Produktübersicht
1.3 Produktübersicht 13 14... - Seite 51 Beschreibung Befestigung via Saugnapfhalterung USB-Stromversorgung HDMI Zurücksetzen* Lautsprecher Weitwinkelobjektiv Mikrofon Seriennummer Netzschalter SD-Kartensteckplatz LED-Anzeige 2-Zoll-Display MODUS ▲ Vorwärts ▼ Rückwärts Um das Gerät zu bedienen, drücken Sie die entsprechenden Tasten gemäß der Symbole am Bildschirm. *Zurücksetzen: Drücken Sie diese Taste im Falle einer Fehlfunktion der Videokamera, um das Gerät zurückzusetzen.
-
Seite 52: Erste Schritte
2. Erste Schritte 2.1 Einsetzen der Speicherkarte Legen Sie die Speicherkarte mit den goldenen Kontakten in Richtung der Rückseite der Videokamera ein. Schieben Sie die Speicherkarte hinein, bis sie mit einem Klicken einrastet. Entfernen der Speicherkarte: Drücken Speicherkarte, um sie aus dem Steckplatz auszuwerfen. -
Seite 53: Anpassen Der Position Des Geräts
2.2.2 Anpassen der Position des Geräts › Lösen Sie den Knopf, um das Gerät vertikal zu drehen. › Lösen Sie den Knopf, um das Gerät horizontal bis zu 360° zu drehen. › Ziehen Sie dann den Knopf an, um sicherzustellen, dass das Gerät sicher verriegelt ist. -
Seite 54: Videokamera Ein-/Ausschalten
2.4 Videokamera ein-/ausschalten 2.4.1 Automatisches Ein-/Ausschalten Sobald der Motor gestartet wird, schaltet sich das Gerät automatisch ein und beginnt mit der Aufnahme. Sobald der Motor des Fahrzeugs abgeschaltet wird, speichert die Videokamera automatisch Aufzeichnung und schaltet die Stromversorgung innerhalb 10 Sekunden ab. 2.4.2 Manuelles Ein-/Ausschalten Drücken Sie den Netzschalter (POWER), um die Stromversorgung manuell einzuschalten. -
Seite 55: Verwenden Der Auto-Videokamera
3. Verwenden der Auto-Videokamera 3.1 Aufzeichnen von Videos 3.1.1 Aufzeichnen von Videos während der Fahrt Sobald der Motor gestartet wird, schaltet sich die Videokamera automatisch ein und beginnt mit der Aufnahme. Die Aufzeichnung wird automatisch beendet, sobald der Motor abgeschaltet wurde. -
Seite 56: Der Aufnahme-Bildschirm Im Stand-By-Modus
Hinweis: Wenn die Black-Box-Funktion (G-Sensor) aktiviert ist und eine Kollision erkannt wird, aktiviert das Gerät automatisch die Notfall-Aufzeichnung. Die Notfall-Aufzeichnung wird in einer neuen Datei erstellt, die geschützt wird, um zu vermeiden, dass sie durch die normale zyklische Aufzeichnung überschrieben wird. Wenn der Speicherplatzbedarf der Notfall-Aufzeichnungen größer als 70 % der Kapazität der Karte wird, löscht das System die älteste Notfall-Datei. -
Seite 57: Fotografieren
Element Beschreibung B1U138 Fahrzeugidentifizierungsnummer. Modus Umschalten zwischen Record (Aufzeichnung), Photo und Setup Mikrofon aktiviert/deaktiviert. ˘ Video abspielen. Aufzeichnung aus dem Stand-by-Bildschirm. ● Aufzeichnung läuft. 00:04:30 Aufzeichnungs-Timer. Schnappschuss. Notfall-Aufzeichnung. Aufzeichnung stoppen. GPS-Funktion nach korrekter Positionierung 3.1.5 Fotografieren Sie können mit dieser Videokamera auch Fotos der aktuellen Szene aufzeichnen. -
Seite 58: Videos Und Fotos Wiedergeben
3.1.6 Foto-Bildschirm Element Beschreibung Fotoauflösung Verbleibende Anzahl Fotos Modus zum Umschalten zwischen Record (Aufzeichnung), Photo und Setup Restkapazität der Batterie Karten-Symbol ˘ Fotos wiedergeben Foto aufnehmen 3.2 Videos und Fotos wiedergeben Drücken Sie die [OK]-Taste während der laufenden Aufzeichnung, um die Aufzeichnung zu beenden. -
Seite 59: Fotos Anzeigen
3. Drücken Sie die Tasten ▲▼, um die gewünschte Videodatei zu suchen und drücken Sie die [OK]-Taste, um das Video wiederzugeben. 4. Drücken Sie die [OK]-Taste, um die Wiedergabe zu beenden. Drücken Sie sie erneut, um die Wiedergabe fortzusetzen. 5. Drücken Sie ▲▼, um die Videolautstärke anzupassen. 6. -
Seite 60: Dateien Löschen Oder Schützen
3.2.3 Dateien löschen oder schützen Zum Löschen oder Schützen einer oder mehrerer Dateien gehen Sie wie folgt vor: Aus dem Video-Stand-by- oder Foto-Stand-by-Fenster: 1. Drücken Sie ▼, um die Video- oder Fotoliste aufzurufen. 2. Drücken Sie die Tasten ▲▼, um die Datei auszuwählen. Halten Sie die [Mode]-Taste für 1 Sekunde gedrückt. -
Seite 61: Einstellungen Anpassen
4. Einstellungen anpassen 4.1 Verwenden des Menüs Sie können das Einstellungsmenü anpassen. 1. Aufzeichnungseinstellungen 2. Systemeinstellungen 3. Drücken Sie die [OK]-Taste während der laufenden Aufnahme, um die Aufnahme zu beenden. 4. Drücken Sie die [MODE]-Taste, um das Menü aufzurufen. 5. Drücken Sie die Tasten ▲▼, um die System- oder Aufnahmeeinstellungen auszuwählen. -
Seite 62: Menübaum
4.2 Menübaum In der nachstehenden Tabelle finden Sie Informationen über die Menüpunkte und die verfügbaren Menüoptionen. Menü-Option Beschreibung Verfügbare Optionen Movie Mode Videoauflösung einstellen FHD 30fps (FHD 30 Bilder pro Sekunde) (1920 x 1080 dpi, 30 Bilder pro Sekunde) HD 30fps (HD 30 Bilder pro Sekunde) (1280 x 720 dpi, 30 Bilder pro Sekunde) -
Seite 63: Menü-Option
Menü-Option Beschreibung Verfügbare Optionen Motion Detection Drücken Sie im Stand- Drücken Sie die Tasten ▲▼, um by-Video-Bildschirm auf OK, um die Erkennung die Empfindlichkeit zu starten auszuwählen: Hoch – Mittel – Niedrig – OFF Drücken Sie ▲▼, um Stamp Speed Wenn die reale OFF - only STREET Geschwindigkeit höher... - Seite 64 Menü-Option Beschreibung Verfügbare Optionen USB Function Stellen Sie die USB- MSDC/PCCAM Funktion zwischen der übertragenden Datei und der PCCAM ein. Format SD-Card SD-Karte formatieren Yes/No Reset Setup Zurücksetzen des Geräts Yes/No Language Sprache wählen English, , Pусский, Deutsch, Français, Italiano, Español, Português, Türkçe FW Version Firmwareversion...
-
Seite 65: Technische Daten
5. Technische Daten Element Beschreibung Bildsensor 1/3-Zoll-CMOS-Sensor Pixel 2304 (H) x 1536 (B) Speichermedium Unterstützt Micro SDHC bis zu 32 GB, Klasse 6 oder höher LCD-Display 2 Zoll LCD-TFT-Farbdisplay (230.000 Pixel) Linse 140° Weitwinkelobjektiv mit fester Brennweite F2.4, f= 2,8 mm Fokusbereich 1,5 m bis unendlich Videoaufzeichnung FHD 30 Bilder pro Sekunde - HD 30 Bilder pro Sekunde - HD 60 Bilder pro Sekunde... - Seite 66 Unterschrift KONFORMITÄTSERKLÄRUNG NR. 2014080101 Hersteller: C.T.E. INTERNATIONAL, Srl Anschrift: VIA SEVARDI, 7 - ZONA INDUSTRIALE MANCASALE - 42124 REGGIO EMILIA STREET GUARDIAN GPS Produktname: Produkttyp: Auto Videokamera MIDLAND Marke: Das oben beschriebene Produkt ist in Übereinstimmung mit den folgenden Spezifikationselementen...
- Seite 67 Via Sevardi, 7 - 42124 Zona Industriale MANCASALE (Reggio Emilia) STREET GUARDIAN Produktname/Modell: Marke: MIDLAND Produkttyp: Auto Videokamera Es wird bestätigt, dass das oben genannte Produkt den Bestimmungen der Richtlinie des Rates der Europäischen Gemeinschaften zur Angleichung der Rechtsvorschriften der Mitgliedstaaten über die elektromagnetische Verträglichkeit, der Richtlinie 2004/108/EG, und den nachfolgenden Änderungen...
- Seite 69 INFORMAZIONE AGLI UTENTI Ai sensi dell’art. 13 del decreto legislativo 25 luglio 2005, n.151 “Attuazione delle Direttive 2002/95/CE, 2002/96/CE e 2003/108/CE, relative alla riduzione dell’uso di sostanze pericolose nelle apparecchiature elettriche ed elettroniche, nonché allo smaltimento dei rifiuti”. Il simbolo del cassonetto barrato riportato sull’apparecchiatura indica che il prodotto alla fine della propria vita utile deve essere raccolto separatamente dagli altri rifiuti.
-
Seite 70: Put Yourself In The Action
Vor Benutzung Bedienungsanleitung beachten. Importado por: ALAN COMMUNICATIONS, SA C/Cobalt, 48 - 08940 Cornellà de Llobregat, Barcelona España www.midland.es Antes de utilizar, lea atentamente el manual de uso. SCOPRI MOLTO DI PIÙ SU SEE MORE ON midlandeurope.com Put Yourself in the Action...