Inhaltsverzeichnis
Werbung
Verfügbare Sprachen
Verfügbare Sprachen
Quicklinks
Werbung
Inhaltsverzeichnis
Fehlerbehebung

Verwandte Anleitungen für Midland TRUCK GUARDIAN WIRELESS


Inhaltszusammenfassung für Midland TRUCK GUARDIAN WIRELESS
- Seite 1 TRUCK GUARDIAN TRUCK GUARDIAN WIRELESS WIRELESS SISTEMA DI SORVEGLIANZA E REGISTRAZIONE PER CAMION DVR AND SURVEILLANCE SYSTEM FOR TRUCKS KAMERASYSTEM FÜR LKWs SISTEMA DE VIGILANCIA Y GRABACIÓN PARA CAMIONES MANUALE D’USO INSTRUCTION GUIDE ANLEITUNG MANUAL DE USUARIO...
- Seite 2 Il manuale multilingua è disponibile sul sito www.midlandeurope.com The multi-language user manual is available on our website www.midlandeurope.com Die mehrsprachige Anleitung finden Sie auf unserer Webseite www.midlandeurope.com El manual multilingüe está disponible en www.midlandeurope.com Le manuel multi langue est disponible sur notre site internet www.midlandeurope.com Το...
-
Seite 3: Informazioni Su Questa Guida
Informazioni su questa guida La presente telecamera è destinata ad un uso non commerciale, nei limiti au- torizzati dalla legislazione Il contenuto del presente documento viene divulgato solo a scopo informa- applicabile. La società NON è responsabile per la perdita di dati/contenuto tivo ed è... -
Seite 4: Contenuto Della Confezione
Caratteristiche Monitor Contenuto della confezione • Wireless a 150m • Monitor Wireless • Alimentazione a 12 o 24V • Telecamera Wireless • Monitor TFT LCD ad alta risoluzione • Cavo d’alimentazione con presa accendisigari (per monitor) • Registrazione ciclica dei filmati •... -
Seite 5: Descrizione Dell'apparato
Descrizione dell’apparato Monitor 1. Schermo LCD 2. Tasto ▼: abbassa volume 3. Tasto ▲: alza volume 4. MENU: premere per accedere alle impostazioni 5. CAM: premere per selezionare la telecamera da visualizzare 6. MODE: premere per avviare la registrazione 7. ON/OFF 8. - Seite 6 Installazione del Kit Telecamera 1. Collegare il connettore d’alimentazione del monitor all’adattatore accen- disigari. 2. Alimentare la telecamera (attraverso l’apposito cavo d’alimentazione). 3. È ora possibile visualizzare e registrare le immagini. Installazione di telecamere opzionali In caso di installazione di videocamere opzionali, occorrerà innanzitutto abbi- narle al monitor seguendo questa procedura: 1.
-
Seite 7: Funzionamento
Funzione SCAN quale rimarrà visualizzato il canale selezionato dopo che il corrispondente cavo sarà scollegato. Attivando questa funzione dal menu IMPOSTAZIONI CAMERE SCAN Esempio di installazione a 2 canali: AUTOMATICO è possibile passare da una videocamera all’altra ciclicamen- te ad intervalli di tempo impostati (IMPOSTAZIONI CAMERE TEMPO 1. - Seite 8 • Contrasto: regola il contrasto dell’immagine attivato dall’evento TRIG, dopo che l’evento è terminato. • Tinta: regola i colori dell’immagine • Linee retromarcia: attiva/disattiva la visualizzazione delle linee di retromar- Volume: regola il volume del monitor • cia sul canale 4 ROTAZIONE IMMAGINE PLAY: consente di scorrere le cartelle contenute nella SD per visualizzare i video registrati.
- Seite 9 Simboli del display Occupazione di memoria La durata della registrazione può differire dalla tabella sotto in funzione della memoria utilizzata e delle condizioni d’uso Capacità SD 8 GB 16 GB 32 GB 64 GB 128 GB Modalità SINGOLA 14 ore 28 ore 55 ore 110 ore...
-
Seite 10: Risoluzione Dei Problemi
Telecomando Risoluzione dei problemi Il telecomando può comandare il monitor in tutte le sue funzioni. Problema Possibile soluzione Nessuna immagine Verificare la corretta connessione dell’ali- mentazione del monitor MUTE POWER Nessun segnale Verificare la corretta connessione dell’ali- mentazione della telecamera Nessun suono Verificare che il volume del monitor non sia 0 o sia spento... - Seite 11 Specifiche Tecniche Monitor Specifiche Tecniche Telecamera Dimensione LCD 7” (16:9) Sensore 1/3” CMOS Risoluzione Monitor 800x480 Risoluzione 756x504 Risoluzione Video 640x480 Angolo di visione 120° Contrasto 500:1 Impermeabilità IP67 Luminosità 400cd/m2 Visione Notturna 12 led IR Canali Distanza di trasmissione 30-150 m Frequenza operative 2400 –...
-
Seite 13: About This Guide
About this Guide This camera is intended for non-commercial use, within the limits permitted by applicable law. The company is NOT responsible for the loss of any data/ The content in this document is for information purpose and is subject to content during operation change without prior notice. -
Seite 14: Monitor Features
Monitor features Box content • Wireless up to 150m • Wi-fi Monitor • 12 or 24V power supply • Wi-fi Camera • High resolution TFT LCD Monitor • Power supply cable with cigarette lighter adapter (for Monitor) • Cycle recording •... -
Seite 15: System Description
System description Monitor 1. 7” LCD screen 2. ▼ button: volume decrease 3. ▲ button: volume increase 4. MENU: press to enter system settings 5. CAM: press to select the cam to view 6. MODE: press to start recording 7. ON/OFF 8. - Seite 16 Kit setup Camera 1. Connect the monitor’s power supply cable to the cigarette lighter 2. Power supply the camera (with its own cable) 3. Now it’s possible to view and record the images Optional camera setup If you want to install optional cameras, at first they have to be paired with the monitor, follow these steps: 1.
-
Seite 17: Scan Function
Menu 2. Rear camera to help you while reversing (set on channel 2) 3. Connecting TRIG[2] (white wire) to the reverse, the monitor will automa- You can access the menu only while in single cam view mode (with split view it tically switch to view rear camera when reverse gear is inserted. - Seite 18 Display Symbol • Mir-Flip: image is 180° rotated and mirrored RECORD • Rewrite: enable cycle recording. When SD card is full, the oldest files are overwritten. When the cycle recording is enabled, the logo will appear. • Format: delete SD card content. CAM SETUP •...
-
Seite 19: Memory Usage
Memory Usage Remote Control Recording time may be different from the time indicated in table below due to Remote can control all monitor’s functions. different memories and recording conditions. SD capacity 8 GB 16 GB 32 GB 64 GB 128 GB Mode MUTE POWER... -
Seite 20: Troubleshooting
Troubleshooting Monitor Technical Specs Problem Possible Solution 7” (16:9) Monitor Resolution 800x480 Verify the good connection of the monitor’s No image power cable Video Resolution 640x480 Verify the good connection of the camera’s Contrast 500:1 No signal power cable Brightness 400cd/m2 No audio Verify the monitor volume is turned on... - Seite 21 Camera Technical Specs Sensor 1/3” CMOS Resolution 756x504 View Angle 120° IP Protection IP67 Night Vision 12 led IR Tx Distance 30-150 m Working Temperature -20 / +70°C Stocking Temperature -30 / +80 °C Size 85x42x50mm Specifications may vary without prior notice. To download further updatings and for information about the warranty please visit www.midlandeurope.com...
- Seite 23 Warnhinweise • Verwenden Sie den Monitor nicht bei extremen Temperaturen. Die Moni- tore sind für den Betrieb bei -20 bis +70°C ausgelegt • Schützen Sie den Monitor vor Feuchtigkeit, Rauch und Schmutz • Schützen Sie den Monitor vor starken Vibrationen, Stößen und Schlägen, wie z.B.
-
Seite 24: Eigenschaften Monitor
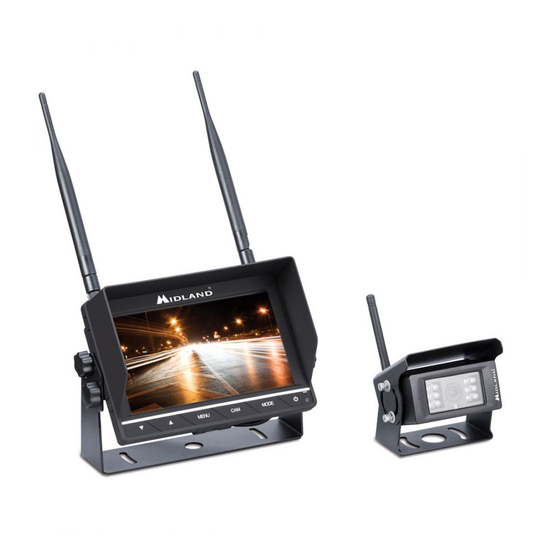
Eigenschaften Monitor Lieferumfang • WLAN Monitor • WLAN Kamera • Drahtlose Übertragung bis zu 150m • Stromkabel mit Zigarettenanzünder-Adapter (für Monitor) • 12V oder 24V Stromversorgung • Stromkabel für Kamera • Hochauflösender TFT LCD Bildschirm • 3 WLAN Antennen (2 für den Monitor + 1 für die Kamera) •... - Seite 25 Bedienelemente Monitor 1. 7” LCD Bildschirm 2. ▼ Taste: Lautstärke reduzieren 3. ▲ Taste: Lautstärke erhöhen 4. MENU: Systemeinstellungen 5. CAM: Auswahl einer Kamera 6. MODE: zum Beginn einer Aufnahme 7. ON/OFF: Ein- oder Ausschalten 8. SD Karte 9. Lautsprecher 10.
-
Seite 26: Installation
Installation Kamera 1. Verbinden Sie das Stromkabel des Monitors mit dem Zigarettenanzünder 2. Schließen Sie das Stromkabel der Kamera an 3. Nun können Sie bereits Bilder beobachten oder aufnehmen Installation optionaler Kameras Wenn Sie weitere Kameras installieren möchten, müssen diese zuerst mit dem Monitor gekoppelt werden. - Seite 27 Im Menü SYSTEM / DELAY TIME können Sie die Zeitdauer einstellen, nach 4. Drücken Sie die CAM Taste, um auf das Bild einer anderen Kamera um- der der vorherige Kanal angezeigt werden soll, sobald das ”TRIG” Kabel en- zuschalten tfernt wurde. 5.
- Seite 28 ANSICHTEN • Zeit: Zeit und Datum einstellen • Sprache: Wählen Sie eine Menüsprache • Geteilt X-X: Sie können 2 Kameras gleichzeitig beobachten • Farbe/Videostandard: wählen Sie das gewünschte Videosystem: PAL oder • 4-geteilt: Sie können 4 Kameras gleichzeitig beobachten NTSC •...
-
Seite 29: Display-Symbole
Display Symbole Speicherplatz Die maximale Aufnahmelänge unterscheidet sich je nach verwendeter Spei- cherkarte und Aufnahmequalität, siehe Tabelle unten: SD Kapazität 8 GB 16 GB 32 GB 64 GB 128 GB Mode EINZELBILD 14 Std. 28 Std. 55 Std. 110 Std. 220 Std. (640x480 1 Kam) 4-GETEILT 11 Std. -
Seite 30: Problembehebung
Fernbedienung Problembehebung Mit der Fernbedienung können Sie alle Funktionen des Systems steuern. Problem Mögliche Lösung Überprüfen Sie die Stromversorgung des Kein Bild Monitors MUTE POWER Überprüfen Sie die Stromversorgung der Kein Signal Kamera Überprüfen Sie, ob die Lautstärke einges- Kein Ton chaltet ist MENU Dunkles Bild oder schlechte... -
Seite 31: Monitor Technische Daten
Monitor Technische Daten Kamera Technische Daten 7” (16:9) Sensor 1/3” CMOS Monitor Auflösung 800x480 Auflösung 756x504 Video Auflösung 640x480 Weitwinkel 120° Kontrast 500:1 Wasserschutzklasse IP67 Helligkeit 400cd/m2 Nachtsicht 12 Infrarot LEDs Kanäle Sendedistanz 30-150 m Frequenz 2400 – 2483.5 MHz Einsatztemperatur-Bereich -20 / +70°C Empfänger Empfindlichkeit... - Seite 33 Acerca de esta guía Esta cámara está diseñada para uso no comercial, dentro de los límites per- mitidos por la ley aplicable. La compañía NO es responsable por la pérdida de El contenido de este documento tiene solo fines informativos y está sujeto datos / contenido durante el funcionamiento del dispositivo.
-
Seite 34: La Caja Contiene
Características del Monitor La caja contiene • Inalámbrico a 150m • Monitor inalámbrico • Alimentación a 12 o 24V • Cámara inalámbrica • Monitor TFT LCD de alta resolución • Cable de alimentación con toma de encendedor (para el monitor) •... -
Seite 35: Descripción Del Aparato
Descripción del aparato Monitor 1. Pantalla LCD 2. Botón ▼: bajar el volumen 3. Botón ▲: subir el volumen 4. MENU: pulsar para acceder a la configuración 5. CAM: pulsar para seleccionar la cámara para mostrar 6. MODE: presione para comenzar a grabar 7. - Seite 36 Instalación del Kit Cámara 1. Conecte el cable de alimentación del monitor a la toma de encendedor. 2. Cargue la cámara (a través de su propio cable de alimentación). 3. Ahora puede ver y grabar imágenes. Instalación de la cámara opcional Si está...
- Seite 37 Menú Ejemplo de instalación de 2 canales: Únicamente puede entrar al menú desde el modo de visualización simple (en 1. Cámara frontal siempre encendida y grabando todo lo que sucede durante modo pantalla dividida no es posible entrar al menú). el viaje (configurado en el canal 1).
- Seite 38 Símbolos del display GRABACIÓN • Bucle: activa la grabación cíclica. Cuando la tarjeta de memoria está llena, los vídeos más antiguos se eliminan. El icono correspondiente aparecerá • Formatea: borra el contenido de la tarjeta SD AJUSTES CAM • Activa Cam1: activar/desactivar el canal 1 •...
-
Seite 39: Control Remoto
Memoria Control Remoto El tiempo de grabación puede diferir de la siguiente tabla, dependiendo de la El control remoto puede controlar el monitor en todas sus funciones. memoria utilizada y las condiciones de uso Capacidad SD MUTE POWER 8 GB 16 GB 32 GB 64 GB... -
Seite 40: Solución De Problemas
Solución de problemas Especificaciones técnicas del monitor Problema Posible solución Dimensiones LCD 7” (16:9) Resolución Monitor 800x480 No hay imagen Verifique la correcta conexión del cable de alimentación del monitor Resolución Video 640x480 No hay señal Verifique la correcta conexión del cable de Contraste 500:1 alimentación de la cámara... - Seite 41 Especificaciones técnicas de la cámara Sensor 1/3” CMOS Resolución 756x504 Ángulo de visión 120° Resistencia al agua IP67 Visión Nocturna 12 led IR Distancia de transmisión 30-150 m Temperatura operativa -20 / +70°C Temperatura de conservación -30 / +80 °C Dimensiones 85x42x50mm Las especificaciones pueden variar sin previo aviso.
- Seite 43 R.E.D. Με το παρών, η Cte International Srl δηλώνει οτι το όνομα του μοντέλου IT / RSM συμμορφώνεται ως προς τις βασικές απαιτήσεις και άλλες σχετικές Cte International Srl dichiara che il prodotto è conforme ai requisiti essenziali διατάξεις του Κανονισμού 2014/53/UE. Η δήλωση συμμόρφωσης e alle disposizioni della Direttiva 2014/53/UE.
- Seite 44 CTE INTERNATIONAL Srl erklærer at produktet er i overensstemmelse CTE INTERNATIONAL Srl deklarē, ka produkts atbilst pamatprasībām un med de viktigste kravene og andre relevante betingelser i Direktivet 2014/53/ citiem ar to saistītajiem Direktīvas 2014/53 / UE. Atbilstības deklarācija ir UE.
- Seite 45 INFORMAZIONE AGLI UTENTI: Ai sensi dell’art. 13 del decreto legislativo All articles displaying this symbol on the body, packaging or instruction manual of same, must not be thrown away into normal disposal bins but brought to 25 luglio 2005, n.151 “Attuazione delle Direttive 2002/95/CE, 2002/96/ specialised waste disposal centres.
- Seite 46 Vertrieb durch: ALAN ELECTRONICS GmbH Daimlerstraße 1K - D-63303 Dreieich Deutschland. Vor Benutzung Bedienungsanleitung beachten. Importado por: MIDLAND IBERIA, SA C/Cobalt, 48 - 08940 Cornellà de Llobregat, Barcelona - España. Antes de utilizar, lea atentamente el manual de uso. Importé par: ALAN FRANCE S.A.R.L.