Herunterladen Inhalt Inhalt Diese Seite drucken

Werbung

Verfügbare Sprachen
  • DE

Verfügbare Sprachen

  • DEUTSCH, seite 39
7910
OBDII
For bmw
Oil reset
EPB reset
BAT
BMS reset
ETCS reset
Tool Setup
7910

Werbung

Inhaltsverzeichnis
loading

Inhaltszusammenfassung für Autophix 7910

  • Seite 1 7910 OBDII For bmw Oil reset EPB reset BMS reset ETCS reset Tool Setup 7910...
  • Seite 2: Safety Precautions

    Necessary. ABOUT 7910 1. Coverage 1) 7910 supports for BMW, Mini and Rolls-Royce brand cars. It works on all the systems such as engine, transmission, ABS and airbag etc. 2) Supports OBDII/EOBD Modes of operation 2.
  • Seite 3 Oil reset EPB reset BMS reset ETCS reset Tool Setup 7910 1. LCD DISPLAY – Indicates test results. Backlit, 320 x 240 pixels display 2. [OK] BUTTON – Confirms a selection (or action) from a menu. 3. ESC BUTTON – Cancels a selection (or action) from a menu...
  • Seite 4 4. [LEFT ]SCROLL BUTTON –in the menu mode through the menu and sub menu move to the left, when rolling in a data interface, use the left button can be moved to the last screen. 5. [RIGHT] SCROLL BUTTON –In the menu mode through the menu and sub menu item move to the right, when rolling in the data interface, use the right button can be moved to the next screen.
  • Seite 5 OPERATION INSTRUCTIONS 1. Connect 7910 1.1 Turn the ignition on. 1.2 Locate the vehicle's 16-pin Data Link Connector (DLC). 2. 7910 Features 2.1 For bmw Choose [For bmw] and then select [For BMW Series Diagnose]. The screen will show all car series. As follows:...
  • Seite 6: Basic Functions

    2.2 Basic Functions Choose [Basic Functions] and it displays as follow: Select Function Basic Functions Special Functions Erase All Systems Fault Codes System scan is to scan all vehicle systems. Manual Select is to display all possible systems, select one of the systems to diagnosis.
  • Seite 7: Version Information

    2.2.1 Version Information Choose [Version Information] and it displays as follows: Select Function Version Information Version Information Read Fault Codes Diagnosis Index: 0F2426 Erase Fault Codes Read Datastream 2.2.2 Read Fault Codes Choose [Read Fault Codes]. Press up or down button to check each fault code as follows: Select Function Read Fault Codes...
  • Seite 8 You need to press [OK] again to clear the fault codes. Or you can press [ESC] button to give up clearing fault codes, as follows: Version Information Erase fault codes had success. Please wait 10 seconds, Turn ignition off and Switch on again. Read fault codes to verify.
  • Seite 9 2.3 Special Functions Choose [Special Functions] and it displays as follows: Select Function Select Function Basic Functions CBS Function(Service Function) Special Functions Reset Control Unit Erase All Systems Fault Codes ECM Engine Control Module Electric fuel pump Battery Management EPB Electronic Parking Brake Steering-angle Sensor 2.3.1 CBS Functions Choose [CBS Function (Service Function)] and it displays as...
  • Seite 10 2.3.2 ECM Engine Control Module Choose [ECM Engine Control Module] and it displays as follows: Select Function ECM Engine Control Module CBS Function(Service Function) Reset adaptation values Reset Control Unit Idle speed ECM Engine Control Module Learning Valvtronic limit positi... Electric fuel pump Battery Management EPB Electronic Parking Brake...
  • Seite 11 Step 2: Use the up or down button to select the (1) option and press the [OK] button to display the following menu: Special Functions Special Functions The battery replacement was registered successfully in the The battery replacement is DME/DDE) entered in the engine The folloeing is now entered electronics(DME or DDE)
  • Seite 12 Note: The special features of each model are different, please according to the actual operation. 2.4 Erase All Systems Fault Codes Choose [Erase All Systems Fault Codes] and it displays as follows: Select Function Information Basic Functions Special Functions Erase fault codes! Erase All Systems Fault Codes Are you sure? You need to press [OK] again to clear the fault codes.
  • Seite 13 3. OBDII System 3.1 Read Codes Stored codes are also known as "hard codes" or "permanent codes". These codes cause the control module to illuminate the malfunction indicator lamp (MIL) when an emission-related fault occurs. Pending Codes are also referred to as "maturing codes" or "continuous monitor codes".
  • Seite 14 2) View DTCs and their definitions on screen. P0143 Generic Current O2 Sensor Circuit Low Voltage Bank 1 Sensor 3 The control module number, sequence of the DTCs, total number of codes detected and type of codes (Generic of Manufacturer specific) will be observed on the upper right hand corner of the display.
  • Seite 15 1) Use the UP/DOWN scroll buttons to select Erase Codes from the Diagnostic Menu and press [OK]. Diagnostic Menu Read Codes Erase Codes I/M Readiness Data Stream Evap System Test Vehicle Information 2) A warning message comes up asking for your confirmation. Erase Codes Clear/Reset Emission-Related Diagnostic Information, AreYou...
  • Seite 16 3.3 I/M Readiness I/M refers to Inspection and Maintenance, that is legislated by the Government to meet federal clean-air standards. I/M Readiness indicates whether or not the various emissions-relat- ed systems on the vehicle are operating properly and are ready for Inspection and Maintenance testing.
  • Seite 17 3.5 Evap Leak Test This function enables the conditions required to conduct an evaporative system leak test, but does not actually run the test. The vehicle manufacturer is responsible to determine the criteria to automatically stop the test. Before performing this function, please check the vehicle's service repair manual to determine the necessary procedures.
  • Seite 18: Tool Setup

    4. Tool Setup 4.1 Language Choose [Language] and it displays as follows: Tool Setup Language Language English Beeper Svenska Instructions(Display at startup) Suomalainen Unit of Measure Norsk språk Skin Style Dansk Feedback Deutsch Device Information Français 1/10 4.2 Beeper Choose [Beeper] and it displays as follows: Tool Setup Beeper Language...
  • Seite 19 Tool Setup Instructions(Display at startup) Language Beeper Instructions(Display at startup) Unit of Measure Skin Style Feedback Device Information 4.4 Unit of measure Choose Unit of measure and it displays as follows: Tool Setup Unit of measure Language Mertic Beeper Imperial Instructions(Display at startup) Unit of Measure Skin Style...
  • Seite 20 4.6 Feedback 1. If it shows connected error with vehicle or other problem during using, please using the feedback function. Choose [Feedback] and it displays as follows: Tool Setup Feedback Language Beeper Automatic recording is ready, perform the related functions Instructions(Display at startup) that require feedback.
  • Seite 21 4. Transfer data to your computer and generate feedback file (You need download upgrade file on the computer from AUTOPHIX website).The device is connected with computer through USB cable. OBDII For bmw Oil reset EPB reset BMS reset ETCS reset...
  • Seite 22: Device Information

    Please send the feedback.bin file to support@autophix.com. 4.7 Device information Choose Device information and it displays as follows: Tool Setup Device Information Language Software Version: Beeper 01.62.000 Instrucions(Display at startup) Hardware Version: Unit of Measure 01.10.000 Skin Style Serial Number:...
  • Seite 23: Warranty

    7. Service Procedures If you have any questions, please contact your local store, distributor or visit our website www. autophix.com . If it becomes necessary to return the scan tool for repair, contact your local distributor for more information.
  • Seite 24: Précautions De Sécurité

    À PROPOS DE 7910 1. couverture 1) 7910 supports pour marques de voitures BMW, Mini et Rolls-Royce. Il fonctionne sur tous les systèmes tels que moteur, transmission, ABS et airbag, etc. 2) Prend en charge les modes de fonctionnement OBDII / EOBD.
  • Seite 25 • Température de stockage: -20 ° C-70 ° C (4-158 ° F) 3. Description de l'apparence et des boutons OBDII Pour BMW Oil reset EPB reset BMS reset ETCS reset Tool Setup 7910 1. LCD DISPLAY - Indique les résultats du test. Écran rétroé- clairé de 320 x 240 pixels.
  • Seite 26 2. [OK] BOUTON - Confirme une sélection (ou une action) dans un menu. 3. BOUTON ESC - Annule une sélection (ou une action) dans un menu ou revient au menu. 4. BOUTON DE DÉFILEMENT [GAUCHE]: en mode menu, le menu et le sous-menu sont déplacés vers la gauche. Lorsque vous naviguez dans une interface de données, utilisez le bouton de gauche pour accéder au dernier écran.
  • Seite 27: Instructions D'utilisation

    Instructions d'utilisation 1. Connectez 7910 1.1 Mettez le contact. 1.2 Localisez le connecteur de liaison de données (DLC) à 16 broches du véhicule. 2. 7910 Caractéristiques 2.1 pour BMW Choisissez [Pour BMW] puis sélectionnez [For BMW Series Diagnose]. L'écran affichera toutes les séries de voitures.
  • Seite 28 2.2 Fonctions de base Choisissez [Fonctions de base] et il s’affiche comme suit: Select Function Basic Functions Special Functions Erase All Systems Fault Codes L'analyse du système consiste à analyser tous les systèmes du véhicule. La sélection manuelle consiste à afficher tous les systèmes possibles.
  • Seite 29 2.2.1 Informations sur la version Choisissez [Informations sur la version] et il s’affiche comme suit: Select Function Version Information Version Information Read Fault Codes Diagnosis Index: 0F2426 Erase Fault Codes Read Datastream 2.2.2 Lire les codes de défaut Choisissez [Lire les codes d'erreur]. Appuyez sur le bouton haut ou bas pour vérifier chaque code d'erreur comme suit: Select Function Read Fault Codes...
  • Seite 30 Vous devez appuyer à nouveau sur [OK] pour effacer les codes d'erreur. Ou vous pouvez appuyer sur la touche [ESC] pour annuler l’effacement des codes de panne, comme suit: Version Information Erase fault codes had success. Please wait 10 seconds, Turn ignition off and Switch on again.
  • Seite 31: Fonctions Spéciales

    Appuyez sur les touches [LEFT] et [RIGHT] pour faire défiler Appuyez sur les boutons [UP] et [DOWN] pour sélectionner un par un Appuyez sur le bouton [OK] pour sélectionner le flux de données. Appuyez sur le bouton [ESC] pour lire Datastream 2.3 Fonctions spéciales Choisissez [Fonctions spéciales] et l’affichage se présente comme suit:...
  • Seite 32 Contrôle du véhicule. [Réinitialisation CBS 2]: Service d'huile, Inspection, Intervalle de temps, Service de suivi correct, Afficher le statut de l'intervalle de service. [Correction CBS]: Huile moteur, Bougies d’allumage, Freins avant, Freins arrière, Liquide de refroidissement, Filtre à particules diesel, Liquide de frein, Microfiltre, Contrôle du véhicule, Contrôle des émissions de gaz d’échappement, Contrôle du véhicule.
  • Seite 33 Étape 1: Utilisez les boutons haut ou bas pour sélectionner l'option (2), puis appuyez sur le bouton [OK] pour remplacer la pile et enregistrer le menu suivant: Special Functions Special Functions Selection The batty (1). Diasplay distance replacement is eneredin reading at last battery the DME/DDE in the next exchange and on before...
  • Seite 34 2.3.5 Capteur d'angle de braquage Choisissez [Capteur d'angle de braquage]. Les informations suivantes s'affichent: Special Functions Information CBS Function(Service Function) Exactly set front wheels to Reset Control Unit staright - ahead position. The ECM Engine Control Module steering wheel must be positioned Electric fuel pump horizontally.(Approximate setting Battery Management...
  • Seite 35 Information Erase fault codes had success. Please wait 10 seconds, Turn ignition off and Switch on again. Read fault codes to verify. Remarque: pour les voitures BMW après 2003. 3. Configuration de l'outil 3.1 Langue Choisissez [Langue] et cela s’affiche comme suit: Tool Setup Language Langue...
  • Seite 36 4. Transférez des données sur votre ordinateur et générez un fichier de commentaires (vous devez télécharger le fichier de mise à niveau sur l'ordinateur à partir du site Web AUTOPHIX). Le périphérique est connecté à l'ordinateur via un câble USB.
  • Seite 37 OBDII For bmw Oil reset EPB reset BMS reset ETCS reset Tool Setup 7910 Choisissez le fichier “Mettre à jour”et il s’affiche comme suit: Cliquez sur "Commentaires" et il apparaît comme suit:...
  • Seite 38: Informations Sur L'appareil

    BMS reset ETCS reset Tool Setup 7910 1) Lors de la mise à niveau du logiciel du périphérique, celui-ci ne prend en charge que le système Windows 7/8/10. 2) Il peut être mis à jour directement sur le système Window8 et window10.
  • Seite 39: Sicherheitshinweise Und Warnungen

    Lappen verwenden, um, wann immer notwendig, die Außenseite des Abtastwerkzeugs zu reinigen. ÜBER 7910 1. Deckung 1) 7910-Unterstützung für Fahrzeuge der Marken BMW, Mini und Rolls-Royce. Es funktioniert auf allen Systemen wie Motor, Getriebe, ABS und Airbag usw. 2) Unterstützt OBDII / EOBD-Betriebsarten 2.
  • Seite 40: Darstellung Und Tastenbeschreibung

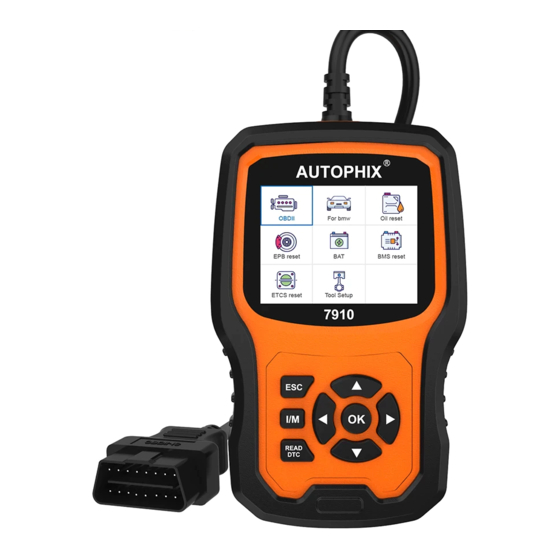
    Oil reset EPB reset BMS reset ETCS reset Tool Setup 7910 1. LCD-ANZEIGE - Zeigt Testergebnisse an. Hintergrundbe- leuchtetes Display mit 320 x 240 Pixel 2. [OK] -TASTE - Bestätigt eine Auswahl (oder Aktion) aus einem Menü. 3. ESC-TASTE - Bricht eine Auswahl (oder Aktion) aus einem...
  • Seite 41 4. [LEFT] SCROLL-TASTE - Im Menümodus durch das Menü und Untermenü nach links bewegen, beim Rollen in einer Datenschnittstelle mit der linken Taste zum letzten Bildschirm bewegen. 5. [RECHTS] -SCROLLTASTE - Bewegen Sie sich im Menümo- dus durch das Menü und den Untermenüpunkt nach rechts. Wenn Sie sich in der Datenschnittstelle bewegen, können Sie die rechte Taste zum nächsten Bildschirm bewegen.
  • Seite 42 Operation instructions 1. Connect 7910 1.1 Turn the ignition on. 1.2 Locate the vehicle's 16-pin Data Link Connector (DLC). 2. 7910 Funktionen 2.1 Für BMW Wählen Sie [Für BMW] und dann [Für BMW Series Diagnose]. Auf dem Bildschirm werden alle Fahrzeugserien angezeigt. Wie...
  • Seite 43 2.2 Grundfunktionen Wählen Sie [Grundfunktionen] und es wird wie folgt angezeigt: Wählen Sie Funktion aus Grundfunktionen Spezialfunktionen Löschen Sie alle Systemfehlerc... Der System-Scan dient zum Scannen aller Fahrzeugsysteme. Manuelle Auswahl dient zum Anzeigen aller möglichen Systeme. Wählen Sie eines der zu diagnostizierenden Systeme aus.
  • Seite 44: Fehlercodes Löschen

    2.2.1 Versions informationen Wählen Sie [Versionsinformationen] und es wird wie folgt angezeigt: Wählen Sie Funktion aus Versionsinformation Versionsinformation Fehlercodes lesen Diagnoseindex: 0F17B0 Fehlercodes löschen Lesen Sie den Datenfluss 2.2.2 Fehlercodes lesen Wählen Sie [Fehlercodes lesen]. Drücken Sie die Hoch- oder Runter-Taste, um jeden Fehlercode wie folgt zu überprüfen: Wählen Sie Funktion aus Fehlercodes lesen...
  • Seite 45 Sie müssen erneut [OK] drücken, um die Fehlercodes zu löschen. Oder Sie können die [ESC] -Taste drücken, um das Löschen von Fehlercodes wie folgt abzubrechen: Informationen Fehlercodes löschen hatteErfolg. Bitte warten Sie 10 Sekunden. Schalten Sie die Zündung aus und wieder ein.
  • Seite 46 Drücken Sie die Tasten [LINKS] und [RECHTS], um zu blättern Drücken Sie die Tasten [UP] und [DOWN], um eine nach der anderen auszuwählen Drücken Sie die Taste [OK], um den Datenstrom auszuwählen Drücken Sie die [ESC] -Taste, um den Datenstrom zu lessen 2.3 Sonder funktionen Wählen Sie [Sonderfunktionen] und es wird wie folgt angezeigt: Wählen Sie Funktion aus...
  • Seite 47: Batteriemanagement

    Folgeservice, Status des Serviceintervalls anzeigen. [CBS-Korrektur]: Motoröl, Zündkerzen, Vorderradbremsen, Hinterradbremsen, Kühlmittel, Dieselpartikelfilter, Bremsflüs- sigkeit, Mikrofilter, Fahrzeugprüfung, Abgasuntersuchung, Fahrzeugprüfung. 2.3.2 ECM-Motorsteuergerät Wählen Sie [ECM Engine Control Module] und es wird wie folgt angezeigt: Sonder Funktionen Spezialfunktionen CBS Function(Service Function) Luftmassenmesser Elektrische Kraftstoffpumpe Reset Control Unit Mengen-Mittelwertanpassung ECM Motorsteuerungsmodul...
  • Seite 48 Spezialfunktionen Spezialfunktionen Im nächsten Auswahl Testschritt wird (1). Kilometerstand Batteriewechsel in die des letzten und DME/DDE eingetragenl vorletzten Motor muss nicht Batterieaustausches Iaufen und KI.15 ein anzeigen. Schritt 2: Wählen Sie mit der Aufwärts- oder Abwärtstaste die Option (1) und drücken Sie die Taste [OK], um das folgende Menü...
  • Seite 49: Alle Systemfehlercodes Löschen

    2.3.5 Lenkwinkelsensor Wählen Sie [Lenkwinkelsensor] und es wird wie folgt angezeigt: Information Sonder Funktionen CBS Function(Service Function) Setzen Sie die Vorderräder Reset Control Unit genau in Geradeausstellung. Das ECM Motorsteuerungsmodul Lenkrad muss horizontal Elektrische Kraftstoffpumpe ausgerichtet werden.(Sicht- Batterie Management Schätzung ausreichend). EPB Electronische Parkbremse Voraussetzung für die Lenkwinkelsensor...
  • Seite 50: Tool Einrichten

    Informationen Fehlercodes löschen hatte Erfolg. Bitte warten Sie 10 Sekunden. Schalten Sin die Zündung aus und wieder ein. Lesen Sie, um die Fehlercodes zu Überprüfen. Hinweis: Für BMW nach 2003. 3. Tool einrichten 3.1 Sprache Wählen Sie [Sprache] und es wird wie folgt angezeigt: Tool Setup Sprache Sprache...
  • Seite 51 3. Nachdem Sie den Batteriewechsel registriert haben, trennen Sie die Verbindung zum Auto. 4. Übertragen Sie Daten auf Ihren Computer und generieren Sie eine Feedback-Datei (Sie müssen die Upgrade-Datei von der AUTOPHIX-Website auf den Computer herunterladen). Das Gerät ist über ein USB-Kabel mit dem Computer verbunden.
  • Seite 52 OBDII Für bmw Oil reset EPB reset BMS reset ETCS reset Tool Setup 7910 Wählen Sie " Aktualisieren " -Datei und es wird wie folgt angezeigt: Klicken Sie auf " Rückmeldung" und es wird wie folgt angezeigt:...
  • Seite 53: Geräteinformationen

    Bitte senden Sie die Datei feedback.bin an support@au- tophix.com. 3.4 Geräteinformationen Wählen Sie Geräteinformationen und es wird wie folgt ange- zeigt: Tool Setup Device Information Sprache Softwareversion: Piepser 01.68.000 Anleitung(Anzeige beim Start) Hardwareversion: Maβeinheit 01.30.000 Hautstil Serial Number: Rückkopplung Autophix20170500266457 Geräteinformation 4.
  • Seite 54 Oil reset EPB reset BMS reset ETCS reset Tool Setup 7910 1) Beim Upgrade der Gerätesoftware wird nur das Windows 7/8/10-System unterstützt. 2) Es kann direkt unter Windows 8 und Windows 10 aktualisiert werden. 3) Wenn der Computer ein Windows 7-System ist, wird der...
  • Seite 55: Precauciones De Seguridad

    Unos 7910 1. Cobertura 1) Soportes 7910 para automóviles BMW, Mini y Rolls-Royce. Funciona en todos los sistemas como motor, transmisión, ABS y airbag, etc. 2) Soporta los modos de operación OBDII / EOBD.
  • Seite 56 EPB reset BMS reset ETCS reset Tool Setup 7910 1. PANTALLA LCD: indica los resultados de la prueba. Retroilu- minado, 320 x 240 píxeles de visualización 2. [OK] BOTÓN: confirma una selección (o acción) de un menú. 3. BOTÓN ESC: cancela una selección (o acción) de un menú...
  • Seite 57 4. [IZQUIERDA] BOTÓN DE DESPLAZAMIENTO: en el modo de menú, a través del menú y el submenú, desplácese hacia la izquierda. Cuando esté rodando en una interfaz de datos, utilice el botón izquierdo para moverse a la última pantalla. 5. [DERECHA] BOTÓN DE DESPLAZAMIENTO: en el modo de menú...
  • Seite 58: Instrucciones De Operación

    1.1 Encienda la ignición. 1.2 Localice el conector de enlace de datos (DLC) de 16 pines del vehículo. 2. Características del 7910 2.1 para bmw Seleccione [Para bmw] y luego seleccione [Para diagnóstico de la serie BMW]. La pantalla mostrará todas las series de coches.
  • Seite 59 2.2 Funciones básicas Elija [Funciones básicas] y se muestra como sigue: Select Function Basic Functions Special Functions Erase All Systems Fault Codes El escaneo del sistema es escanear todos los sistemas del vehículo. Selección manual es para mostrar todos los sistemas posibles, seleccione uno de los sistemas para el diagnóstico.
  • Seite 60 2.2.1 Información de la versión Elija [Información de la versión] y se muestra de la siguiente manera: Select Function Version Information Version Information Read Fault Codes Diagnosis Index: 0F2426 Erase Fault Codes Read Datastream 2.2.2 Leer códigos de falla Elija [Leer códigos de error]. Presione el botón arriba o abajo para verificar cada código de falla de la siguiente manera: Select Function Read Fault Codes...
  • Seite 61 Debe presionar [OK] nuevamente para borrar los códigos de falla. O puede presionar el botón [ESC] para renunciar a borrar los códigos de falla, de la siguiente manera: Version Information Erase fault codes had success. Please wait 10 seconds, Turn ignition off and Switch on again.
  • Seite 62: Funciones Especiales

    Presione los botones [IZQUIERDA] y [DERECHA] a la página Presione los botones [ARRIBA] y [ABAJO] para seleccionar uno por uno Presione el botón [OK] para seleccionar Datastream Presione el botón [ESC] para leer Datastream 2.3 Funciones especiales Elija [Funciones especiales] y se muestra de la siguiente manera: Select Function Select Function...
  • Seite 63 tiempo, Servicio de seguimiento correcto, Mostrar estado de intervalo de servicio. [Corrección de CBS]: aceite del motor, bujías, frenos delan- teros, frenos traseros, refrigerante, filtro de partículas diésel, líquido de frenos, microfiltro, inspección del vehículo, inspec- ción de emisiones de escape, verificación del vehículo. 2.3.2 ECM Engine Control Module Choose [ECM Engine Control Module] and it displays as follows: Select Function...
  • Seite 64 Special Functions Special Functions The battery Selection (1)Diasplay Kilometrr replacement is eneredin the DME/DDE in the reading of last battery change and last but next test step! The engine does not (2). Register battery have to be running and Paso 2: Use el botón arriba o abajo para seleccionar la opción (1) y presione el botón [OK] para mostrar el siguiente menú: Special Functions Special Functions...
  • Seite 65 2.3.5 sensor de ángulo de dirección Elija [Sensor de ángulo de dirección] y se muestra de la siguiente manera: Select Function Information CBS Function(Service Function) Exactly set front wheels to Reset Control Unit staright - ahead position. The ECM Engine Control Module steering wheel must be positioned Electric fuel pump horizontally.(Approximate setting...
  • Seite 66: Configuración De La Herramienta

    Debe presionar [OK] nuevamente para borrar los códigos de falla. O puede presionar el botón [ESC] para dejar de borrar los códigos de falla. Se muestra a continuación después de borrar los códigos de error. Information Erase fault codes had success.
  • Seite 67 4. Transfiera datos a su computadora y genere un archivo de comentarios (necesita descargar el archivo de actualización en la computadora del sitio web de AUTOPHIX). El dispositivo está conectado a la computadora a través del cable USB.
  • Seite 68 OBDII For bmw Oil reset EPB reset BMS reset ETCS reset Tool Setup 7910 Elija el archivo "Actualizar" y se muestra como sigue: Haga clic en "Comentarios" y se muestra como sigue: Envíe el archivo feedback.bin a support@autophix.com.
  • Seite 69: Información Del Dispositivo

    Oil reset EPB reset BMS reset ETCS reset Tool Setup 7910 1) Cuando actualice el software del dispositivo, solo es compat- ible con el sistema de Windows 7/8/10. 2) Se puede actualizar directamente en los sistemas Window8 y window10. 3) Cuando la computadora es un sistema window7, el controlador de software del dispositivo está...
  • Seite 70: Misure Di Sicurezza

    CIRCA 7910 1. Copertura 1) 7910 supporti per auto di marca BMW, Mini e Rolls-Royce. Funziona su tutti i sistemi come motore, trasmissione, ABS e airbag ecc. 2) Supporta le modalità di funzionamento OBDII / EOBD.
  • Seite 71 Oil reset EPB reset BMS reset ETCS reset Tool Setup 7910 1. DISPLAY LCD - Indica i risultati del test. Display retroillumi- nato, 320 x 240 pixel 2. TASTO [OK] - Conferma una selezione (o azione) da un menu. 3. TASTO ESC - Annulla una selezione (o azione) da un menu...
  • Seite 72 4. [SINISTRA] PULSANTE DI SCORRIMENTO: nella modalità menu attraverso il menu e il sottomenu spostarsi a sinistra, quando si scorre in un'interfaccia dati, utilizzare il pulsante sinistro può essere spostato sull'ultima schermata. 5. [DESTRA] PULSANTE DI SCORRIMENTO - Nella modalità menu attraverso il menu e la voce del sottomenu spostarsi a destra, quando si scorre nell'interfaccia dati, utilizzare il pulsante destro può...
  • Seite 73: Istruzioni Di Funzionamento

    Istruzioni di funzionamento 1. Connetti 7910 1.1 Accendere l'accensione. 1.2 Individuare il connettore DLC (Data Link Connector) a 16 pin del veicolo. 2. 7910 Caratteristiche 2.1 per bmw Scegliere [Per bmw] e quindi selezionare [Per diagnosi serie BMW]. Lo schermo mostrerà tutte le serie di auto. Come segue:...
  • Seite 74 2.2 Funzioni di base Scegli [Funzioni di base] e visualizza come segue: Select Function Basic Functions Special Functions Erase All Systems Fault Codes La scansione del sistema consiste nello scannerizzare tutti i sistemi del veicolo. Selezione manuale serve per visualizzare tutti i sistemi possibili, selezionare uno dei sistemi da diagnosticare.
  • Seite 75 2.2.1 Informazioni sulla versione Scegli [Informazioni sulla versione] e viene visualizzato come segue: Select Function Version Information Version Information Read Fault Codes Diagnosis Index: 0F2426 Erase Fault Codes Read Datastream 2.2.2 Leggi codici di errore Scegli [Leggi codici errore]. Premere il pulsante su o giù per controllare ciascun codice di errore come segue: Select Function Read Fault Codes...
  • Seite 76 È necessario premere nuovamente [OK] per cancellare i codici di errore. Oppure puoi premere il tasto [ESC] per rinunciare a cancellare i codici di errore, come segue: Version Information Erase fault codes had success. Please wait 10 seconds, Turn ignition off and Switch on again.
  • Seite 77: Funzioni Speciali

    Premere i pulsanti [SINISTRA] e [DESTRA] per pagina premere i pulsanti [SU] e [GIÙ] per selezionare uno ad uno Premere il tasto [OK] per selezionare il flusso di dati Premere il tasto [ESC] per leggere Datastream 2.3 Funzioni speciali Scegli [Funzioni speciali] e visualizza come segue: Select Function Select Function Basic Functions...
  • Seite 78 servizio follow-on corretto, visualizzazione dello stato dell'inter- vallo di servizio. [Correzione CBS]: olio motore, candele, freni anteriori, freni posteriori, liquido di raffreddamento, filtro antiparticolato diesel, liquido freni, filtro micro, ispezione del veicolo, ispezione delle emissioni di scarico, controllo del veicolo. 2.3.2 Modulo di controllo del motore ECM Scegli [Modulo controllo motore ECM] e visualizza come segue: Select Function...
  • Seite 79 Special Functions Special Functions Selection The battery (1)Diasplay Kilometrr replacement is eneredin reading of last battery the DME/DDE in the change and last but next test step! The engine does not (2). Register battery have to be running and Passaggio 2: utilizzare il pulsante su o giù per selezionare l'opzione (1) e premere il pulsante [OK] per visualizzare il seguente menu: Special Functions...
  • Seite 80 2.3.5 Sensore angolo di sterzata Scegli [Sensore angolo di sterzata] e visualizza come segue: Select Function Information CBS Function(Service Function) Exactly set front wheels to Reset Control Unit staright - ahead position. The ECM Engine Control Module steering wheel must be positioned Electric fuel pump horizontally.(Approximate setting Battery Management...
  • Seite 81: Impostazione Dello Strumento

    Information Erase fault codes had success. Please wait 10 seconds, Turn ignition off and Switch on again. Read fault codes to verify. Nota: per auto BMW dopo il 2003. 3. Impostazione dello strumento 3.1 Lingua Scegli [Lingua] e visualizza come segue: Tool Setup Language Language...
  • Seite 82 3. Dopo aver effettuato il cambio batteria, disconnettersi con l'automobile. 4. Trasferire i dati sul computer e generare un file di feedback (è necessario scaricare il file di aggiornamento sul computer dal sito Web di AUTOPHIX). Il dispositivo è collegato al computer tramite cavo USB.
  • Seite 83 OBDII For bmw Oil reset EPB reset BMS reset ETCS reset Tool Setup 7910 Scegli il file "Aggiorna" e viene visualizzato come segue: Fai clic su " Risposta " e viene visualizzato come segue:...
  • Seite 84 Si prega di inviare il file feedback.bin a support@autophix.com. 3.4 Informazioni sul dispositivo Scegli Informazioni dispositivo e viene visualizzato come segue: Tool Setup Device Information Language Software Version: Beeper 01.62.000 Instructions(Display at startup) Hardware Version: 01.10.000 Unit of Measure Skin Style...
  • Seite 86 Stock 4, gebäude 2, jinxicheng industriepark, longhua bezirk, shenzhen, china Piso 4, edificio 2, parque industrial de Jinxicheng, distrito de Longhua, Shenzhen, China Piano 4, edificio 2, parco industriale Jinxicheng, distretto di Longhua, Shenzhen, Cina Phone: 0755-8528-1258 E-mail: support@autophix.com Website: www.autophix.com...

Inhaltsverzeichnis