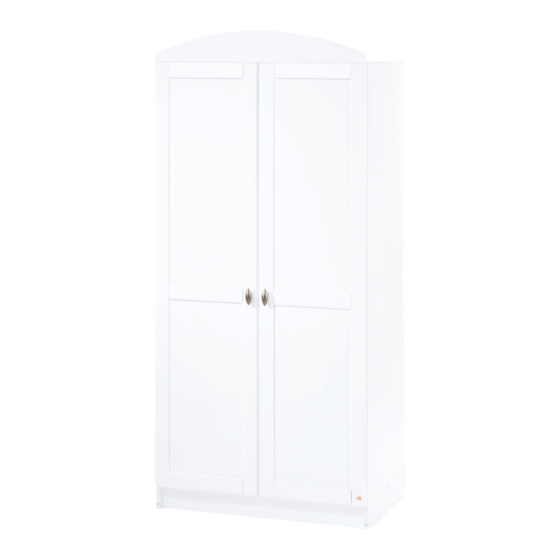
Inhaltszusammenfassung für Pinolino Laura
- Seite 1 Aufbauanleitung Assembly plan Instructions de montage Serien Nr. : Serial No.: No. série: Kleiderschrank ‘Laura’ Wardrobe ‘Laura’ • Armoire ‘Laura’ Art.-Nr. 14 00 25 Dekor: Uni, weiß • Wood efect: plain-coloured white • Décor: uni, blanc...
- Seite 2 FÜR SPÄTERE VERWENDUNG AUFBEWAHREN Sehr geehrte Kunden! Wir freuen uns, dass Sie sich für diesen hochwertigen Artikel entschieden haben. Wir von Pinolino haben diesen Artikel mit großer Sorgfalt hergestellt. Die von uns verwendeten Materialien sind umweltschonend und entsprechen den strengen Auflagen der Europäischen Sicherheitsnormen.
-
Seite 3: Maintenance
KEEP FOR FUTURE REFERENCE Dear clients, We are glad that you have chosen this premium product. We, the Pinolino staff, have manufactured this item with greatest care. The materials that were used are eco-friendly and comply with the strict European safety standards. - Seite 4 Si malgré une surveillance constante de nos produits, un défaut est constaté, veuillez cocher le composant concerné dans ce manuel de montage. Veuillez imprimer le formulaire de contact de notre site www.pinolino.de. Décrivez brièvement le défaut ou bien la problème. Envoyez ces instructions de montage, une copie de la facture et aussi le formulaire Service complété, avec le numéro de série (qui vous trouvez sur le carton, sur les instructions de montage et sur l'article même), à...
-
Seite 5: Produktspezifikationen
Produktspezifikationen • Product specifications • Spécifications du produit Artikelmaß Karton • Product size • Dimensions de l'article • Pack • Carton 9 cm 191 cm 7 cm Gewicht • Weight • Poids Karton A • Pack A • Carton A: 38,5 kg Karton B •... - Seite 6 Bauteile • Components • Composants Seitenteil links Mittelwand Seitenteil rechts Platte oben Left side panel Intermediary panel Right side panel Upper plate Panneau latéral gauche Panneau intermédiaire Panneau latéral droite Planche supérieure Platte unten Tür links Tür rechts Rückwand Bottom plate Left door Right door Back panel...
-
Seite 7: Zusätzlich Benötigtes Werkzeug
Beschläge • Hardware • Ferrure 16 x 12 x 12 x 30 x WDH 8/35 WE 16 VR 3/20 Holzdübel Exzenterstift Exzenter Kunstoffnagelgleiter Holzschraube für Rückwand Dowel Eccentric rod Eccentric cam Nail-on glide Wood screw for back panel Cheville en bois Goujon d’assemblage Boîtier de ferrure Patin de protection en plastique... -
Seite 8: Montage
Montage • Assembly • Montage • Bitte bauen Sie den Artikel nummerisch, nach Reihenfolge auf. Bitte Dübel in das richtige Loch einstecken! Beachten Sie bitte, dass alle Dübel bis zum Anschlag zuerst in das tiefere Loch einzutreiben sind. • Please set up the article in numerical order. Please, insert the dowels in the correct position! Please note that all dowels should be at first advanced in the deeper hole up to marking. •... - Seite 9 WDH 8/35 WE 16 und • and • et WI 4...
- Seite 10 WDH 8/35...
- Seite 11 WE 16 und • and • et WI 4...
- Seite 12 Achtung Warning Attention • • • Schrauben Sie die Rückwand erst an, nachdem Sie sich davon überzeugt haben, dass der Kleiderschrank im rechten Winkel montiert ist. • Screw the back panel only after having convinced yourself that the wardrobe is assembled in a r ight angle. •...
- Seite 13 • and • et VS 3,5/15...
- Seite 14 20 x...
- Seite 15 WSS und • and et • HK und • and et • 12 x VS 3,5/15 VS 4/30...
- Seite 16 • Die Einstellung der Tür funktioniert wie folgt: • The door must be adjusted as follows: • L’installation de la porte doit être faite de la manière suivante:...
- Seite 17 Achtung Warning Attention • • • Die Türen nicht weiter als 95° öffnen, da es sonst zu einer Überdehnung der Scharniere kommen könnte. • Do not open the doors to more t han 95°, as the hinge could be over stretched. •...
- Seite 19 N2 und • and • et VS 3,5/15 VS 3,5/15...


