Keter APEX 8X6 Montageanleitung
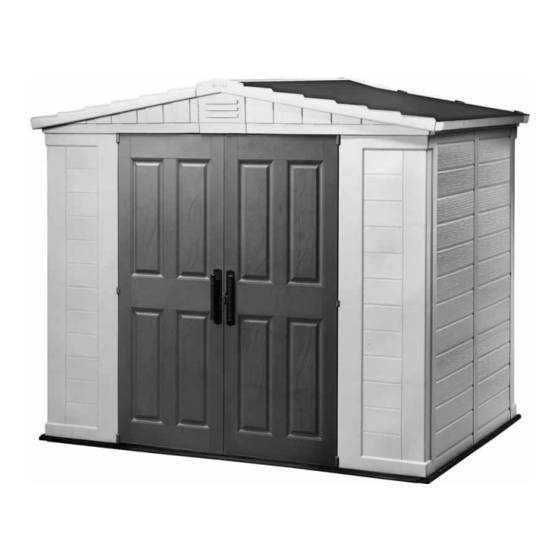
APEX 8X6
ASSEMBLY INSTRUCTIONS | CONSIGNES DE MONTAGE | INSTRUCCIONES DE MONTAJE | MONTAGEANLEITUNG
| MONTAGE-VOORSCHRIF TEN | ISTRUZIONI D'ASSEMBL AGGIO | INSTRUÇÕES DE MONTAGEM
Thank you for your purchase of the Keter shed,
In order to activate your warranty, please enter
WARRANTY
www.keter.com, under storage buildings
ACTIVATION
category and fill in the sheds warranty
activation form.
IF THERE ARE MISSING OR BROKEN PARTS, PLEASE DO NOT RETURN THE PRODUCT TO THE STORE.
Please log onto our website, or contact Customer Service at:
S'IL Y A DES PIÈCES MANQUANTES OU CASSÉES, NE RETOURNEZ PAS LE PRODUIT AU MAGASINV.
euillez visiter notre site Internet, ou contacter notre Service Clientèle:
SI HUBIERA ALGUNA PARTE FALTANTE O DAÑADA, NO DEVUELVA EL PRODUCTO A LA TIENDA.
Inicie sesión en nuestro sitio en Internet o contáctese con nuestro servicio de atención al cliente:
BITTE BRINGEN SIE IHR PRODUKT NICHT GLEICH ZUM LADEN ZURÜCK, FALLS TEILE FEHLEN ODER DEFEKT SIND.
Bitte loggen Sie in unsere Website ein oder wenden Sie sich an unseren Kundenservice:
IN GEVAL VAN ONTBREKENDE OF GEBROKEN ONDERDELEN NIET HET PRODUCT NAAR DE WINKEL RETOURNEREN.
Ga naar onze website of neem contact op met de Klantenservice:
IN CASO DI PARTI MANCANTI O DANNEGGIATE, EVITARE DI RESTITUIRE IL PRODOTTO AL NEGOZIO.
Accedere al nostro sito o contattare il Servizio Clienti:
SE HOUVER PEÇAS EM FALTA OU PARTIDAS, NÃO DEVOLVA O PRODUTO À LOJA.
Entre na nossa página de Internet ou contacte o Serviço de Clientes:
APEX 8X6
2 easy steps to use a QR-code:
1. Download a FREE QR-Code
reader from your smartphone
application site.
2. Scan the QR-Code.
SKU: 17187140
WWW.KETER.COM
US: # 1-888-374-4262
Canada: # 1-800-661-6721
UK: # 0121-5060008
Other European Countries:
# 31-1612-28301
Inhaltsverzeichnis

Verwandte Anleitungen für Keter APEX 8X6


Inhaltszusammenfassung für Keter APEX 8X6
- Seite 1 | MONTAGE-VOORSCHRIF TEN | ISTRUZIONI D’ASSEMBL AGGIO | INSTRUÇÕES DE MONTAGEM APEX 8X6 SKU: 17187140 2 easy steps to use a QR-code: Thank you for your purchase of the Keter shed, 1. Download a FREE QR-Code In order to activate your warranty, please enter WARRANTY reader from your smartphone www.keter.com, under storage buildings...
- Seite 2 VICE | SERVIZIO CLIENTI | ASSISTÊNCIA AO CLIENTE IMPORTANT: For assistance with assembly or to request missing parts, please log onto our web site at www.www.keter.com or contact Customer Service. IMPORTANT: Pour toute assistance lors du montage ou pour obtenir des pièces manquantes, veuillez visiter notre site Internet: www.keter.com ou contacter notre Service Clientèle.
- Seite 3 LEVEL THE GROUND | NIVELLEMENT DU SOL | NIVELE EL SUELO | SORGEN SIE FÜR EINE EBENE | GRUNDFLÄCHE MAAK DE GROND WATERPAS | METTERE IL TERRENO A LIVELLO | NIVELAR O SOLO Clear area of stones | Remove all plants, roots and other obstacles | Rake the ground | Make ground level using a long, flat object (e.g. wood beam) Retirez toutes les pierres | Arrachez toutes les plantes, racines et autres obstacles | Ratissez le sol | Aplanissez le sol à...
- Seite 4 CAUTION | AVERTISSEMENT | ADVERTENCIA | WICHTIG | WAARSCHUWING | ATTENZIONE | ATENÇÃO Some parts have steel edges | Please be careful when handling components | Always wear work gloves, eye protection and long sleeveswhen assembling or performing any maintenance on your shed | Do not attempt assembly on days with strong winds or low temperatures. Certaines pièces ont des bords en acier | Soyez prudent en les manipulant | Portez toujours des gants de travail, des lunettes de protection et des vêtements à...
- Seite 5 BEFORE STARTING ASSEMBLY | AVANT DE COMMENCER LE MONTAGE | ANTES DE EMPEZAR EL ARMADO | VOR MONTAGEBEGINN | VOORDAT U BEGINT TE MONTEREN | PRIMA DI INIZIARE IL MON- TAGGIO | ANTES DE INICIAR A MONTAGEM seguintes passos | As peças estão marcadas com cores nas instruções para indicar quais deverão ser montadas numa determinada fase de montagem | Prepare antecipadamente estes componentes no início de cada fase.
- Seite 6 ASSEMBLY PARTS | PIÈCES À ASSEMBLER | PIEZAS DE ENSAMBLE | MONTAGETEILE | MONTAGESTUK- KEN | PARTI DA MONTARE | PEÇAS DE MONTAGEM For easy identification of the parts, code letters are imprinted on them | Pour une identification plus aisée, des lettres sont imprimées au dos de chaque pièce | Para una fácil identificación de las piezas, éstas llevan letras de código impresas | Für einfaches Identifizieren der Teile haben wir die Kennbuchstaben auf diesen eingeprägt | Voor het makkelijk identificeren van de onderdelen zijn er codeletters op afgedrukt | Per un’identificazione più...
- Seite 7 FLOOR PANELS | PANNEAUX DU SOL | PANELES DEL PISO | BODENELEMENTE | VLOERPANELEN | PANNELLI DEL PAVIMENTO | PAINÉIS DO PISO FS(X2) FG(X2) DOOR PARTS | PIÈCES DE LA PORTE | PARTES DE LA PUERTA | TÜRELEMENTE | DEURONDERDELEN | PARTI DELLA PORTA | PEÇAS DAS PORTAS DOOR TYPE 1 | PORTE DE TYPE 1 | TÜRTYP 1 | TIPO DE DOOR TYPE 2 | PORTE DE TYPE 2 | TÜRTYP 2 | TIPO DE...
- Seite 8 FLOOR ASSEMBLY • MONTAGE DU SOL • MONTAGE DER BODENPLATTE • ARMADO DEL PISO • VLOERMONTAGE • MONTAGGIO DEL PAVIMENTO • MONTAGEM DO PISO FG x 2 FS x 2...
- Seite 9 SC1 x 12 SHELL ASSEMBLY • MONTAGE DE LA STRUCTURE • GERÜSTMONTAGE • MONTAJE DEL ARMAZÓN MONTAGGIO DELLA STRUTTURA • GERAAMTESAMENSTELLING • MONTAGEM DA ESTRUTURA CO x 3 WA x 3 O x 1 O x 1...
- Seite 10 DECIDING ON THE LOCATION OF WINDOWS OVER DE LOCATIE VAN RAMEN BESLISSEN • Note that these panels (SPK) can be installed in any of the six wall panels. • Let op dat deze panelen (SPK) in elk van de zes-murige panelen •...
- Seite 11 SP/SPK x 1 • This side out • Côté extérieur • Cara exterior SP/SPK • Diese seite nach Aussen • Deze kant buiten • Lato rivolto verso L'esterno • Este lado para fora CS x 1 11 11...
- Seite 12 SP/SPK x 1 SP/SPK CO x 3 WA x 3 O x 1 12 12...
- Seite 13 CO x 2 WA x 2 TD2 x 1 CO x 3 WA x 3 O x 1 CS x 1 SP/SPK x 2 SP/SPK 13 13...
- Seite 14 CO x 3 WA x 3 O x 1 CS x 1 SP/SPK x 2 CO x 2 WA x 2 TD2 x 1 14 14...
- Seite 15 Follow the appropriate assembly instructions for your type of door. Suivez les instructions d’assemblage appropriées à votre type de porte. Befolgen Sie die entsprechende Montageanleitung für Ihren Türtyp. Siga las instrucciones de armado apropiadas para su tipo de puerta. Seguire le istruzioni di assemblaggio inerenti il vostro tipo di porta Volg de passende montage-instructies voor uw type deur.
- Seite 16 Door Type 2 • Porte de type 2 • Türtyp 2 • Tipo de Puerta 2 • Porta di tipo 2 • Deurtype 2 • Porta Tipo 2 2ND x 1 ND x 1 DB x 2 DX x 2 HG x 4...
- Seite 17 DD/ND x 2 17 17...
- Seite 18 ROOF ASSEMBLY • MONTAGE DU TOIT • DACHMONTAGE • ARMADO DEL TECHO DAKMONTAGE • MONTAGGIO DEL TETTO • MONTAGEM DO TELHADO A3, A4 x 1 A1, A2 x 1 BC x 2 • Back • Arrière • Trasero • Hinterseite •...
- Seite 19 CO x 8 WA x 8 AP x 1 Logo DUC x 2 CA x 1 19 19...
- Seite 20 BM x 1 SC9 x 4 AP x 1 MT2 x 2 20 20...
- Seite 21 NB x 2 RS x 12 SC9 x 12 DS x 2 21 21...
- Seite 22 SC6 x 16 SC9 x 4 22 22...
- Seite 23 Follow the appropriate assembly instructions for your type of door. Suivez les instructions d’assemblage appropriées à votre type de porte. Befolgen Sie die entsprechende Montageanleitung für Ihren Türtyp. Siga las instrucciones de armado apropiadas para su tipo de puerta. Seguire le istruzioni di assemblaggio inerenti il vostro tipo di porta Volg de passende montage-instructies voor uw type deur.
- Seite 24 DH1 x 1 • Left • Gauche • Izquierdo • Verließ • Links • Sinistra • Esquerdo...
- Seite 25 SC5 x 8 DNS x 1 • Left • Gauche • Izquierdo • Verließ • Links • Sinistra • Esquerdo DLA x 2 • Left • Gauche • Izquierdo • Verließ • Links • Sinistra • Esquerdo 25 25...
- Seite 26 DH2 x 1 SC5 x 2 • Right • Droit • Derecho • Richtig • Rechts • Destra • Direito Door Type 2 • Porte de type 2 • Türtyp 2 • Tipo de Puerta 2 • Porta di tipo 2 • Deurtype 2 • Porta Tipo 2 DH1 x 1 DH2 x 1 SC5 x 4...
- Seite 27 SC12 x 4 • Left side • Right side • Côté gauche • Côté droit • Lado izquierdo • Lado derecho • Linke Seite • Rechte Seite • Linkerzijde • Rechterzijde • Lato sinistro • Lato destro • Lado esquerdo •...
- Seite 28 SHELVES • ÉTAGÈRES • REGALE • ESTANTES • PLANKEN • MENSOLE • PRATELEIRAS SN x 2 SC6 x 2 SA x 2 GEMS x 2 SL x 2 GEMS OPTIONAL • OPCIÓN • OPTIE • OPZION • OPÇÃOE Option Option Opción Opción Optie...
-
Seite 29: Jahres -Garantie Mit Beschränkter Haftung
In case a problem should occur, please address your claim to customer service either by phone or through our web site: www.keter.com. The warranty is valid as of the date of purchase and a dated proof of purchase should be presented on request. -
Seite 30: Précautions Et Sécurité
GARANZIA LIMITATA DI 2 ANNI L’ottima reputazione di cui gode Keter per i suoi prodotti è il risultato di una dedizione e di un impegno costante verso la qualità, il design e l’innovazione. L’intera gamma degli armadietti e dei box viene prodotta con materiali di prima qualità, sotto un controllo e una supervisione rigorosi. Se dovesse presentarsi un problema, presentare reclamo al servizio d’assistenza, per telefono o attraverso il nostro sito Web: www.keter.com. -
Seite 31: Manutenzione E Sicurezza
anderen ungeeigneten Putzgeräten kann das Material beschädigen. zur Gefahr werden lassen. die Windbelastung des Schuppen im Allgemeinen und der Türseite im Besonderen zu verringern. CUIDADO Y SEGURIDAD marcados, e insertando los tornillos apropiados en el suelo (tamaño: 1,9’’-3’’. L os tornillos no vienen incluidos.). de limpieza abrasivo podría dañar el cobertizo.