Eminent Easy Pro View Schnelle Installation
Quicklinks
Easy Pro View
Professional IP Camera | Quick Install Guide
Package Content
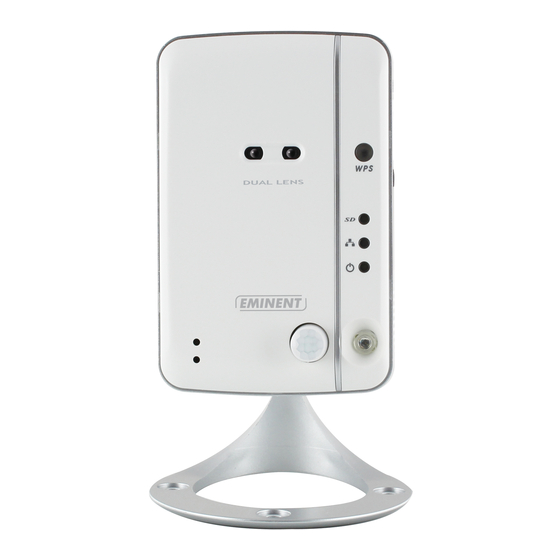
IP Cam
Bracket
Installation CD
Plugs &
Power Adapter
Ethernet Cable
1
Screws
IP Cam
Power Adapter
EN
1. Connect the power adapter to the camera and the mains. The red LED on the camera will be on.
2. Connect the ethernet cable to the Modem/Router and to the IP Camera. The blue LED will be on.
3. The IP Camera will get an IP address from the Modem/Router(with DHCP enabled) automatically and will be connected to the internet.
Check if the red and blue LEDs of the IP Camera are on. If the red LED is blinking, please check step 1 and 2 again.
NL
1. Sluit de voeding aan. De rode LED zal aangaan.
2. Sluit de ethernetkabel aan op de router en op de IP Camera. De blauwe LED zal aangaan.
3. De IP Camera krijgt automatisch een IP adres van de router (met DHCP ingeschakeld) en zal met het internet verbonden worden.
Controleer of de rode en blauwe LED's van de IP camera aanstaan. Controleer stap 1 en 2, als de rode LED knippert.
Snel installeren | Installation rapide | Installazione rapida | Schnelle Installation | Instalación rápida | Guia de instalação rápida | Gyors telepítés
ID/Password Card Quick Install Guide
Screw Driver
NAT/Router
Ethernet Cable
Internet
Hardware installation
EN
Use the Screw Driver "A" counterclockwise
to loosen the screw "B" a little.
Draai de schroevendraaier "A" tegen de
NL
klok in, om de schroef wat losser te draaien.
Utilisez le tournevis "A" dans le sens
FR
antihoraire pour desserrer un peu la vis "B".
IT
Girare il cacciavite "A" in senso antiorario per allentare
leggermente la vite "B".
DE
Drehen Sie den Schraubendreher "A" gegen den
Uhrzeigersinn, um die Schraube "B" ein wenig zu lösen.
ES
Utilice el destornillador "A" girándolo en sentido contrario a
las agujas del reloj para aflojar el tornillo "B" un poco.
HU
Az "A" csavarhúzó segítségével lazítsa meg kissé a "B"
csavart annak balra forgatásával.
Com a chave de fendas "A",
PT
rode no sentido contrário aos ponteiros do relógio para
desapertar o parafuso "B" ligeiramente.
Connecting the IP cam to the internet
1. Branchez l'adaptateur secteur sur la caméra et surs le secteur. La LED rouge de la caméra s'allume.
FR
2. Connectez le câble Ethernet au modem / routeur et à la caméra IP. La LED bleue s'allume.
3. La caméra IP obtient une adresse IP à partir du modem / routeur (avec DHCP activé) et est automatiquement connectée à Internet.
Vérifiez si les LED rouge et bleue de la caméra IP sont allumés. Si la LED rouge clignote, veuillez vérifiez à nouveau les étapes 1 et 2.
IT
1. Collegare l'adattatore di alimentazione alla telecamera e alla rete. Il LED rosso della telecamera si accende.
2. Collegare il cavo Ethernet al modem/router e alla telecamera IP. Il LED blu si accende.
3. La telecamera IP ottiene automaticamente un indirizzo IP dal modem/router (con DHCP abilitato) e viene connessa ad Internet.
Controllare se i LED rosso e blu della telecamera IP sono accesi. Se il LED rosso lampeggia, controllare di nuovo i passi 1 e 2.
DE
1. Verbinden Sie das Netzteil mit der Kamera und dem Netzstrom. Die rote LED an der Kamera leuchtet jetzt.
2. Verbinden Sie das Ethernet-Kabel mit dem Modem/Router und der IP-Kamera. Die blaue LED leuchtet jetzt.
3. Die IP-Kamera bezieht eine IP-Adresse automatisch vom Modem/Router(bei aktiviertem DHCP) und verbindet sich mit dem Internet.
Vergewissern Sie sich, dass die roten und blauen LEDs der IP-Kamera leuchten. Sollte die rote LED blinken, wiederholen Sie bitte die Schritte 1 und 2.
1. Conecte el adaptador de alimentación a la cámara y a la toma de corriente. El LED de color rojo de la cámara se encenderá.
ES
2. Conecte el cable Ethernet al módem o enrutador y a la cámara IP. El LED azul se encenderá.
3. La cámara IP obtendrá una dirección IP del módem o enrutador (con la función DHCP habilitada) automáticamente y se conectará a Internet.
Compruebe si los LED rojo y azul de la cámara IP están encendidos. Si el LED rojo parpadea, compruebe los pasos 1 y 2 de nuevo.
HU
1. Csatlakoztassa a hálózati adaptert a kamerához és az áramforráshoz. A kamerán lévő vörös LED bekapcsolódik.
2. Csatlakoztassa az Ethernet kábelt a Modem/Routerhez és az IP kamerához. A kék LED bekapcsolódik.
3. Az IP kamera az IP-címet a Modem/Routertől automatikusan megkapja (engedélyezett DHCP mellett) és az internethez csatlakozik.
Ellenőrizze, hogy az IP-kamera vörös és kék LED-jei világítanak-e. Ha a vörös LED villog, ellenőrizze újra az 1. és 2. lépést.
1. Ligue o transformador à câmara e à tomada elétrica. O LED vermelho na câmara irá acender.
PT
2. Ligue o cabo Ethernet ao Modem/Router e à Câmara IP. O LED azul irá acender.
3. A Câmara IP irá obter um endereço IP a partir do Modem/Router (com DHCP ativado) automaticamente e será ligada à Internet.
Verifique se os LED vermelho e azul da Câmara IP estão ligados. Se o LED vermelho estiver intermitente, volte a efetuar os passos 1 e 2.
Place the bracket in the mounting hole,
Use the Screw Driver "A" clockwise to
and adjust it to the appropriate angle.
tighten the screw "B"
Plaats de houder in het montagegat en
Draai de schroevendraaier "A" met de
en draai de montagebeugel naar de gewenste stand.
klok mee om de schroef vast te draaien.
Placez le support dans le trou de montage,
Utilisez le tournevis "A" dans
et ajustez-le à l'angle approprié.
le sens horaire pour serrer la vis "B"
Posizionare la staffa nel foro
Girare il cacciavite "A" in senso orario
di montaggio e regolarla all'angolo adeguato.
per serrare la vite "B"
Stecken Sie die Halterung in das Montageloch und richten.
Drehen Sie den Schraubendreher "A" im Uhrzeigersinn,
Sie sie in einem passenden Winkel aus.
um die Schraube "B" fest anzuziehen.
Coloque el soporte en el orificio de montaje y
Utilice el destornillador "A" girándolo en
ajústelo al ángulo apropiado.
el sentido de las agujas del reloj para apretar el tornillo "B"
Illessze a konzolt a szerelőlyukra, majd állítsa be, hogy a
Az "A" csavarhúzó segítségével húzza meg
megfelelő szögben álljon.
a "B" csavart annak jobbra forgatásával.
Coloque o suporte no orifício de montagem,
"Com a chave de fendas "A", rode no sentido dos ponteiros
e ajuste-o até obter o ângulo adequado.
do relógio para apertar o parafuso "B".

Verwandte Anleitungen für Eminent Easy Pro View


Inhaltszusammenfassung für Eminent Easy Pro View
- Seite 1 Snel installeren | Installation rapide | Installazione rapida | Schnelle Installation | Instalación rápida | Guia de instalação rápida | Gyors telepítés Easy Pro View Hardware installation Professional IP Camera | Quick Install Guide Package Content Use the Screw Driver “A” counterclockwise Place the bracket in the mounting hole, Use the Screw Driver “A”...
- Seite 2 For wireless/WPS installation or PC configuration check the full manual on the CD-Rom. The full manual can be found on the cd-rom. Please check our website www.eminent-online.com for the newest updated manual, drivers and firmware. Also, you will find frequently asked questions in the FAQ section.