Herunterladen Inhalt Inhalt Diese Seite drucken
Inhaltsverzeichnis

Werbung

Verfügbare Sprachen
  • DE

Verfügbare Sprachen

  • DEUTSCH, seite 35

Werbung

Inhaltsverzeichnis
loading

Inhaltszusammenfassung für Telefunken CLASSIC Serie

  • Seite 2: Inhaltsverzeichnis

    MODE D’EMPLOI CADRE PHOTOS NUMERIQUES TELEFUNKEN DPF 15002 I. Découvrez et installez votre cadre ............2 1. Contenu de la boîte ......................2 2. Schéma du cadre ......................2 3. Installation ........................... 2 II. Utilisez votre cadre ................... 3 1. Sélection de la langue ....................... 3 2.
  • Seite 3: Découvrez Et Installez Votre Cadre

    Découvrez et installez votre cadre Vous venez d’acheter un cadre photo numérique TELEFUNKEN DPF 15002 et nous vous en remercions. Avant d’utiliser votre appareil, veuillez consulter le présent mode d’emploi et le conserver afin de pouvoir vous y reporter ultérieurement.
  • Seite 4: Utilisez Votre Cadre

    Utilisez votre cadre 1. Sélection de la langue Une fois le diaporama lancé, appuyez sur la touche « EXIT » de la télécommande pour afficher l’écran de menu principal puis appuyez sur le bouton « SETUP ». A l’aide des touches « DROITE/GAUCHE » de la télécommande, sélectionnez l’icône des langues, puis appuyez sur «...
  • Seite 5: Suppression De Photos

    A partir de l’écran de menu principal, sélectionnez l’icône « Dossiers » à l’aide des touches « DROITE/GAUCHE » de la télécommande et appuyez sur la touche « ENTER ». La liste de tous les fichiers présents sur votre support s’affiche. Sélectionnez les fichiers à copier à l’aide des touches «...
  • Seite 6: Sélection Du Type De Fichiers À Lire

    Supprimer vos photos à partir du mode vignettes Avec cette méthode, vous pouvez supprimer une sélection ou toutes les photos de la mémoire interne. 1. A partir du menu principal, sélectionnez l’icône « Photo » et appuyez sur « ENTER ». Les images s’affichent sous forme de vignettes.
  • Seite 7: Configuration Photo

    Réinitialiser le cadre Afficher la version du logiciel interne du cadre 1. Configuration Photo Lorsque vous êtes dans le menu principal, sélectionnez l’icône « Photo » et appuyez sur « ENTER ». Les vignettes s’affichent. Appuyez sur « SETUP » pour afficher le menu photo. Vous pouvez alors régler les paramètres suivants : L’ordre de classement des photos La copie des photos (si vous lisez une carte mémoire ou une clé...
  • Seite 8: Réglages Musique

    2. Réglages musique Lorsque vous êtes dans le menu principal, sélectionnez l’icône « Musique » à l’aide des touches « DROITE/GAUCHE » de votre télécommande puis appuyez sur «ENTER». Appuyez sur « SETUP » pour accéder au menu de réglage. Vous pouvez paramétrer : L’ordre de classement des fichiers La copie des fichiers (si vous lisez une carte mémoire ou une clé...
  • Seite 9: Configuration Calendrier

    Il est possible de transférer des fichiers dans le cadre en reliant celui-ci à votre micro-ordinateur. Pour en savoir plus, vous pouvez télécharger le mode d’emploi complet sur le site : http://www.telefunken-digicadre.com Instructions de sécurité Manipulez le cadre photo numérique avec précaution et évitez de toucher l’écran ; les traces de doigts sont difficiles à...
  • Seite 10: Garantie

    Ventilation Les emplacements pour cartes mémoires et les ouvertures permettent de ventiler le cadre. Pour assurer une utilisation optimale du cadre et pour empêcher toute surchauffe, ces ouvertures ne doivent pas être obstruées ou couvertes. Gardez le cadre numérique à une distance suffisante du mur pour assurer sa ventilation. Ne placez pas le cadre photo numérique sur un lit ou un canapé...
  • Seite 11 Exclusion Les dommages ou défauts causés par une mauvaise utilisation ou manipulation du cadre numérique et par l’utilisation d’accessoires autres que ceux d’origine ou non recommandés par la présente notice ne sont pas couverts par la garantie. La garantie ne couvre pas les dommages causés par des éléments extérieurs comme la foudre, l’eau ou le feu ou tout autre dommage causé...
  • Seite 12: Caractéristiques Techniques

    VIII. Caractéristiques techniques Caractéristiques DPF 15002 Taille 15 ˝ 1024 x 768 Définition Ratio image Mémoire interne 2 Go Audio/vidéo Cartes compatibles SD/MMC, SDHC, MS, XD, CF, Clés USB Redimensionnement auto Rotation auto Entrée alimentation 100-240 V AC 50/60 Hz 12V DC 2Ah Sortie alimentation Dimensions...
  • Seite 13 DIGITAL PHOTO FRAME INSTRUCTIONS TELEFUNKEN DPF 15002 I. Learn about and install your frame ............2 1. Box contents ........................2 2. Frame diagram ........................2 3. Installation ........................... 3 II. Use your frame ..................3 1. Selecting a language ......................3 2.
  • Seite 14: Learn About And Install Your Frame

    I. Learn about and install your frame Thank you for your recent purchase of a TELEFUNKEN DPF 15002 digital photo frame. Before using your device, please consult these operating instructions and keep them so you may refer to them later 1.
  • Seite 15: Installation

    3. Installation Take your frame and its accessories out of their packaging. Remove the plastic film protecting the front of the frame. Pull the plastic tab protecting the contacts in the remote control. Install the frame's stand by sliding it into the slot provided on the back of the frame. Position the frame in the desired location, pulling the adjustable stand towards you.
  • Seite 16: Copying Photos To The Internal Memory

    If your media (card, key or internal memory) contains music, the slideshow will play without it. To activate music during the slideshow, press the "ENTER" key on the remote. 3. Copying photos to the internal memory There are two ways to copy images from your memory card to the frame's internal memory. Copy your files from the file manager If you use this method, you can select any type of file to copy (photos, audio, video).
  • Seite 17: Selecting The Type Of Files To Play

    From the main menu screen, select the "Folders" icon using the "RIGHT/LEFT" keys on the remote and press the "ENTER" key. The list of every file on your media will appear. Select the files to delete using the "UP/DOWN" keys on your remote, and confirm the selection of each file by pressing the "Select"...
  • Seite 18: Music

    3. Music Press the "EXIT" key twice to display the main screen. Using the "RIGHT/LEFT" keys on the remote, select the "Music" icon. Press the "ENTER" key: playback will begin. IV. Settings In slideshow mode, press the "EXIT" key on the remote to display the main menu, then press the "SETUP"...
  • Seite 19: Music Settings

    Transition effects Image display time Screen brightness, contrast, saturation and tint For these settings, select the desired icon, press "ENTER", choose the setting you want using the "UP/DOWN" keys and press "EXIT". When you are in slideshow mode, pressing the "SETUP" key will display a menu that lets you access: Image rotate Zoom Copying of photos (if you are reading a memory card or a USB key)
  • Seite 20: Video Settings

    V. Other information It is possible to transfer files into the frame by connecting it to your personal computer. For more information, you can download the complete operating instructions at: http://www.telefunken-digicadre.com Noncontractual document subject to change in case of typographical errors (Mktg1009)
  • Seite 21: Safety Instructions

    VI. Safety instructions Handle the digital photo frame with care, and avoid touching the screen; fingerprints are difficult to remove. Always set the digital photo frame on a flat and stable surface to prevent it from falling and being damaged. Avoid exposing the digital photo frame to the sun or high temperatures, as these may damage the frame or reduce its operational life.
  • Seite 22 The warranty must be proven by presenting the original invoice or receipt on which the date and model purchased appear. Coverage A defective digital frame must be returned complete to your distributor with an explanation. If this digital frame presents a defect during the warranty period, the authorized After-Sales Service will repair any defective component or manufacturing defect.
  • Seite 23: Specifications

    VIII. Specifications Characteristic DPF 15002 Display dimensions 15" 1024 x 768 Resolution Image ratio Internal memory 2 GB Audio/video Compatible cards SD/MMC, SDHC, MS, XD, CF, USB keys Auto resizing Auto rotation Power input 100-240V AC 50/60 Hz 12V DC 2Ah Power output Dimensions 450 x 340 x 35 mm...
  • Seite 24 MANUAL DE INSTRUCCIONES DEL MARCO DE FOTOS DIGITAL TELEFUNKEN DPF 15002 I. Conocer e instalar el marco ..............2 1. Contenido de la caja ......................2 2. Esquema del marco ......................2 3. Instalación ........................... 3 II. Utilización del marco ................3 1.
  • Seite 25: Conocer E Instalar El Marco

    I. Conocer e instalar el marco Le agradecemos la compra de un marco de fotos digital TELEFUNKEN DPF 15002. Antes de utilizar el aparato, lea las presentes instrucciones de uso y consérvelas para poder consultarlas posteriormente. 1. Contenido de la caja...
  • Seite 26: Instalación

    3. Instalación Saque el marco y sus accesorios del embalaje Retire la lámina de plástico de protección de la pantalla del marco Tire de la lengüeta de plástico que protege los contactos del mando a distancia Coloque la base deslizándola por las ranuras detrás del marco Coloque el marco en el lugar deseado tirando hacia usted de la base ajustable.
  • Seite 27: Copia De Fotos En La Memoria Interna

    Si el soporte (tarjeta, memoria extraíble o interna) contiene música, la presentación de dispositivas se verá sin música. Para activar la música durante la presentación de diapositivas, pulse el botón«ENTER» del mando a distancia. 3. Copia de fotos en la memoria interna Existen dos métodos para copiar imágenes de su tarjeta de memoria a la memoria interna del marco.
  • Seite 28: Selección Del Tipo De Archivos Para Reproducirlos

    Suprima sus archivos a través del administrador de archivos Si utiliza este método, podrá seleccionar y eliminar cualquier tipo de archivo (foto, audio o vídeo). menú principal, seleccione icono «Carpetas» mediante botones «DERECHA/IZQUIERDA» del mando a distancia y pulse «ENTER». Aparecerá la lista con todos los archivos existentes en el soporte.
  • Seite 29: Música

    3. Música Pulse dos veces el botón «EXIT» para ver la pantalla principal. Por medio de los botones «IZQUIERDA/DERECHA» del mando a distancia, seleccione el icono «Música». Pulse el botón «ENTER» para iniciar la lectura. IV. Ajustes Durante la presentación de diapositivas, pulse el botón «EXIT» del mando a distancia para ver el menú principal y pulse el botón «SETUP».
  • Seite 30: Ajustes De La Música

    Rotación de la foto Ampliar foto Copia de las fotos (de una tarjeta de memoria o memoria extraíble USB) Supresión de fotos (al leer las fotos de la memoria interna. No se preocupe por la seguridad, no se pueden suprimir fotos de una tarjeta de memoria o memoria extraíble USB) Ajuste del brillo, contraste, color y saturación de la pantalla OBSERVACIÓN: También puede acceder a las opciones ampliar y rotación con los botones del mando a distancia.
  • Seite 31: Configuración Del Calendario

    Se pueden transferir archivos al marco conectándolo a su ordenador. Para obtener más información al respecto, puede descargar las instrucciones de uso completas de la página: http://www.telefunken-digicadre.com VI. Instrucciones de seguridad Manipule el marco de fotos digital con precaución y evite tocar la pantalla; las marcas de dedos son difíciles de limpiar.
  • Seite 32 Vigile la ubicación del cable de alimentación, que no deberá poder pisarse ni estar en contacto con otros objetos. No coloque el cable sobre un tapete. Compruebe periódicamente el estado del cable para prevenir cualquier daño. Si el cable está dañado, desconéctelo y sustitúyalo. Ventilación ranuras tarjetas...
  • Seite 33: Garantía

    Exclusión Los daños o defectos ocasionados por el mal uso o la manipulación del marco digital o bien por la utilización de accesorios no originales o no recomendados por el presente aviso no están cubiertos por la garantía. La garantía no cubre los daños ocasionados por elementos exteriores como rayos, inundaciones o incendios, ni ningún otro daño ocasionado durante un transporte.
  • Seite 34 Salida alimentación 12 V CC 2 Ah Dimensiones 450 × 340 × 35 mm 2,950 kg Peso Sistemas compatibles Windows XP, Vista, Mac OS 9.0 y posteriores Documento no contractual que puede sufrir modificaciones en caso de errores tipográficos (Mktg1009)
  • Seite 35 BEDIENUNGSANLEITUNG DIGITALBILDERRAHMEN TELEFUNKEN DPF 15002 I. Auspacken und Installieren Ihres Bilderrahmens ....... 2 1. Inhalt der Verpackung ....................... 2 2. Abbildung des Rahmens ....................2 3. Installierung ........................3 II. Benutzung Ihres Bilderrahmens ............. 3 1. Sprachauswahl ........................3 2. Lesen einer Speicherkarte oder eines USB-Sticks ............3 3.
  • Seite 36: Auspacken Und Installieren Ihres Bilderrahmens

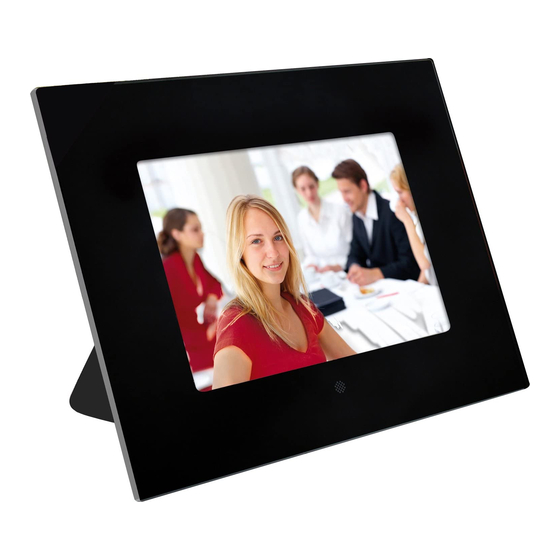
    I. Auspacken und Installieren Ihres Bilderrahmens Vielen Dank für Ihren Kauf des digitalen Bilderrahmens TELEFUNKEN DPF 15002. Bevor Sie Ihr Gerät benutzen, lesen Sie bitte die vorliegende Gebrauchsanweisung durch und bewahren Sie sie gut auf, um später auf sie zurückgreifen zu können.
  • Seite 37: Installierung

    3. Installierung Nehmen Sie Ihren Bilderrahmen und sein Zubehör aus der Verpackung. Entfernen Sie die Schutzfolie von der Vorderseite des Bilderrahmens. Ziehen Sie den Plastikstreifen zum Schutz der Kontakte der Fernbedienung ab. Installieren Sie den Ständer des Rahmens, indem Sie ihn an der hierfür vorgesehenen Stelle auf der Rückseite des Rahmens einschieben.
  • Seite 38: Kopieren Von Fotos In Den Internen Speicher

    Wählen Sie mithilfe der Tasten „Rechts/Links“ der Fernbedienung die gewünschte Karte aus und drücken Sie auf „Enter“, um Ihre Wahl zu bestätigen. Das Hauptmenü wird erneut angezeigt; Drücken Sie auf die Taste „SLIDE SHOW“, um die Diashow zu starten. Falls Ihr Datenträger (Karte, Stick oder interner Speicher) Musik enthält, wird die Diashow ohne Musik abgespielt.
  • Seite 39: Löschen Von Fotos

    4. Löschen von Fotos Sie können Fotos löschen, die sich im internen Speicher Ihres Bilderrahmens befinden. Löschen Ihrer Dateien über den Dateimanager. Wenn Sie diese Methode anwenden, können Sie die zu löschenden Dateien egal welcher Art (Foto, Audio, Video) auswählen. Wählen Sie im Hauptmenü...
  • Seite 40: Videos

    2. Videos Drücken Sie auf die „Exit“-Taste, um den Hauptbildschirm aufzurufen. Wählen Sie mithilfe der Pfeiltasten „Links/Rechts“ der Fernbedienung das Symbol „Video“. Drücken Sie auf „Enter“: das Abspielen beginnt. 3. Musik Drücken Sie zweimal auf die „Exit“-Taste, um den Hauptbildschirm aufzurufen. Wählen Sie mithilfe der Pfeiltasten „Links/Rechts“...
  • Seite 41: Musikeinstellungen

    Zurücksetzen des Rahmens Auswahl der zu lesenden Datenträgerart Anzeigegröße Aktivierung der Mehrfachanzeige Übergangseffekte Anzeigedauer der Bilder Helligkeit, Kontrast, Sättigung und Farbe des Bildschirms Wählen Sie für alle diese Einstellungen das gewünschte Symbol, drücken Sie auf „Enter“ und wählen Sie die gewünschte Einstellung mithilfe der Tasten „Hoch/Runter“. Drücken Sie anschließend auf „Exit“.
  • Seite 42: Videoeinstellungen

    Das Löschen von Dateien (falls die Dateien aus dem internen Speicher abgelesen werden. Aus Sicherheitsgründen ist es nicht möglich, Dateien von einer Speicherkarte oder einem USB-Stick zu löschen.) Zurücksetzen des Rahmens Auswahl der zu lesenden Datenträgerart Art des Ablesens Auswahl eines Musikstücks als Weckton Wählen Sie den einzustellenden Parameter anhand der Tasten „Rechts/Links“...
  • Seite 43: Weitere Funktionen

    Es ist möglich, Dateien von einem PC auf den Bilderrahmen zu übertragen. Mehr dazu erfahren Sie in der kompletten Gebrauchsanweisung, die Sie auf der folgenden Website herunterladen können: http://www.telefunken-digicadre.com VI. Sicherheitshinweise Behandeln Sie den digitalen Bilderrahmen mit Vorsicht und vermeiden Sie es, den Bildschirm zu berühren, denn Fingerabdrücke lassen sich nur schwer entfernen.
  • Seite 44: Garantie

    Nehmen Sie in keinem Fall die Plastikhaube auf der Rückseite des Bilderrahmens ab. Der digitale Bilderrahmen enthält Stromkreise, an denen Sie sich verletzen können, falls Sie sie anfassen. Versuchen Sie nicht, Ihren digitalen Bilderrahmen selbst zu reparieren. VII. Garantie Die Garantie deckt keine Schäden ab, die durch einen Reparaturversuch durch Sie (oder eine andere nicht autorisierte Person) entstanden sind.
  • Seite 45: Technische Merkmale

    Schäden oder Defekte, die durch eine unsachgemäße Benutzung oder Handhabung des digitalen Bilderrahmens oder durch die Verwendung von nicht originalen Zubehörteilen oder von Zubehörteilen, die von der vorliegenden Gebrauchsanweisung nicht empfohlen werden, entstehen, sind von der Garantie ausgeschlossen. Die Garantie deckt keine Schäden ab, die durch äußere Einflüsse wie Blitz, Wasser oder Feuer verursacht werden oder während eines Transports entstehen.
  • Seite 46 Merkmale DPF 15002 Größe 15 ˝ Auflösung 1024 x 768 Bildratio Interner Speicher 2 GB Audio/Video Kompatible Karten SD/MMC, SDHC, MS, XD, CF, USB-Sticks Automatische Skalierung Automatisches Drehen NEIN Eingangsspannung 100-240 V AC 50/60 Hz Ausgangsspannung 12V DC 2Ah Maße 450 x 340 x 35 mm Gewicht 2,950 kg...
  • Seite 47 ISTRUZIONI PER L'USO DELLE CORNICI DIGITALI TELEFUNKEN DPF 15002 I. Descrizione e installazione della cornice ..........2 1. Contenuto della confezione ..................... 2 2. Schema della cornice ....................... 2 3. Installazione ........................3 II. Utilizzo della cornice ................3 1. Selezione della lingua ....................... 3 2.
  • Seite 48: Descrizione E Installazione Della Cornice

    I. Descrizione e installazione della cornice Grazie per aver acquistato una cornice digitale TELEFUNKEN DPF 15002. Prima di utilizzare questa apparecchiatura, consultare le presenti istruzioni per l'uso e conservarle per riferimento futuro. 1. Contenuto della confezione 1 cornice digitale 1 adattatore di rete...
  • Seite 49: Installazione

    3. Installazione Estrarre la cornice e gli accessori dall'imballaggio Rimuovere la pellicola in plastica che protegge la parte anteriore della cornice Tirare la linguetta di plastica che protegge i contatti del telecomando Installare il piedino facendolo scorrere nell'alloggiamento collocato sul retro della cornice. Poggiare la cornice nella posizione desiderata tirando verso di sé...
  • Seite 50: Copia Di Foto Nella Memoria Interna

    Se il supporto utilizzato (scheda, chiave o memoria interna) contiene brani musicali, lo slideshow verrà letto senza la musica. Per attivare la musica durante la presentazione, premere il tasto "Enter" del telecomando. 3. Copia di foto nella memoria interna Sono disponibili due modi per copiare le immagini dalla scheda di memoria alla memoria interna della cornice.
  • Seite 51: Eliminazione Di Foto

    4. Eliminazione di foto È possibile eliminare delle foto dalla memoria interna della cornice. Eliminazione dei file dall'utilità di gestione file Utilizzando questo metodo, sarà possibile selezionare i file il da eliminare qualunque sia la loro tipologia (foto, audio, video) Dalla schermata del menu principale, e aiutandosi con i tasti "DESTRA/SINISTRA"...
  • Seite 52: Video

    2. Video Premere il tasto "Exit" per visualizzare la schermata principale. Con le frecce "SINISTRA/DESTRA" del telecomando, selezionare l'icona "Video". Premere il tasto "ENTER": la lettura ha inizio 3. Musica Premere due volte il tasto "Exit" per visualizzare la schermata principale. Con le frecce "SINISTRA/DESTRA"...
  • Seite 53: Impostazioni Musica

    Reset della cornice (riporta ai valori predefiniti) Selezione del tipo di supporto da leggere Dimensioni di visualizzazione Attivazione della visualizzazione multipla Effetti di transizione Durata di visualizzazione delle immagini Luminosità, contrasto, saturazione e colore dello schermo Per tutte queste impostazioni, selezionare l'icona desiderata, premere "ENTER", scegliere l'impostazione più...
  • Seite 54: Impostazioni Video

    Eliminazione dei file (se si stanno leggendo le immagini della memoria interna. Questa operazione non pone problemi di sicurezza poiché non è possibile eliminare i file presenti su una scheda di memoria o su una chiave USB) Reset della cornice (riporta ai valori predefiniti) Selezione del tipo di supporto da leggere Tipo di lettura Selezione di un brano musicale da usare come allarme...
  • Seite 55: Altre Funzionalità

    V. Altre funzionalità È possibile trasferire dei file nella cornice collegandola al portatile. Per ulteriori informazioni, scaricare le istruzioni complete sul sito: http://www.telefunken-digicadre.com VI. Istruzioni di sicurezza Manipolare con attenzione la cornice digitale, evitando di toccare lo schermo: le impronte digitali sono difficili da togliere.
  • Seite 56 La garanzia non copre i danni causati dai tentativi di riparazione della cornice da parte dell'utente o di persone non autorizzate. Se la cornice emette fumo, rumori o odori inusuali, spegnerla e scollegarla immediatamente. Rivolgersi al rivenditore. Se non si utilizza la cornice digitale per un periodo prolungato, scollegare il cavo di alimentazione. La garanzia copre la cornice digitale e non include gli accessori.
  • Seite 57: Caratteristiche Tecniche

    Riciclo delle apparecchiature elettriche ed elettroniche al termine della loro durata utile. Le apparecchiature elettriche ed elettroniche usate non vanno smaltite con i rifiuti domestici comuni. La presenza del simbolo sul prodotto o sull'imballaggio lo ricorda. Alcuni materiali che compongono questo prodotto possono essere riciclati, se il prodotto viene consegnato a un centro di riciclo autorizzato.
  • Seite 58 GEBRUIKSAANWIJZING DIGITALE FOTOLIJST TELEFUNKEN DPF 15002 I. Uw fotolijst uitpakken en installeren ............. 2 1. Inhoud van de doos ......................2 2. Uitzicht van de fotolijst ..................... 2 3. Installeren ..........................3 II. Uw fotolijst gebruiken ................3 1. Selecteren van de taal ...................... 3 2.
  • Seite 59: Uw Fotolijst Uitpakken En Installeren

    I. Uw fotolijst uitpakken en installeren U hebt zonet de digitale fotolijst TELEFUNKEN DPF 15002 aangekocht, waarvoor onze dank. Wij raden u aan deze gebruiksaanwijzing grondig door te nemen alvorens uw apparaat in gebruik te nemen en ze daarna te bewaren voor toekomstig gebruik.
  • Seite 60: Installeren

    3. Installeren Verwijder de fotolijst en de accessoires uit hun verpakking. Verwijder de plastic beschermfolie van de voorkant van de fotolijst. Verwijder het plastic lipje dat de contacten van de afstandsbediening beschermt. Bevestig de voet aan de fotolijst door hem in de uitsparing op de achterzijde van de fotolijst te schuiven.
  • Seite 61: Kopiëren Van Foto's Naar Het Interne Geheugen

    Selecteer de gewenste kaart met behulp van de toetsen ‘LINKS/RECHTS’ op uw afstandsbediening en druk op ‘ENTER’ om uw keuze te bevestigen. Het hoofdmenu wordt opnieuw geopend. Druk op de toets ‘SLIDE SHOW’ om de diashow te starten. Als uw gegevensdrager (kaart, stick of intern geheugen) muziek bevat, dan zal de diashow zonder muziek worden weergegeven.
  • Seite 62: Foto's Verwijderen

    4. Druk op ‘Enter’. U kunt nu de foto’s bevestigen, annuleren of kopiëren en hun formaat aanpassen aan de resolutie van de fotolijst. Maak uw selectie en druk op de toets ‘ENTER’. 4. Foto’s verwijderen U kunt foto’s uit het interne geheugen van uw fotolijst verwijderen. Uw foto’s verwijderen via bestandsbeheer Als u deze methode gebruikt, kunt u alle soorten bestanden verwijderen (foto, audio, video) Selecteer in het hoofdmenu het pictogram ‘Mappen’...
  • Seite 63: Selecteren Van Het Type Te Lezen Bestanden

    III. Selecteren van het type te lezen bestanden 1. Foto’s Ongeacht in welke weergave u zich bevindt, wanneer u op de toets ‘SLIDESHOW’ drukt, zal de fotodiashow worden gestart. 2. Video’s Druk op de toets ‘EXIT’ om het hoofdscherm weer te geven. Selecteer met behulp van de pijltjestoetsen ‘LINKS/RECHTS’...
  • Seite 64: Fotoconfiguratie

    1. Fotoconfiguratie Wanneer u zich in het hoofdmenu bevindt, selecteer dan het pictogram ‘Foto’ en druk op ‘ENTER’.De miniatuurafbeeldingen worden weergegeven. Druk op ‘SETUP’ om het fotomenu weer te geven. U kunt nu de volgende parameters instellen: Weergavevolgorde van foto’s Kopiëren van foto’s (als u een geheugenkaart of USB-stick leest) Verwijderen van foto’s (als u foto’s uit het interne geheugen leest.
  • Seite 65: Muziekinstellingen

    2. Muziekinstellingen Wanneer u zich in het hoofdmenu bevindt, selecteer dan het pictogram ‘Muziek’ met behulp van de toetsen ‘LINKS/RECHTS’ op uw afstandsbediening en druk vervolgens op ‘ENTER’. Druk op ‘SETUP’ om toegang te krijgen tot het instellingenmenu. U kunt volgende zaken instellen: Weergavevolgorde van bestanden Kopiëren van bestanden (als u een geheugenkaart of USB-stick leest) Verwijderen van bestanden (als u bestanden uit het interne geheugen leest.
  • Seite 66: Kalenderconfiguratie

    Het is mogelijk om bestanden over te zetten naar de fotolijst door deze aan te sluiten op uw pc. Meer informatie hierover vindt u in de volledige gebruikshandleiding die u kunt downloaden op de volgende site: http://www.telefunken-digicadre.com VI. Veiligheidsinstructies Hanteer de fotolijst voorzichtig en vermijd het aanraken van het scherm. Vingerafdrukken zijn moeilijk te verwijderen.
  • Seite 67: Garantie

    Ventilatie De sleuven voor de geheugenkaarten en de openingen maken het mogelijk om de fotolijst te ventileren. Om een optimaal gebruik van de lijst te garanderen en om oververhitting te voorkomen, mogen deze openingen niet versperd of afgedekt worden. Bewaar voor een goede ventilatie voldoende afstand tussen de digitale fotolijst en de muur. Plaats de digitale fotolijst niet op een bed of een zitbank om oververhitting te voorkomen.
  • Seite 68: Technische Specificaties

    Uitsluiting Schade of defecten veroorzaakt door een foutief gebruik of hanteren van de digitale fotolijst en door het gebruik van andere dan de oorspronkelijke accessoires of accessoires die niet worden aanbevolen door deze instructies worden niet gedekt door de garantie. De garantie dekt geen schade die veroorzaakt wordt door externe elementen zoals bliksem, water, brand of alle andere schade veroorzaakt tijdens transport.
  • Seite 69 Beeldverhouding Intern geheugen 2 GB Audio/video Compatibele kaarten SD/MMC, SDHC, MS, XD, CF, USB-keys Automatische formaataanpassing Automatisch roteren Stroomingang 100-240 V AC 50/60 Hz Stroomuitgang 12 V DC 2Ah 450 x 340 x 35 mm Afmetingen 2,950 kg Gewicht Systeemcompatibiliteit Windows XP, Vista, Mac OS 9.0 en latere versies...
  • Seite 70 MANUAL DE UTILIZAÇÃO MOLDURA FOTOGRÁFICA DIGITAL TELEFUNKEN DPF 15002 I. Conheça e instale a sua moldura ............2 1. Conteúdo da embalagem ....................2 2. Esquema da moldura ......................2 3. Instalação ..........................3 II. Utilização da moldura ................3 1.
  • Seite 71: Conheça E Instale A Sua Moldura

    I. Conheça e instale a sua moldura Acaba de adquirir uma moldura fotográfica digital TELEFUNKEN DPF 15002, pelo que lhe estamos gratos. Antes de utilizar o seu dispositivo, queira consultar este manual de utilização, conservando-o para futuras consultas. 1. Conteúdo da embalagem 1 Moldura fotográfica digital...
  • Seite 72: Instalação

    3. Instalação Retire a moldura e respectivos acessórios da embalagem Retire o filme plástico de protecção da parte da frente da moldura Puxe a fita plástica destinada a proteger os contactos do telecomando Instale o suporte da moldura fazendo-o deslizar para dentro do local previsto na parte de trás da moldura Coloque a moldura no local pretendido puxando para si o suporte ajustável Ligue o cabo de alimentação à...
  • Seite 73: Cópia De Fotos Para A Memória Interna

    Caso o suporte (cartão, disco USB ou memória interna) contenha música, o diaporama será lido sem a música. Para activar a música durante o diaporama, prima a tecla "Enter" do telecomando. 3. Cópia de fotos para a memória interna Existem dois métodos para copiar imagens do seu cartão de memória para a memória interna da moldura.
  • Seite 74: Selecção Do Tipo De Ficheiros A Serem Lidos

    Eliminar os seus ficheiros a partir do gestor de ficheiros Caso utilize este método, poderá seleccionar os ficheiros a eliminar qualquer que seja o tipo dos mesmos (foto, áudio, vídeo) A partir do ecrã do menu principal, seleccione o ícone "Pastas" através das teclas "DIREITA/ESQUERDA"...
  • Seite 75: A Música

    3. A música Prima duas vezes a tecla "Sair" para visualizar o ecrã principal. Através das setas "Esquerda/Direita" do telecomando, seleccione o ícone "Música". Prima a tecla "Enter": a leitura começa. IV. Os ajustes Durante o diaporama, prima a tecla "SAIR" do telecomando para visualizar o menu principal e depois prima a tecla "DEF".
  • Seite 76: Ajustes Da Música

    A rotação da imagem O zoom A cópia das fotos (caso esteja a ler a partir de um cartão de memória ou um disco USB) A eliminação das fotos (caso esteja a ler as imagens a partir da memória interna. Por questões de segurança, não é...
  • Seite 77: Configuração Calendário

    É possível transferir ficheiros para a moldura ligando-a ao seu microcomputador. Para mais informações, poderá descarregar o manual de utilização completo no site: http://www.telefunken-digicadre.com VI. Instruções de segurança Manipule a moldura fotográfica digital com precaução para evitar tocar no ecrã; é difícil retirar as marcas de dedos.
  • Seite 78: Garantia

    Evite expor a moldura digital à chuva, água ou humidade. Não o coloque num lavatório nem numa bacia onde poderia entrar em contacto com a água. Nunca coloque objectos pesados ou cortantes sobre a moldura, o ecrã ou a alimentação da moldura. Tenha o cuidado de não ligar a moldura fotográfica digital a uma tomada ou um cabo com alimentação demasiado potente.
  • Seite 79 Uma moldura digital com defeito deverá ser devolvida completa ao seu distribuidor com uma nota explicativa. Caso a moldura digital apresente um defeito durante o período de garantia, o Serviço Pós-Venda autorizado irá consertar todos os elementos com defeito ou qualquer defeito de fabrico. O Serviço Pós- Venda decidirá...
  • Seite 80: Características Técnicas

    VIII. Características técnicas Características DPF 15002 Tamanho 15 ˝ Definição 1024 x 768 Rácio imagem Memória interna 2 GB Áudio/vídeo SD/MMC, SDHC, MS, Cartões compatíveis XD, CF, discos USB Redimensionamento automático Rotação automática NÃO Entrada alimentação 100-240 V CA 50/60 Hz Saída alimentação 12V CC 2Ah Dimensões...

Diese Anleitung auch für:

Dpf15002

Inhaltsverzeichnis