Inhaltsverzeichnis
Werbung
Werbung
Inhaltsverzeichnis
Fehlerbehebung

Verwandte Anleitungen für auna 10021816


Inhaltszusammenfassung für auna 10021816
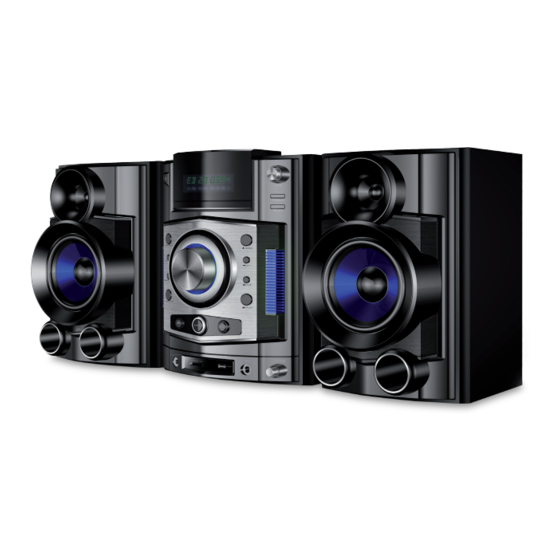
- Seite 1 DVD-Micro-System 10021815 10021816...
- Seite 2 Lieferumfang: • Gerät • 2.0 Lautsprecher • Fernbedienung • UKW-Antenne • Audio/Video-Kabel • Bedienungsanleitung System-Anschluss Halten Sie sich beim Einrichten der Verbindungen an das abgebildete Schema. Stecken Sie den Netzstecker nicht in die Steckdose, solange diese Verbindungen noch nicht hergestellt wurden. Hinweise: 1.
-
Seite 3: Grundlegende Funktionen
Grundlegende Funktionen Wiedergabe 1. Drücken Sie die Power-Taste, um das Gerät einzuschalten. Eine eingelegte Disc wird vom System automatisch gestartet. Wenn keine Disc eingelegt ist, zeigt das Display „no disk“ an. 2. Drücken Sie die Auswerfen-Taste, um das CD-Fach zu öffnen. 3. Legen Sie die Disc ein und schließen Sie das Fach indem Sie die Taste erneut drücken. Wiedergabe stoppen 1. - Seite 4 Untertitel Drücken Sie „Subtitle“, um alle Untertitel-Optionen einzublenden. Titel Drücken Sie „Title“, um das Hauptmenü aufzurufen. (Diese Taste ist nur wirksam, wenn Untermenüs existieren) Angle Drücken Sie diese Taste, um (falls diese Option auf der DVD verfügbar ist) das Bild aus einem anderen Blickwinkel zu betrachten.
-
Seite 5: Spezielle Funktionen
Spezielle Funktionen Audio-CD Wiedergabe Das System ist in der Lage, Audio-CDs wiederzugeben. Drücken Sie Vor/Zurück, um zum nächsten bzw. zum vorherigen Titel zurückzukehren. Drücken Sie FF/FR, um vor- bzw. zurückzuspulen. MP3-Wiedergabe Sobald eine MP3-CD eingelegt wird, zeigt Ihnen das Gerät eine Übersicht des Inhalts an. Navigieren Sie mit den Richtungstasten durch die Übersicht und drücken Sie Enter/Play, um die ausgewählte Datei abzuspielen. -
Seite 6: Multimedia-Funktionen
Video-Einstellungen: Component: Hier können Sie die gewünschte Video-Ausgabe einstellen. Quality: Hier können Sie die Bild-Qualität anpassen. Verfügbare Optionen sind: Sharpness (Schärfe), Brightness (Helligkeit), Contrast (Kontrast) HDMI-Einstellungen: Hier können Sie die HDMI-Ausgabe ein- bzw. ausschalten und die Auflösung anpassen. Preference (Wiedergabe-Einstellungen): TV-Typ: Wählen Sie zwischen PAL, NTSC und Automatik Audio: Wählen Sie die Standard-Sprache für die DVD-Wiedergabe Subtitle (Untertitel): Wählen Sie Ihre Standard-Einstellung für Untertitel. -
Seite 7: Verbindung Zwischen Dvd-Player Und Lautsprecher
Radio 1. Drücken Sie die Taste „Signal Source“, um auf die Radio-Funktion zuzugreifen. 2. Drücken Sie dann „Search“ auf der Fernbedienung. Das System durchsucht die Frequenzen und speichert die gefundenen Sender auf den 20 Senderspeichern ab. 3. Mit VOR und ZURÜCK schalten Sie zwischen den Sendern hin und her. 4. -
Seite 8: Problembehebung
Bei einer älteren Version des Bluetooth-Moduls Ihres Gerätes (beispielsweise ihr Mobiltelefon), wird dieses Sie bei der erstmaligen Kopplung bitten, das Passwort „0000“ einzugeben. Wenn ihr Bluetooth-Gerät mit zu vielen Geräten gekoppelt ist, kann es u.U. zu Verbindungsproblemen kommen. Entfernen Sie in diesem Fall andere Geräte aus der Geräte-Liste. Die Bluetooth-Versionen bei Computern variieren sehr häufig. Stellen Sie sicher, dass Sie einen aktuellen Bluetooth-Treiber installiert haben. -
Seite 9: Safety Information
BEFORE USE Safety Information Safety Information Danger! High Voltage! Electric Shock If Opened! Operate with Caution! Please refer to the related operating instructions. Label for Class II Products (Dual Insulation) WARNING: To avoid fire and electric shock, never attempt to put the System in the rain or in a place with high humidity. - Seite 10 Safety Information and Maintenance Safety Information and Maintenance Please read through this Manual and understand the warning signs and indications on the parts. Keep the Manual properly for the use of the future. All parts are specially designed and manufactured so as to ensure safety. Keep all parts away from Avoid direct sunshine and high Power supply: Follow the descriptions...
- Seite 11 Disk Protection the power cord and keep the machine running idle for about 2-3 hours. And When the System works for a long time, the water can be evaporated after the the panels at the top and bottom of the temperature rises.
-
Seite 12: System Connection
Set the Size of TV Screen TV screens always have a special proportion that corresponds to its size. 16:9 Screen Common Full Screen Mailbox Type Wide Screen Displayed Part 16:9 Accessories unit 1 piece 2.0 Speaker 1 set Remote control 1 piece FM antenna 1 piece Audio/video cable 1 sets User’s Manual 1 piece... -
Seite 14: Basic Functions
Basic Functions Basic Functions Preparation Previous/Next Track If you want to use watch the disk In playing mode, you can press contents, turn on the TV, select Previous to go back to the beginning the video mode and connect TV of the chapter. -
Seite 15: Advanced Functions
Advanced Functions Advanced Functions NOTE: The functions said below are only applicable to DVD files. And different DVD player may provide different functions. to his preference.(This key is effe Display ctive only when submenus exist) Press Display, and such options for Angle disk info as “played title”, “current title”, Press this key to view the DVD... - Seite 16 contents of the chapter. Language Press it twice to repeat the Some DVD Players supports multiple contents of the title. languages. Press the key Language, Press it thrice to repeat the and the first audio selection will whole contents of the DVD disk. appear on the screen.
-
Seite 17: Special Functions
Special Functions Special Functions Audio CD Playback When a disk with CD format is inserted into the device, the System can pay its contents automatically. ● Press Previous/Next to change the track, and FF/FR to fast forward or fast reverse the contents. ●Note: A CD+G disk is equal to an Audio CD. -
Seite 18: System-Setup
System Setup System Setup contents of DVD disk are recorded Select the key Set on the remote control, and the setup interface with 16:9 format and the TV displays the image with proportion of 4:3, the will appear on the screen. 1. - Seite 19 Setting the Speaker Note: This function is only effective for those disks with hidden subtitles. E.Screen saver After the system enters the stop state for several minutes, the screensaver mode will be enabled and a moving image will appear on the screen.
- Seite 20 Setting the Speaker Note: This function is only effective for those disks with hidden subtitles. E.Screen saver After the system enters the stop state for several minutes, the screensaver mode will be enabled and a moving image will appear on the screen.
- Seite 21 Original or modified SPDIF: With this Video Setup surround format, the audio source is A. Component output through the Dolby digital decoder Use this item to set the video formed on the basis of the optical mouse output. at the rear panel and the co-axial connector. Interface for setting Dolby digital surround A.
- Seite 22 C. HDMI SETUP Press the key Right, and the interface below will appear: Then press Left/Right to adjust HDMI switch. the brightness, and press Enter/Play to confirm the selection. At the same time, the screen returns to the previous interface. Contrast You can set the contrast through the interface of Video setting.
- Seite 23 B. Audio Default Setting You can choose the item Audio in The item Default Setting appears the preference interface to set the only when the machine was not used. audio output of the DVD contents. To activate the adjustment, you have to restart the machine.
- Seite 24 E. Parental Control With the item Channel Supervision, you can set the examination class for DVD disk, so that family members can view the contents in accordance with their respective age group. 8 examination classes are available. Press Left/Right to make the selection, Note: To avoid oblivion, you may and press Enter/Play to confirm it.
- Seite 25 Copy Contents of CD, MP3 and AVI to USB Device Please make sure the movable USB device has enough memory space that can accept all contents from DVD Player. CD Taking-In 1. Basic setting: This DVD Player can read the contents in CD, USB device and have enough memory.
- Seite 26 MIC SETUP MIC SETUP Use the UP/DOWNbutton to increase or decrease the karaoke 1 volume Use the UP/DOWN button to increase or decrease the echo level. Use the right arrow button to select status ofkaraoke, may set to AUTO or OFF. NOTICE: 1.
- Seite 27 Playing Radio functions 1. The frequency the embedded radio receives in the system ranges from 87.50MH~ 108 MHz. 2. In playing mode of the DVD Player, press the key Signal Source to switch to FM mode. Then press the key Search on the remote control, and the system will search the channels and save 1-20 of them.
- Seite 28 Connection Between DVD Player and Speaker 1. Use the related cable to connect channel “R” at the place marked as “+” on the DVD Player to the place with the same mark “+” on the speaker; Use the related cable to connect channel “R” at the place marked as “-” on the DVD Player to the place with the same mark “-”...
- Seite 29 Operating Instructions of Bluetooth Press the SOURCE button to switch the audio source to the “BT” (Bluetooth input) mode (obstacle between the machine and the connected device shall be removed): After the Bluetooth module is powered on, the blue indicator lamp quickly flashes for three times and the prompt “dudu” will be heard;...
-
Seite 30: Troubleshooting
Troubleshooting Troubleshooting Before you contact the service center or distributor, you may refer to the table below to see if you can find out how the problem comes and if you can solve it. Failure Solution Not electrified ●Check whether the power is properly connected to the device. -
Seite 31: Specifications
Specifications Specifications System Power supply--------------------------------------------------------- AC 110-240V 50/60Hz Chan nel separation------------------------------------------------ >40dB Distortion rate-------------------------------------------------------- 0.7% Frequency response range-------------------------------------- 20Hz-20KHz (±3dB) Audio S/N-------------------------------------------------------------- >80dB Audio output (analog)---------------------------------------------- Level output: 1.0-2.0v Audio output (digital)----------------------------------------------- Level output: 0.5vp-p Video output---------------------------------------------------------- Level output: 1.0vp-p YUV output----------------------------------------------------------- Level output: 0.7vp-p Tuner FM Frequency range----------------------------------------------- 87.5-108MHz...